Table of Contents
Advertisement
Quick Links
Table Of Contents:
Wire Harnesses Quick View
Programming Bank 3 (Remote Start)
Tach Rate Programming
Circuit Wiring Layout
Rev A: New Format Add Timing PASD & Light Blue + DBI Lock, Lock, Lock 5/2013
If booklet format, pages 26-30, Programming & Wiring Diagram shall be foldout or seperate 5 sheets
front & back.
PATENTED: www.voxxintl.com/company/patents
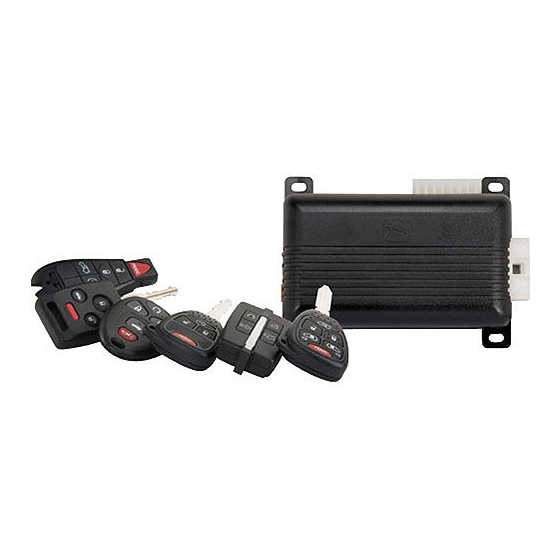
Model AS-9234
Installation Manual
Vehicle Security System
with Remote Start
Page 2
Page 3 - 4
Page 5 - 6
Page 6 - 7
Page 8 - 12
Page 13
Page 13
Page 13
Page 14 -15
Page 16
Page 16 -17
Page 17
Page 18
Page 18
Page 18 - 19
Page 19
Page 19 - 20
Page 20
Page 20
Page 20 - 21
Page 21 - 22
Page 22 - 24
Page 25
Page 25
Page 26
Page 27
Page 27
Page 30
Page 30
Page 32
1
128-8971a
1 of 32
Advertisement
Table of Contents

Subscribe to Our Youtube Channel
Related Manuals for Audiovox AS-9234


Summary of Contents for Audiovox AS-9234
-
Page 1: Table Of Contents
Model AS-9234 Installation Manual Vehicle Security System with Remote Start Table Of Contents: Before You Begin Page 2 Wire Harnesses Quick View Page 3 - 4 Installation of the Major Components Page 5 - 6 Wiring the 6 Pin Main Power Harness... -
Page 2: Before You Begin
Before You Begin PROFESSIONAL INSTALLATION IS STRONGLY RECOMMENDED Roll down window to avoid locking the keys in the vehicle during installation. Avoid mounting components or routing wires near hot surfaces or near moving parts like the steering wheel as it may prevent proper operation of the vehicle. - Page 3 16 Pin Main Wiring Harness #1124049 Dark Blue/Black External Remote Start Trigger Input Grey Shutdown Input (-) Green/Yellow Diesel Wait To Start Input White Parking Light Output White/Red Parking Light Input White/Black Siren Output (+) Black/White Horn Output (-) 300mA Green/Orange Tachometer Input Orange...
- Page 4 6 Pin Power / Start Harness #1123742 Purple Accessory (+) Blue Ignition 1 (+) Battery 2 - 12V (+) Red/White Battery 1 - 12V (+) Yellow Starter Output Green Ignition 2 (+) 5 Pin Arm/Disarm/Trunk Shunt Harness #1123237 Green/Black Arm Input 2 Disarm Input 1 Green Arm Input 1...
-
Page 5: Installation Of The Major Components
This Remote Start/Alarm System is designed to be used with Automatic Transmission- Fuel Injection Gas or Diesel Vehicles Only! INSTALLATION OF THE MAJOR COMPONENTS: CONTROL MODULE: PART # 1365186 Select a mounting location inside the passenger compartment (up behind the dashboard). The mounting location selected must be within 24"... -
Page 6: Wiring The 6 Pin Main Power Harness
THE OPTIONAL RECEIVER/ANTENNA /PUSHBUTTON/LED ASSEMBLY: The optional Superheterodyne Receiver Antenna, ADDSS or ADDP1 allows routing from below the dash board for maximum operating range. Choose a location above the belt line (dashboard) of the vehicle for best reception. Special considerations must be made for windshield glass as some newer vehicles utilize a metallic shielded window glass that will inhibit or restrict RF reception. - Page 7 5 Yellow Wire: Starter Output Careful consideration for the connection of this wire must be made to prevent the vehicle from starting while in gear. Understanding the difference between a mechanical and an electrical Neutral Start Switch will allow you to properly identify the circuit and select the correct installa- tion method.
-
Page 8: Wiring Connections: 16 Pin Accessory Input/Output Harness
WIRING CONNECTIONS: 16 Pin Accessory Input/Output Harness PART # 1124049 1 Dark Blue/Black Trace Wire: External Trigger Input The Dark Blue/Black trace wire allows the remote start unit to be activated from an external source. The intent of this wire is to allow the unit to be controlled from a "POSSE/CAR-LINK" paging system or similar device. - Page 9 on has +12 Volt switched parking lights, connect this wire to a fused + 12 Volt source. (Max. 15 Amps) NOTE: If the vehicle's parking lights are ground switched, connect this wire to chassis ground. Parking Light Wiring Detail 6 White w/ Black Trace Wire: (+) Optional Siren Output This is the positive siren feed wire.
- Page 10 compartment and connect to the negative side of the ignition coil. This Remote Start unit learns the tach rate of the vehicle and in most cases will operate properly from one multi coil pack regardless of the number of cylinders. If the vehicle has a single coil unit for each cylinder, it may be necessary to connect this wire to more than one cylinder for proper tach reference.
- Page 11 13 Yellow w/ Black Trace Wire: + 12 Volt Alarm By - Pass Output NOTE: You must disconnect the ignition input of the alarm from any other wire that it is presently connected to in the vehicle. This wire provides a + 12 Volt output when the ignition key is turned to the “ON” position, and 0 Volts when the ignition key is “OFF”...
- Page 12 4. Cut (#1) wire (as shown), and connect the ignition switch side of the cut wire to terminal #87a of the relay. Connect the other side of the (#1) wire to terminal #30. 5. Connect the previously selected resistor from terminal #87 to the second (#2) wire (as shown). NOTE: The above information and following diagram is for the GM VATS system only.
-
Page 13: Understanding Arm & Disarm #1 And #2
UNDERSTANDING ARM & DISARM #1 AND #2: Because of the complexities of the different factory installed Remote Keyless Entry Units on the market today, this system uses two disarm and two arm inputs. Whether installing into a vehicle using a 2-step unlock circuit, single step unlock circuit, or as a stand alone passive alarm, both disarm and arm wires must be connected in all installations. -
Page 14: Pin Door Lock/Unlock Harness
Red w/Black Trace Wire : DISARM INPUT #2 Connect this wire to the unlock side of the door lock/unlock switch or any passenger door unlock motor wire, which will receive a negative or positive pulse when all doors are unlocked using the door panel switch or the remote transmitter, but will not receive a pulse when the driver only door is unlocked using the remote transmitter. - Page 15 These applications require the use of additional components which may include relays, fixed resistors, or for convenience, a Door Lock Interface. Refer to the AUDIOVOX Door Lock Wiring Supplement and or the Audiovox fax back service for information on your particular vehicle for properly connecting to these types of circuits.
-
Page 16: Wiring The 4 Pin Auxiliary Output Harness
WIRING THE 4 PIN AUXILIARY OUTPUT HARNESS Part #1122585 The auxiliary 4 pin connector provides low current outputs to control various functions in the vehicle during different stages of the Remote Start unit's operation. Understanding these outputs and the time in which they occur will allow you to determine if they are needed for the particular vehicle you are working on as well as how to use them. -
Page 17: Additional Harnesses And Connectors For The System
(Connector Port) The 4 pin port located on the side of this module is for proprietary Audiovox data bus interface modules. These modules are used to access a variety of features in the vehicle which can be as simple as door trigger inputs, to more complex door locks outputs, or transponder interfaces for remote starting. -
Page 18: Timed Start Operation
TIMED START PROGRAM: The Remote Start unit has the ability to start the vehicle automatically at timed intervals. This feature is useful in extremely cold climates where starting the engine is the only means to keep the battery charged and fluids warm. The operator has the option to have the unit start every 2 or 4 hours for a maximum of 48 hours. -
Page 19: Diagnostics
5. When the unit senses the tach signal, the parking lights will begin to flash. 6. Release the valet/program pushbutton switch. The parking lights will turn on for three seconds to indicate that the learned tach signal is stored and the unit is out of the tach learn mode. NOTE: If the unit fails to learn tach rate due to an improper tachometer connection or a poor tach source, the parking lights will not flash. -
Page 20: Testing Your Installation
3. Connect the Yellow wire to a +12 Volt ignition 1 source. This wire will have +12 Volts with the ignition in the on and start position and have 0 volts with the ignition in the off position. 4. Connect the Green wire to the (Green) or (Orange/Green) tach input of the Audiovox remote start unit. TESTING YOUR INSTALLATION:... -
Page 21: Neutral Start Safety Test
3. The LED begins to flash two short flashes followed by one long flashes and continues this pattern until returned to normal mode of operation. The action above puts the unit into the Remote Start Override mode or vehicle service mode and will not start from the RF transmitter or any other input. -
Page 22: Key In Sensor Circuits
Mechanical Neutral Start Switch from starting in gear. AUDIOVOX ADVISES THAT YOU MAINTAIN THE FACTORY CIRCUIT WHENEVER POSSIBLE. The following two circuits may be used only if the above circuit is not available. - Page 23 5. Connect the cathode (striped) side of a 4002 series diode to this same wire, and connect the (non striped) side to the negative shut down safety wire (Gray / Black) of the Audiovox Remote Start Unit. 6. Connect terminal 86 of the relay to a fused +12 volt constant battery source.
- Page 24 METHOD 2: To connect to the key in sensor circuit as shown for method 2: 1. Locate the control wire that connects the drivers door pin switch to the key in sensor switch. 2. Cut this wire and connect the ignition cylinder side to chassis ground. 3.
-
Page 25: Dome Delay Learn Feature
DOME DELAY LEARN FEATURE: This unit has the ability to learn the dome light delay time, up to 60 seconds. If the vehicle has delay interior lights, and you wish to avoid three chirp, defect zone, indication normally associated with this type of interior light, we suggest you learn the interior light delay. -
Page 26: Completing The Installation
COMPLETING THE INSTALLATION: After you have confirmed the operation of the Audiovox Remote Start unit and tested all the safety features of the system: 1. Mount the control module up and behind the dash securing it in place with cable ties or screws. Be certain that the chosen mounting location will not inhibit any of the controls of the vehicle. -
Page 27: Programming Bank 1 (Transmitters)
The transmitters are pre-programmed from the factory, If you find you need to program new or additional transmitters follow the instructions below. PROGRAMMING BANK 1 (TRANSMITTERS): When Using ADDP1 or ADDSS 1. Turn the ignition key to the on position. 2. - Page 28 The transmitters are pre-programmed from the factory, If you find you need to program new or additional transmitters follow the instructions below. PROGRAMMING BANK 1 (TRANSMITTERS): When Using ADDP1 or ADDSS 1. Turn the ignition key to the on position. 2.
- Page 29 128-8971a 29 of 32...
- Page 30 PROGRAMMING BANK 3 (REMOTE START ): You can enter Bank 3 from Bank 2 by turning the ignition key off then on after you've made the changes you wanted in Bank 2, (Siren two Long Chirp), You can also go right to bank 3 by: 1.
- Page 31 128-8971a 31 of 32...
- Page 32 For technical support go to www.prestigecarsecurity.com or call 1 800 225 6074. © 2013 Audiovox Electronics Corp., Hauppauge, N.Y. 11788 128-8971a 128-8971a 32 of 32...
Need help?
Do you have a question about the AS-9234 and is the answer not in the manual?
Questions and answers