Vermont Castings VCS4007 Assembly Procedures
Signature series
Hide thumbs
Also See for VCS4007:
- User manual (36 pages) ,
- User's manual & assembly (28 pages) ,
- Specification (7 pages)
Table of Contents
Advertisement
Quick Links
Tools Required: knife or scissors, Phillips or Robertson (square head) screwdriver..
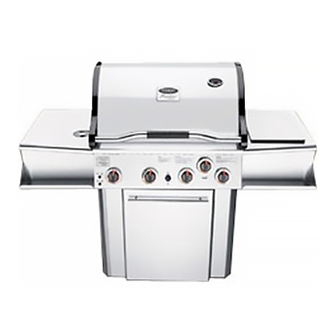
Model VCS4007
Shown
Step 1: Unpack Carton and Verify Contents
Use a sharp cutting tool to cut the straps on the packaging and then lift off the carton top. The sleeve
surrounding the barbecue can be removed by lifting it straight up and over the top of the unit.
all contents to the parts list that accompanies this assembly manual.
coverings from the metal parts
removing the protective plastic. Refer to the parts list for fastener detail.
Some parts may have sharp edges; to avoid injury, wearing gloves during assembly is
CAUTION:
strongly recommended
VCS4007 / VCS4017 / VCS4027 / VCS4037
VCS5007 / VCS5017 /
ASSEMBLY PROCEDURES
. Be careful not to scratch or damage the finish of the metal parts when
VCS50
27
/ VCS50
Next,
Page 1
37
Compare
remove the protective plastic
50004062 11/06 Rev.0 En
Advertisement
Table of Contents

Related Manuals for Vermont Castings VCS4007


Summary of Contents for Vermont Castings VCS4007
- Page 1 VCS4007 / VCS4017 / VCS4027 / VCS4037 VCS5007 / VCS5017 / VCS50 / VCS50 ASSEMBLY PROCEDURES Tools Required: knife or scissors, Phillips or Robertson (square head) screwdriver.. Model VCS4007 Shown Step 1: Unpack Carton and Verify Contents Use a sharp cutting tool to cut the straps on the packaging and then lift off the carton top. The sleeve surrounding the barbecue can be removed by lifting it straight up and over the top of the unit.
- Page 2 VCS4007 / VCS4017 / VCS4027 / VCS4037 / VCS5007 / VCS5017 / VCS50 / VCS50 37 Assembly Step 2: Install the Casters Parts Required: (4) Casters, (1) Block (not included) Casters (wheels) may differ from those shown in Note: the illustration depending on the model you purchased.
- Page 3 VCS4007 / VCS4017 / VCS4027 / VCS4037 / VCS5007 / VCS5017 / VCS50 / VCS50 37 Assembly Step 4: Install the Side Shelf Supports Parts Required: (1) Left Side Shelf Support (1) Left Condiment Tray (1) Right Side Shelf Support...
- Page 4 VCS4007 / VCS4017 / VCS4027 / VCS4037 / VCS5007 / VCS5017 / VCS50 / VCS50 37 Assembly Step 6: Secure Shelves Fig. 6 Parts Required: (4) 10-24 x 1/2” Bolts (black) Secure each Shelf by inserting (2) 10-24 x 1/2” bolts through the U-Clip fasteners as shown in the diagram.
- Page 5 VCS4007 / VCS4017 / VCS4027 / VCS4037 / VCS5007 / VCS5017 / VCS50 / VCS50 37 Assembly Step 9: Attach Side Burner Lid (S/B-Single) Parts Required: (1) Side Burner Lid (S/B-Single) (2) #10-24 x 3/4” ( 1/4” Shank)* Included with the Side Burner Kit...
- Page 6 VCS4007 / VCS4017 / VCS4027 / VCS4037 / VCS5007 / VCS5017 / VCS50 / VCS50 37 Assembly Step 12: Attach the Handle to the Door Parts Required: VCS4007/VCS4017/VCS4027/VCS4037: (1) Handle VCS5007/VCS5017/VCS5027/VCS5037: (3) Handles Handles may not appear exactly as shown in...
- Page 7 VCS4007 / VCS4017 / VCS4027 / VCS4037 / VCS5007 / VCS5017 / VCS50 / VCS50 37 Assembly Step 15: Install the Internal Components Parts Required: VCS4007 / VCS4017 : (4) Sear Plates VCS4027 / VCS4037 (3) Cooking Grates (1) Warming Rack...
- Page 8 VCS4007 / VCS4017 / VCS4027 / VCS4037 / VCS5007 / VCS5017 / VCS50 / VCS50 37 Assembly Step 17: Install the LP Cylinder (LP Models Only) Parts Required: (1) LP Gas Cylinder (not included) Check your user’s manual for the cylinder filling...
Need help?
Do you have a question about the VCS4007 and is the answer not in the manual?
Questions and answers