Table of Contents
Advertisement
Quick Links
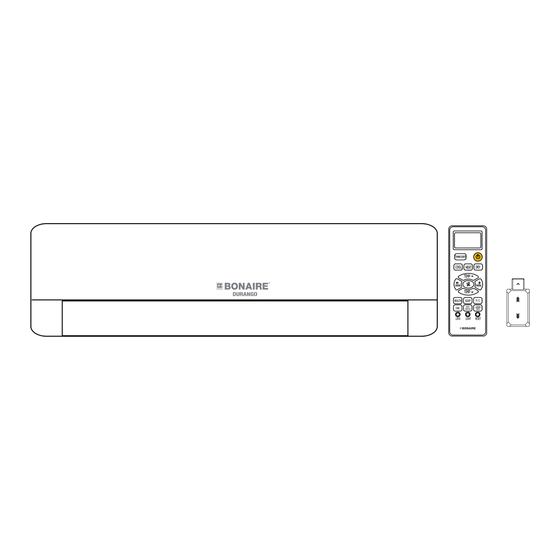
Ductless Mini Split Air Conditioner
CRC7000012 Ductless Mini Split Air Conditioner 12K
CRC7000018 Ductless Mini Split Air Conditioner 18K
CRC7000024 Ductless Mini Split Air Conditioner 24K
Caution:
For better user experience, please follow the recommended line-set
installation method in this guide.
Design may vary by model number.
L'aspect peut varier selon le numéro de modèle.
Installation Manual
El diseño puede variar según el número de model.
Advertisement
Chapters
Table of Contents

Related Manuals for BONAIRE DURANGO CRC7000012


Summary of Contents for BONAIRE DURANGO CRC7000012
- Page 1 Installation Manual Ductless Mini Split Air Conditioner CRC7000012 Ductless Mini Split Air Conditioner 12K CRC7000018 Ductless Mini Split Air Conditioner 18K CRC7000024 Ductless Mini Split Air Conditioner 24K Caution: For better user experience, please follow the recommended line-set installation method in this guide. Design may vary by model number.
-
Page 2: Table Of Contents
Table of Contents IMPORTANT SAFETY INFORMATION ..................3 INSTALLATION INSTRUCTIONS . -
Page 3: Important Safety Information
IMPORTANT SAFETY INFORMATION READ ALL INSTRUCTIONS BEFORE USING THE APPLIANCE WARNING For your safety, the information in this manual must be followed to minimize the risk of fire, electric shock, or personal injury. • Use this equipment only for its intended purpose as For any service which requires entry into the described in this manual. -
Page 4: Installation Instructions
Installation Instructions FOR MORE HELP, VISIT WWW.BONAIREDURANGO.COM OR CALL THE CONSUMER HELP LINE AT 877-337-3639. BEFORE YOU BEGIN Required Tools for Installation Read these instructions completely and carefully. • 5/8” (16mm), 7/8” (22mm), 1” (25mm) or adjustable IMPORTANT – wrench •... - Page 5 Installation Instructions Box part Breakdown Indoor Unit Box Extra Foam Insulation x1 Indoor Unit x1 Mounting Plate x1 Guard Ring x2 Remote Controller + Wall Installation Template x1 Holder x1 Battery AAA x2 Wifi Dongle x1 Drain Pipe x1 Communication Cable x1 。...
-
Page 6: Minimum Clearances
Installation Instructions MINIMUM CLEARANCES (Appearance may vary) This picture is for reference only. Your product may look different. Read your manual before installation. Attention must be paid to more than 4in. the pitch of drain hose Piping Exit Advice Rear right more than 4in. -
Page 7: Step 1 - Installation Of The Indoor Unit
Installation Instructions Step 1 - Installation of the Indoor Unit A. Select the Indoor location: B. Mark the wall using provided template: • Do not allow any heat or steam near the unit. • Place the mounting plate template against the •... -
Page 8: Step 1
Installation Instructions Step 1 - Installation of the Indoor Unit (Cont.) D. Install the Tubing: • If not able to align all screw holes with studs, wall • Drill holes where the pipe holes were originally anchors are supplied. marked. •... - Page 9 Installation Instructions Step 1 - Installation of the Indoor Unit (Cont.) E. Mount Indoor Unit to Mounting Plate: G. Install indoor unit filter: • Bundle the refrigerant piping, drain piping, and • Open the inlet grille. Prop up the inlet grille by using a wiring with tape and carefully rout the bundle small device named grille-support which is located in through the piping hole.
-
Page 10: Step 2 - Installation Of The Outdoor Unit
Installation Instructions Step 2 - Installation of the Outdoor Unit Select the Outdoor location: NOTES: • Choose a level place solid enough to bear the weight • OD unit cannot hang from a ceiling or be stacked. and vibration of the OD unit and where the operation •... -
Page 11: Step 2
It is NOTE: models will not use a BonAire Durango recommended that the power cord pass through drain elbow. If condensate management is the upper hole of the bracket and the connecting required by code, a 3rd party pan is needed. - Page 12 Installation Instructions Step 2 - Installation of the Outdoor Unit(Cont.) C. Install the outdoor unit D. Secure the outdoor unit • The outdoor unit should be installed at least ½ mile away from the salt water, including seacoasts and inland waterways. If the unit installed from ½ mile to 5 miles away from the salt water, including seacoasts and inland waterways, please follow the installation instruction below.
- Page 13 Installation Instructions Step 2 - Installation of the Outdoor Unit (Cont.) • E. Connecting the refrigerant lineset to outdoor and indoor unit imperative For your safety, always wear goggles and work gloves when connecting the pipes. • piping while unrolling the line set. Any kinks in the piping will affect the unit's performance.
-
Page 14: Installation Instructions
Installation Instructions Step 2 - Installation of the Outdoor Unit (Cont.) 3. Remove the cover on the top valve using an ATTENTION: Once you have made the connections adjustable wrench. Using a 5mm Allen key, place key from the line set to the indoor head, ensure that the inside of the valve and turn counter clockwise slowly black lines on the fittings are aligned. - Page 15 Installation Instructions Step 2 - Installation of the Outdoor Unit (Cont.) G. Flared connection method(Requires 6. After confirming that there is no leakage in the certified HVAC Technician) system, use the black cement and white heat insulation 1. Intall Copper Lineset pipe in the accessory to wrap the connection between •...
- Page 16 Installation Instructions Step 2 - Installation of the Outdoor Unit (Cont.) This accessory is Sound Deadening Wrap. Please follow the installation instructions below. IMPORTANT If your pre-selected installation position is inconsistent with the default position in the installation operation manual, be sure to wrap the exposed lineset part of the room with this installation accessory for better user experience.
- Page 17 Installation Instructions Step 2 - Installation of the Outdoor Unit (Cont.) Manifold Gauges 2.Leak Test • Remove the cap on the service valve. • Using a tank of dry nitrogen and approved Suction Line regulator, charge the system with 150 psig of dry Service Part nitrogen using mini split adapter to connect the valve.
-
Page 18: Step 3
Installation Instructions Step 2 - Installation of the Outdoor Unit (Cont.) 5. Check Items for Test Run Contains fluorinated greenhouse gases No gas leak from linesets? covered by the Kyoto Protocol Are the linesets insulated properly? R410A Are the connecting wirings of indoor and outdoor firmly inserted to the terminal block? Is the connecting wiring of indoor and outdoor fixed? -
Page 19: Important
IMPORTANT If you have a problem with this product, Visit our website at www.bonairedurango.com For Technical Advice/Warranties call 800-939-2983 or mail us at info@bonairedurango.com Monday to Friday 8:00 A.M. – 1:00 P.M. Pacific Time DATED PROOF OF PURCHASE REQUIRED FOR WARRANTY SERVICE Printed in China 0011526908... - Page 20 Duct-Free SYSTEM OWNER’S MANUAL UCT30RWA SAFETY INFORMATION . . . . . . 3 REMOTE CONTROL FEATURES AND SETTINGS . . . . . . . . . . . . . . 4 EMERGENCY OPERATION AND MAINTENANCE .
- Page 22 IMPORTANT SAFETY INFORMATION READ ALL INSTRUCTIONS BEFORE USING THE SYSTEM For your safety, the information in this manual must be followed to minimize the risk of fire, electric WARNING shock or personal injury. • Use this appliance only for its intended purpose as •...
-
Page 23: Remote Control Features
Remote Control Features and Settings Remote Control 4. HEAT Button In HEAT mode, warm air will blow out after a short period of the time due to cold-air prevention function. When FAN is set to AUTO, the heat pump automatically adjusts the fan speed according to room temperature. - Page 24 Remote Control Features and Settings • When turning the unit on, the remote control will helps with achieving maximum efficiency and comfort automatically return the louver to the previous set from your unit while you sleep. position. 10. FAN Button FAN mode circulates air only;...
-
Page 25: Emergency Operation And
Emergency Operation and Maintenance Emergency Operation Optimizing Performance • Use this operation only when the remote control is defective or lost. • When the emergency operation switch is pressed, the unit beeps once, which indicates the start of this operation. •... -
Page 26: Troubleshooting Tips
Troubleshooting Tips ... Before you call for service For additional troubleshooting tips, see the full installation manual at GEAppliances.com/ductless or Haierappliances.com/ductless Problem Cause and Solution Normal Performance The system does not When the unit is stopped, it will not restart again for 3 minutes to Inspection restart immediately protect the system. -
Page 27: Limited Warranty
Limited Warranty For warranty detail please refer to installation manual.
Need help?
Do you have a question about the DURANGO CRC7000012 and is the answer not in the manual?
Questions and answers
The lugs on my outside unit are (N) and (L) My question is (N) lug the second power connection? The original installation manual does not clarify.
No, the (N) lug is the first power connection for the BONAIRE DURANGO CRC7000012 outside unit. Power wiring is marked as 1(N) and 2(L), where 1(N) is neutral and 2(L) is line.
This answer is automatically generated
Bonaire Durango 24000 mini split The lugs on my outside unit are (N) and (L) My question is (N) lug the second power connection? The original installation manual does not clarify