Table of Contents
Advertisement
Installation and Operation Data
FOR YOUR SAFETY - This product must be installed and serviced by a contractor who is licensed
and qualified in pool equipment by the jurisdiction in which the product will be installed where such
state or local requirements exists. In the event no such state or local requirement exists, the installer
or maintainer must be a professional with sufficient experience in pool equipment installation and
maintenance so that all of the instructions in this manual can be followed exactly. Before installing
this product, read and follow all warning notices and instructions that accompany this product.
Failure to follow warning notices and instructions may result in property damage, personal injury, or
death. Improper installation and/or operation can create carbon monoxide gas and flue gases which
can cause serious injury, property damage, or death. For indoor installations, as an additional mea-
sure of safety, Zodiac Pool Systems, Inc. strongly recommends installation of suitable Carbon
Monoxide detectors in the vicinity of this appliance and in any adjacent occupied spaces. Improper
installation and/or operation will void the warranty.
Installation and
Operation Manual
™
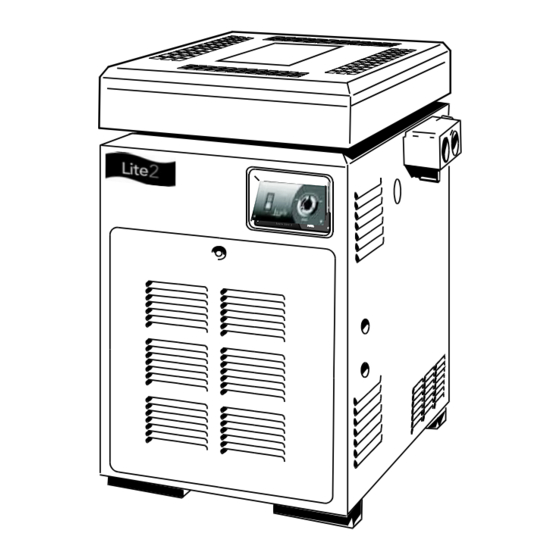
Lite 2
Model LG
Pool and Spa Heater
Natural Gas or LPG Gas
Read this manual in its entirety. If these instructions are not followed exactly, a fire or
explosion may result, causing property damage, personal injury, or death.
The GAS SAFETY (INSTALLATION AND USE) REGULATIONS 1998 as amended,
place statutory requirements on gas users.
This heater is certified to European requirements for use only as a swimming
pool or spa heater. The heater must not be used for any other purpose and must
be installed and serviced by a qualified professional. The heater must be
operated strictly in accordance with the user's instructions and applicable laws.
If the heater is installed in a room, it must be separated from a living space, and
adequate air supply and ventilation must be provided and maintained.
Do not store or use gasoline or other flammable vapors and liquids in the vicinity
of this or any other appliance.
WARNING
WARNING
Advertisement
Table of Contents

Related Manuals for Jandy Lite 2 LG


Summary of Contents for Jandy Lite 2 LG
- Page 1 Installation and Operation Data WARNING FOR YOUR SAFETY - This product must be installed and serviced by a contractor who is licensed and qualified in pool equipment by the jurisdiction in which the product will be installed where such state or local requirements exists. In the event no such state or local requirement exists, the installer or maintainer must be a professional with sufficient experience in pool equipment installation and maintenance so that all of the instructions in this manual can be followed exactly.
-
Page 3: Table Of Contents
TABLE OF CONTENTS 3C-4. Putting the Heater in Operation SECTION 1. (Commissioning) ........14 General Information 3C-5. Filter Pump Operation ........ 15 Introduction ........... 1 Inlet/Outlet Temperatures ......15 Description ........... 1 Seasonal Care ..........15 Warranty ............3 3E-1. Spring and Fall Operation ...... -
Page 5: General Information
LITE 2 MODEL LG POOL AND SPA HEATER Page 1 accordance with all required quality procedures SECTION 1. (Certificate N:BG/EC-87/95/46/M7, PI number General Information 87AQ46). LG performance characteristics are listed in Table 1. General data for the model LG is listed in 1A. - Page 6 Page 2 Table 2. Model LG General Data LG Size Water Capacity (L) 0.81 0.95 1.16 1.35 1.57 Minimum Water Flow (l/min) 75.7 75.7 94.6 113.6 113.6 Maximum Static Head (bar) Maximum Outlet Temp (C) Dry Weight (kg) Gas Connection 3/4 in Bsp 3/4 in Bsp 3/4 in Bsp...
-
Page 7: Warranty
WARNING Do not connect the heater to any external The LG heater is certified to European source of electricity. The Jandy Lite 2 Model requirements for use only as a swimming pool LG heater has a built in thermoelectric or spa heater. The LG heater must not be used generator. - Page 8 Page 4 Table 3. Pipe Installation Regulations Small Pipes Large Pipes British Gas Publications: Purging Procedures of Non-Domestic Gas Installations Soundness Testing Procedures for Industrial and Commercial Gas Installations BS.6891 Installation of Low Pressure IM11 Flues for Commercial and Industrial Pipework Gas Fired Boilers and Air Heaters IM16 Guidance notes on the Installation...
- Page 9 LITE 2 MODEL LG POOL AND SPA HEATER Page 5 CLAMP IN/OUT HEADER BAFFLES BRACKET Figure 3. Flue collector holddown brackets. GROMMETS GROMMET BUTTON PLUG Figure 2. Heat exchanger reversal. Figure 4. Temperature sensing bulb. 12. Unscrew the nut on the brass compression fitting securing the pressure switch to the Caution header.
-
Page 10: Site Location
Secure white wires to the pressure switch tube 2D-1. Indoor Installation with tie straps. The Lite 2 LG )heater is designed and certified for indoor installation only when equipped with a 20. Connect the white wire labeled PS to the pres- draught divertor and flue system. -
Page 11: Outdoor Installation
LITE 2 MODEL LG POOL AND SPA HEATER Page 7 1.12 meters above the top of the heater. The area Table 4. Minimum Heater Clearances From Combustible Surfaces under the overhang must be open on three sides. This stops combustion gases from being diverted into living Minimum Clearance areas through doors, windows, or gravity inlets. -
Page 12: Combustion And Ventilation Air Supply
Page 8 without placing a base or platform between the 2F-3. Flue System (Indoor) carpeting and the heater. The base or platform may Connect the draught divertor to a flue system of be made of hollow masonry no less than 102 millime- at least the same diameter, and end at least 0.61 ters (mm) thick, covered with sheet metal at 24 gauge meters above the highest point of the roof or other... -
Page 13: Gas Supply And Piping
WARNING 1. No less than 25 mm inside diameter. Do not connect the heater to any external source of electricity. The Jandy Lite 2 Model 2. Made from acid condensate resistant material LG heater has a built-in thermoelectric (e.g., stainless steel). -
Page 14: Water Piping
Page 10 The heater has 50 mm universal header cou- plings. You can connect threaded 50 mm iron or TO LIMIT SWITCHES TO LIMIT SWITCHES FIELD PROVIDED WIRING copper pipe or unthreaded 38 mm iron or copper pipe WHITE WHITE without an adapter. -
Page 15: Pressure Relief Valve
LITE 2 MODEL LG POOL AND SPA HEATER Page 11 Balancing Three-way Valves changeover Heater Main Pool valves From From Main Heater Return Filter Skimmer Drain Skimmer Filter Main Pool Pump Pump Check Main Valve Balancing valves for Drain skimmer and drain. Manual by-pass is used only when filtration rate Pool... -
Page 16: Operating Instructions
Page 12 SECTION 3. NOTE: When using metal pipe as heat sink, join Operating Instructions metal and PVC/CPVC, using metal male and PVC/CPVC female 3A. Start-Up Procedure connection. Full lighting and shutdown instructions are found on the label attached inside the service door of the heater and in the user's instructions. -
Page 17: Temperature Control
LITE 2 MODEL LG POOL AND SPA HEATER Page 13 3C. Lighting and Shutdown WARNING 3C-1. Lighting the Heater Natural Gas Models: To avoid possible Full lighting and shutdown instructions can also injury, fire and explosion, read and follow be found attached to the wall inside the control these precautions and all instructions on this compartment door. -
Page 18: 1. Lighting The Heater
Page 14 9. Replace the service door. 10. Turn the rocker switch to ON. 11. Set temperature control to against the TEMPLOK tab. The main burner should light. Until the water reaches a temperature of about 21°C (70°F), it is normal to have some water accumulating in the base of the heater. -
Page 19: Filter Pump Operation
LITE 2 MODEL LG POOL AND SPA HEATER Page 15 13. Refit the service door and return all controls to the required settings. 3C-5. Filter Pump Operation It is recommended that the filter pump must continue running for at least 15 minutes after the heater shuts off to prevent damage to the system piping. -
Page 20: Water Chemistry
Page 16 Figure 20. Heater drain locations. and in the heater tubes. To protect your heater from damage, you must take the precaution of maintaining the ph factor of the pool water between 7.4 and 7.6. 3F-2. For Spa The control of chemical balance in a spa is more COPPER critical than in a swimming pool for satisfactory TUBING... -
Page 21: Corrosion
LITE 2 MODEL LG POOL AND SPA HEATER Page 17 3F-3. Corrosion 6. During the winter, and when on holiday for longer than a week, follow the instructions in The corrosive action of spa water is increased by Section 3 to shut down the heater. the following: 1. -
Page 22: Maintenance
Page 18 7. Inspect the external surfaces of the heat Pilot Flame Pattern exchanger tubes for soot buildup by placing a Thermal Pile mirror between and under the burners when Thermocouple the heater is firing. Remove soot if it has collected on the tubes, and correct the cause. -
Page 23: Pressure Switch Adjustment
LITE 2 MODEL LG POOL AND SPA HEATER Page 19 1. Pump is operating properly. 7. Check the adjustment by turning the filter pump off. The heater should shut off immedi- 2. Filter and strainers are not clogged. ately. If it does not, restart the filter pump and repeat steps 5 and 6. -
Page 24: Removal Of Gas Burners
Page 20 Caution Label all wires prior to disconnection. Wiring errors can cause improper and dangerous operation. 3. Tag and remove all wires from the gas valve terminals. 4. Remove the two screws that fasten the anti- rotation bracket to the inner panel, and the three screws attaching the manifold bracket. -
Page 25: Heat Exchanger
LITE 2 MODEL LG POOL AND SPA HEATER Page 21 Anti-Rotation Bracket Figure 26. Burner tray removal. 4. Install the burner in the burner tray. 5. Reconnect the pilot gas tube to the pilot assembly and gas valve. 4E. Heat Exchanger 4E-1. -
Page 26: Cleaning The Heat Exchanger
Page 22 4E-2. Cleaning the Heat Exchanger 4. Ream the insides of the tubes (see Fig. 28). 5. Take the reamer out often to remove lime Caution powder and prevent the drill from binding in Black carbon soot buildup on a dirty heat the tube. -
Page 27: Automatic Flow Control Valve
To should be replaced (see Section 6, Parts List). install either the Jandy draught divertor (required on all indoor installations) or the external flue terminal (outdoor installations), follow these procedures: SECTION 5. - Page 28 Page 24 8. If installing an External Flue Terminal, re- 3. Remove the rainguard assembly (see Fig. install the rainguard (see Fig. 36). 32). If installing an indoor Draught Diverter, discard the rainguard. If installing an Exter- nal Flue Terminal, set the rainguard aside to 9.
-
Page 29: Parts List For Lite 2, Model Lg Heater
Lite 2 pool and spa heaters, contact your nearest the Adapter Plate Adapter Plate Jandy dealer or distributor. If they cannot supply you with what you need, contact the techical support department at Zodiac Pool Systems, Inc., 6000 Condor Drive, Moorpark, California, 93021, Tele- phone 800.822.7933. -
Page 30: Parts List
Page 26 6B. PARTS LIST Model ORDER Model ORDER Description PART NO Description PART NO Adapter Plate 125-400 10535301-05 PILOT GAS SYSTEM - LLG Clip 10211000 Pilot, Main Burner Assembly, NAT 10806401 Pilot, Main Burner Assemby, LPG 10806402 WATER SYSTEM Pilot Burner, NAT 10802401 Inlet/Outlet Header, 2"... - Page 31 LITE 2 MODEL LG POOL AND SPA HEATER Page 27 90 91 65 66 70,73 71 69 65...
-
Page 32: Limited Warranty
1. Jandy heat pumps are warranted for two (2) years. Heat pump compressors and heat exchangers are warranted for five (5) years. 2. Electronic salt water chlorine generators are warranted for three (3) years, with the exception of the Jandy AquaPure® Ei Series, which is warranted for one (1) year.
Need help?
Do you have a question about the Lite 2 LG and is the answer not in the manual?
Questions and answers