Table of Contents
Advertisement
Installation and Operation Data
WARNING: FOR YOUR SAFETY -
a professional service technician, qualified in pool heater installation. Improper instal-
lation and/or operation could create carbon monoxide gas in flue gases which could
cause serious injury, property damage, or death. For indoor installations, as an addi-
tional measure of safety, Waterpik Technologies strongly recommends installation of
suitable Carbon Monoxide detectors in the vicinity of this appliance and in any adja-
cent occupied spaces. Improper installation and/or operation will void the warranty.
Installation and
Operation Manual
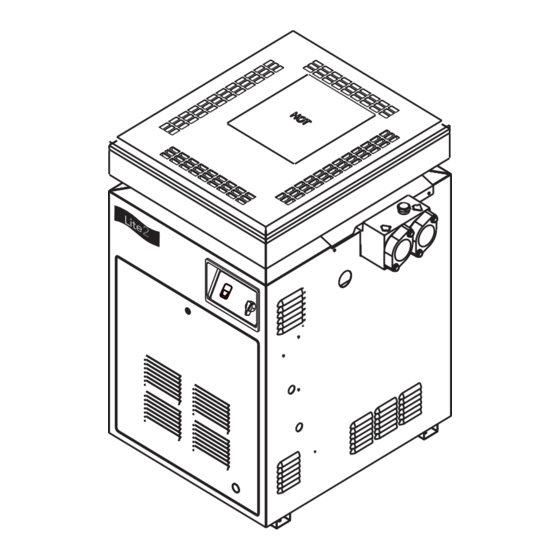
Lite2
™
Pool and Spa Heater
Model LG
Natural Gas or LP Gas
WARNING: If these instructions are not followed exactly, a fire or explosion may
result, causing property damage, personal injury, or death.
Do not store or use gasoline or other flammable vapors and liquids in the vicinity
of this or any other appliance.
• Do not try to light any appliance.
• Do not touch any electrical switch; do not use any phone in your building.
• Immediately call your gas supplier from a nearby phone. Follow the gas
supplier's instructions.
• If you cannot reach your gas supplier, call the fire department.
Installation and service must be performed by a qualified installer, service agency,
or the gas supplier.
This product must be installed and serviced by
WHAT TO DO IF YOU SMELL GAS
Advertisement
Table of Contents
Troubleshooting

Related Manuals for Jandy LG125


Summary of Contents for Jandy LG125
- Page 1 Installation and Operation Data WARNING: FOR YOUR SAFETY - This product must be installed and serviced by a professional service technician, qualified in pool heater installation. Improper instal- lation and/or operation could create carbon monoxide gas in flue gases which could cause serious injury, property damage, or death.
-
Page 2: Table Of Contents
TABLE OF CONTENTS SECTION 1. Bonding ............17 Auxiliary Time Clock Wiring ......17 General Information Introduction ............1 SECTION 7. Consumer Information and Safety ...... 1 Operating Instructions 1.2.1 Spa/Hot Tub Safety Rules ........1 1.2.2 Swimming Pool Energy Saving Tips ....2 Normal Operation .......... -
Page 3: General Information 1.1 Introduction
Read these installation and operation instruc- temperature. tions completely before proceeding with the installa- tion. Consult the Jandy factory, or local factory representative, with any questions regarding this equipment. Certain sections of this manual are specific to either United States or Canadian installations, and are labeled as such. -
Page 4: Swimming Pool Energy Saving Tips
Details are specified on the back cover of • Lack of awareness of impending hazard this manual. Make all warranty claims to an authorized Jandy • Failure to perceive heat representative or directly to the factory. Claims must include the heater serial number and model (this •... -
Page 5: Materials Installer Must Provide
A factory authorized draft hood and vent pipe for heater for connecting 2" PVC pipe. indoor installations in the USA and outdoor shelter installations in Canada (see Section Flow Rate: 3.2.2). Draft hoods are available from any Jandy Maximum: 125 gpm (475 lpm) distributor. Minimum:... -
Page 6: Dimensions
Installation Instructions directly with occupied areas. Check the rating plate on the heater or the Parts List (Section 11) of this manual for the correct Jandy WARNING drafthood or vent cap part number. See instructions supplied with the drafthood or vent cap for installation Improper installation or maintenance can cause and attachment. -
Page 7: Clearances
U.S. Indoor or Firing Rate / Hr.* Vent Outdoor Width CAN Outdoor (1,000's) Diameter Dim "H" Shelter Dim "H" (cm) (cm) (cm) (cm) (kcal) LG125 (38) (13) 17 3/8 (44) 16 1/4 (41) (32) LG175 (46) (15) (46) 24 1/8 (61) (44) -
Page 8: Flooring
The heater can be installed on a combustible floor if a noncombustible base assembly, available from Jandy, is used. See the heater rating plate or the Parts List (Section 11) of this manual for the appropri- ate base part number. Heaters must never be installed directly on carpeting. -
Page 9: Indoor And Outdoor Shelter Installation
Model LG Pool and Spa Heater Page 7 WARNING United States Do not install the heater with the top of the vent assembly within 4 feet (1.22 m) horizontally and 4 feet (1.22 m) vertically of any opening into a building. -
Page 10: Venting
Jandy distributor. See Section 11 (Parts List) of this per 4,000 BTU/h (1.2kW) input of the total input rating manual for the correct part number for you model and of all appliances in the enclosed area. -
Page 11: Vent Pipe Sizing And General Installation
Approved vent caps Be sure to support all venting so that connections may be obtained through your Jandy distributor. -
Page 12: Inspection And Replacement Of Existing Vent System With New Components
Page 10 will not separate and so that the weight of the vent WARNING pipe does not rest on the heater draft hood. All con- The Lite2 pool and spa heaters are designed nections should be made with rustproof sheet metal for use with either natural gas or LP gas. -
Page 13: Manifold Pressure
Model LG Pool and Spa Heater Page 11 Table 4. Natural Gas Pipe Size Requirements* NOTE: The maximum inlet gas pressure must Distance from Gas Meter not exceed the specified value. The minimum value listed is for the purpose of input 0-50 feet 50-100 feet 100-200 feet... -
Page 14: Special Precautions For Propane Gas
Page 12 NPT protective plug form the port and install the the "Natural Gas and Propane Installation Code" appropriate 1/8" NPT fitting to connect your manom- (CAN/CSA-B149.1), and any local codes and fire eter. The pressure will be zero when the heater is not protection authorities about specific installation restric- running. -
Page 15: Check Valve Installation
Jandy Technical Service depart- nents. ment at (707)-776-8200 ext 260. - Page 16 Page 14 Remove the screws securing the two flue collector hold down clamps and remove the clamps (see Figure 9). Remove flue collector. Remove the three rubber jacket/plug grommets and drain plugs (see Figure 8). One is located under the water connections on the right side. The other two are on the left side of the heater.
-
Page 17: Connections At Heater
Model LG Pool and Spa Heater Page 15 13. After replacing the heat exchanger into the 27. Install plastic tie wraps on wiring in the vestibule heater, the end baffles must be replaced. Each (controls compartment). one is held in place by two screws which mount 28. -
Page 18: Pressure Relief Valve
Page 16 Figure 15. Thermometer and pressure relief valve. 5.7 Auxiliary Components, Chlorinators, Ozone Generators, and Sanitizing Chemicals. The Lite2 heater is manufactured with materials that are not compatible with high concentrations of Figure 14. Plastic piping connections. ozone, chlorine, bromine, or other sanitizing chemi- cals. -
Page 19: Main Power
Model LG Pool and Spa Heater Page 17 6.1 Main Power The length of the wire between the heater and the time clock should not exceed 10-15 feet (4.57 m). The Lite2 model LG heater does not require an The contact points of the time clock switch should be external source of electrical power to operate. - Page 20 Page 18 Figure 17. LG Connection/Schematic Wiring Diagram...
-
Page 21: Start-Up
Model LG Pool and Spa Heater Page 19 7.2 Start-Up WARNING Vent pipes, draft hoods, and heater tops get CAUTION hot! These surfaces can cause serious burns. Do not touch these surfaces while the heater is Do not use this heater if any part has been in operation. -
Page 22: Lighting And Shutdown Procedures
Page 20 WARNING When the heater is fired for the first time, the combustion chamber refractory binder material is driven out by the heat of the flame. White smoke and/or sharp odors may be emitted from the vent during this period. Do not inhale combustion product fumes at any time, and especially when these fumes are being emitted. -
Page 23: Lighting Instructions
Model LG Pool and Spa Heater Page 21 FOR YOUR SAFETY READ BEFORE OPERATING WARNING: If you do not follow these instructions exactly, a fire or explosion may result, causing property damage, personal injury or loss of life. LIGHTING INSTRUCTIONS INSTRUCTIONS TO LIGHT HEATER Position ON/OFF switch to “OFF”. -
Page 24: Water Pressure Switch Adjustment
15 feet (4.57 m) below or 6 feet Make sure the pool filter is clean. (1.83 m) above the pool surface. Consult your local Jandy representative for recommendations. Set the rocker switch on the temperature control On some installations, the piping from the heater panel (see Figure 18) to OFF. -
Page 25: Adjusting The Manual Bypass Valve
Model LG Pool and Spa Heater Page 23 Insert a pocket thermometer (see Figure 14) 13. If the temperature rise is within the correct range, through the Pete's plug into the header. complete the procedure as follows: Turn the filter pump ON and wait 3 minutes. The Turn heater OFF. -
Page 26: Seasonal Care
Page 24 Figure 20. Heater drain locations. The proper chemical balance in spa water is 8.2 Seasonal Care more critical than in a swimming pool heater opera- tion. Due to the spa’s size, high water temperature CAUTION and heavy usage, chemical values in a spa can vary greatly. -
Page 27: Winterizing
Model LG Pool and Spa Heater Page 25 8.2.2 Winterizing can result in conditions where nausea or asphyxiation from carbon monoxide or flue gases could cause In areas where freezing temperatures occur in severe injury, property damage or death. winter, and the pool or spa will not be used, have your service technician perform the following steps: WARNING Turn off the main gas supply valve to the heater,... -
Page 28: Professional Inspection
Page 26 replacing the valve, be sure that the pump is off. lever on the top of the valve to make sure that Install the valve so that the discharge is directed water runs freely through it. If corrosion is found, away from any area that may be damaged by replace the pressure relief valve. -
Page 29: Troubleshooting
Model LG Pool and Spa Heater Page 27 SECTION 9. 9.1 General Heater Troubleshooting The following table lists some of the more Troubleshooting common problems, causes and solutions encountered when running the heater. Most problems occur when the heater is being started for the first time after installation or at Spring start-up. -
Page 30: Professional Maintenance, Service And Diagnostic Trouble Shooting
This is neces- sary for proper operation of the burner system. LG Temperature Control- The Jandy LG controller is an electronic control which senses water temperature by means of a thermistor and... -
Page 31: Electrical Troubleshooting
Model LG Pool and Spa Heater Page 29 EXHAUST VENT TOP FLUE COLLECTOR HEAT EXCHANGER COMBUSTION CHAMBER BURNER BURNER TRAY SHELF FLOW Figure 23. Atmospheric Combustion System Limit Switches - Two limit switches prevent desired temperature. The desired temperature is excessive water temperature - one within the heat set by rotating a knob on the face of the control exchanger and one for water leaving the heater. -
Page 32: Gas Valve
Page 30 valve (test point 1) and the TH terminal on the gas Note: Pump must be running during the valve (test point 17). If the meter shows less than troubleshooting procedure. 220mVDC then there is a problem with the pilot generator, the sensors in the safety loop or the control These procedures require a voltmeter with a panel. -
Page 33: Fireman Switch And External Interlocks
Model LG Pool and Spa Heater Page 31 If no voltage is detected at test point 3, the wire replacement of limit switches. Excessive water between the gas valve and the fusible link is broken. temperature may be caused by low water flow. Water Replace the wire. -
Page 34: Water Pressure Switch
Page 32 10.4.6 Water Pressure Switch range. Remove the temperature control wires from the control circuit board. Place one lead of the meter If the meter shows at least a 220mV signal at test on each of the wires (test points 18 & 19). With the point 11, move the black lead of the meter to the other control set to MIN the meter should read near 10,000 terminal on the water pressure switch (test point 12). - Page 35 Model LG Pool and Spa Heater Page 33...
-
Page 36: Replacement Parts
R0058200 To order or purchase parts for the Lite2 model LG Wire Harness R0058000 Plate Assembly 10457300 pool/spa heater, contact your nearest Jandy dealer or On-Off Switch R0099800 distributor. See the Jandy web page at www.Jandy.com Temperature Control Label H0105300... - Page 37 1. For altitudes 2,000 Ft above sea level, call factory for orifice size. 2. For altitudes 5,000 Ft above sea level, call factory for orifice size. Jandy® is a trademark of Jandy Industries, Inc. All other brand names, product names or trademarks belong to their respective holders.
-
Page 38: General Exploded View
Page 36 11.3 General Exploded View UNITED STATES HEAT EXCHANGER SEE NEXT PAGE FOR DETAIL TEMPERATURE CONTR0L SEE NEXT PAGE FOR DETAIL BURNER TRAY SEE NEXT PAGE FOR DETAIL... -
Page 39: Detailed Exploded View
Model LG Pool and Spa Heater Page 37 11.4 Detailed Exploded View 38 39... -
Page 40: Limited Warranty
If the dealer is not available, you can locate a service center in your area by visiting www.jandy.com or by calling our technical support department at (707) 776-8200 extension 260. All returned parts must have a Returned Material Authorization number to be evaluated under the terms of this warranty.
Need help?
Do you have a question about the LG125 and is the answer not in the manual?
Questions and answers