Table of Contents
Advertisement
Quick Links
Advertisement
Table of Contents

Related Manuals for Lantronix WiBox2100E


Summary of Contents for Lantronix WiBox2100E
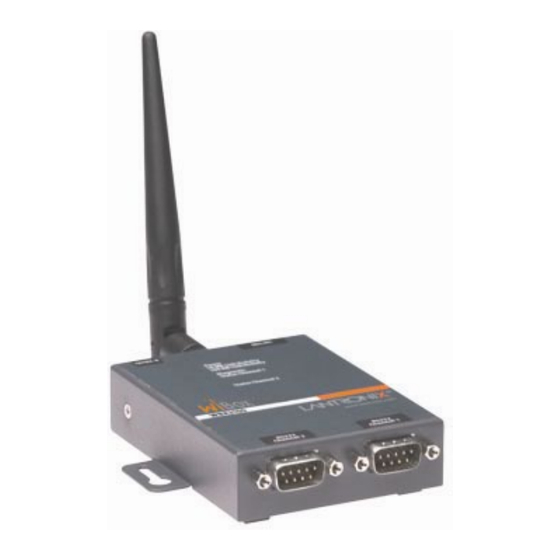
- Page 1 WiBox2100E User Guide Part Number 900-351 Revision H May 2007...
-
Page 2: Copyright And Trademark
Copyright and Trademark © 2005, 2006, 2007 Lantronix. All rights reserved. No part of the contents of this book may be transmitted or reproduced in any form or by any means without the written permission of Lantronix. Printed in the United States of America. -
Page 3: Table Of Contents
Viewing the Current Configuration__________________________________________23 4: Web-Manager Configuration Accessing Web-Manager through a Web Browser _____________________________26 Network Configuration ___________________________________________________27 Network Mode Configuration __________________________________________________28 Automatic IP Address Configuration _____________________________________________28 Static IP Address Configuration ________________________________________________29 Ethernet Configuration _______________________________________________________29 Server Configuration ____________________________________________________30 Hostlist Configuration ___________________________________________________31 WiBox2100E User Guide... - Page 4 Auto Increment Source Port ______________________________________________59 Remote IP Address _____________________________________________________59 Remote Port __________________________________________________________59 DisConnMode _________________________________________________________59 Flush Mode (Buffer Flushing) _____________________________________________60 Pack Control __________________________________________________________61 Packing Interval_____________________________________________________________61 Trailing Characters __________________________________________________________62 Send Characters ____________________________________________________________62 DisConnTime (Inactivity Timeout) __________________________________________62 Send Characters _______________________________________________________62 WiBox2100E User Guide...
- Page 5 WLAN Settings _____________________________________________________________72 Expert Settings _____________________________________________________________73 Security Settings ____________________________________________________________73 Exit Configuration Mode _________________________________________________74 9: Monitor Mode Entering Monitor Mode via the Serial Port ____________________________________75 Entering Monitor Mode via the Network Port __________________________________75 Monitor Mode Commands ________________________________________________75 10: Updating Firmware WiBox2100E User Guide...
-
Page 6: List Of Tables
7-6. Modem Mode Commands _________________________________________________ 58 Table 7-7. Disconnect Mode Options ____________________________________________ 60 Table 7-8. Flush Mode Options ________________________________________________ 60 Table 7-9. Pack Control Options _______________________________________________ 61 Table 9-1. Monitor Mode Commands ____________________________________________ 75 Table 9-2. Command Response Codes __________________________________________ 77 WiBox2100E User Guide... -
Page 7: List Of Figures
Figure 5-2. Setup Menu Options _______________________________________________ 44 Figure 7-1. Serial Port Parameters______________________________________________ 49 Figure 7-2. Manual Connection Address Example __________________________________ 54 Figure 8-1. Expert Settings____________________________________________________ 67 Figure 8-2. Encryption Keys ___________________________________________________ 71 Figure 10-1. TFTP Window ___________________________________________________ 79 WiBox2100E User Guide... -
Page 8: 1: Using This Guide
WiBox. 11: Wireless Bridging Provides information on the WiBox wireless bridging feature, which will be available for WiBox2100E with firmware version 6.2 or later. 12: Troubleshooting Describes common problems and error messages and how to contact Lantronix Technical Support. -
Page 9: Additional Documentation
Using This Guide Additional Documentation The following guides are available on the product CD and the Lantronix web site www.lantrronix.com. WiBox Quick Start Provides instructions for getting your WiBox up and running. Provides information on using DeviceInstaller to DeviceInstaller Online Help assign an IP address and view current configuration settings. -
Page 10: 2: Introduction
WB2100EGB-01 (WiBox board only) WB2100EG0-01 (No power supply) Note: In this User Guide, we generally refer to the WiBox2100E as the WiBox. Applications The WiBox device server connects serial devices such as those listed below to wireless and Ethernet networks using the IP protocol family. -
Page 11: Application Examples
A PC connected to an AP via an Ethernet connection and a PC with a wireless connection to the AP LAN access the WiBox as though they are connected to it directly. The combination of the WiBox, a PC, and Lantronix’s Redirector software allows the PC to communicate directly to the WiBox’s serial devices, providing wireless serial tunneling. -
Page 12: Ad Hoc Network
In the example above, the WiBox communicates with another device server via the AP. The UDS device server, in this example, is connected via an Ethernet connection to the AP. In this way, the WiBox and the device server communicate directly and can transfer information between their serial devices. WiBox2100E User Guide... -
Page 13: Ad Hoc Wibox Connection
Serial & Telnet Ports: There are two approaches to accessing Setup Mode. Make a Telnet connection to the network port (9999) or connect a terminal (or a PC running a terminal emulation program) to the unit’s serial port. (See 5: Telnet or Serial Port (Setup Mode) Configuration.) WiBox2100E User Guide... -
Page 14: Addresses And Port Numbers
The hardware address is also referred to as the Ethernet address or the MAC address. The first three bytes of the Ethernet address are fixed and read 00-20-4A, identifying the unit as a Lantronix product. The fourth, fifth, and sixth bytes are unique numbers assigned to each unit. -
Page 15: Serial Connector Pinouts
9600 baud, 8 bits, no parity, and 1 stop bit (9600, 8, N, 1). Figure 2-5. DB9M DTE Serial Connector Alternatively, you can configure the WiBox for RS-422/485 4-wire communications (Figure 2-6) or for RS-485 2-wire communications (Figure 2-7). Figure 2-6. RS-422/485 4-Wire Pinouts WiBox2100E User Guide... -
Page 16: Wbx2100E Network Interface
Introduction Figure 2-7. RS-485 2-Wire Pinouts WBX2100E Network Interface The back panel of the WBX2100E contains a 9-30VDC power plug and an RJ45 (10/100) Ethernet port. Figure 2-8. Network Interface Power Plug RJ45 Ethernet Port (WBX2100E only) WiBox2100E User Guide... -
Page 17: Ethernet Connector Pinouts
Ethernet Link LED: Green, steady on Active network connection. Port 1 LED: Green, steady on Idle Port 1 LED: Green, blinking Active TCP connection Port 2 LED: Yellow, steady on Idle Port 2 LED: Yellow, blinking Active TCP connection WiBox2100E User Guide... -
Page 18: Technical Specifications
Introduction Technical Specifications Table 2-2. WiBox Technical Specifications CPU, Memory Lantronix DSTni-EX 186 CPU 256 KB zero wait state SRAM 2048 KB Flash Serial Interface Rate is software selectable (300 bps to 921600 bps) Network Interface Wireless 802.11b/g 10/100 RJ45 Ethernet (WBX2100E only) -
Page 19: 3: Getting Started
Press Enter for Setup Mode 5. Press Enter within 5 seconds to display the Change Setup menu. Configuring the WiBox Two settings are required for the WiBox to communicate on a wireless network: The Server (0) settings The WLAN (4) settings WiBox2100E User Guide... - Page 20 Web-Manager. We provide a separate utility for changing the Country/Zone setting. The utility is called SetZone and is included in the WiBox package. It is also available for download from the Lantronix web site. The syntax is SetZone <IP address> [<zone abbreviation>] Leaving the zone blank causes the utility to report the current setting only.
- Page 21 The passphrase input is safer because it is up to 63 chars long. ASCII input is a maximum of 5 (WEP64) or 13 (WEP128) characters long and limits the number of key combinations. Please refer to the other equipment’s manual to determine WiBox2100E User Guide...
- Page 22 Indicate whether the new key is in hexadecimal or passphrase format. Enter key Enter the passphrase. The maximum length is 63 characters. Lantronix recommends using a passphrase of 20 characters or more for maximum security. Encryption Set the type to the minimum required security level. The “+”...
-
Page 23: Using Device Installer
Enter to complete. This description or comment is not visible on other PCs or laptops using DeviceInstaller. Device Family Displays the WiBox’s device family type as Wireless. Type Displays the device type as WiBox. WiBox2100E User Guide... - Page 24 Displays 45, the WiBox’s TCP keepalive range. range Supports Configurable False Pins Supports Email Triggers False Supports AES Data Displays True if the WiBox unit supports AES encryption. Stream Supports 485 Displays True if the WiBox supports the RS-485 protocol. WiBox2100E User Guide...
- Page 25 Supports HTTP Server Displays True if the WiBox supports HTTP server. Supports HTTP Setup Displays True if the WiBox supports HTTP setup. Supports 230K Baudrate Displays True if the WiBox supports a baud rate of 230K. Supports GPIO False WiBox2100E User Guide...
-
Page 26: 4: Web-Manager Configuration
This chapter describes how to configure the WiBox using Web-Manager, Lantronix’s browser-based configuration tool. The unit’s configuration is stored in nonvolatile memory and is retained without power. The unit performs a reset after the configuration is changed and stored. Accessing Web-Manager through a Web Browser 1. -
Page 27: Network Configuration
Network Configuration Select Network from the main menu to display the unit's network values. The following sections describe the configurable network parameters. Note: If the IP address is assigned via DHCP, its DHCP settings do not display. WiBox2100E User Guide... -
Page 28: Network Mode Configuration
Enable permits the Bootstrap Protocol (BOOTP). The BOOTP server assigns the IP address automatically from a pool of addresses. Enable permits Dynamic Host Configuration Protocol (DHCP). DHCP DHCP to assign a leased IP address to the WiBox unit automatically. WiBox2100E User Guide... -
Page 29: Static Ip Address Configuration
Speed: The speed of data transmission. The default setting is 100 Mbps. Duplex: The direction of data transmission. The default setting is Full. 3. When you are finished, click the OK button. 4. On the main menu, click Apply Settings. WiBox2100E User Guide... -
Page 30: Server Configuration
Select Disable to disable the entry into the monitor mode via the yyy or xx1 key sequence at startup. This command prevents the unit from entering monitor mode by interpreting the stream of characters that are received during the device WiBox2100E User Guide... -
Page 31: Hostlist Configuration
Allows for the configuration of the 0x77FE server port number. Enter a number between 1 and 65535. The configurability available only in Bridging mode for the discovery of Lantronix device servers behind the bridge. The default 0x77FE server port number is 30718. -
Page 32: Channel 1 And Channel 2 Configuration
Serial Settings To configure a channel’s serial settings: 1. From the main menu, click Serial Settings for either Channel 1 or Channel 2 to display the Serial Settings page for the selected channel. WiBox2100E User Guide... -
Page 33: Figure 4-5. Channel Serial Settings
921600. For baud rates 460 and 921 Kbps, the CPU Performance Mode must be set to High. Data Bits Indicates the number of character bits. The default setting is 8. Parity Checks for the parity bit. The default setting is None. WiBox2100E User Guide... -
Page 34: Pack Control
The default setting is No. Flush Output Buffer (Network to Serial) With Active Connect Select Yes to clear the output buffer with a connection that is initiated from the device to the network. The default setting is WiBox2100E User Guide... -
Page 35: Connection Settings - Tcp
1. From the main menu, click Connection for either Channel 1 or Channel 2 to display the Connection Settings page for the selected channel. 2. In the available fields, enter the following information: Connect Protocol Protocol Select TCP from the pull-down menu. Figure 4-6. TCP Connection Settings WiBox2100E User Guide... -
Page 36: Endpoint Configuration
50,000 to 59,999 and loops back to the beginning when the maximum range is reached. Disabled by default. Remote Port Enter the remote port number. Remote Host Enter the IP address of the remote device. WiBox2100E User Guide... -
Page 37: Common Options
Enter time in the format mm:ss, where m is the number of minutes, and s is the number of seconds. To disable the inactivity timeout, enter 00:00. 3. When you are finished, click the OK button. 4. On the main menu, click Apply Settings. WiBox2100E User Guide... -
Page 38: Connection Settings - Udp
The default is not to broadcast. Note: Datagrams are sent as subnet-directed broadcasts. Device Address Table This table is enabled when Datagram Type is set to FD. Enter values in the range 1-255 to identify units on the local network WiBox2100E User Guide... -
Page 39: Wlan Configuration
Web-Manager. However, we provide a separate utility for changing the Country/Zone setting. The utility is called SetZone and is included in the WiBox package. It is also available for download from the Lantronix web site. The syntax is SetZone <IP address> [<zone abbreviation>] Leaving the zone blank causes the utility to report the current setting only. -
Page 40: Figure 4-8. Wlan Settings
WEP Options Authentication Select an authentication scheme (Open/None or Shared) from the drop-down list. Select the encryption type (64 bits or 128 bits for WEP) from Encryption the drop-down list. 64 bits is the default encryption for WEP. WiBox2100E User Guide... -
Page 41: Advanced Settings
Radio Power Power management reduces the overall power consumption Management of the WiBox unit. Selecting Enable increases the response time. Power management is not permitted in Ad-Hoc mode. 3. When you are finished, click the OK button. WiBox2100E User Guide... -
Page 42: Updating Settings
Click the Apply Defaults button to reset the unit’s settings to the factory defaults, except for the network IP address, gateway, netmask, and WLAN settings. For a complete list of the default settings, see Default Settings on page 72. WiBox2100E User Guide... -
Page 43: 5: Telnet Or Serial Port (Setup Mode) Configuration
1. From the Windows Start menu, click Run and type the following command, where x.x.x.x is the IP address, and 9999 is the unit’s fixed network configuration port number: Windows: telnet x.x.x.x 9999 UNIX: telnet x.x.x.x:9999 2. Click the OK button. The following information displays. WiBox2100E User Guide... -
Page 44: Serial Port Connection
(or emulation) while resetting the unit. You must do this within three seconds of resetting the WiBox. At this point, the screen display is the same as when you use a Telnet connection. To continue, go to step 3 in Telnet Connection, above. WiBox2100E User Guide... -
Page 45: Exiting Setup Mode
To save all changes and reboot the device, select option 9 Save and exit from the Change Setup menu. All values are stored in nonvolatile memory. To exit the configuration mode without saving any changes or rebooting, select option 8 Exit without save from the Change Setup menu. WiBox2100E User Guide... -
Page 46: 6: Setup Mode: Server Configuration
The following table shows the bits you can manually configure to force the WiBox to disable AutoIP, DHCP, or BootP. To disable an option, set the appropriate bit. Table 6-1. BootP/DHCP/AutoIP options Options AutoIP DHCP BootP WiBox2100E User Guide... -
Page 47: Set Gateway Ip Address
Change telnet config password (N) ? _ An enhanced password setting (for Telnet access only) of 16 characters is available under Security Settings on page 69. Note: You do not need a password to access the Setup Mode window by a serial connection. WiBox2100E User Guide... -
Page 48: Dhcp Name
LTXYY where YY is what you chose for the last octet of the IP address. If the IP address you specify is 0.0.0.12, then the DHCP name is LTX12. This method only works with two-digit numbers (01-99). WiBox2100E User Guide... -
Page 49: 7: Setup Mode: Channel Configuration
Valid baud rates are 300, 600, 1200, 2400, 4800, 9600 (default), 19200, 38400, 57600, 115200, 230400, 460800, or 921600. The current value is displayed in parentheses. Baudrate (9600) ? _ WiBox2100E User Guide... -
Page 50: I/F (Interface) Mode
0111 1000 RS-485 2-wire, 8-bit, No Parity, 1 stop bit 0100 1111 RS-422, 8-bit, Odd Parity, 1 stop bit 0101 1101 Flow Flow control sets the local handshaking method for stopping serial input/output. The default setting is 00. WiBox2100E User Guide... -
Page 51: Port Number
Connect Mode Connect Mode defines how the unit makes a connection, and how it reacts to incoming connections over the network. The default setting is C0. ConnectMode (C0) ? _ Enter Connect Mode options in hexadecimal notation. WiBox2100E User Guide... -
Page 52: Table 7-5. Connect Mode Options
With a specific start character Manual connection Autostart Hostlist d) Datagram Type Directed UDP e) Modem Mode No Echo Data Echo & Modem Response (Numeric) Data Echo & Modem Response (Verbose) Modem Response Only (Numeric) Modem Response Only (Verbose) WiBox2100E User Guide... -
Page 53: A) Incoming Connection
Attempts to connect when the Modem Control In input changes from not asserted to asserted. Control In With a Specific Start Attempts to connect when it receives a specific start character Character from the serial port. The default start character is carriage return. WiBox2100E User Guide... -
Page 54: Figure 7-2. Manual Connection Address Example
Result if remote IP is 129.1.2.3 and remote port is 1234 Complete override; connection is started with host 121.2.4.5, C121.2.4.5/1 port 1. Connects to 129.1.2.5, port 1234. C28.10/12 Connects to 129.1.28.10, port 12. C0.0.0.0/0 Enters Monitor Mode. WiBox2100E User Guide... - Page 55 2. To delete, modify, or add an entry, select Yes. If you enter an IP address of 0.0.0.0, that entry and all others after it are deleted. 3. After completing the hostlist, repeat the previous step if necessary to edit the hostlist again. WiBox2100E User Guide...
-
Page 56: D) Datagram Type
Modem Responses Full Verbose: The unit does not echo modem commands and Only responds to a command with a message string shown in the table below. Numeric Response: The unit does not echo modem commands WiBox2100E User Guide... - Page 57 No serial data is received for one second after the last + character. At this time, the unit responds affirmatively per the selected echo/response mode. The character string ATH is received, terminated with a carriage return. The unit responds affirmatively according to the selected echo/response mode WiBox2100E User Guide...
-
Page 58: Send The Escape Sequence (+++) In Modem Mode
Send the Escape Sequence (+++) in Modem Mode Send ‘+++’ in Modem Mode (Y) ? _ Disable or enable the WiBox’s ability to send the escape sequence. The default setting is Y (Yes) (send the escape sequence). Show IP addr after 'RiNG' WiBox2100E User Guide... -
Page 59: Auto Increment Source Port
In DisConnMode (Disconnect Mode), Modem Control In either drops the connection or is ignored. Note: All bit positions in the table that are blank represent “don’t care” bits for that particular option; they can be set to either a 0 or 1 value. WiBox2100E User Guide... -
Page 60: Flush Mode (Buffer Flushing)
Clear when the network connection to or from the device is disconnected Output Buffer (Network to Serial) Clear with a connection initiated from the device to the network Clear with a connection initiated from the network to the device WiBox2100E User Guide... -
Page 61: Pack Control
Send Immediately After Send chars Packing Interval Packing Interval defines how long the unit should wait before sending accumulated characters. This wait period is between successive network segments containing data. For alternate packing, the default interval is 12 ms. WiBox2100E User Guide... -
Page 62: Trailing Characters
Mode. With this option enabled, you can use the terminal name for the Telnet terminal type. Enter only one name. With terminal type option enabled, the unit also reacts to the EOR (end of record) and binary options, useful for applications like terminal emulation to IBM hosts. WiBox2100E User Guide... -
Page 63: Channel (Port) Password
IEEE standard 802.11i. It enables the AES-based strong CCMP encryption. Security suite 0=none, 1=WEP, 2=WPA, 3=WPA2/802.11i (0) ? _ Authentication 0=open/none, 1=shared (0) ? _ Encryption 0=WEP64, 1=WPE128 (1) ? Display current key (N) ? WiBox2100E User Guide... -
Page 64: Wpa
Please refer to the other equipment’s manual to determine the passphrase input style recommended. Note: Lantronix recommends using a passphrase of 20 characters or more for maximum security. TX Key index Select the WEP key used for transmissions. Enter a value from 1 to 4. -
Page 65: 802.11I/Wpa2-Personal
Indicate whether the new key is in hexadecimal or passphrase format. Enter key Enter the passphrase. The maximum length is 63 characters. Lantronix recommends using a passphrase of 20 characters or more for maximum security. Encryption Set the type to the minimum required security level. -
Page 66: Enable Power Management
The radio is enabled to synchronize and check for incoming messages (every 100 ms). Note: This option is not available when the Topology is set to Adhoc. Enable power management (N) ? _ WiBox2100E User Guide... -
Page 67: 8: Setup Mode: Advanced Settings
If the unit gets no response, it drops that connection. The default setting is 45. TCP Keepalive time in s (1s – 65s; 0s=disable): (45)? _ WiBox2100E User Guide... -
Page 68: Arp Cache Timeout In Seconds
TCP and UDP. Enter between 512 and 1400 bytes. The default setting is 1400 bytes. MTU Size: (1400) ? _ Alternate MAC Address If necessary, enable the alternate MAC address (if specified in the OEM setup record). Enable alternate MAC (N) ? WiBox2100E User Guide... -
Page 69: Ethernet Connection Type
Disable Telnet Setup (N) ? _ Disable TFTP Firmware Upgrade This setting defaults to the N (No) option. The Y (Yes) option disables TFTP for network firmware upgrades. Disable TFTP Firmware Update (N) : _ WiBox2100E User Guide... -
Page 70: Disable Port 77Fe (Hex)
Configuring encryption should be done through a local connection to the serial port of the WiBox, or via a secured network connection. Initial configuration information including the encryption key is sent in clear text over the network. WiBox2100E User Guide... -
Page 71: Figure 8-2. Encryption Keys
AES encryption protocols. To communicate successfully, products and applications on the peer side must use the same protocols and the same encryption key as the WiBox. Lantronix Secure Com Port Redirector provides an encrypted connection from Windows-based applications to the WiBox. Information about SCPR is http://www.lantronix.com/device-networking/software-services/scpr.html A 30-day trial version of SCPR is included on the CD. -
Page 72: Default Settings
Port No 10002 Connect Mode C0 (always accept incoming connection; no active connection startup) Hostlist Retry Counter Hostlist Retry Timeout 250 (msec) Send Character 0x0D (CR) All other parameters WLAN Settings Topology 1 (AdHoc) Network Name LTRX_IBSS Channel WiBox2100E User Guide... -
Page 73: Expert Settings
N (No) Disable TFTP Firmware Update N (No) Disable Port 77FEh N (No) Disable Web Server N (No) Disable Web Setup N (No) Disable ECHO ports Y (Yes) Enable Encryption N (No) Enable Enhanced password N (No) WiBox2100E User Guide... -
Page 74: Exit Configuration Mode
To save all changes and reboot the device, select option 9 Save and exit from the Change Setup menu. To exit the configuration mode without saving any changes or rebooting, select option 8 Exit without save from the Change Setup menu. WiBox2100E User Guide... -
Page 75: 9: Monitor Mode
Note: All commands must be in capital letters. Table 9-1. Monitor Mode Commands Command Command Name Function Version Queries software header record (16 bytes) of unit. Get Configuration Gets configuration of unit as hex records (120 bytes). WiBox2100E User Guide... - Page 76 Ethernet or BSSID, encryption, authentication for wireless interfaces. Responses to some of the commands are given in Intel Hex format. Note: Entering any of the commands listed above generates one of the following command response codes: WiBox2100E User Guide...
-
Page 77: Table 9-2. Command Response Codes
Monitor Mode Table 9-2. Command Response Codes Response Meaning 0> OK; no error 1> No answer from remote device 2> Cannot reach remote device or no answer 8> Wrong parameter(s) 9> Invalid command WiBox2100E User Guide... -
Page 78: 10: Updating Firmware
TFTP or via the serial port. You can also update the unit’s internal web interface (*COB) via TFTP. Here are typical names for those files. Check the Lantronix web site for the latest versions and release notes. Table 10-1. Firmware Files ROM File WBXxxx.ROM... -
Page 79: Using Tftp: Command Line Interface
1. Connect the COM interface of your PC to serial port 1 of the WiBox. 2. Start DeviceInstaller. If your PC has more than one network adapter, a message displays. Select an adapter and click the OK button. WiBox2100E User Guide... -
Page 80: Wlan Country Setting
Web-Manager. However, we provide a separate utility for changing the Country/Zone setting. The utility is called SetZone and is included in the package. It is also available for download from the Lantronix web site. The syntax is: SetZone <IP address> [<zone abbreviation>] Leaving the zone blank causes the utility to report the current setting only. -
Page 81: 11: Wireless Bridging
Note: The WiBox2100E with firmware version 6.2 and later will support bridging. Bridging allows a host, connected on the WiBox’s wired Ethernet interface, to be accessible over the wireless network (via the WiBox). To initialize the bridging feature: 1. Configure the WiBox’s wireless settings. See WLAN Configuration on page 39. -
Page 82: Method 3
Wireless Bridging Method 3 As an alternative to configuring through the wired interface, connect a device through the WiBox’s serial port. For more information on configuration through the serial port, 5: Telnet or Serial Port (Setup Mode) Configuration. WiBox2100E User Guide... -
Page 83: 12: Troubleshooting
This chapter discusses how you can diagnose and fix errors quickly without having to contact a dealer or Lantronix. It helps to connect a terminal to the serial port while diagnosing an error to view summary messages that may be displayed. When troubleshooting, always ensure that the physical connections (power cable, network cable, and serial cable) are secure. - Page 84 0-9 and letters A-F. In Windows and usually in Unix, the segments of the Ethernet address are separated by dashes. In some forms of Unix, the Ethernet address is segmented with colons. WiBox2100E User Guide...
- Page 85 If the Status LED is solid green, then the socket connection does not exist. Use the Connect Mode option C0 WiBox2100E User Guide...
-
Page 86: Technical Support
If you are experiencing an error that is not described in this chapter, or if you are unable to fix the error, check our online knowledge base or send a question to Technical Support at http://www.lantronix.com/support. Technical Support Europe, Middle East, and Africa... -
Page 87: A: Mounting Brackets
The following drawings provide dimensions of the brackets for mounting the WiBox. WiBox2100E User Guide... -
Page 88: B: Binary To Hexadecimal Conversions
Another simple way to convert binary to hexadecimals is to use a scientific calculator, such as the one available on Windows’ operating systems. For example: 1. On the Windows’ Start menu, click Programs Accessories Calculator. 2. On the View menu, select Scientific. The scientific calculator displays. WiBox2100E User Guide... - Page 89 Binary to Hexadecimal Conversions 3. Click Bin (Binary), and type the number to convert. 4. Click Hex. The hexadecimal value displays. WiBox2100E User Guide...
-
Page 90: C: Compliance
Compliance Information Manufacturer’s Name & Address: Lantronix 15353 Barranca Parkway, Irvine, CA 92618 USA Declares that the following product: Product Name: WiBox Device Server Model: WBX2100E Conforms to the following standards or other normative documents: Safety: UL 60950-1 CAN/CSA-C22.2 No. 60950-1-03 EN 60950-1:2001, Low Voltage Directive (73/23/EEC) EMC &... -
Page 91: Regulatory Information
Caution: Changes or modifications to this product not expressly approved by Lantronix could void the user's authority to operate this equipment. Note: This equipment has been tested and found to comply with the limits for a Class B digital device, pursuant to part 15 of the FCC Rules. -
Page 92: Europe - R&Tte Directive 99/5/Ec, Wireless Notice
Australia and New Zealand and is designated to have met Compliance Level 2. 7The compliance mark is designated with the circle and check mark inside is called the “C-Tick” mark. This C-Tick mark label is located underneath this product and signifies its compliance, as shown below: WiBox2100E User Guide... - Page 93 9 digit number designates the local representative in Australia who can take inquiries regarding this product’s compliance status. The following contact address is found below: Lantronix Australia Pty. Ltd. c/o LLK Chartered Accountants Suite 2, Level 7 122 Walker Street...
-
Page 94: D: Warranty
Lantronix. Lantronix will ship the replacement media to the customer. In no event will Lantronix be responsible to the user in contract, in tort (including negligence), strict liability or otherwise for any special, indirect, incidental or...
Need help?
Do you have a question about the WiBox2100E and is the answer not in the manual?
Questions and answers