Table of Contents
Advertisement
Quick Links
Download this manual
See also:
Owner's Manual
Advertisement
Table of Contents

Related Manuals for Toshiba TDP-MT500


Summary of Contents for Toshiba TDP-MT500
- Page 1 OWNER’S MANUAL HOME PROJECTOR TDP-MT500...
-
Page 2: Safety Precautions
Consult the dealer or an experienced radio/TV technician for help. WARNING: Changes or modifications made to this equipment, not expressly approved by Toshiba, or par- ties authorized by Toshiba, could void the user’s authority to operate the equipment. Use the attached RS-232C cable and mini D-SUB 15P - DVI conversion cable with this equip- ment so as to keep interference within the limit of a FCC class B device. -
Page 3: Important Safety Instructions
IMPORTANT SAFETY INSTRUCTIONS CAUTION: PLEASE READ AND OBSERVE ALL WARNINGS AND INSTRUCTIONS PROVIDED IN THIS OWNER'S MANUAL AND THOSE MARKED ON THE PROJECTOR. KEEP THIS OWNER'S MANUAL FOR FUTURE REFERENCE. This projector has been designed and manufactured to assure personal safety. Im- proper use can result in electric shock or fire hazard. - Page 4 IMPORTANT SAFETY INSTRUCTIONS Heat Power-Cord Protection The product should be situated away Power-supply cords should be routed from heat sources such as radiators, so that they are not likely to be walked heat registers, stoves, or other prod- on or pinched by items placed upon or ucts (including amplifiers) that produce against them, paying particular atten- heat.
- Page 5 IMPORTANT SAFETY INSTRUCTIONS 11. Object and Liquid Entry 14. Attachments Never push objects of any kind into Do not use attachments not recom- this product through openings as they mended by the product manufacturer may touch dangerous voltage points or as they may cause a hazard.
- Page 6 IMPORTANT SAFETY INSTRUCTIONS 16. Damage Requiring Service 18. Servicing Unplug this product from the wall Do not attempt to service this product outlet and refer servicing to qualified yourself as opening or removing cov- service personnel under the following ers may expose you to dangerous conditions: voltage or other hazards.
- Page 7 IMPORTANT SAFETY INSTRUCTIONS 21. Do not leave thermal-paper documents or easily damaged items on top of the projector or near the air exhaust. The heat from the projector could erase the information on the thermal paper, or cause damage or warping. Also, when you touch a metal object put near the air exhaust, it could be hot and burn you.
-
Page 8: Important Precautions
SELECTING THE POWER CORD If your line voltage is 220 to 240 V, use one of the following types of cord. Plug Plug configuration Plug type Line voltage configuration Plug type Line voltage Australian EURO 220 – 240 V 240 V 10 A Switzerland 200 –... -
Page 9: Exemption Clauses
Exemption Clauses • Toshiba Corporation bears no responsibility in the case of damages arising from earthquakes, fire not liable to Toshiba Corporation, operating by third parties, other accidents, or use under abnormal conditions including erroneous or improper operation and other problems. -
Page 10: Table Of Contents
TABLE OF CONTENTS PREPARING YOUR PROJECTOR Checking accessories ................................11 Inserting the batteries into the remote control ........................11 Understanding the parts of the projector ..........................12 Using the remote control ................................13 Operational range of the remote control ..........................14 SETTING UP YOUR PROJECTOR Setting up the screen................................15 Basic setup ....................................15... -
Page 11: Preparing Your Projector
PREPARING YOUR PROJECTOR Checking accessories The following accessories are provided with this projector. Check to be sure that all of the accessories are packed in the package. Power supply parts Remote control parts R03 (Size-AAA) batteries (two) Power cord (two) Remote control Personal computer parts Video parts... -
Page 12: Understanding The Parts Of The Projector
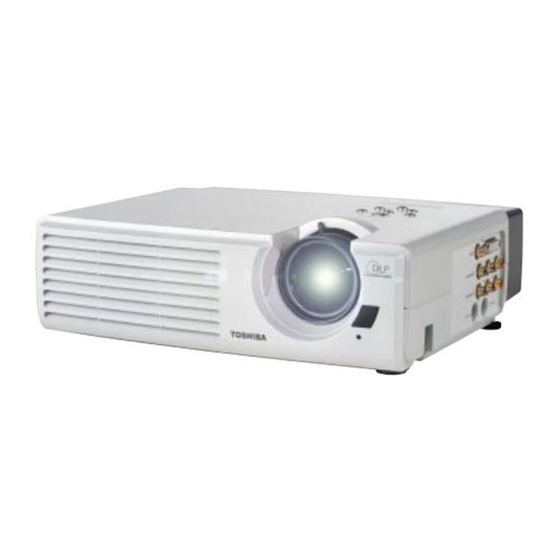
PREPARING YOUR PROJECTOR Understanding the parts of the projector Remote control photo-sensor (Front) Intake vent Operation panel Remote control photo-sensor (Rear) Angle adjusting button 15 Terminal panel Kensington Security Lock Standard Angle adjusting connector button Power cord inlet Exhaust vent Angle adjusting foot 15 Main power switch Operation panel (Top) -
Page 13: Using The Remote Control
PREPARING YOUR PROJECTOR Using the remote control Name and function of operational parts of the remote control POWER ON/STANDBY POWER button: SOURCE SOURCE button: COMP1 COMP2 DVI-D Selects an input video signal to be projected. S-VIDEO VIDEO DVI-A ASPECT button: 16:9 Selects size of the video image according to 16:9... -
Page 14: Operational Range Of The Remote Control
PREPARING YOUR PROJECTOR Operational range of the remote control Front of projector Rear of projector • Keep the remote control photo-sensor away from direct sun light or fluorescent lamp light. 15˚ 15˚ 15˚ 15˚ • Keep the remote control photo-sensor at Operate the least 2 m apart from fluorescent lamps. -
Page 15: Setting Up Your Projector
SETTING UP YOUR PROJECTOR Setting up the screen Set the screen perpendicular to the projector. If the screen can not be set perpendicularly, adjust the projection angle of the projector. (See below.) • Adjust the screen or projector so that the shadow of the projector lens may be projected onto the center of the screen. -
Page 16: Screen Size And Projection Distance
SETTING UP YOUR PROJECTOR Screen size and projection distance Determine screen size by referring to the following table: When the screen size is 16: 9 Screen size Screen Projector Projector distance (L) (Unit : cm) Screen size Projector distance (L) Height (A) Type Height... -
Page 17: Viewing Video Images
VIEWING VIDEO IMAGES A. Connecting the projector to video equipment Preparations: • Check to be sure that the power for the projector and video equipment is turned off. 1 Connect an end of a commercially available video cable to the VIDEO terminal of the To VIDEO terminal projector. -
Page 18: Plugging In The Power Cord
VIEWING VIDEO IMAGES Connecting to video equipment that has DVI-D terminal The DVI terminal of this projector makes it possible to project high-quality video images on screen by connecting with video equipment that has DVI-D terminal. Also, because this projector is in conformity with HDCP, it is possible to receive digital image signals encrypted from video equipment. -
Page 19: Projection The Image
VIEWING VIDEO IMAGES C. Projection the image Preparations: • Remove the lens cap. • Turn on power for the connected video equipment. 1 Turn “ON” the main power switch (O I). • When the main power switch is turned Main power switch on, the POWER indicator comes on in Lighting in orange orange. -
Page 20: Main Power Switch
VIEWING VIDEO IMAGES When stopping projection: Main power switch 8 Press the POWER ( ) button. • A confirmation message appears on the screen. • To cancel this state, wait for a while, or press the EXIT button or MENU button on the remote control, or press the MENU/EXIT button of the projector. -
Page 21: Setting The Aspect
VIEWING VIDEO IMAGES D. Setting the ASPECT This projector can change the ASPECT ratio (the ratio between the width and length of the image frame) according to the input video signals. 16 : 9 DYNAMIC 4 : 3 ZOOM REAL Projects 4-to-3 Projects video Projects video... -
Page 22: Viewing Computer Images
VIEWING COMPUTER IMAGES A. Connecting the projector to a computer Preparations: • Make sure that the power for the projector and computer are turned off. • With a desktop type computer, disconnect the RGB cables connected to the monitor. In the case of analog connections: 1 Connect the attached mini D-SUB 15pin-DVI conversion To DVI terminal cable to DVI terminal of the projector. -
Page 23: Projection The Image
VIEWING COMPUTER IMAGES C. Projection the image Preparations: • Remove the lens cap. • Turn on power for the connected video equipment. 1 Turn “ON” the main power switch (O I). • When the main power switch is turned Main power switch on, the POWER indicator comes on in Lighting in orange orange. - Page 24 VIEWING COMPUTER IMAGES When stopping projection: Main power switch 8 Press the POWER ( ) button. • A confirmation message appears on the screen. • To cancel this state, wait for a while, or press the EXIT button or MENU button on the remote control, or press the MENU/EXIT button of the projector.
-
Page 25: Using The Menus
USING THE MENUS Menu construction PICTURE... CONTRAST – 32 ~ +31 BRIGHTNESS – 30 ~ +30 COLOR – 30 ~ +30 TINT – 15 ~ +15 – 5 ~ +5 SHARPNESS ICC RED ICC CONTROL – 15 ~ +15 PRO-PICTURE... ICC GREEN –... -
Page 26: How To Make A Menu Setting
USING THE MENUS 6 Press the $ , % buttons for the setting. How to make a menu setting: The following figures describe how to set the trapezoi- KEYSTONE dal correction as an example: 1 Press the MENU button. KEYSTONE The main menu (the first level) appears. -
Page 27: Items That Can Be Set With The Menus
USING THE MENUS Items that can be set with the menus In this projector, the following items can be set from the set up menus. PICTURE MENU ITEM SETTING FUNCTION PICTURE... CONTRAST CONTRAST ------- -32 ~ +31 ---------- Adjusts contrast of projected images. (See Page 29.) BRIGHTNESS COLOR BRIGHTNESS ---- -30 ~ +30 ---------- Adjusts brightness of projected images. - Page 28 USING THE MENUS OPTION MENU ITEM SETTING FUNCTION OPTION... RESET ALL ENTER RESET ALL -------------------------------- Pressing the ENTER button shows a confirmation box. Select “Yes” and press ENTER button. Then, the AUTO OFF MINUTES settings that were made in the picture quality setting LAMP HOUR HOURS menu and the professional-use picture quality setting...
-
Page 29: On The Memory For Projected Image Quality
USING THE MENUS On the memory for projected image quality This projector allows each item in the PICTURE menu and the PROFESSIONAL-PICTURE menu (except for SET USER COLOR TEMP) to be adjusted to up to three kinds of favorable picture quality for each input signal. Input that allows the setting Number of settings SAVE... - Page 30 USING THE MENUS Adjusting color (COLOR and TINT) Items related to color of projected images are adjusted with menus. To adjust the color: (Refer to Page 26 for setting menus.) 1 Bring up the PICTURE menu. COLOR 2 Select “COLOR” or “TINT” by pressing the {, } buttons. TINT 3 Adjust the selected item by pressing the $, % buttons.
- Page 31 USING THE MENUS To adjust the degree of white color (SET USER COLOR TEMP): When setting (storing) user’s preferable color temperatures, use “SET USER COLOR TEMP” in the PRO- PICTURE menu. (Refer to Page 26 for setting menus.) To store the settings: SET USER COLOR TEMP 1 Bring up the PRO-PICTURE menu.
-
Page 32: Adjusting Picture Images Sent From Computers
USING THE MENUS Adjusting picture images sent from computers This projector automatically sets an appropriate signal processing format according to the image signal sent from computers. However, depending on the type of the computer, the image signals may not be projected properly. If this happens. -
Page 33: Indicators
INDICATORS How to see the internal states from indicators There are three indicators that show the status of the projector. Check the followings, and if there is any phenomenon, stop use of the projector and be sure to unplug the power plug. Then, contact your dealer. LAMP indicator POWER indicator TEMP(temperature) indicator... -
Page 34: Replacing The Lamp/Cleaning The Projector
In these cases, replace the lamp to new one in good time. To replace the lamp, be sure to use the light- source lamp that is sold exclusively for the TDP-MT500 (Model TDPLMT50). For the details, refer to the operation manual for TLPLMT50. - Page 35 REPLACING THE LAMP / CLEANING THE PROJECTOR 7 Holding the handle, pull out the light-source lamp from the projector. • Pull out the light-source lamp slowly. The lamp may burst the glass of the lamp is pulled out too quickly. •...
-
Page 36: Troubleshooting
TROUBLESHOOTING Before asking for repair of the projector, check the followers: If the phenomenon still continues, stop using it and be sure to unplug the power plug. Then, contact the delivery agent of the projector. Picture images are not projected on screen. Problem Solution Power can not be... - Page 37 TROUBLESHOOTING Solution Problem • Adjust the projector and the screen so that they are perpendicular to each other. (See Projected images are Page 15.) distorted. • Adjust BRIGHTNESS and CONTRAST in the PICTURE menu. (See Page 29.) Projected images are •...
-
Page 38: Specifications
(The specifications and outside appearance of the projector are sub- SPECIFICATIONS ject to change without prior notice.) Item HOME projector Model no. TDP-MT500 Projection system (Single-Board DMD ) system Power AC 100-240 V, 50/60 Hz Power dissipation 3.5 A Resolution... -
Page 39: Type Of Connectable Signals
SPECIFICATIONS Type of connectable signals Input signal Screen size Signal Resolution Horizontal sync Vertical sync REAL display representation (H x V) frequency (kHz) frequency (Hz) (H x V) 480i – 15.73 59.94 720 x 480 576i – 15.63 50.00 720 x 576 480p –... - Page 40 For assistance with your Toshiba projector in the United States, please visit www.toshiba.com/tacp or contact by phone at 800-346-6672. For assistance with your Toshiba projector in the Europe, please visit www.toshiba-europe.com or contact your local Toshiba dealer. Printed in JAPAN...
Need help?
Do you have a question about the TDP-MT500 and is the answer not in the manual?
Questions and answers