Table of Contents
Advertisement
Quick Links
Advertisement
Table of Contents

Related Manuals for Toshiba TDP-MT400


Summary of Contents for Toshiba TDP-MT400
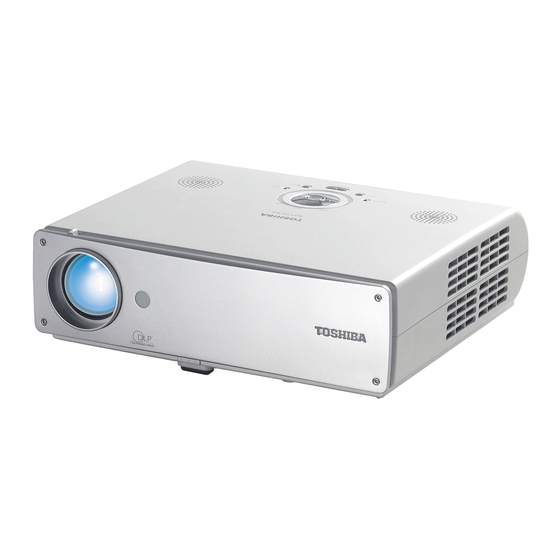
- Page 1 TOSHIBA SERVICE MANUAL DATA PROJECTOR TDP-MT400 PRINTED IN UK. 2005 C...
- Page 2 Preface This manual is applied to Toshiba S80/S81/SW80/MT200/T80/T90/T91/TW90/T98/T90A/ T91A/TW90A DMD Projector with digital imaging functionality based on Digital Micro-mirror Device (DMD) technology. It is the mode of single Panel, 200 Watt Lamp. The manual gives you a brief description of basic technical information to help in service and maintain the product.
-
Page 3: Table Of Contents
Troubleshooting Equipment Needed Main Procedure Main Procedure Description Factory Mode 3-10 Chapter 4 Function Test and Alignment Procedure Product Test Equipment Test Condition Test Display Modes & Pattern Inspection Procedure Wireless Testing Procedure (For TW90 and SW80) 4-11 Toshiba Series... - Page 4 Exploded Overview for MT200 7-24 Appendix B 7-37 MT200 vs. MT400 Comparison Table 7-37 T90A vs. S80 Comparison Table 7-38 TW90A vs. TW90A vs.S80 Comparison Table 7-39 Appendix C 7-37 Serial Number System Definition 7-40 PCBA Code Definition 7-41 Toshiba Series...
-
Page 5: Introduction
Auto image re-sizing to 800 x 600 full screen Auto image re-sizing to 1024 x 576 full screen Auto detection of computer signal input Auto Image synchronization (Auto-tracking / frequency / position adjustment) by Auto- setting key. Freeze function. Toshiba Series... -
Page 6: Display Panel Specifications
- S Video Input (Mini-Din 4-Pin x 1) connector - Composite Video Input (RCA x 1) - RS232 (Mini-Din 8pin x 1) Terminals & I/O - Digital Video with HDCP Input (DVI-D) connector Terminals & I/O - USB (Mini B type) Connector Toshiba Series... -
Page 7: Optical Specifications
Full on / off 2500:1 (Typical) 1500 : 1 (Minimum) JBMA 75% (Typical) 60% (Minimum) Uniformity JBMA 80% (Typical) 65% (Minimum) OSRAM E17.5 200W P-VIP Lamp Phoenix X66 200W SHP Lamp Lamp Philips E19 200W UHP Lamp Philips E19V 200W UHP Lamp Toshiba Series... -
Page 8: Environmental Specifications
Firmware is used for specific models (with a check in the blank). That is, Firmware A is totally different from Firmware B. This rule also stands true for Firmware C~H. (1) T90 & TW90 implement the same Firmware. (2) S80, S81 & SW80 implement the same Firmware. Toshiba Series... -
Page 9: Disassembly Procedure
H e x S l e e v e s 8 m m H e x S l e e v e s 5 m m B a l l - e n d h e x - k e y 2 m m Toshiba Series... -
Page 10: Removing Lamp Module
Unscrew 1 screw to remove the Lamp Cover, and then unscrew 2 screws to remove the Lamp Module. Screw Bit (+) : 107 Lamp Module 2-2 Removing Front Cover, Option Cover and Rear Cover Module Unscrew 4 screws to remove the Front Cover. Ball-endhex-key 2mm Front Cover Toshiba Series... - Page 11 Unscrew 2 screws to remove the Option Cover. Screw Bit (+) : 107 Option Cover (Blank) PC + ABS - CAOLA Unscrew 6 hex screws and 2 screws to remove the Rear Cover Module. Screw Bit (+) : 102 Rear Cover Module Toshiba Series...
-
Page 12: Removing Top Cover, Keypad Board, Speaker
Press point A; then press point B to separate the Top Cover and the Main Body carefully. Unplug the FFC cable to remove the Top Cover. Unscrew 6 screws to remove the Keypad Board, Speaker and Select the Button Module. Speaker Keypad Board Screw Bit (+) : 107 Select Button Module Toshiba Series... -
Page 13: Removing Main Board, Lvps Module, Lamp Driver Module
Unplug all cables and unscrew 5 screws to remove the Main Board. Screw Bit (+) : 107 Tear off Mylar and then unscrew 5 screws to remove the LVPS Module. Screw Bit (+) : 107 Mylar LVPS Module Toshiba Series... - Page 14 Screw Bit (+) : 107 Unscrew 2 screws to remove the Fan Module. Screw Bit (+) : 107 Axial Fan Module (70x70x20mm) Note: TW90- Add 1 cable to link wireless function from the Main Board of TW90. (As the picture display) Toshiba Series...
-
Page 15: Removing Interrupter Switch, Engine Module, Fan Module
Tear off the Deflector Tinplate and then unscrew 5 screws to remove the Brackets. Screw Bit (+) : 102 Unscrew 6 screws of the red rectangle area and then remove the Engine Module. Engine Module Screw Bit (+) : 107 Toshiba Series... - Page 16 Remove the Fan Module. Fan Module (50x50x20mm) Unscrew 4 screws to remove the Heat Sink. Screw Bit (+) : 107 Heat Sink Unscrew 4 hex screws to remove the DMD Board. DMD Board Hex Sleeves 8mm Toshiba Series...
-
Page 17: Removing Dmd Chip, Color Wheel And Photo Sensor Board
Unscrew 1 screw to remove the Color Wheel and the Photo Sensor Board. Color Wheel Photo Sensor Board Unscrew 3 screws to remove the Zoom Ring and the Focus Ring from the Engine Module. Focus Ring Zoom Ring Toshiba Series... -
Page 18: Removing Thermal Board, Ir Sensor Board And Fan Duct
Turn over the Bottom Cover Module; then, unscrew 1 screw to remove the IR Sensor Board. IR Sensor Board Screw Bit (+) : 107 Unscrew 1 screw to remove the Fan Duct from the Bottom Module. Fan Duct Screw Bit (+) : 107 one screw Toshiba Series 2-10... -
Page 19: Removing Wireless Board (For Tw90 Only)
2-8 Removing Wireless Board (For TW90 Only) Unscrew 2 screws to remove the Option Cover. Option Cover Pull out the Wireless Board. Toshiba Series 2-11... - Page 20 4.) Frequency : Press “Setup” button, then adjustment from “Frequency” mode. 5.) Phase : Press “Setup” button, then adjustment from “Phase” mode. 6.) Reset Lamp Use Time : Refer Chapter 3-4 Hot Key, item 3 7.) Reset All : Press “Menu” --> Default Setting Menu. Toshiba Series...
-
Page 21: Troubleshooting
D. Audio Is Audio OK ? Troubleshooting Is Remote E. Remote Control Control OK? Troubleshooting F. Camera Is Camera OK? Troubleshooting (For T91 and S81) G. Wireless Is Wireless OK? Troubleshooting (For TW90 and SW80) No Fault Found Toshiba Series... - Page 22 ? OK ? Change Is System Fan Is Optical Fan Main Board working ? working ? Change System Change Optical Change Change Change Change Change Lamp Is Lamp lit ? DMD Board Main Board Lamp Driver LVPS Module Toshiba Series...
- Page 23 Is color OK ? Engine Procedure DMD Board *Refer to Chapter Module 3-4, item 7 Dot defect isn’t Change compliant with the DMD Chip spec.? Adjust Change Have line bar ? frequency Adjust Change Have noise ? phase Toshiba Series...
- Page 24 Does OSD show Keypad FFC Troubleshooting FFC OK ? up ? Change Is Keypad OK? Main BD Keypad BD Change Can OSD function Keypad Main board be adjusted ? Change Can OSD data Main board be saved ? Toshiba Series...
- Page 25 Can hear Change Main Board Keypad Board sound ? Speaker Change Sound is clear Change Main Board without noise ? Speaker 3-2.5 E. Remote Control Troubleshooting Start Replace the battery Change Remote Controller Change IR Receiver Board Change M/B Toshiba Series...
- Page 26 Check the photo sensor BD if the image displayed with color flicking issue. Judge *Note Adjust the RGB offset. Adjust the color wheel index delay. (Refer to 3-4.5 CW index delay menu) Change Main board. Note : Press “Menu” button to enter setting display. Adjust the R-level, G-level, B-level. Toshiba Series...
- Page 27 Press “VOL-“ or “VOL+” button on the keypad and check if the mute function is enabled. Check Main BD if there is audio sound output when you input the audio signal with other ports. Check the speaker Judge Change Keypad BD Toshiba Series...
- Page 28 Check the Projector setting. (Refer to Chapter 4, P4-10 Wireless Testing Procedure) Judge Change Wireless Card and Wireless BD. Camera Troubleshooting (for T91, S81 and T91A) Check if the Projector is normal. (Note : Don’t connect Camera for testing.) Check if VGA Cable is OK. Judge Change Camera Module. Toshiba Series...
- Page 29 Put the projector on the stand which is horizontally and is not tipped (0 +/- 0.1 degree) Procedure: Choose KC0. Execute automatic calibration. If adjustment is successfully completed, values will change from default value “0”. If it failed, values don’t change. 3-10 Toshiba Series...
- Page 30 If adjustment is successfully completed, values will change from default value “0”. If it failed, values don’t change. e.) Save data to E2PROM Procedure: Push Up/Down/Left/Right at the same time. If these key inputs are accepted, all LEDs light orange. 3-11 Toshiba Series...
- Page 31 Range is from 0 to 1275 minutes (5 minutes step). 0 means no off-time in the burn in mode. d.) Burn in cycle setting Procedure : Choose the cycle. Adjust a value. Range is from 1 to 255 and INF which means infinity. 3-12 Toshiba Series...
- Page 32 The On LED blinks during the burn in mode. Pushing the return key will cancel execution of the burn in mode. When the burn in mode finishes, the projector becomes the standby mode automatically. 3-13 Toshiba Series...
- Page 33 Focus V-Ramp Key : Up / Down Choose an item with cursor Enter Display a test pattern Return Return to the test pattern menu Notes : This menu is for test use. No value will be saved. 3-14 Toshiba Series...
- Page 34 The altitude is a setting of the fan high mode (Range is from 0 to 6). The error count is the sum of all error counts. A number in the error log means an error ID. 3-15 Toshiba Series...
- Page 35 Range is from B to E. DMD Chip Default value is E. c.) Save data to EEPROM Procedure : Push Up / Down / Left / Right at the same time. If these key inputs are accepted, all LEDs light orange. 3-16 Toshiba Series...
- Page 36 3-17 Toshiba Series...
-
Page 38: Function Test And Alignment Procedure
Test Display Mode & Pattern (Refer to 4-4.1 & 4-4.2) Function test and alignment procedure Run-in Time : After changing all materials For LVPS and Lamp Driver, it will run-in 2 hours. For DMD BD, Main BD, Thermal BD and Engine, it will run-in 4 hours. Toshiba Series... -
Page 39: Test Display Modes & Pattern
1 0 2 4 * 7 6 8 i M A C D V 1 1 5 2 * 8 7 0 6 8 . 4 9 i M A C D V 1 2 8 0 * 9 6 0 Toshiba Series... - Page 40 1 0 2 4 * 7 6 8 i M A C D V 1 1 5 2 * 8 7 0 6 8 .49 i M A C D V 1 2 8 0 * 9 6 0 Toshiba Series...
- Page 41 1 0 2 4 x7 6 8 i M a c D V 1 1 5 2 x 8 7 0 6 8 .4 9 i M a c D V 1 2 8 0 x 9 6 0 Toshiba Series...
- Page 42 Blue 60 pattern. The text in the corner should be Figure Focus Text Pattern clear after adjusting the focus ring. Horizontal and Vertical position of Boundary Figure Boundary video should be adjustable to be Frame the screen frame. Toshiba Series...
- Page 43 Figure 1. Fine Line Moire Figure 2. 32 Gray Scale Figure 3. 64 RGBW Scale Figure 4. Red Pattern Figure 5. Green Pattern Figure 6. Blue Pattern Toshiba Series...
- Page 44 Figure 7. Full White Figure 8. Full Black Figure 9. Gary 30 Pattern Figure 10. Blue 60 Pattern Figure 11. Text Pattern Figure 12. Boundary Frame Toshiba Series...
-
Page 45: Inspection Procedure
R, G, B and white color contrast : Test Signal : 1280*1024 @ 75Hz Test Pattern : 64 RGBW scale pattern Please check and ensure if each color is normal and distinguishable. If not, please return the unit to repair area. Toshiba Series... - Page 46 Test Pattern : Boundary frame pattern Please check and ensure the unit is within the spec. (The horizontal and vertical position of image should be adjustable to be the screen frame.) If not, please return the unit to repair area. Toshiba Series...
- Page 47 Test Signal : HDTV signal Test Pattern : 480i, 480p, 720p, 1080i Please check and ensure the unit can display the HDTV signal without color abnormal or image abnormal issue. If not, please return the unit to repair area. Toshiba Series 4-10...
-
Page 48: Wireless Testing Procedure (For Tw90 And Sw80)
4-6 Wireless Testing Procedure (For TW90, TW90A and SW80) Software : Wireless Utility 4-6.1 Wireless Setup Procedure Press “Setup” icon to execute the program. Toshiba Series 4-11... - Page 49 Press “Next” icon. Press “Yes” icon. Toshiba Series 4-12...
- Page 50 Press “Next” icon. Toshiba Series 4-13...
- Page 51 Choose “Yes, I want to restart my computer now”, then press “Finish” icon. Toshiba Series 4-14...
- Page 52 4-6.2 Projector Setup Procedure Press “Menu” twice, then into “Wireless setting” mode. Choose “Ad hoc” function. Toshiba Series 4-15...
- Page 53 Choose “Projector name” function. 4. Key-in any English name when the “Projector name” appears on the screen. Note : “Ad hoc” function is P to P(Point to Point) transmission. The “Projector Name” can be keyed in by the Remote Control. Toshiba Series 4-16...
- Page 54 4-6.3 Network Setup Procedure Press “Wireless Network Connection”. Click “Properties”. Toshiba Series 4-17...
- Page 55 Select “Wireless Networks”. Click “DPJ” and then press “Ok”. Toshiba Series 4-18...
- Page 56 Click “Close”. Select “Show all connections”. Toshiba Series 4-19...
- Page 57 Right click “Wireless Network Connection” and select “View Available Wireless Networks”. Toshiba Series 4-20...
- Page 58 Choose “DPJ” and check the below box “Allow me to connect to..”, and then press “Connect”. If the wireless connection is well established, the below message will appear on the task bar. Toshiba Series 4-21...
- Page 59 11. Choose the Projector name, and then press “GO” button to link the Projector. Then you will find the projectors and your PC(or laptop) are wireless connected. The “Projection name” is the name you keyed in by the romote control previously Toshiba Series 4-22...
-
Page 60: Camera Setup Procedure (For T91 And S81)
VGA Cable * 1 (Special) 4-7.2 Setup Procedure Connect Camera to the 2nd VGA port of T91 by VGA Cable. Power on the Projector. Press “Input” button on the Keypad. Note : Projector will find Image function from Camera automatically. Toshiba Series 4-23... -
Page 61: Firmware Upgrade Procedure
Connect Firmware cable to Projector and COM1 or COM2 (Serial port) of PC. Note:If you use DLP Composer Lite V3.2, you have to connect the firmware cable to COM2 of PC. If you use DLP Composer Lite V3.6, you can connect the firmware cable toCOM1 or COM2. Toshiba Series... - Page 62 DLP composer Setup : Execute “DLP Composer Lite Setup.exe” to start the setup procedure. Press “Next” button. Toshiba Series...
- Page 63 Choose the “I accept and agree to be bound by all the terms and conditions of this License Agreement”. Then, press “Next” button. Press “Next” button. Toshiba Series...
- Page 64 Choose “All” icon and then press “Next” button. Press “Next” button. Toshiba Series...
- Page 65 Press “Next” button. Press “Yes” button to reboot. Toshiba Series...
-
Page 66: Firmware Upgrade Procedure
Press and hold “on/standby”, “Input” and “Setup” buttons simultaneously and then turn on power switch to enter the firmware upgrade mode. Note: If the firmware upgrade mode is activated, the LEDs of LAMP, TEMP and FAN will be blinking. Execute “DLP Composer” program. Choose “Edit-->Preferences” to setup Firmware upgrade status. Toshiba Series... - Page 67 Choose “Output”, setting Number of is “2000”. Choose “Communications”, setting Port is “COM2” and then press “Configure” button into the next setup procedure. Toshiba Series...
- Page 68 Setup the Baud Rate is “115200”, Data Bits is “8”, Stop Bits is “1”, Parity is “None”, RTS is “Disable” and CTS is “Disable”, then press “OK” button. Come back to this layer, and then press “OK” button to execute the program. Toshiba Series...
- Page 69 Click “Flash Loader.” Choose the Firmware upgrade program from Browser. Then press “Start Download” button to execute upgrade program. Press “Yes” button. Toshiba Series...
- Page 70 10. After the firmware upgrade is complete, power off projector, and then restart it again. Toshiba Series 5-10...
-
Page 71: Equipment Needed
Hardware : Power Cord DVI To DFP Cable RS-232 Cable MT200 Projector Fixture for MT200 RS-232 Cable 6-pin Power Adapter Fixture for MT200 DVI to DFP Cable Software : EDID.exe MT_200_EDID.ini Environment : Windows 98 / 2000 / XP Toshiba Series... -
Page 72: Setup Procedure
6-2 Setup Procedure Connect DVI-DFP Cable to MT200. Connect RS-232 of Fixture to COM1 of PC. (Can be connected to COM1 or COM2) Connect Power of Fixture. Power RS-232 DVI Port 6-3 EDID Upgrade Procedure Execute “EDID” icon. Toshiba Series... - Page 73 Press “Model” icon. Choose the “MT_200_EDID.ini” file then press “open” icon. Toshiba Series...
- Page 74 Press Port setting button. Setting the right COM Port. Select “Digital”. Press “Write” icon. Toshiba Series...
- Page 75 The message will shown on the screen. “OK” means the EDID upgrade is complete. Toshiba Series...
- Page 76 Check if EDID is ok, press “Read” botton and then the data will show up as step 2 shows. Note : The below information is for English version of Windows. Toshiba Series...
-
Page 77: Appendix
Appendix Series Appendix A I. Exploded Overview for T9X Series Packing (DP.80S01G00A) for T9X Series Note: Please refer to RSPL for updated Part Number. Toshiba Series... - Page 78 D.C. TDP-T90 "GREEN" (DC.80S01G001) for T9X series Note: Please refer to RSPL for updated Part Number. Toshiba Series...
- Page 79 Top Cover Module (70.80S01G001) for T9X series Note: Please refer to RSPL for updated Part Number. Toshiba Series...
- Page 80 Bottom Cover Module (70.80S02G001) for T9X series Note: Please refer to RSPL for updated Part Number. Toshiba Series...
- Page 81 Lamp Module (70.80S04G001) for T9X series Note: Please refer to RSPL for updated Part Number. Toshiba Series...
- Page 82 Adjust Foot Module (70.80S05G001) for T9X series Note: Please refer to RSPL for updated Part Number. Toshiba Series...
- Page 83 Engine Module (70.80S06G001) for T9X series Note: Please refer to RSPL for updated Part Number. Toshiba Series...
- Page 84 Bottom Cover (70.80S07G001) for T9X series Note: Please refer to RSPL for updated Part Number. Toshiba Series...
- Page 85 Key Pad Module (70.80S08G001) for T9X series Note: Please refer to RSPL for updated Part Number. Toshiba Series...
- Page 86 Blower Module (70.80S12G001) for T9X series Note: Please refer to RSPL for updated Part Number. Toshiba Series 7-10...
- Page 87 Fan Module (70.80S13G001) for T9X series Note: Please refer to RSPL for updated Part Number. Toshiba Series 7-11...
- Page 88 Cover Glass Holder (70.80S14G001) Note: Please refer to RSPL for updated Part Number. Toshiba Series 7-12...
- Page 89 II. Exploded Overview for S8X/T90A Series Note: Please refer to RSPL for updated Part Number. Toshiba Series 7-13...
- Page 90 Note: Please refer to RSPL for updated Part Number. Toshiba Series 7-14...
- Page 91 Toshiba Series 7-15...
- Page 92 Note: Please refer to RSPL for updated Part Number. Toshiba Series 7-16...
- Page 93 Note: Please refer to RSPL for updated Part Number. Toshiba Series 7-17...
- Page 94 Note: Please refer to RSPL for updated Part Number. Toshiba Series 7-18...
- Page 95 Note: Please refer to RSPL for updated Part Number. Toshiba Series 7-19...
- Page 96 Note: Please refer to RSPL for updated Part Number. Toshiba Series 7-20...
- Page 97 Note: Please refer to RSPL for updated Part Number. Toshiba Series 7-21...
- Page 98 Note: Please refer to RSPL for updated Part Number. Toshiba Series 7-22...
- Page 99 Note: Please refer to RSPL for updated Part Number. Toshiba Series 7-23...
- Page 100 III. Exploded Overview for MT Series Exploded Overview for MT200 Note: Please refer to RSPL for updated Part Number. Toshiba Series 7-24...
- Page 101 Note: Please refer to RSPL for updated Part Number. Toshiba Series 7-25...
- Page 102 Note: Please refer to RSPL for updated Part Number. Toshiba Series 7-26...
- Page 103 Note: Please refer to RSPL for updated Part Number. Toshiba Series 7-27...
- Page 104 Note: Please refer to RSPL for updated Part Number. Toshiba Series 7-28...
- Page 105 Exploded Overview for MT400 Toshiba Series 7-29...
- Page 106 Note: Please refer to RSPL for updated Part Number. Toshiba Series 7-30...
- Page 107 Bottom Cover Module (70.83G03G001) for MT series Toshiba Series 7-31...
- Page 108 Note: Please refer to RSPL for updated Part Number. Toshiba Series 7-32...
- Page 109 Bottom Cover Module (70.83G02G001) for MT series Toshiba Series 7-33...
- Page 110 Note: Please refer to RSPL for updated Part Number. Toshiba Series 7-34...
- Page 111 Top Cover Module (70.83G02G001) for MT series Toshiba Series 7-35...
- Page 112 Note: Please refer to RSPL for updated Part Number. Toshiba Series 7-36...
- Page 113 ASSY BOTTOM COVER 70.83G06GR01 ASSY BOTTOM COVER MODULE TDP-M TDP-MT400(RMA) 51.81H04G001 ZOOM RING PC+ABS-CA02A 51.83G01G001 ZOOM RING PC+ABS- TDP-MT200 CA02A TDP-MT400 70.81H13G001 ASSY ENGINE MODULE TDP- 70.83G07GR01 ASSY ENGINE MODULE MT200 TDP-MT400(RMA) 51.80S06G001 FOCUS RING PC+ABS-CA02A 51.83G02G001 FOCUS RING PC+ABS-...
- Page 114 A20 FW FLASH ROM T90A AM29LV160DB TDP-S 23.82G15G001 PHILIPS 200/150W 1.0 E19V 23.80S10G011 LAMP COVER GLESS INDE OF DP739 SER 23.80S10G021 LAMP COVER GLASS OF DP739 SERIES WITH MAR 52.82G21G001 LAMP INSULATOR SILICONE 52.80W12G001 LAMP INSULATOR RUBBER SILICONE RUBBER Toshiba Series 7-38...
- Page 115 ASSY PHILIPS LAMPDRIVER 2200MP 75.82G09G001 ASSY PHILIPS LAMPDRIVER 200W(T 80.80S01G006 PCBA MAIN BOARD S80 80.83L01G004 PCBA MAIN BOARD FOR TDP-TW90A 80.83L01G003 PCBA MAIN BOARD TDP-T91A WITH 80.80S02G002 PCBA DMD BOARD 80.80S02G001 PCBA DMD BOARD TDP-T90 FOR WIT Toshiba Series 7-39...
- Page 116 Serial Number Format for Projector CCCC A = Year/Month (The numeral is fixed by Toshiba) Y ear / M onth 2004 / 6 2004 / 7 2004 / 8 2004 / 9 2004 / 10 2004 / 11 2004 / 12...
- Page 117 II. PCBA Code Definition PCBA Code for Projector A B XXXXXXXXXX C XXX EEEE C: M/B B: DMD/ B Vendor Code Revision Date Code Toshiba Series 7-41...
- Page 118 TOSHIBA Information Systems (UK) Ltd Consumer Products Division, European Service Centre, Admiralty Way, Camberley, Surrey. GU15 3DT...
Need help?
Do you have a question about the TDP-MT400 and is the answer not in the manual?
Questions and answers