Table of Contents
Advertisement
Quick Links
Advertisement
Table of Contents

Subscribe to Our Youtube Channel
Related Manuals for TRENDnet WLAN ADSL2 plus Router


Summary of Contents for TRENDnet WLAN ADSL2 plus Router
-
Page 1: User Manual
User Manual WLAN ADSL2+ Router... -
Page 2: Table Of Contents
INDEX 1.0 About This Manual ....................... 1 1.1 Document Objectives ......................1 1.2 Product Overview ........................ 1 1.3 Product Description ......................1 2.0 Specification......................... 2 2.1 LED Meaning ........................3 2.2 Back Panel Connectors ....................... 4 2.3 Factory Default Settings ...................... 5 3.0 Hardware Requirements...................... -
Page 3: About This Manual
WLAN ADSL2+ Router 1.0 About This Manual This manual is developed for users, system managers, network managers, and contains installation, configuration, and operation of the WLAN ADSL2+ Router. 1.1 Document Objectives The objectives of this manual are to describe all the initial hardware installation and basic configuration procedure for the WLAN ADSL2+ Router. -
Page 4: Specification
WLAN ADSL2+ Router 2.0 Specification ADSL Standards supported ● Compliant to ITU-T G.992.1 (G.dmt), G.992.2 (G.lite), G.992.3 (ADSL2), G.992.4 (splitterless ADSL2), G.992.5 (ADSL2+) for Annex A, B ● G.lite (G.992.2) with line rate support of up to 1.5Mbps downstream and 512Kbps upstream. ●... -
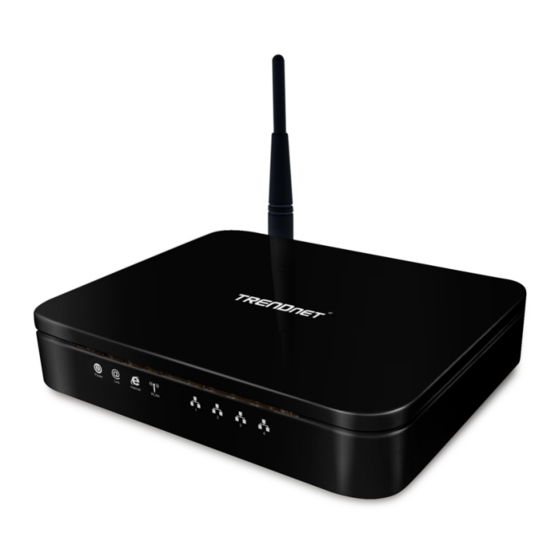
Page 5: Led Meaning
WLAN ADSL2+ Router 2.1 LED Meaning Your WLAN ADSL2+ Router has indicator lights on the front side. Please see below for an explanation of the function of each indicator light. Power indicator ADSL Link indicator ADSL Active indicator Wireless Active indicator Ethernet Active indicator Table 1. -
Page 6: Back Panel Connectors
WLAN ADSL2+ Router 2.2 Back Panel Connectors Table 2 shows the function of each connector and switch of the WLAN ADSL2+ Router’s back panel. Figure 1 illustrated the connectors Table 2. Function / Description of Connectors Connector Description RESET Reset bottom, RESET the WLAN ADSL2+ router to its default settings SWITCH Power Switch POWER... -
Page 7: Factory Default Settings
WLAN ADSL2+ Router 2.3 Factory Default Settings Before configuration, please refer to following default settings, Web interface: Username: admin Password: 1234 LAN IP Settings: IP Address: 192.168.1.1 Subnet Mask: 255.255.255.0 DHCP: DHCP Server: Enable 3.0 Hardware Requirements To use WLAN ADSL2+ Router, please have following hardware / accessories ready. A PC with Pre-installed Ethernet Adapter (Required) 12Vac power adaptor (Included in the package) RJ-45 Ethernet cable (Included in the package) -
Page 8: Installation & Setup
WLAN ADSL2+ Router 4.0 Installation & Setup Follow each STEP carefully and only go to the next step once you have complete the previous STEP. Connection of WLAN ADSL2+ Router If you have an ISDN telephone line connect the modem router as shown below: 1. - Page 9 WLAN ADSL2+ Router If you have a PSTN telephone line (normal analog line) connect the router as shown below: 1. Connect the supplied RJ45 Ethernet cable from your PC's Ethernet port to any of the 4 WLAN ADSL2+ Router's LAN Ports. 2.
-
Page 10: Configuration Procedures
WLAN ADSL2+ Router 5.0 Configuration Procedures Before starting the WLAN ADSL2+ Router configuration, please kindly configure the PC computer as below, to have automatic IP address / DNS Server. For Windows 98SE/ME/2000/XP 1. Click on “Start” -> “Control Panel” (in Classic View). In the Control Panel;... - Page 11 WLAN ADSL2+ Router Double click on “Internet Protocol (TCP/IP)”. Check “Obtain an IP address automatically” and “Obtain DNS server address automatically” then click on “OK” to continue. Click “Show icon in notification area when connected” (see screen image in 3. above) then Click on “OK” to complete the setup procedures.
- Page 12 WLAN ADSL2+ Router For Windows Vista-32/64 1. Click on "Start” -> “Control Panel” (in Classic View) -> “Network and Sharing Center”. In the Manage network connections, double click on "Manage network connections" to continue. 2. Single RIGHT click on “Local Area connection", then click "Properties". 3.
- Page 13 WLAN ADSL2+ Router Double click on "Internet Protocol Version 4 (TCP/IPv4)" Check "Obtain an IP address automatically" and “Obtain DNS server address automatically” then click on "OK" to continue. You can see the screen will appear as shown in Step 4. above, then click “OK” to complete the setup procedures.
-
Page 14: Wlan Adsl2+ Router Configuration
WLAN ADSL2+ Router 6.0 WLAN ADSL2+ Router Configuration Please insert the supplied CD into your CD-ROM drive. The CD should auto-start, displaying the window shown in 3. below. If your CD does not start automatically, go to Windows Explorer, Select your CD drive and double click “setup.exe”. - Page 15 WLAN ADSL2+ Router To configure the device, please click the “Configuration” There are two ways to configure your WLAN ADSL Router, depend on your connection type. One is normal connection, please click “Internet Configuration” button to continue (see 6 ~ 10 below). The another one is for IPTV connection, please click “IPTV Connection”...
- Page 16 WLAN ADSL2+ Router If you click “Internet Configuration“ button, displaying the window shown in 6 below. Please click the “Next” to continue. Select your country, town, ISP and settings your ISP (Internet Services Provider) provided, and enter your required settings. Then press “Save Configuration”.
- Page 17 WLAN ADSL2+ Router When the “Information” screen pop-up, please click “OK” button to configure the WLAN setting, or click “Cancel” button to quit. Please enter the SSID and wireless channel if you want to change (the default setting SSID=TRENDnet_ADSL, Channel=9). Choose the Authentication type if necessary, as Disable / WEP-64bits / WEP-128bits / WPA-PSK and WPA2-PSK.
- Page 18 WLAN ADSL2+ Router 10. Please click on “Save configuration” button. When the “Information” screen pop-up, please click “OK” button to exit the program. If you click “ IPTV Connection “ button, displaying the window shown in 11 below. 11. Please click the “Next” to continue.
- Page 19 WLAN ADSL2+ Router 12. Follow the diagram to connect your device, please click the “Next” to continue. 13. Select your town, ISP and settings your ISP (Internet Services Provider) provided, and enter your required settings. Then press “Save Configuration”. Please wait for about 60 seconds.
- Page 20 WLAN ADSL2+ Router 14. When the “Information” screen pop-up, please click “OK” button to configure the Internet setting, or click “Cancel” button to quit. 15. Select your country, town, ISP and settings your ISP (Internet Services Provider) provided, and enter your required settings. Then press “Save Configuration”.
- Page 21 WLAN ADSL2+ Router 16. When the “Information” screen pop-up, please click “OK” button to configure the WLAN setting, or click “Cancel” button to quit. 17. Please enter the SSID and wireless channel if you want to change (the default setting SSID=TRENDnet_ADSL, Channel=9). Choose the Authentication type if necessary, as Disable / WEP-64bits / WEP-128bits / WPA-PSK and WPA2-PSK.
- Page 22 WLAN ADSL2+ Router 18. Please click on “Save configuration” button. When the “Information” screen pop-up, please click “OK” button to exit the program.
- Page 23 WLAN ADSL2+ Router 6.1 Connect Wirelessly For easy installation it is saved to keep the settings. You can later change the wireless settings via the wireless configuration menu. (see user manual on the CD – Chapter 8 and other) 1. Double click on the wireless icon on your computer and search for the wireless network that you enter SSID name 2.
- Page 24 WLAN ADSL2+ Router 2. Enter the network key that belongs to your authentication type and key. You can later change this network key via the wireless configuration menu. (see user manual on the CD – Chapter 8 and other) 4. Click on “Connect” or Apply Now, the WLAN ADSL2+ Router has been configured, and able to connect to ISP/ Website.
-
Page 25: Technology Glossary
WLAN ADSL2+ Router 7.0 Technology Glossary 10Base-T An adaptation of the Ethernet standard for Local Area Network (LAN). 10Base-T uses a twisted pair cable with maximum length of 100 meters. ATM Adaptation Layer that defines the rules governing segmentation and reassembly of data into cells. - Page 26 WLAN ADSL2+ Router Digital Line Subscriber (DSL) technology provides high-speed access over twisted copper pair for connection to the Internet, LAN interfaces, and to broadband services such as video-on-demand, distance learning, and video conferencing. File Transfer Protocol. The Internet protocol (and program) used to transfer files between hosts.
- Page 27 WLAN ADSL2+ Router PPPoE (RFC 2516) This document describes how to build PPP sessions and encapsulate PPP packets over Ethernet. PPP over Ethernet (PPPoE) provides the ability to connect a network of hosts over a simple bridging access device to a remote Access Concentrator.
- Page 28 WLAN ADSL2+ Router Virtual Path Identifier. Part of the ATM cell header, a VPI is a pipe for a number of Virtual Circuits. Wide area network. A data communications network that spans any distance and is usually provided by a public carrier (such as a telephone company or service provider)
-
Page 29: Introduction Of The Web Configuration
WLAN ADSL2+ Router 8.0 Introduction of the Web Configuration 8.1 Web Configuration Overview The embedded web configuration allows you to manage WLAN ADSL2+ Router from anywhere through a browser such as Microsoft Internet Explorer or Netscape Navigator. Use Internet Explorer 6.0 and later or Netscape Navigator 7.0 and later versions with JavaScript enabled. - Page 30 WLAN ADSL2+ Router Step 6. You should now see the Site Map screen.
- Page 31 WLAN ADSL2+ Router Quick Start Guide You can use "Quick Start" to setup the router as follows, and the router will connect to the Internet via ADSL line. Click "Quick Start" to get into the quick setup procedures. Click "RUN WIZARD" to start up this procedure.
- Page 32 WLAN ADSL2+ Router Step 1 – Please click "Next" to setup your new administrator's password. Step 2 – Please click "Next" to setup your time zone.
- Page 33 WLAN ADSL2+ Router Step 3 – Please click "Next" to setup your Internet connection type. You can have this information from your Internet Service Provider. Step 4 - Enter the connection information provided by your ISP and click “Next “.
- Page 34 WLAN ADSL2+ Router Step 5 - Enter the connection information provided by your ISP and click “Next “. Step 6 – Please click “CLOSE “ to finish Quick Start.
- Page 35 WLAN ADSL2+ Router System Time Go to Maintenance->Time Zone and select system time as you wish. Connecting to a Simple Network Time Protocol (SNTP) server allows the router to synchronize the system clock to the global Internet. The synchronized clock in the router is used to recorded the security log and control client filtering.
- Page 36 WLAN ADSL2+ Router Firmware Update Go to Maintenance -> Firmware to upgrade the firmware. The new firmware for your router can improve functionality and performance. Enter the path and name of the upgrade file then click the UPGRADE button below. You will be prompted to confirm the upgrade. System Log Go to Status ->...
- Page 37 WLAN ADSL2+ Router System Reset Go to Maintenance -> SysRestart to restart your system.In the event that the router stops responding correctly or in some way stops functioning, you can perform a reset. Your settings will not be changed. To perform the reset, select "Current Setting" and click on the "RESTART"...
- Page 38 WLAN ADSL2+ Router ADSL Statistics Go to Status-> Statistics and select ADSL interface. You can see the traffic Statistics of ADSL interface. VC Configuration Go to Interface Setup -> Internet. To add or delete ADSL VC configuration, these information provide by ISP.
- Page 39 WLAN ADSL2+ Router WAN Configuration Go to Interface Setup -> Internet. The router can be connected to your service provider in any of the following ways. Dynamic IP Address: Obtain an IP address automatically from your service provider. Static IP Address: Uses a static IP address. Your service provider gives a static IP address to access Internet services.
- Page 40 WLAN ADSL2+ Router WAN Status Go to Status -> Device Info and select the Virtual Circuit to see the connection status.
- Page 41 WLAN ADSL2+ Router Go to Interface -> LAN to enable DHCP server. Then you can set DNS server for the router. A Domain Name system (DNS) server is like an index of IP addresses and Web addresses. If you type a Web address into you browser, a DNS server will find that name in its index and find the matching IP address.
- Page 42 WLAN ADSL2+ Router DDNS Go to Access Management -> DDNS to setup your DDNS parameters. Dynamic DNS allows you to update your dynamic IP address with one or many dynamic DNS services. So anyone can access your FTP or Web service on your computer using DNS-like address.
- Page 43 WLAN ADSL2+ Router LAN Configuration Go to Interface Setup -> LAN. The 'LAN Settings' option enables you to configure the LAN port. If the DHCP Relay is selected, the DHCP requests from local PCs are forward to the DHCP server runs on WAN side. To have this function working properly, disable the NAT to run on router mode only, disable the DHCP server on the LAN port, and make sure the routing table has the correct routing entry.
- Page 44 WLAN ADSL2+ Router Wireless Settings Go to Interface -> Wireless to setup the wireless parameters. SSID The identifier for the network. You can change the SSID. Only devices with the same SSID can interconnect. Channel ID The channel number is used for wireless networking. The channel setting of the wireless devices within a network should be the same.
- Page 45 WLAN ADSL2+ Router Wireless Security Go to Interface -> Wireless to setup the wireless security. The Authentication type supports “shared key WEP 64bits", "shared key WEP 128bits”, “WPA-PSK”.
- Page 46 WLAN ADSL2+ Router IP Filtering Go to Access Management -> IP Filtering to block some packets form WAN.The router provides extensive firewall protection by restricting connection parameters to limit the risk of intrusion and defending against a wide array of common hacker attacks. The user can set different IP filter rules of a given protocol (TCP, UDP or ICMP) and a specific direction (incoming, outgoing, or both) to filter the packets.
- Page 47 WLAN ADSL2+ Router ACL Setting Go to Access Management -> ACL to enable remote management. The user may remotely access the WLAN ADSL2+ Router once setting his IP as a Secure IP Address through selected applications. With the default IP 0.0.0.0, any client would be allowed to remotely access the WLAN ADSL2+ Router.
- Page 48 WLAN ADSL2+ Router Virtual Server Go to Advanced Setup ->NAT -> Virtual Server to set virtual server as you need.(known as Port Mapping).You can configure the router as a virtual server so that remote users accessing services such as the Web or FTP at your local site via public IP addresses can be automatically redirected to local servers configured with private IP addresses.
- Page 49 WLAN ADSL2+ Router DMZ Setting Go to Advanced Setup ->NAT -> DMZ to set DMZ parameters. If you have a local client PC that cannot run an Internet application properly from behind the NAT firewall, you can open the client up to unrestricted two-way Internet access by defining a virtual DMZ Host. Static Routing Go to Advance Setup ->...
- Page 50 WLAN ADSL2+ Router Dynamic Routing Go to Interface Setup -> Internet to select Dynamic Route as you need. The dynamic routing feature of the router can be used to allow the router to automatically adjust to physical changes in the network's layout. The router uses the dynamic RIP protocol. It determines the route that the network packets take based on the fewest number of hops between the source and the destination.
- Page 51 WLAN ADSL2+ Router Routing Table Go to Advanced Setup -> Routing to see the Routing Table.The Routing table allows you to see how many routings on your routing table and interface information System Status Go to Status -> Device Info to see the router's information. The System Status page shows the WAN, LAN and the router's firmware version.
- Page 52 WLAN ADSL2+ Router SNMP Go to Access Management -> SNMP to setup SNMP feature.Simple Network Management Protocol is used for exchanging information between network device. Get Community : Select to set the password for the incoming Get- and GetNext requests from the management station.
- Page 53 WLAN ADSL2+ Router QoS Setting Go to Advanced Setup -> QoS to setup QoS features. This option will provide better service of selected network traffic over various technologies.
- Page 54 WLAN ADSL2+ Router VLAN Go to Advanced Setup -> VLAN to enable VLAN features. Virtual LAN (VLAN) is a group of devices on one or more LANs that are configured so that they can communicate as if they were attached to the same wire, when in fact they are located on a number of different LAN segments.
- Page 55 WLAN ADSL2+ Router VLAN Group Go to Advanced Setup -> VLAN-> Define VLAN Group to setup VLAN group features. Firewall Go to Advanced Setup ->Firewall to setup Firewall features. Select this option can automatically detect and block Denial of Service (DoS) attacks, such as Ping of Death, SYN Flood, Port Scan and Land Attack.
-
Page 56: Universal Plug-And-Play (Upnp)
WLAN ADSL2+ Router 9.0 Universal Plug-and-Play (UPnP) 9.1 Universal Plug and Play Overview Universal Plug and Play (UPnP) is a distributed, open networking standard that uses TCP/IP for simple peer-to-peer network connectivity between devices. An UPnP device can dynamically join a network, obtain an IP address, convey its capabilities and learn about other devices on the network. -
Page 57: Configuring Upnp
WLAN ADSL2+ Router 9.5 Configuring UPnP From the Site Map in the main menu, click UPnP under Access Managemen to display the screen shown next. The following table describes the labels in this screen. LABEL DESCRIPTION Select this checkbox to activate UPnP. Be aware that anyone could use a UPnP UPnP application to open the web configuration's login screen without entering WLAN ADSL2+ Router's IP address (although you must still enter the password to... -
Page 58: Installing Upnp In Windows Example
WLAN ADSL2+ Router 9.6 Installing UPnP in Windows Example This section shows how to install UPnP in Windows Me and Windows XP. 9.7 Installing UPnP in Windows Me Follow the steps below to install the UPnP in Windows Me. Step 1. Click Start and Control Panel. Double-click Add/Remove Programs. Step 2. -
Page 59: Installing Upnp In Windows Xp
WLAN ADSL2+ Router 9.8 Installing UPnP in Windows XP Follow the steps below to install the UPnP in Windows XP. Step 1. Click Start and Control Panel. Step 2. Double-click Network Connections. Step 3. In the Network Connections window, click Advanced in the main menu and select Optional Networking Components …. -
Page 60: Using Upnp In Windows Xp Example
WLAN ADSL2+ Router 9.9 Using UPnP in Windows XP Example This section shows you how to use the UPnP feature in Windows XP. You must already have UPnP installed in Windows XP and UPnP activated on WLAN ADSL2+ Router. Make sure the computer is connected to a LAN port of WLAN ADSL2+ Router. Turn on your computer and WLAN ADSL2+ Router. - Page 61 WLAN ADSL2+ Router Step 4. You may edit or delete the port mappings or click Add to manually add port mappings. Step 5. Select Show icon in notification area when connected option and click OK. An icon displays in the system tray Step 6.
-
Page 62: Web Configuration Easy Access
WLAN ADSL2+ Router 10.0 Web Configuration Easy Access With UPnP, you can access the web-based configuration on WLAN ADSL2+ Router without finding out the IP address of WLAN ADSL2+ Router first. This comes helpful if you do not know the IP address of WLAN ADSL2+ Router. Follow the steps below to access the web configuration. - Page 63 WLAN ADSL2+ Router Step 6. Right-click on the icon for your WLAN ADSL2+ Router and select Properties. A properties window displays with basic information about WLAN ADSL2+ Router.
-
Page 64: Troubleshooting
WLAN ADSL2+ Router 11.0 Troubleshooting A.1 Using LEDs to Diagnose Problems The LEDs are useful aides for finding possible problem causes. A.1.1 Power LED The PWR LED on the front panel does not light up. STEPS CORRECTIVE ACTION Make sure that WLAN ADSL2+ Router’s power adaptor is connected to WLAN ADSL2+ Router and plugged in to an appropriate power source. -
Page 65: Web Configuration
WLAN ADSL2+ Router A.3 Web Configuration I cannot access the web configuration. STEPS CORRECTIVE ACTION Make sure you are using the correct IP address of WLAN ADSL2+ Router. Check the IP address of WLAN ADSL2+ Router. Make sure that there is not a console session running. Check that you have enabled web service access. -
Page 66: Wan Interface
WLAN ADSL2+ Router A.6 WAN Interface Initialization of the ADSL connection failed. STEPS CORRECTIVE ACTION Check the cable connections between the ADSL port and the wall jack. The DSL LEDs on the front panel of WLAN ADSL2+ Router should be on. Check that your VPI, VCI, type of encapsulation and type of multiplexing settings are the same as what you collected from your telephone company and ISP.
Need help?
Do you have a question about the WLAN ADSL2 plus Router and is the answer not in the manual?
Questions and answers