TRENDnet TW100-BRV204 User Manual
Trendnet tw100-brv204: user guide
Hide thumbs
Also See for TW100-BRV204:
- Quick installation manual (62 pages) ,
- Specifications (2 pages) ,
- Datasheet (2 pages)
Table of Contents
Advertisement
Quick Links
Advertisement
Table of Contents

Related Manuals for TRENDnet TW100-BRV204


Summary of Contents for TRENDnet TW100-BRV204
-
Page 3: Table Of Contents
CHAPTER 1 INTRODUCTION ... 1 TW100-BRV204 Features ... 1 Package Contents ... 3 Physical Details ... 4 CHAPTER 2 INSTALLATION ... 7 Requirements ... 7 Procedure ... 7 CHAPTER 3 SETUP ... 9 Overview ... 9 Configuration Program ... 10 Setup Wizard ... - Page 4 APPENDIX A TROUBLESHOOTING ... 139 Overview ... 139 General Problems ... 139 Internet Access ... 139 APPENDIX B SPECIFICATIONS ... 141 TW100-BRV204 ... 141 FCC Statement ... 141 CE Marking Warning ... 142 P/N: 9560KZ0101 Copyright © 2004. All Rights Reserved.
-
Page 5: Chapter 1 Introduction
Internet Access Features • Shared Internet Access. through the TW100-BRV204 , using only a single external IP Address. The local (invalid) IP Addresses are hidden from external sources. This process is called NAT (Network Ad- dress Translation). •... -
Page 6: Advanced Internet Functions
LAN. • DHCP Server Support. address to PCs and other devices upon request. The TW100-BRV204 can act as a DHCP Server for devices on your local LAN and WLAN. •... -
Page 7: Package Contents
3DES. Microsoft VPN Gateway Support • PPTP Server. The TW100-BRV204 emulates a Microsoft PPTP VPN Server, allowing clients to use the Microsoft VPN client provided in Windows. • Windows Client Support. Adapter) provided in recent versions of Windows. -
Page 8: Physical Details
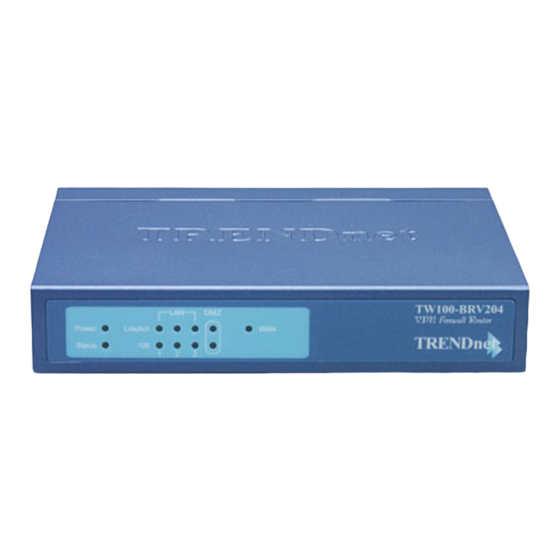
TW100-BRV204 User’s Guide Physical Details Front-mounted LEDs Power On - Power on. Off - No power. Status (Red) On - Error condition. Off - Normal operation. Blinking - This LED blinks during start up. Each port has 2 LEDs •... -
Page 9: Rear Panel
2. Hold the Reset Button down while you Power On. 3. Keep holding the Reset Button for a few seconds, until the RED 4. Release the Reset Button. The TW100-BRV204 is now using Connect the DSL or Cable Modem here. If your modem came with a WAN port cable, use the supplied cable. - Page 10 TW100-BRV204 User’s Guide • PCs connected to the DMZ port are on the same LAN segment as PCs connected to the Hub ports. They must use the same IP address range. • PCs connected to the DMZ port are NOT visible to PCs on the hub (LAN) ports. So you cannot use Microsoft networking or other networking protocols to connect to PCs on the DMZ.
-
Page 11: Chapter 2 Installation
For Internet Access, an Internet Access account with an ISP, and a Broadband modem (usually, DSL or Cable modem). Procedure 1. Choose an Installation Site Select a suitable place on the network to install the TW100-BRV204 . Ensure the TW100-BRV204 and the DSL/Cable modem are powered OFF. 2. Connect LAN Cables •... -
Page 12: Check The Leds
PCs connected to the DMZ port are isolated from your LAN. 3. Connect WAN Cable Connect the Broadband modem to the WAN port on the TW100-BRV204 . Use the cable supplied with your Broadband modem. If no cable was supplied, use a standard LAN ca- ble. -
Page 13: Chapter 3 Setup
PCs on your local LAN may also require configuration. For details, see Chapter 4 - PC Confi- guration. Other configuration may also be required, depending on which features and functions of the TW100-BRV204 you wish to use. Use the table below to locate detailed instructions for the required functions. To Do this: Configure PCs on your LAN. -
Page 14: Configuration Program
Configuration Program The TW100-BRV204 contains an HTTP server. This enables you to connect to it, and confi- gure it, using your Web Browser. Your Browser must support JavaScript. The configuration program has been tested on the following browsers: •... -
Page 15: Using Your Web Browser
1. After installing the TW100-BRV204 in your LAN, start your PC. If your PC is already running, restart it. 2. Start your WEB browser. 3. In the Address box, enter "HTTP://" and the IP Address of the TW100-BRV204 , as in this example, which uses the TW100-BRV204 's default IP Address: HTTP://192.168.0.1... - Page 16 TW100-BRV204 User’s Guide • Enter admin for the User Name, and leave the Password blank. • These are the default values. Both the name and password can (and should) be changed, using the Admin Login screen. Once you have changed either the name or the password, you must use the current values.
-
Page 17: Setup Wizard
Setup Wizard The first time you connect to the TW100-BRV204 , the Setup Wizard will run automatically. (The Setup Wizard will also run if the TW100-BRV204 's default setting are restored.) 1. Step through the Wizard until finished. • You need to know the type of Internet connection service used by your ISP. Check the data supplied by your ISP. -
Page 18: Singtel Ras
TW100-BRV204 User’s Guide PPTP Other Modems (e.g. Broadband Wireless) Type Dynamic IP Address Static (Fixed) IP Address Big Pond Cable (Australia) For this connection method, the following data is required: • User Name • Password • Big Pond Server IP address... -
Page 19: Home Screen
Home Screen After finishing or exiting the Setup Wizard, you will see the Home screen. When you connect in future, you will see this screen when you connect. An example screen is shown below. Navigation & Data Input • Use the menu bar on the top of the screen, and the "Back" button on your Browser, for navigation. -
Page 20: Lan Screen
Data - LAN Screen TCP/IP IP address for the TW100-BRV204 , as seen from the local LAN. Use IP Address the default value unless the address is already in use or your LAN is using a different IP address range. In the latter case, enter an unused IP Address from within the range used by your LAN. -
Page 21: What Dhcp Does
You can only use one (1) DHCP Server per LAN segment. If you wish to use another DHCP Server, rather than the TW100-BRV204 's, the following procedure is required. 1. Disable the DHCP Server feature in the TW100-BRV204 . This setting is on the LAN screen. -
Page 22: Chapter 4 Pc Configuration
BRV204 . The first step is to check the PC's TCP/IP settings. The TW100-BRV204 uses the TCP/IP network protocol for all functions, so it is essential that the TCP/IP protocol be installed and configured on each PC. TCP/IP Settings - Overview If using the default TW100-BRV204 settings, and the default Windows TCP/IP settings, no changes need to be made. -
Page 23: Checking Tcp/Ip Settings - Windows 9X/Me
Using DHCP To use DHCP, select the radio button Obtain an IP Address automatically. This is the default Windows setting. Using this is recommended. By default, the TW100-BRV204 will act as a DHCP Server. Restart your PC to ensure it obtains an IP Address from the TW100-BRV204 . - Page 24 TW100-BRV204 User Guide • On the Gateway tab, enter the TW100-BRV204 's IP address in the New Gateway field and click Add, as shown below. Your LAN administrator can advise you of the IP Address they assigned to the TW100-BRV204 .
-
Page 25: Checking Tcp/Ip Settings - Windows Nt
PC Configuration Checking TCP/IP Settings - Windows NT4.0 1. Select Control Panel - Network, and, on the Protocols tab, select the TCP/IP protocol, as shown below. Figure 12: Windows NT4.0 - TCP/IP 2. Click the Properties button to see a screen like the one below. Figure 13: Windows NT4.0 - IP Address 3. - Page 26 If your PC is already configured, check with your network administrator before making the following changes. 1. The Default Gateway must be set to the IP address of the TW100-BRV204 . To set this: • Click the Advanced button on the screen above.
- Page 27 PC Configuration Figure 15: Windows NT4.0 - DNS...
-
Page 28: Checking Tcp/Ip Settings - Windows
TW100-BRV204 User Guide Checking TCP/IP Settings - Windows 2000: 1. Select Control Panel - Network and Dial-up Connection. 2. Right - click the Local Area Connection icon and select Properties. You should see a screen like the following: Figure 16: Network Configuration (Win 2000) 3. -
Page 29: Using Dhcp
If your PC is already configured, check with your network administrator before making the following changes. • Enter the TW100-BRV204 's IP address in the Default gateway field and click OK. (Your LAN administrator can advise you of the IP Address they assigned to the TW100- BRV204 .) •... -
Page 30: Checking Tcp/Ip Settings - Windows Xp
TW100-BRV204 User Guide Checking TCP/IP Settings - Windows XP 1. Select Control Panel - Network Connection. 2. Right click the Local Area Connection and choose Properties. You should see a screen like the following: Figure 18: Network Configuration (Windows XP) 3. - Page 31 If your PC is already configured, check with your network administrator before making the following changes. • In the Default gateway field, enter the TW100-BRV204 's IP address and click OK. Your LAN administrator can advise you of the IP Address they assigned to the TW100- BRV204 .
- Page 32 TW100-BRV204 User Guide Checking TCP/IP Settings – Windows Vista From the Start menu, right-click Network, then click Properties. Now, the Network and Sharing Center displays. Under Tasks located on the left-hand side of the window, click Manage network connec- tions.
- Page 33 PC Configuration 5. Select Internet Protocol Version 4 (TCP/IPv4), then click Properties. From the General tab, verify that Obtain an IP address automatically and Obtain DNS server address auto- matically are selected. Click the OK button.
-
Page 34: For Windows Xp
6. Select the Connection from the list and click on next. Accessing AOL To access AOL (America On Line) through the TW100-BRV204 , the AOL for Windows software must be configured to use TCP/IP network access, rather than a dial-up connection. - Page 35 Click Edit Location. Select TCP/IP for the Network field. (Leave the Phone Number blank.) • Click Save, then OK. Configuration is now complete. • Before clicking "Sign On", always ensure that you are using the "TW100-BRV204 " location. PC Configuration...
-
Page 36: Macintosh Clients
• Ensure your DNS settings are correct. Linux Clients To access the Internet via the TW100-BRV204 , it is only necessary to set the TW100- BRV204 as the "Gateway". Ensure you are logged in as "root" before attempting any changes. -
Page 37: Chapter 5 Operation And Status
This Chapter details the operation of the TW100-BRV204 and the status screens. Operation Once both the TW100-BRV204 and the PCs are configured, operation is automatic. However, there are some situations where additional Internet configuration may be required: • If using Internet-based Communication Applications, it may be necessary to specify which PC receives an incoming connection. - Page 38 For additional information about the PCs on your LAN, and the IP addresses allocated to them, use the PC Database option on the Other menu. This displays the current name of the TW100-BRV204 . The current version of the firmware installed in the TW100- BRV204 .
-
Page 39: Connection Status - Pppoe
Connection Status - PPPoE If using PPPoE (PPP over Ethernet), a screen like the following example will be displayed when the "Connection Details" button is clicked. Data - PPPoE Screen Connection Physical Address IP Address Network Mask PPPoE Link Status Connection Log Connection Log Figure 21: PPPoE Status Screen... -
Page 40: Connection Log Messages
TW100-BRV204 User Guide Buttons Connect Disconnect Clear Log Refresh Connection Log Messages Message Connect on Demand Manual connection Reset physical connection Connecting to remote server Remote Server located Start PPP PPP up successfully Idle time-out reached Disconnecting Error: Remote Server not... -
Page 41: Connection Status - Pptp
Connection Status - PPTP If using PPTP (Peer-to-Peer Tunneling Protocol), a screen like the following example will be displayed when the "Connection Details" button is clicked. Data - PPTP Screen Connection Physical Address The hardware address of this device, as seen by remote devices on the Internet. -
Page 42: Connection Status - Telstra Big Pond
TW100-BRV204 User Guide Update the data on screen. Refresh Connection Status - Telstra Big Pond An example screen is shown below. Figure 23: Telstra Big Pond Status Screen Data - Telstra Big Pond Screen Connection Physical Address The hardware address of this device, as seen by remote devices. -
Page 43: Connection Details - Singtel Ras
The Network Mask associated with the IP Address above. Network Mask Default Gateway The IP Address of the remote Gateway or Router associated with the IP Address above. The IP Address of the Domain Name Server which is currently used. - Page 44 "Renew" button will attempt to re-establish the connection and obtain an IP Address from the ISP's DHCP Server. If an IP Address has been allocated to the TW100-BRV204 (by the ISP's DHCP Server), this button will say "Release". Clicking the "Release" button will break the connection and release the IP...
-
Page 45: Connection Details - Fixed/Dynamic Ip Address
"Renew" button will attempt to re-establish the connection and obtain an IP Address from the ISP's DHCP Server. If an IP Address has been allocated to the TW100-BRV204 (by the ISP's DHCP Server), this button will say "Release". Clicking the "Release" button will break the connection and release the IP... - Page 46 TW100-BRV204 User Guide Address. Refresh Update the data shown on screen.
-
Page 47: Chapter 6 Internet Features
Chapter 6 Internet Features This Chapter explains when and how to use the TW100-BRV204 's "Internet" Features. Overview The following advanced features are provided. • WAN Port Configuration • Advanced Internet • Communication Applications • Special Applications • Multi-DMZ •... -
Page 48: Wan Port Configuration
TW100-BRV204 User Guide WAN Port Configuration The WAN Port Configuration screen provides an alternative to using the Wizard. It can be accessed from the Advanced menu. An example screen is shown below. Figure 26: WAN Port Configuration Screen Data – WAN Port Configuration Screen... - Page 49 Enable NAT all PCs on your LAN to share the Internet IP address allocated to the WAN port on this Router. From the Internet, all PCs appear to have the same IP address. For normal operation, this setting must be ENABLED.
-
Page 50: Advanced Internet
• URL filter Communication Applications Most applications are supported transparently by the TW100-BRV204 . But sometimes it is not clear which PC should receive an incoming connection. This problem could arise with the Communication Applications listed on this screen. If this problem arises, you can use this screen to set which PC should receive an incoming connection, as described below. -
Page 51: Special Applications
If you use Internet applications which use non-standard connections or port numbers, you may find that they do not function correctly because they are blocked by the TW100-BRV204 's firewall. In this case, you can define the application as a "Special Application". -
Page 52: Using A Special Application
TW100-BRV204 User Guide • Type - Select the protocol (TCP or UDP) used when you send data to Outgoing the remote system or service. Ports • Start - Enter the beginning of the range of port numbers used by the application server, for data you send to it. - Page 53 • The URL Filter can be Enabled or Disabled on the Advanced Internet screen. URL Filter Screen Click the "Configure URL Filter" button on the Advanced Internet screen to access the URL Filter screen. An example screen is shown below. Data - URL Filter Screen Filter Strings This lists any existing entries.
-
Page 54: Dynamic Dns (Domain Name Server)
2. After registration, follow the Service Provider's procedure to request a Domain Name, and have it allocated to you. 3. Enter your DDNS data on the TW100-BRV204 's DDNS screen (shown below). 4. The TW100-BRV204 will then automatically ensure that your current IP Address is recorded and updated at the DDNS server. - Page 55 DDNS Data DDNS Service Select the desired DDNS Service provider. Enter your Username for the DDNS Service. User Name Password/Key Enter your current password for the DDNS Service. Domain Name Enter the domain name allocated to you by the DDNS Service. If you have more than one name, enter the name you wish to use.
-
Page 56: Virtual Servers
TW100-BRV204 User Guide Virtual Servers This feature allows you to make Servers on your LAN accessible to Internet users. Normally, Internet users would not be able to access a server on your LAN because: • Your Server does not have a valid external IP Address. -
Page 57: Virtual Servers Screen
• For each enabled Virtual Server, a firewall rule to allow incoming traffic from the Internet (WAN) to the DMZ is automatically created. If the Server is connected to the LAN (hub) ports, you must add the firewall rule manually. Note that the DMZ port is a normal port, not an "uplink"... -
Page 58: Options
TW100-BRV204 User Guide http://203.70.212.52 ftp://203.70.212.52 It is more convenient if you are using a Fixed IP Address from your ISP, rather than Dynamic. However, you can use the Dynamic DNS feature, described in the following section, to allow users to connect to your Virtual Servers using a URL, rather than an IP Address. -
Page 59: Chapter 7 Security Configuration
2. The default password is blank (no password). Enter the desired password in the New Password and Verify Password fields. 3. Save your changes. You will see a login prompt when you connect to the TW100-BRV204, as shown below. Figure 34: Password screen... - Page 60 TW100-BRV204 User Guide Figure 35: Password Dialog Enter the "User Name" and "Password" you set on the Admin Login screen above.
-
Page 61: Access Control
Access Control This feature is accessed by the Access Control link on the Security menu. The Access Control feature allows administrators to restrict the level of Internet Access avail- able to PCs on your LAN. With the default settings, everyone has unrestricted Internet access. To use this feature: 1. - Page 62 TW100-BRV204 User Guide "Members" Button Click this button to add or remove members from the current Group. • • • See the following section for details of the Group Members screen. Internet Access Select the desired options for the current group: Restrictions •...
-
Page 63: Group Members Screen
Group Members Screen This screen is displayed when the Members button on the Access Control screen is clicked. Use this screen to add or remove members (PCs) from the current group. • The "Del >>" button will remove the selected PC (in the Members list) from the current group. -
Page 64: Firewall Rules
TW100-BRV204 User Guide Firewall Rules For normal operation and LAN protection, it is not necessary to use this screen. The Firewall will always block DoS (Denial of Service) attacks. A DoS attack does not attempt to steal data or damage your PCs, but overloads your Internet connection so you can not use it - the service is unavailable. - Page 65 For each rule, the following data is shown: Data • Name - The name you assigned to the rule. • Source - The traffic covered by this rule, defined by the source IP address. If the IP address is followed by ... this indicates there is range of IP addresses, rather than a single address.
- Page 66 TW100-BRV204 User Guide Define Firewall Rule Clicking the "Add" button in the Firewall Rules screen will display a screen like the example below. Data - Define Firewall Rule Screen Name Type Source IP Dest IP Figure 39: Define Firewall Rule Enter a suitable name for this rule.
- Page 67 Services Action Select the desired Service or Services. This determines which packets are covered by this rule, based on the protocol (TPC or UDP) and port number. If necessary, you can define a new Service on the "Services" screen, by defining the protocols and port numbers used by the Service.
-
Page 68: Logs
Since only a limited amount of log data can be stored in the TW100-BRV204 , log data can also be E-mailed to your PC or sent to a Syslog Server. - Page 69 Web-based management interface is used. • Other connections and traffic to this Router - This option will log other traffic sent to the Router itself, such as "pings" or RIP (Router Information Protocol) packets. • Known DoS attacks and Port Scans - This will log details of DoS (Denial of Service) attacks which have been blocked by the built-in Firewall.
-
Page 70: E-Mail
TW100-BRV204 User Guide E-mail Data – E-Mail Screen E-Mail Alerts Send E-Mail alert E-Mail Logs Send Logs by E-Mail Include Send E-mail address Subject Figure 41: E-Mail Screen If enabled, an E-mail will be sent immediately if a DoS (Denial of Service) attack is detected. - Page 71 SMTP Server Port No. Enter the address or address or IP address of the SMTP (Simple Mail Transport Protocol) Server you use for outgoing E-mail. Enter the port number used to connect to the SMTP Server. The default value is 25. Security Configuration...
-
Page 72: Security Options
Internet connection. Select the setting to match the bandwidth of your Internet connec- tion. If checked, the TW100-BRV204 will respond to ICMP packets received from the Internet. If not checked, ICMP packets from the Internet will be ignored. - Page 73 If enabled, PCs on the LAN can use VPN software to connect to Allow VPN pass- remote clients via the Internet connection. The protocols supported through are: • • • If enabled, fragmented IP packets are discarded, forcing re- Drop fragmented transmission of these packets.
-
Page 74: Scheduling
TW100-BRV204 User Guide Scheduling • This schedule can be (optionally) applied to any Access Control Group. • Blocking will be performed during the scheduled time (between the "Start" and "Finish" times.) • Two (2) separate sessions or periods can be defined. -
Page 75: Services
Services Services are used in defining traffic to be blocked or allowed by the Access Control or Fire- wall Rules features. Many common Services are pre-defined, but you can also define your own services if required. To view the Services screen, select the Services button on the Access Control in the Advanced menu. - Page 76 TW100-BRV204 User Guide this field should be left blank.
-
Page 77: Chapter 8 Vpn (Ipsec)
Transport Mode - the payload (data) part of the packet is encapsulated through encryp- tion but the IP header remains in the clear (unchanged). The TW100-BRV204 does NOT support Transport Mode. • Tunnel Mode - everything is encapsulated, including the original IP header, and a new IP header is generated. - Page 78 Policy", and "IPSec Proposal" have the same meaning. However, some vendors separate IKE Policies (Phase 1 parameters) from IPSec Policies (Phase 2 parameters). For the TW100-BRV204 ; each VPN policy contains both Phase 1 and Phase 2 parameters (if IKE is used). Each policy defines: •...
-
Page 79: Common Vpn Situations
In this situation, the PC must run appropriate VPN client software in order to connect, via the Internet, to the TW100-BRV204 . Once connected, the client PC has the same access to LAN resources as PCs on the local LAN (unless restricted by the network administrator). - Page 80 TW100-BRV204 User Guide Connecting 2 LANs via VPN Figure 47: Connecting 2 VPN Gateways This allows two (2) LANs to be connected. PCs on each endpoint gain secure access to the remote LAN. • The 2 LANs MUST use different IP address ranges.
-
Page 81: Vpn Configuration
VPN Configuration This section covers the configuration required on the TW100-BRV204 when using Manual Key Exchange (Manual Policies) or IKE (Automatic Policies). Details of using Certificates are covered in a later section. VPN Policies Screen To view this screen, select VPN Policies from the VPN menu. This screen lists all existing VPN policies. - Page 82 TW100-BRV204 User Guide The order in which policies are listed is only important if you have Move multiple polices for the same remote site. In that case, the first matching policy is used. There are 2 ways to change the order of policies: •...
- Page 83 Figure 50: VPN Wizard – General Screen General Settings Enter a suitable name. This name is not supplied to the remote VPN. It is Policy Name used only to help you manage the policies. Enable Policy Enable or disable the policy as required. For each remote VPN, only 1 policy can be enabled at any time.
- Page 84 TW100-BRV204 User Guide Figure 51: VPN Wizard - Traffic Selector Screen • For outgoing VPN connections, these settings determine which traffic will cause a VPN tunnel to be created, and which traffic will be sent through the tunnel. • For incoming VPN connections, these settings determine which systems on your local LAN will be available to the remote endpoint.
- Page 85 Remote IP addresses • Type • • The remote VPN should have these IP addresses entered as it's "Local" addresses. 3. Click Next to continue. The screen you will see depends on whether you previously selected "Manual Key Exchange" or "IKE". Manual Key Exchange Figure 52: VPN Wizard - Manual Key Exchange Screen These settings must match the remote VPN.
- Page 86 TW100-BRV204 User Guide • • • • ESP (Encapsulating Security Payload) provides security for the ESP Encryption payload (data) sent through the VPN tunnel. Generally, you will want to enable both Encryption and Authentication. Encryption Algorithm • • Key - In / Key - Out •...
- Page 87 IKE Phase 1 If you selected IKE, the following screen is displayed after the Traffic Selector screen. This screen sets the parameters for the IKE SA. Figure 53: VPN Wizard - IKE Phase 1 Screen IKE Phase 1 (IKE SA) This setting must match the "Remote Identity"...
- Page 88 TW100-BRV204 User Guide • Authentication • Select the desired option, and ensure that both endpoints have the Authentication same settings. Algorithm Select the desired method, and ensure the remote VPN endpoint uses Encryption the same method. Algorithm • • Select the desired option, and ensure the remote VPN endpoint uses IKE Exchange the same mode.
- Page 89 IKE Phase 2 Screen This screen sets the parameters for the IPSec SA. When using IKE, there are separate connec- tions (SAs) for IKE and IPSec. Figure 54: VPN Wizard - IKE Phase 2 Screen IKE Phase 2 (IPsec SA) IPsec SA Life Time This setting does not have to match the remote VPN endpoint;...
- Page 90 TW100-BRV204 User Guide For IKE, configuration is now complete. Click "Next" to view the final screen. Figure 55: VPN Wizard - Final Screen On the final screen, click "Finish" to save your settings, then "Close" to exit the Wizard.
-
Page 91: Vpn Examples
VPN Examples This section describes some examples of using the TW100-BRV204 in common VPN situa- tions. Example 1: Connecting 2 TW100-BRV204 s In this example, 2 LANs are connected via VPN. Figure 56: Connecting 2 TW100-BRV204 s Note • The LANs MUST use different IP address ranges. - Page 92 TW100-BRV204 User Guide IKE Authentication Pre-shared Key method Pre-shared Key Xxxxxxxxxx IKE Authentication algorithm IKE Encryption IKE Exchange Main Mode mode DH Group Group 1 (768 bit) IKE SA Life time 28800 IKE PFS Disable IPSec SA Parameters IPSec SA Life time...
- Page 93 Example 2: Windows 2000/XP Client to LAN In this example, a Windows 2000/XP client connects to the TW100-BRV204 and gains access to the local LAN. Figure 57: Windows 2000/XP Client to TW100-BRV204 To use 3DES encryption on Windows 2000, you need Service Pack 3 or later installed.
- Page 94 TW100-BRV204 User Guide DH Group Group 1 (768 bit) IKE SA Life time 28800 IKE PFS Disable IPSec SA Parameters IPSec SA Life time 28800 IPSec PFS Disable AH authentication Disabled ESP authentication Enable/MD5 ESP encryption Enable/DES Windows Client Configuration 1.
- Page 95 Figure 59: Windows 2000/XP - Policy Properties • Note that no rules are in use. Two (2) rules are required - incoming and outgoing. • The outgoing rule will be added first. 6. Deselect the "Use Add Wizard" checkbox, then click "Add" to view the screen below. 7.
- Page 96 TW100-BRV204 User Guide 8. Enter the Source IP address and the Destination IP address. • Since this is the outgoing filter, the Source IP address is "My IP address" and the Destination IP address is the address range used on the remote LAN.
- Page 97 Microsoft VPN Figure 63: New Rule Properties: Filter Action 11. Select Require Security, then click the "Edit" button, to view the Require Security Proper- ties screen. Figure 64: Require Security Properties 12. Select Negotiate security (this selects IKE), then click "Add".
- Page 98 TW100-BRV204 User Guide 13. On the resulting screen (above), select High [ESP] then click "OK" to save your changes and return to the Require Security Properties screen. 14. Ensure the following settings are correct, then click "OK" to return to the Filter Action tab of the Edit Rule Properties screen.
- Page 99 15. Click the Tunnel Setting tab, then select The tunnel endpoint is specified by this IP ad- dress. Enter the WAN (Internet) IP address of the TW100-BRV204 , as shown below. 16. Click the Authentication Methods tab, then click the "Edit" to see the screen like the example below.
- Page 100 TW100-BRV204 User Guide Figure 69: Windows 2000/XP Client to TW100-BRV204 20. To add the second (incoming) rule, click "Add". For the name, enter "To Win2K", then click "Add". Figure 70: Windows 2000/XP Client to TW100-BRV204 21. Enter the Source IP address and the Destination IP address as shown below.
- Page 101 Microsoft VPN Figure 71: Filter Properties: Addressing 22. Click "OK" to save your changes, then "Close". Figure 72: Filter List 23. Ensure the "To Win2K" filter is selected, then click the Filter Action tab.
- Page 102 TW100-BRV204 User Guide 24. Select Require Security, then click "Edit". On the Require Security Methods screen below, select Negotiate security. 25. Click the "Add" button. On the resulting Modify Security Method screen below, select High [ESP]. Figure 73: Filter Action...
- Page 103 26. Click "OK" to save your changes, then click "OK" again to return to the Filter Action screen. 27. Select the Tunnel Setting tab, and enter the WAN (Internet) IP address of this PC (172.16.9.10 in this example). 28. Select the Authentication Methods tab, and click the "Edit" button to see the screen below. Figure 75: Modify Security Method Figure 76: Tunnel Setting Microsoft VPN...
- Page 104 TW100-BRV204 User Guide 29. Select Use this string to protect the key exchange (preshared key), then enter your pre- shared key in the field provided. 30. Click "OK" to save your settings, then "Close" to return to the DUT to Win2K Properties screen.
- Page 105 Microsoft VPN Figure 79: Properties - General Tab 32. Click the "Advanced" button to see the screen below. Figure 80: Key Exchange Settings 33. Click the "Methods" button to see the screen below.
- Page 106 36. Click "OK" to save, then "OK" again, and then "Close" to return to the Local Security Settings screen. 37. Right click the DUT to Win2K Policy and select "Assign" to make your policy active. Figure 83: Windows 2000/XP Client to TW100-BRV204 Configuration is now complete. Figure 82: IKE Security Algorithms...
- Page 107 Example 3: Windows 2000 Server to VPN Gateway In this example, a Windows 2000 Server connects to the TW100-BRV204 . Users on each LAN can then gain access to the remote LAN. Figure 84: TW100-BRV204 to Windows 2000 Server TW100-BRV204 Configuration This is the same as for the client setup earlier, with the exception of the IP address range for the remote endpoint.
-
Page 108: Windows 2000 Server Configuration
• The Source Address should be set to "A specific IP Subnet", and the IP address and Subnet mask set to the address range used on the TW100-BRV204 's LAN. • The Destination Address should be set to "A specific IP Subnet", and the IP address and... -
Page 109: Certificates
Certificates Certificates are used to authenticate users. Certificates are issued to you by various CAs (Certification Authorities). These Certificates are called "Self Certificates". Each CA also issues a certificate to itself. This Certificate is required in order to validate communication with the CA. These certificates are called "Trusted Certificates." The Certificates screen lists either the Trusted Certificates - the certificates of each CA itself - or Self Certificates - the certificates issued to you. -
Page 110: Self Certificates
4. Select the file. The name will appear in the "Certificate File" field. 5. Click "Upload" to upload the certificate file to the TW100-BRV204 . 6. Click "Back" to return to the Trusted Certificate list. The new Certificate will appear in the list. - Page 111 Authority). See the following section for details. Requesting a Self Certificate The TW100-BRV204 must generate a request for the CA. This request must then be supplied to the CA. The procedure is as follows: 1. On the Self Certificates screen, click the New Request button to view the first screen of the Self Certificate Request procedure, shown below.
- Page 112 Select the file. The name will appear in the Certificate File field. • Click the Upload button to upload the certificate file to the TW100-BRV204 . • Click Back to return to the Self Certificates screen.. The new Certificate will appear in the Active Self Certificates list.
-
Page 113: Crls
Select the file. The name will appear in the "File to Upload" field. • Click "Upload" to upload the CRL file to the TW100-BRV204 . • Click "Back" to return to the CRL list. The new CRL will appear in the list. - Page 114 TW100-BRV204 User Guide Data – VPN Status Screen VPN Status The name of the VPN Policy which triggered this VPN connection. Policy Name Each SA (Security Association) has a unique SPI. For manual keys, this SPI is specified by user input. If using IKE, the SPI is generated by the IKE negotiation process.
-
Page 115: Chapter 9 Microsoft Vpn
Status Server Setup The TW100-BRV204 incorporates a PPTP (Peer-to-Peer Tunneling Protocol) server which is compatible with the "VPN Adapter" provided with recent versions of Microsoft Windows. Remote Windows clients are able to connect to this Server. Once connected, they can access the LAN as if they connected locally. -
Page 116: Client Database
TW100-BRV204 User Guide Data – Microsoft VPN Screen PPTP Server Use this checkbox to enable or disable this feature as required. Enable To allow connection by remote Windows clients, you must enable this feature, and enter the client details (on the Clients screen) to allow them to login to this Server. - Page 117 Properties Use this to enable or disable access by this user, as required. Allow connection Login Name Enter the login name. The remote user must provide this name when they connect. The name must not contain spaces, punctuation, or special characters. Login Password Enter the login password.
-
Page 118: Status Screen
TW100-BRV204 User Guide Status Screen The Status screen is accessed by selecting the Status option on the Microsoft VPN menu. Figure 97: Microsoft VPN Status Screen Data - Microsoft VPN Status Screen Server Status This indicates whether or not the PPTP (VPN) Server is enabled. -
Page 119: Windows Client Setup
Windows Client Setup To connect to the PPTP (VPN) Server in the VPN Broadband Gateway: • The Microsoft VPN feature in the VPN Broadband Gateway must be enabled and confi- gured, as described in the previous section. • Each user must have a login (username and password) on the VPN client database on the VPN Broadband Gateway. - Page 120 TW100-BRV204 User Guide 5. Click "Finish" to exit the Wizard. The new entry will now be listed in "Dial-up Networking". If necessary, you can change the settings for this connection by right-clicking on it, and select- ing Properties. To force all outgoing traffic to be sent via VPN, enable the setting This is the default Internet connection on the Dialing tab.
-
Page 121: Windows 2000
Windows 2000 Ensure you have logged on with Administrator rights before attempting this procedure. 1. Open "Network Connections", and start the "New Connection" Wizard. Figure 100: Windows 2000 Network Connection 2. Select the VPN option ("Connect to a private network through the Internet"), as shown above, and click Next. - Page 122 TW100-BRV204 User Guide 4. On the screen above, enter the Domain Name or Internet IP address of the TW100- BRV204 you wish to connect to. Click Next to continue. Figure 103: Windows 2000 Connection Availability 5. Choose whether to allow this connection for everyone, or only for yourself, as required.
- Page 123 3. You can choose to have Windows remember the password if desired, so you do not have to enter it again. Changing the connection settings The PPTP (VPN) Server in the TW100-BRV204 is designed to work with the default Win- dows settings. •...
- Page 124 TW100-BRV204 User Guide Windows XP Ensure you have logged on with Administrator rights before attempting this procedure. 1. Open Network Connections (Start-Settings-Network Connections), and start the New Connection Wizard. Figure 105: Windows XP Network Connection Type 2. Select the option "Connect to the network at my workplace", as shown above, and click Next.
- Page 125 Figure 107: Windows XP Connection Name 4. Enter a suitable name for this connection. Click Next to continue. Figure 108: Windows XP Public Network 5. On the screen above, select "Do not dial the initial connection". Click Next to continue. Figure 109: Windows XP VPN Server Microsoft VPN...
- Page 126 3. You can choose to have Windows remember the password if desired, so you do not have to enter it again. Changing the connection settings The PPTP (VPN) Server in the TW100-BRV204 is designed to work with the default Win- dows settings. •...
-
Page 127: Chapter 10 Other Features & Settings
The screens available are: Backup or restore the configuration file for the TW100-BRV204 . This Config File file contains all the configuration data. Network Ping, DNS Lookup. -
Page 128: Config File
You can restore a previously-downloaded configuration file to the TW100-BRV204 , by uploading it to the TW100-BRV204 . This screen also allows you to set the TW100-BRV204 back to its factory default configura- tion. Any existing settings will be deleted. -
Page 129: Network Diagnostics
Network Diagnostics This screen allows you to perform a "Ping" or a "DNS lookup". These activities can be useful in solving network problems. An example Network Diagnostics screen is shown below. Figure 112: Network Diagnostics Screen Data - Network Diagnostics Screen Ping Enter the IP address you wish to ping. -
Page 130: Pc Database
By default, non-Server versions of Windows act as "DHCP Clients"; this setting is called "Obtain an IP Address automatically". • The TW100-BRV204 uses the "Hardware Address" to identify each PC, not the name or IP address. The "Hardware Address" can only change if you change the PC's network card or adapter. - Page 131 Data - PC Database Screen Known PCs This lists all current entries. Data displayed is name (IP Address) type. The "type" indicates whether the PC is connected to the LAN. If adding a new PC to the list, enter its name here. It is best if this Name matches the PC's "hostname".
- Page 132 BRV204 will always allocate the same IP Address to this PC. Enter the required IP address. Only the last field is required; the other fields must match the TW100-BRV204 's IP address. Fixed IP Address - Select this if the PC is using a Fixed (Static) IP address.
- Page 133 MAC Address Select the appropriate option • Automatic discovery - Select this to have the TW100-BRV204 contact the PC and find its MAC address. This is only possible if the PC is connected to the LAN and powered On. •...
-
Page 134: Remote Administration
TW100-BRV204 User Guide Remote Administration Remote Administration allows you to connect to this interface via the Internet, using your Web browser. Figure 115: Remote Administration Screen Data - Remote Administration Screen Information Information To establish a connection from the Internet: 1. - Page 135 2. In the "Address" bar, enter "HTTPS://" followed by the Internet IP Address of the TW100-BRV204 . If the port number is not 80, the port number is also required. (After the IP Address, enter ":" followed by the port number.) e.g.
-
Page 136: Routing
If you don't have other Routers or Gateways on your LAN, you can ignore the "Routing" page completely. • If the TW100-BRV204 is only acting as a Gateway for the local LAN segment, ignore the "Routing" page even if your LAN has other Routers. •... - Page 137 For class "C" networks, the default mask is 255.255.255.0 Gateway IP Address - The IP Address of the Gateway or Router which the TW100-BRV204 must use to communicate with the destination above. (NOT the router attached to the re- mote segment.) Interface - Normally, this will be "LAN".
-
Page 138: Configuring Other Routers On Your Lan
It is essential that all IP packets for devices not on the local LAN be passed to the TW100- BRV204 , so that they can be forwarded to the external LAN, WAN, or Internet. To achieve this, the local LAN must be configured to use the TW100-BRV204 as the Default Route or Default Gateway. - Page 139 Static Routing - Example For the TW100-BRV204 's Routing Table For the LAN shown above, with 2 routers and 3 LAN segments, the TW100-BRV204 requires 2 entries as follows. Entry 1 (Segment 1) Destination IP Address Network Mask Gateway IP Address...
- Page 140 TW100-BRV204 User Guide For Router B's Default Route Destination IP Address Network Mask Gateway IP Address Interface 0.0.0.0 0.0.0.0 192.168.1.80 (TW100-BRV204 's local router)
-
Page 141: Upgrade Firmware
During the upgrade process, all existing Internet connections will be terminated. • The upgrade process must NOT be interrupted!. Data – Upgrade Firmware Screen Upgrade Firmware Enter the current password assigned to the TW100-BRV204 . If no TW100-BRV204 password has been assigned, leave this blank. Password Upgrade File Click the "Browse"... -
Page 142: Upnp
If Disabled, UPnP users can NOT disable Internet access via this device. But currently, this restriction only applies to users running Windows XP, who access the Properties via UPnP. (e.g. Right - click the TW100-BRV204 in My Network Places, and select Properties) -
Page 143: Appendix A Troubleshooting
This chapter covers some common problems that may be encountered while using the TW100- BRV204 and some possible solutions to them. If you follow the suggested steps and the TW100-BRV204 still does not function properly, contact your dealer for further advice. General Problems Problem 1: Can't connect to the TW100-BRV204 to configure it. - Page 144 Problem 2: Some applications do not run properly when using the TW100-BRV204 Solution 2: The TW100-BRV204 processes the data passing through it, so it is not transparent. Use the Special Applications feature to allow the use of Internet applications which do not function correctly.
-
Page 145: Appendix B Specifications
Appendix B Specifications TW100-BRV204 Model Dimensions Operating Temperature Storage Temperature Network Protocol: Network Interface: LEDs Power Adapter FCC Statement This equipment has been tested and found to comply with the limits for a Class B digital device, pursuant to Part 15 of the FCC Rules. These limits are designed to provide reasonable protection against harmful interference in a residential installation. -
Page 146: Ce Marking Warning
TW100-BRV204 User Guide FCC Radiation Exposure Statement This equipment complies with FCC RF radiation exposure limits set forth for an uncontrolled environment. This equipment should be installed and operated with a minimum distance of 20 centimeters between the radiator and your body. -
Page 147: Limited Warranty
TW100-BRV204 – 5 Years Warranty If a product does not operate as warranted above during the applicable warranty period, TRENDware shall, at its option and expense, repair the defective product or part, deliver to customer an equivalent product or part to replace the defective item, or refund to customer the purchase price paid for the defective product. - Page 148 TW100-BRV204 User Guide PERSON’S MISUSE, NEGLECT, IMPROPER INSTALLATION OR TESTING, UNAUTHORIZED ATTEMPTS TO REPAIR OR MODIFY, OR ANY OTHER CAUSE BEYOND THE RANGE OF THE INTENDED USE, OR BY ACCIDENT, FIRE, LIGHTNING, OR OTHER HAZARD. LIMITATION OF LIABILITY: TO THE FULL EXTENT ALLOWED BY LAW...
- Page 149 Appendix B - Specifications...
Need help?
Do you have a question about the TW100-BRV204 and is the answer not in the manual?
Questions and answers