
Related Manuals for AUDAC AXIR


Summary of Contents for AUDAC AXIR
-
Page 1: User Manual
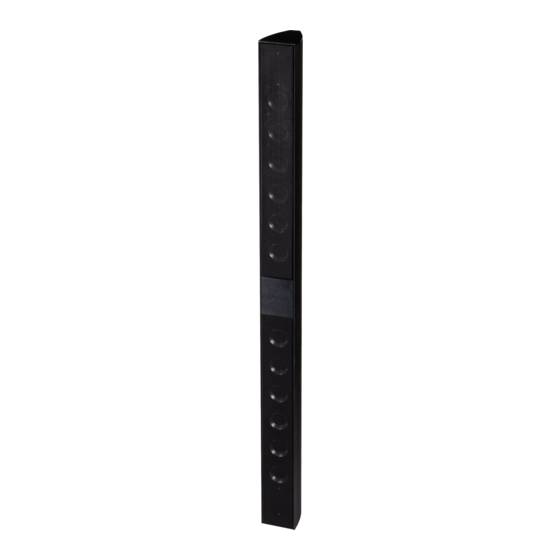
AXIR Design Column Speaker AUDAC PROFESSIONAL AUDIO EQUIPMENT AXIR Design Column speaker User Manual & Installation Guide... - Page 2 A U D A C P R O F E S S I O N A L A U D I O E Q U I P M E N T User Manual & Installation Guide AUDAC http://www.audac.eu info@audac.eu...
-
Page 3: Table Of Contents
DETERMINING LISTENING AREA AND MOUNTING HEIGHT ..........................4 OTHER POINT TO PAY ATTENTION TO ..................................7 CREATE SPECIFIC POLAR PATTERNS ..................................8 CONNECTING THE AXIR ........................................9 CONNECTIONS ........................................... 9 LINE TRANSFORMER POWER TAPS.................................... 10 CONVERT FOR USE IN LOW IMPEDANCE APPLICATIONS ........................... 11 ADDITIONAL INFORMATION AXIR .................................... -
Page 4: Introduction
This introduction briefly describes the possibilities of the AXIR design column speaker.. he AXIR was designed to meet professional demands en proves its worth in auditoria, conference rooms, meeting rooms, churches,… any place that requires a great flexibility in positioning and tuning, ass well as state-of-the-art audio quality and design. -
Page 5: Safety Requirements
Chapter Warning Only use the correct amplifier output voltage and impedance, exceeding these limits could cause damage, fire or other failures. Only install the speaker on surfaces that can accommodate the weight of the speaker and the mounting bracket. ... -
Page 6: Installation
The dimensions of the desired listening area has to be determined where out the correct mounting height and angle can be derived. A step by step installation procedure describes the method to determine the mounting height and angle for the AXIR. DETERMINING LISTENING AREA AND MOUNTING HEIGHT STEP 1: Determine the dimensions of the desired Listening Area. - Page 7 After the listening area, determine at which angle the loudspeaker array has to be mounted. The AXIR column speaker was designed to aim the sound just above the heads of the listeners, and it is recommended not to exceed an angle of 6°. There are two different approaches to determine the mounting angle, each with specific advantages and disadvantages.
- Page 8 Distance A between speaker and listening area...
-
Page 9: Other Point To Pay Attention To
This height is determined by aiming the 0° axis of the AXIR in the desired position, precisely above the ear level of the listener who’s the furthest away from the speaker. This can be adjusted by mounting the loudspeaker higher and lower on the wall. -
Page 10: Create Specific Polar Patterns
CREATE SPECIFIC POLAR PATTERNS The AXIR contains two individual speaker sections whose power can be individually set between 20W, 10W, 5W and 2.5W. The desired power taps can be selected by a recessed adjuster screw behind the speakers cover. This allows us to set the total speaker power between 5W and 40W, but it also gives the possibility to create a specific polar pattern. -
Page 11: Connecting The Axir
Connecting the AXIR CONNECTIONS: At the back of the AXIR is a 3 pole euro terminal block connector provided to connect the amplifier with the AXIR column speaker. Depending of the speaker is used in 100V applications or low impedance applications, the wiring diagram is different. -
Page 12: Line Transformer Power Taps
LINE TRANSFORMER POWER TAPS: To adjust the power taps of the speaker, the front cover plate with the AUDAC logo should be removed very carefully. This is best done by carefully sticking a flat object under the cover plate (e.g. a small flat screwdriver). The cover plate is coming loose, without performing large forces. -
Page 13: Convert For Use In Low Impedance Applications
For use in low impedance applications, the internal switches of the speaker must be switched. To reach the internal switches, the front cover plate with the AUDAC logo should be removed very carefully. This is best done by carefully sticking a flat object under the cover plate (e.g. -
Page 14: Additional Information Axir
Chapter Additional information AXIR TECHNICAL SPECIFICATIONS RMS Power 120 W Max Power 240 W Impedance 6 Ohm 2 x 500 Ohm / 2 x 20 W Line Transformer power 2 x 1000 Ohm / 2 x 10 W tappings 2 x 2000 Ohm / 2 x 5 W... -
Page 15: Polar Patterns
Polar patterns 250 Hz 500 Hz 1000 Hz 2000 Hz 4000 Hz 8000 Hz... -
Page 16: Personal Notes
Personal notes...
Need help?
Do you have a question about the AXIR and is the answer not in the manual?
Questions and answers