
Related Manuals for GRASS VALLEY LDX 86 HS


Summary of Contents for GRASS VALLEY LDX 86 HS
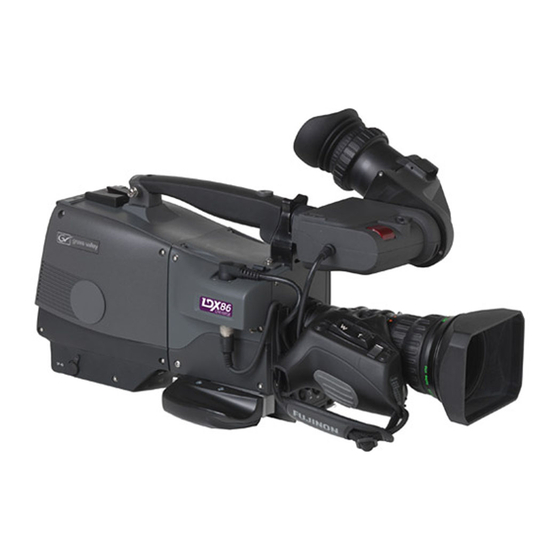
- Page 1 User’s Guide 3922 496 32221 May 2014 v1.0 — LDX 86 HS/XS + XF Fiber Adapter HiSpeed/XtremeSpeed HD camera...
-
Page 2: Declaration Of Conformity
Liable to technical alterations in the course of further development. Trademarks Grass Valley, LDX Series and derivatives are trademarks of Belden Inc. or Grass Valley. All other tradenames referenced are service marks, trademarks, or registered trademarks of their respective companies. -
Page 3: Table Of Contents
Location of controls (back panel) ........34 LDX 86 HS/XS HiSpeed/XtremeSpeed HD camera User’s Guide (v1.0) - Page 4 4.13.4 Access control ..........58 LDX 86 HS/XS HiSpeed/XtremeSpeed HD camera User’s Guide (v1.0)
- Page 5 Diagnostics menu ........... 101 LDX 86 HS/XS HiSpeed/XtremeSpeed HD camera User’s Guide (v1.0)
- Page 6 Chapter 9 – Specifications Specifications for LDX 86 HS/XS camera head ......119 9.1.1...
- Page 7 Certificate of Recycling or a Certificate of Destruction, depending on the ultimate disposition of the product, can be sent to the requester. Grass Valley will be responsible for all costs associated with recycling and disposal, including freight, however you are responsible for the removal of the equipment from your facility and packing the equipment ready for pickup.
-
Page 8: Important Information
Important information Read these instructions carefully and retain them for future reference. Regularly check the Grass Valley website (www.grassvalley.com) for new updates of this and other user’s guides. During installation and operation of this equipment, local building safety and fire protection standards must be observed. - Page 9 Connect the product only to a power source with the specified voltage rating. To prevent risk of overheating, ventilate the camera correctly. Do not block the hot airflow coming from the outlet on the right side of the camera adapter. LDX 86 HS/XS HiSpeed/XtremeSpeed HD camera User’s Guide (v1.0)
- Page 10 Avoid extreme highlights as these can cause various kinds of optical reflections. • Be careful when connecting and disconnecting Triax or Fiber cables. • Do not connect Grass Valley camera systems with other manufacturer’s camera system parts. • Make connections swiftly and firmly to avoid false error messages.
- Page 11 This separation can be achieved by using an isolation transformer between the local power outlet and the equipment connected to the camera. Alternatively, use equipment that has a double insulation and therefore does not require an earth connection. LDX 86 HS/XS HiSpeed/XtremeSpeed HD camera User’s Guide (v1.0)
- Page 12 Insert connectors straight and fully into their corresponding sockets. • In fiber-optic cable systems always put the dust caps on cable and panel connectors immediately after disconnecting a cable. Keep the dust caps clean. LDX 86 HS/XS HiSpeed/XtremeSpeed HD camera User’s Guide (v1.0)
- Page 13 Air can be used to remove lint or loose dust from the port of a transmitter or receiver to be mated with the connector. Never insert any liquid into the ports. LDX 86 HS/XS HiSpeed/XtremeSpeed HD camera User’s Guide (v1.0)
- Page 14 LDX 86 HS/XS HiSpeed/XtremeSpeed HD camera User’s Guide (v1.0)
-
Page 15: Chapter 1 - Introduction
1.1.1 About this guide The purpose of this guide is to present a detailed description of how to operate an LDX 86 HS/ XS camera head equipped with a dockable transmission adapter. It provides the information necessary to use the camera in different configurations and with various attachments. This guide describes all operating features of the camera so it can be used to its full potential. -
Page 16: Technology
AnyLightXtreme flicker reduction assures that no more irritating light flickering occurs in the replays. Grass Valley LDX HiSpeed and LDX XtremeSpeed cameras are fully integrated with all the LDX Series of cameras, so they share the same camera accessories and use the same camera control system, which also includes the full support of the Connect Gateway for the best possible integration with external control systems. -
Page 17: Anylightxtreme™ Flicker Reduction System
A visual flicker is perceived as changes in light levels due to the mismatch between the camera scanning frequency and the power frequency of artificial lights. With the unique AnyLightXtreme feature for the LDX 86 HS/XS cameras, there is compensation for this mismatch that helps to automatically reduce flicker, with several presets for different lighting conditions available in the cameras. -
Page 18: Acquisition Formats
The clever PickMe button places the camera operator in the middle of the action and provides a great help for fast event handling in the field • Suitability for 3D productions LDX 86 HS/XS HiSpeed/XtremeSpeed HD camera User’s Guide (v1.0) - Page 19 Advanced secondary color corrector with 6 sets for color hue, saturation and luminance adjustment. • Compatible with Grass Valley’s C2IP control systems and RefleX SuperXpander. • Horizontal and vertical chromatic lens aberration and sharpness solution (CLASS) compatible with many digital lenses •...
-
Page 20: List Of Accessories
Dynamic headset (single muff) with XLR-5 connector LDK 6985/30 Universal LDK/LDX Camera script board LDK 5020/05 Universal transport case LDK 5020/01 Carrying bag LDK 5901/00 External power supply unit (100 W) LDX 86 HS/XS HiSpeed/XtremeSpeed HD camera User’s Guide (v1.0) -
Page 21: Chapter 2 - Installation
Connect the lens cable to the lens connector at the right side of the camera. ✎ Use the clips (2) on the front of the camera to guide the lens cable along the camera body. LDX 86 HS/XS HiSpeed/XtremeSpeed HD camera User’s Guide (v1.0) -
Page 22: Ec 270 Eyecatcher Viewfinder
✎ To improve the comfort of the skin contact when using the viewfinder, fit the eye piece cover to the rubber eyepiece. Spare covers are available via your Grass Valley representative. • Connect the viewfinder cable to the viewfinder socket (1) at the top right of the camera. -
Page 23: Positioning The Viewfinder
Loosen the support bracket round bar retaining lever (3). • Slide the round bar (2) forwards or backwards. • When the desired position is reached tighten the round bar retaining lever (3) again. LDX 86 HS/XS HiSpeed/XtremeSpeed HD camera User’s Guide (v1.0) -
Page 24: Aj-Mc700 Microphone
CONFIGURATION menu. When a longer microphone is used, it is not necessary to place it in the split tube. Phantom power is always present on the front microphone socket. LDX 86 HS/XS HiSpeed/XtremeSpeed HD camera User’s Guide (v1.0) -
Page 25: Ldk 5301/10 Tripod Adapter Plate
Press and hold the red locking lever (3) against the release handle (4). Ensure that you have a firm hold of the camera. Pull the release handle (4) forward. Move the camera backwards and up. LDX 86 HS/XS HiSpeed/XtremeSpeed HD camera User’s Guide (v1.0) -
Page 26: Adjusting The Shoulder Pad
The shoulder pad can now be moved backwards and forwards along the axis of the camera. ✎ Adjust the shoulder pad when all units have been mounted to get the best balanced shoulder position. Shoulder pad adjustment lever LDX 86 HS/XS HiSpeed/XtremeSpeed HD camera User’s Guide (v1.0) -
Page 27: Exchanging The Camera Adapter
[1] of the camera. Carefully press camera head and adapter together at the bottom and tighten the two screws [2] at both sides of the camera head. LDX 86 HS/XS HiSpeed/XtremeSpeed HD camera User’s Guide (v1.0) -
Page 28: Detaching The Adapter
To prevent damage always detach the lens from the camera head before transporting. 2.8 Packing for return If a unit is being returned to Grass Valley for servicing, try to use the containers and materials of the original packaging. Attach a tag indicating the type of service required, return address, model number, full serial number and the return number which will be supplied by your Grass Valley service centre. -
Page 29: Chapter 3 - Configurations
XCU 4280 Series XF Fiber XtremeSpeed camera head adapter XF Fiber XCU Master Black F4.5 Iris OCP 400 MCP 400 Video Harddisk recorder Playback controller Monitoring Program output output for slow-motion playback LDX 86 HS/XS HiSpeed/XtremeSpeed HD camera User’s Guide (v1.0) - Page 30 Chapter 3 - Configurations LDX 86 HS/XS HiSpeed/XtremeSpeed HD camera User’s Guide (v1.0)
-
Page 31: Chapter 4 - Operating Instructions
The startup process can be monitored on the indicator panel of the XCU. To switch the camera to stand-by, set the power switch of the camera to the position. LDX 86 HS/XS HiSpeed/XtremeSpeed HD camera User’s Guide (v1.0) -
Page 32: Location Of Controls (Front)
Chapter 4 - Operating instructions 4.2 Location of controls (front) 20 19 18 17 16 LDX 86 HS/XS HiSpeed/XtremeSpeed HD camera User’s Guide (v1.0) - Page 33 [22] Return B button Move up or down to select an exposure time This button can be assigned to an External or hold to set a variable exposure time. Video channel. LDX 86 HS/XS HiSpeed/XtremeSpeed HD camera User’s Guide (v1.0)
-
Page 34: Location Of Controls (Back Panel)
Chapter 4 - Operating instructions 4.3 Location of controls (back panel) Analog VF Out/ AES In An VF Out AES In LDX 86 HS/XS HiSpeed/XtremeSpeed HD camera User’s Guide (v1.0) - Page 35 Lights orange when too much power is This button is used to activate the intercom drawn from the DC Ouput connector. Engineering channel. [8] Intercom Prod button This button is used to activate the intercom Production channel. LDX 86 HS/XS HiSpeed/XtremeSpeed HD camera User’s Guide (v1.0)
-
Page 36: Controlling The Camera
You will quickly learn to operate the camera intuitively. ☞ ☞ Note Note Some of the menu items may not appear if the user level is not set to 3. LDX 86 HS/XS HiSpeed/XtremeSpeed HD camera User’s Guide (v1.0) -
Page 37: Entering The Camera Menu
The other items are available by scrolling up or down with the rotary control. PREVIOUS Levels >> Exposure >> Color >> Image Control >> Files >> Production Setup Video Mode 720p50 Sensitivity LDX 86 HS/XS HiSpeed/XtremeSpeed HD camera User’s Guide (v1.0) -
Page 38: Leaving The Camera Menu
If you make changes to the video settings in the camera menu and you decide not to keep them, use the green standard button at the side of the camera to recall a standard set of values for the video parameters. LDX 86 HS/XS HiSpeed/XtremeSpeed HD camera User’s Guide (v1.0) -
Page 39: Assigning User Buttons
Viewing zoom function (Zoom) • Switch to external video signal 1 (Ext1) • Focus Assist (FocAst) • Switch to external video signal 2 (Ext2) • Production intercom (Prod) • Engineering intercom (Eng) LDX 86 HS/XS HiSpeed/XtremeSpeed HD camera User’s Guide (v1.0) -
Page 40: Handgrip Button
The Left Handgrip button can be assigned to: • Production intercom (Prod) • Engineering intercom (Eng) The Right Handgrip button is assigned to: • Switch to external video signal 1 (Ext1) LDX 86 HS/XS HiSpeed/XtremeSpeed HD camera User’s Guide (v1.0) -
Page 41: Viewfinder Controls (Eyecatcher Only)
The diopter of the viewfinder can be adjusted to suit your eyesight by turning the diopter adjustment ring. Turn to the right for negative diopter values, turn to the left for positive values. LDX 86 HS/XS HiSpeed/XtremeSpeed HD camera User’s Guide (v1.0) -
Page 42: Back
On Air. This indicator has the same “underscan” appear. Set the switch to Off to function as the front tally indicator. return to the original picture. LDX 86 HS/XS HiSpeed/XtremeSpeed HD camera User’s Guide (v1.0) -
Page 43: Viewfinder Information
When the Iris indicator (2a) is switched on, the Focus indicator (2b) is automatically switched off and vice versa. When the Filter indicator (4a) is switched on, the Depth of Field indicator (4b) is automatically switched off and vice versa. LDX 86 HS/XS HiSpeed/XtremeSpeed HD camera User’s Guide (v1.0) -
Page 44: On Screen Marker Indicators
Different aspect ratios shows the limits of a 4:3, 15:9 or 14:9 picture. for the safe area can be set in the menu. [2] Center Cross Marks the center of the picture. LDX 86 HS/XS HiSpeed/XtremeSpeed HD camera User’s Guide (v1.0) -
Page 45: Viewfinder Led Indicators (Eyecatcher Only)
– AWC (Auto White Continuous or automatic white balance) or FL color [7] Zoom indicator temperature is switched on. Lights when viewfinder zoom is active. [8] Focus Assistant indicator Lights when focus assistant is active. LDX 86 HS/XS HiSpeed/XtremeSpeed HD camera User’s Guide (v1.0) -
Page 46: Information Screen
Displays the current user level (“ULvl”), the [3] User button assignments last recalled operator file (“OpFl”) and the Displays the assignments for the user standard recall file (“STDOper”). buttons on the camera. LDX 86 HS/XS HiSpeed/XtremeSpeed HD camera User’s Guide (v1.0) -
Page 47: Focus Assist
(“CLASS: Turn lens rings”) is briefly shown in the viewfinder. Turn both zoom and focus ring all the way from one end to the other. After startup when CLASS is active, a message (“CLASS: Active”) is shown in the viewfinder. LDX 86 HS/XS HiSpeed/XtremeSpeed HD camera User’s Guide (v1.0) -
Page 48: Auto Iris
This system automatically focuses the image within a user defined focus frame on the screen. When precision focus is enabled on the lens, the focus frame is superimposed on the LDX 86 HS/XS HiSpeed/XtremeSpeed HD camera User’s Guide (v1.0) -
Page 49: Lens Indicators In The Viewfinder
The focus indicator shows the percentage of the focus distance range from 0 (close-up) to 99 (infinity). This feature is only available when a digital lens is used. LDX 86 HS/XS HiSpeed/XtremeSpeed HD camera User’s Guide (v1.0) -
Page 50: Connecting Audio
Digital audio channels 3 and 4 are available on the digital audio output (3+4) connector on the XCU and as embedded audio channels 3 and 4 in the HD-SDI video signal. LDX 86 HS/XS HiSpeed/XtremeSpeed HD camera User’s Guide (v1.0) -
Page 51: Using Intercom
(momentary or alternating) of the Eng button. Hold the production (Prod) channel selection button to talk to the production channel. Release to switch off the production channel. LDX 86 HS/XS HiSpeed/XtremeSpeed HD camera User’s Guide (v1.0) -
Page 52: Adjusting Intercom Volume
The user buttons at the left side panel of the camera (SW1 and SW2), the user button under the handgrip and the VTR button on the lens can also be used to send the intercom signal from the headset to Production or Engineering. LDX 86 HS/XS HiSpeed/XtremeSpeed HD camera User’s Guide (v1.0) -
Page 53: Setting Up Tracker Headset
Off, On Switches bias tee power (12 VDC) to the Tracker’s microphone on or off. Tracker Mic Src Eng, Side Side Selects Engineering channel or Tracker’s microphone sidetone for tracker’s headphone. LDX 86 HS/XS HiSpeed/XtremeSpeed HD camera User’s Guide (v1.0) -
Page 54: Communication
Typically, a Connect Gateway server routes this signal to the production control room and an automated action is executed, for example switching the camera signal directly to the program channel (On Air). LDX 86 HS/XS HiSpeed/XtremeSpeed HD camera User’s Guide (v1.0) -
Page 55: Call Button
The 20-pin auxiliary connector on the back panel of the adapter provides, as well as providing full intercom facilities for the dolly or crane driver, also carries the tally signal and a +12 VDC power supply. This allows an external On Air lamp to be used. LDX 86 HS/XS HiSpeed/XtremeSpeed HD camera User’s Guide (v1.0) -
Page 56: Managing Files
The standard Customer operator file is stored via the SECURITY menu, not the FILES menu. The decision to use the factory defined file or the customer defined file as the standard file is also made in this menu. LDX 86 HS/XS HiSpeed/XtremeSpeed HD camera User’s Guide (v1.0) -
Page 57: Lens Files
The selection of a factory defined or a customer defined file for use as a standard file is also made in this menu. You can only access the functions of the SECURITY menu with the PIN code of the camera. LDX 86 HS/XS HiSpeed/XtremeSpeed HD camera User’s Guide (v1.0) -
Page 58: Access And Security
PIN code when it leaves the factory is set to 0000. It is strongly advised that this code be changed by the owner on receipt of the camera. This ensures added protection against unauthorised access to the Security menu. LDX 86 HS/XS HiSpeed/XtremeSpeed HD camera User’s Guide (v1.0) -
Page 59: Chapter 5 - Video Setup
SELECT to switch to the selected video mode. In the camera menu, go to the PRODUCTION SETUP > VIDEO MODE menu item and select the video mode you wish to use for your production. LDX 86 HS/XS HiSpeed/XtremeSpeed HD camera User’s Guide (v1.0) -
Page 60: Color Bar
-, 0, +, ++ and +++. The actual value of the gain in dB is assigned to these presets in the PRODUCTION SETUP > LEVELS > GAIN > GAIN PRESETS menu. LDX 86 HS/XS HiSpeed/XtremeSpeed HD camera User’s Guide (v1.0) - Page 61 Release the switch when you reached the value you want. This exits the value selection mode. Using the switch momentarily again sets the gain to the nearest preset value. ☞ ☞ Note Note Selecting high gain levels may introduce more noise into the image. LDX 86 HS/XS HiSpeed/XtremeSpeed HD camera User’s Guide (v1.0)
-
Page 62: Gamma
☞ Note Note It’s also possible to change Gamma for each channel (R,G,B). Changing the slopes of the individual color gamma changes the representation of white in the mid-range tonal values. LDX 86 HS/XS HiSpeed/XtremeSpeed HD camera User’s Guide (v1.0) -
Page 63: Contrast
Contrast adjustment is always applied after Gamma. 5.4.2 Black Stretch The Black Stretch function changes the level of tones in the shadow areas of the picture without affecting the rest of the picture. LDX 86 HS/XS HiSpeed/XtremeSpeed HD camera User’s Guide (v1.0) -
Page 64: Knee
When Black Stretch is switched on the non-standard indicator in the viewfinder lights (only for ocular viewfinders). 5.5 Knee Knee is a function that compresses the wide dynamic range of the video signal coming from the imager into the more limited video output range. LDX 86 HS/XS HiSpeed/XtremeSpeed HD camera User’s Guide (v1.0) -
Page 65: Knee (In Powercurves Mode)
To use Knee in the compatibility mode, follow the steps below and refer to the next chapter for more information. Press the KNEE button and press the NEXT button until the KNEE MODE item is shown. Use this item to select Compat. LDX 86 HS/XS HiSpeed/XtremeSpeed HD camera User’s Guide (v1.0) -
Page 66: Knee (In Compatibility Mode)
Both a Neutral Density filter (ND) and a Special Effects filter (FX) can be placed in the path of the optical signal to modify the incoming light. These filters can be used, for example, to control depth of field or exposure levels. LDX 86 HS/XS HiSpeed/XtremeSpeed HD camera User’s Guide (v1.0) -
Page 67: Exposure
Press the EXP . TIME button and select the EXP SEL function. Select the exposure time you want to use. On the left side panel of the camera the momentary up/down exposure time switch gives a choice of exposure time presets. LDX 86 HS/XS HiSpeed/XtremeSpeed HD camera User’s Guide (v1.0) - Page 68 60 Hz lighting (adjustable with Lighting correction) ☞ ☞ Note Note If an exposure time other than nominal (Nom.) is selected, the non-standard indicator in the viewfinder lights (only for ocular viewfinders). LDX 86 HS/XS HiSpeed/XtremeSpeed HD camera User’s Guide (v1.0)
-
Page 69: Lighting Correction
Nom or use the exposure time switch. The exposure time returns to its previous non-variable setting. ☞ ☞ Note Note When Variable Exposure is switched on, the non-standard indicator in the viewfinder lights (only for ocular viewfinders). LDX 86 HS/XS HiSpeed/XtremeSpeed HD camera User’s Guide (v1.0) -
Page 70: Led Wall Filter
Filter is not disabled when AWC is on. 5.8.4 Selecting color temperature The up/down color temperature switch on the left side of the camera allows a choice between three preset color temperatures: LDX 86 HS/XS HiSpeed/XtremeSpeed HD camera User’s Guide (v1.0) -
Page 71: Variable Color Temperature
Release the switch when you reach the value you want. This exits the value selection mode. Using the switch momentarily again sets the color temperature to the nearest standard value. LDX 86 HS/XS HiSpeed/XtremeSpeed HD camera User’s Guide (v1.0) -
Page 72: Auto White Balance
On the OCP 400, press the WHITE BALANCE button again — the button flashes. On the camera, press the White Balance button on the front panel again to start the measurement procedure. LDX 86 HS/XS HiSpeed/XtremeSpeed HD camera User’s Guide (v1.0) -
Page 73: Saturation
100% decrease colors while values higher than 100% increase colors. Press the COLOR button, select the SATURATION item and adjust the level. In the camera menu, navigate to the PRODUCTION SETUP > COLOR > SATURATION item and adjust the level LDX 86 HS/XS HiSpeed/XtremeSpeed HD camera User’s Guide (v1.0) -
Page 74: Color Protect
(in the video parameter section). The color menu is displayed. Use the NEXT button to scroll to the next menu. Switch on the color corrector with the CORRECTOR item at the top left of the screen. LDX 86 HS/XS HiSpeed/XtremeSpeed HD camera User’s Guide (v1.0) - Page 75 In the CREATIVE CONTROL > COLOR ADJUSTMENT > COL CORR menu, switch the item COL CORR on. Go to the item SET and select a color correction set. Switch on the item SET ON/OFF to activate the selected set. LDX 86 HS/XS HiSpeed/XtremeSpeed HD camera User’s Guide (v1.0)
-
Page 76: Sharpness
TEXTURE to adjust the amount of Texture detail added to the picture. ☞ ☞ Note Note Texture can be disabled in the advanced submenu of the camera menu, or in the Detail menu of the OCP . LDX 86 HS/XS HiSpeed/XtremeSpeed HD camera User’s Guide (v1.0) -
Page 77: Advanced Options
DETAIL EQUALIZER item. Use the SHADOWS, MIDTONES or HIGHLIGHTS items to adjust the detail level for each tonal range between 0 and 99. Values below 50 decrease detail while values above 50 increase detail. LDX 86 HS/XS HiSpeed/XtremeSpeed HD camera User’s Guide (v1.0) -
Page 78: Skin Detail
Now point the two small black boxes at the intended surface (generally a face). Press the select button again to start the measurement procedure (the iris is automatically set to auto by the camera). The process running message appears: ASKIN: running LDX 86 HS/XS HiSpeed/XtremeSpeed HD camera User’s Guide (v1.0) -
Page 79: Anylightxtremetm
It is not recommended that 50, 100,150 and 300 Hz video modes are used with 60 Hz lighting and similarly, it is not recommended that 60, 120,180 and 360 Hz video modes are used with 50 Hz lighting. LDX 86 HS/XS HiSpeed/XtremeSpeed HD camera User’s Guide (v1.0) -
Page 80: Image Control
In the camera menu, navigate to the PRODUCTION SETUP > IMAGE CONTROL > REVERSE SCAN menu to switch reverse scan on or off and to select the scan mode (horizontal, vertical or both). LDX 86 HS/XS HiSpeed/XtremeSpeed HD camera User’s Guide (v1.0) -
Page 81: Chapter 6 - Camera Menu Reference
User 3 is the least restrictive. Service is the access level for advanced functions. • File: indicates the file type (Operator, Scene or Lens file) in which the function is stored. • Description: a short description of the function and its values. LDX 86 HS/XS HiSpeed/XtremeSpeed HD camera User’s Guide (v1.0) -
Page 82: Operator Toolbox Menu
Selects type of signal to view in viewfinder. G, R-G, B-G VF Detail VF Detail Off, On, Boost User 0 Oper Switches detail for viewfinder signal on or off or adds extra detail to the viewfinder signal (‘Boost’). LDX 86 HS/XS HiSpeed/XtremeSpeed HD camera User’s Guide (v1.0) - Page 83 (push) or alternating (toggle). LED Brightness High, Low High User 0 Oper Selects brightness level for the LED buttons at the back panel of the camera. LDX 86 HS/XS HiSpeed/XtremeSpeed HD camera User’s Guide (v1.0)
- Page 84 Selects a standard, camera or USB Operator OCam1, OCam2... File for storing. Store Exec, ... Exec User 1 — Stores the current operator settings in the selected operator file. Recll Oper File LDX 86 HS/XS HiSpeed/XtremeSpeed HD camera User’s Guide (v1.0)
- Page 85 Notch EXT Off, On User 0 — Switches external notch filter on or off. EXT AspectRatio 16:9, 4:3 User 0 — Selects aspect ratio of external video signal displayed in the viewfinder. LDX 86 HS/XS HiSpeed/XtremeSpeed HD camera User’s Guide (v1.0)
-
Page 86: Production Setup Menu
Scene Sets Gamma level for the Blue channel. White Limiter White Limiter On, Off Service Scene Switches White Limiter on or off. Use to limit highlight levels in the video signal. LDX 86 HS/XS HiSpeed/XtremeSpeed HD camera User’s Guide (v1.0) - Page 87 Sets the exposure correction to fine-adjust for ambient lighting frequency when exposure time is set to 50 Hz or 60 Hz. Acq Timing V-Shift Off, On User 1 Scene Switches V-Shift (acquisition timing shift) on or off. LDX 86 HS/XS HiSpeed/XtremeSpeed HD camera User’s Guide (v1.0)
- Page 88 G/M, M/G Service Scene Selects the order of the matrix and gamma: G/M = gamma before matrix; M/G = matrix before gamma (advised to use when matching with cameras of other manufacturers) LDX 86 HS/XS HiSpeed/XtremeSpeed HD camera User’s Guide (v1.0)
- Page 89 R/W = Read and Write; R = Read only. Video Mode 1080i150, 720p159, 1080i15 User 3 — Selects video mode. Available video modes 1080i150 ... depending on camera model and license. LDX 86 HS/XS HiSpeed/XtremeSpeed HD camera User’s Guide (v1.0)
-
Page 90: Creative Control Menu
Slope M 0..99 User 3 Scene Sets the Knee slope (when Knee = Var). Point M 0..99 User 3 Scene Sets the Knee point (when Knee = Var). Advanced LDX 86 HS/XS HiSpeed/XtremeSpeed HD camera User’s Guide (v1.0) - Page 91 Selects method for smoothing transitions Smooth between affected and nonaffected areas. Reset Exec, .. Exec User 3 — Resets the color corrector to its default values. All sets are reset. Col Protect LDX 86 HS/XS HiSpeed/XtremeSpeed HD camera User’s Guide (v1.0)
- Page 92 Texture is disabled. Soft Detail Lvl 0..99 User 2 Scene Sets the maximum limit level of Detail for Soft Detail. Note: this function is only available when Texture is disabled. LDX 86 HS/XS HiSpeed/XtremeSpeed HD camera User’s Guide (v1.0)
- Page 93 Sets width level (Blue) for Skin Gate 3. Color3 Red 0..99 User 3 Scene Sets color level (Red) for Skin Gate 3. Color3 Blue 0..99 User 3 Scene Sets color level (Blue) for Skin Gate 3. LDX 86 HS/XS HiSpeed/XtremeSpeed HD camera User’s Guide (v1.0)
-
Page 94: Configuration Menu
Iris level when a range extender (RE) is used. Lens Corrections CLASS CLASS Auto, Off Auto User 0 — Selects CLASS mode: Auto = Automatic correction; Off = no correction. LDX 86 HS/XS HiSpeed/XtremeSpeed HD camera User’s Guide (v1.0) - Page 95 Off = no routing; Switch = intercom route depends on switch at the rear of the adapter; Track = route signal to Tracker channel; Prod = route signal to Production channel. LDX 86 HS/XS HiSpeed/XtremeSpeed HD camera User’s Guide (v1.0)
- Page 96 Audio 1 HPF Off, On User 1 — Switches High Pass Filter for Audio channel 1 on or off. Use to reduce 50 Hz and 60 Hz hum or low frequency noise. LDX 86 HS/XS HiSpeed/XtremeSpeed HD camera User’s Guide (v1.0)
- Page 97 User 3 Oper Selects the output signal on the TP Out/ Analog Ref In connector on the adapter side panel. H-Phase 0..99 User 0 — Sets main video signals horizontal phase. LDX 86 HS/XS HiSpeed/XtremeSpeed HD camera User’s Guide (v1.0)
- Page 98 Chapter 6 - Camera menu reference LDX 86 HS/XS HiSpeed/XtremeSpeed HD camera User’s Guide (v1.0)
-
Page 99: Licenses Menu
User 2 — Select new value for month. Year 2000..2199 2012 User 2 — Select new value for year. Apply Date Exec, ... Exec User 2 — Execute to apply new date. LDX 86 HS/XS HiSpeed/XtremeSpeed HD camera User’s Guide (v1.0) - Page 100 Execute to make the selected trial license active (trial licenses are active for 3 minutes). Time Left 0..240 sec 0 sec User 2 — Shows time left after activating a trial license. LDX 86 HS/XS HiSpeed/XtremeSpeed HD camera User’s Guide (v1.0)
-
Page 101: Diagnostics Menu
Opt Module Unknown, Unknown Service — Shows received optical margin. FTLF1424P2 RX Power (uW) 0...6553.5 Service — RX Power (dBm) -100 .. 100 Service — TX Power (uW) 0...6553.5 Service — LDX 86 HS/XS HiSpeed/XtremeSpeed HD camera User’s Guide (v1.0) - Page 102 None User 2 — Displays type of the attached viewfinder. 7”HD, 8”LCD, 7”LCD, 9”LCD, 2”LCD Lens User 2 Package Info Camera Package Package Ok, Not Ok User 2 Shows Package status LDX 86 HS/XS HiSpeed/XtremeSpeed HD camera User’s Guide (v1.0)
- Page 103 Package 12NC 0..65535 User 2 Shows Package 12NC SW/FW Name RPICFW User 2 Shows SW/FW Name SW/FW 12NC 0..65535 User 2 Shows SW/FW 12NC SW/FW Version 0..65535 User 2 Shows SW/FW Version LDX 86 HS/XS HiSpeed/XtremeSpeed HD camera User’s Guide (v1.0)
-
Page 104: Service Menu
Format the internal camera SD Card. Note: this takes about one minute. Status Unknown, Running, Unknown Service — Shows current status of the SD Card OK, Error, No Card Formatting process. LDX 86 HS/XS HiSpeed/XtremeSpeed HD camera User’s Guide (v1.0) -
Page 105: Chapter 7 - Maintenance
7.1.1 About eLicenses With eLicenses it is possible to temporarily or permanently add one or more extra features to your LDX camera. Contact your local Grass Valley representative for information about the availability and prices of the different eLicenses. 7.1.2 Installation procedure Licenses have the form of a .lic file which is a plain text file containing one or more licenses for... - Page 106 To activate a trial license, navigate to the LICENSES > TRIAL LICENSES menu and switch on the license you want to use. ✎ Running a trial license is a good way of checking if your camera system is capable of running a specific functionality. LDX 86 HS/XS HiSpeed/XtremeSpeed HD camera User’s Guide (v1.0)
-
Page 107: Formatting The Sd Card
It takes about one minute to complete. During the process, you can monitor the process using the STATUS item. When the SD Card formatting has finished, the camera can be used normally. LDX 86 HS/XS HiSpeed/XtremeSpeed HD camera User’s Guide (v1.0) - Page 108 Chapter 7 - Maintenance LDX 86 HS/XS HiSpeed/XtremeSpeed HD camera User’s Guide (v1.0)
-
Page 109: Chapter 8 - Connectors
Chapter 8 - Connectors Chapter 8 Connectors 8.1 Camera front Viewfinder connector BOTTOM VIEW: Network HDMI Lens Front LDX 86 HS/XS HiSpeed/XtremeSpeed HD camera User’s Guide (v1.0) -
Page 110: Viewfinder Connector
Receive data - (RX-) Not connected Not connected 8.1.3 USB connector USB type A connector (host) Pin Description compatible with USB 2.0 standard + 5 VDC Data - Data + USB host connector LDX 86 HS/XS HiSpeed/XtremeSpeed HD camera User’s Guide (v1.0) -
Page 111: Hdmi Connector
Nominal input level -40 dBu Audio shield Signal at pin 2 of audio input is in phase Audio In (+) with signal at pin 2 of audio output. Audio Return (-) XLR 3-pin female connector LDX 86 HS/XS HiSpeed/XtremeSpeed HD camera User’s Guide (v1.0) -
Page 112: Camera Back Panel
This connector is used as analog viewfinder output or as AES/EBU digital audio input. BNC connector 8.2.3 Viewfinder output/Main output connector This connector is used as viewfinder output or Main video output. BNC connector LDX 86 HS/XS HiSpeed/XtremeSpeed HD camera User’s Guide (v1.0) -
Page 113: Transmission Connector
XCU and adapter (RS-232 levels, 100 kBit/sec max). Note: the second private data channel TxD1 is reserved for future use. TxD2 (future use) Manufacturer code: HR10A-7R-6SB Hirose 6-pin female RxD1 connector RxD2 (future use) LDX 86 HS/XS HiSpeed/XtremeSpeed HD camera User’s Guide (v1.0) -
Page 114: Auxiliary Connector
[Select] (14) Menu Select Green: Call (15) Call indication (16) GND [Up] (17) Menu Up [Down] (18) Menu Down Yellow: ISO (19) ISO indication Red: On Air (20) On Air signal LDX 86 HS/XS HiSpeed/XtremeSpeed HD camera User’s Guide (v1.0) -
Page 115: Audio 1 + 2 Connectors
8.2.13 DC Power input connector Pin Description Pins 1 & 2 are bridged +12 to +17 V Pins 3 & 4 are bridged +12 to +17 V XLR 4-pin male connector LDX 86 HS/XS HiSpeed/XtremeSpeed HD camera User’s Guide (v1.0) -
Page 116: Side Panel
(CVBS). Signal selection for this connector is done in the camera menu: Configuration > Signals > TP Output In stand-alone mode this connector can be used as an analog reference input (3- BNC connector level sync) to connect a second camera. LDX 86 HS/XS HiSpeed/XtremeSpeed HD camera User’s Guide (v1.0) -
Page 117: Ethernet Connector (Future Use)
IEEE-802.3 (edition 2000) Transmit data + (TX+ ) Transmit data - (TX-) Receive data+ (RX+) 8-pin standard RJ-45 ethernet no connection connector no connection Receive data - (RX-) no connection no connection LDX 86 HS/XS HiSpeed/XtremeSpeed HD camera User’s Guide (v1.0) - Page 118 Chapter 8 - Connectors LDX 86 HS/XS HiSpeed/XtremeSpeed HD camera User’s Guide (v1.0)
-
Page 119: Chapter 9 - Specifications
Second wheel: Clear, 4 point star, soft focus Electronic color correction 3200 K, 5600 K, 7500 K, FL, 2 AWB presets, Variable, Continuous Auto White. Exposure Electronic exposure down to 1/1000 s LDX 86 HS/XS HiSpeed/XtremeSpeed HD camera User’s Guide (v1.0) -
Page 120: Video Modes
Front microphone XLR-3 female, balanced, phantom +48 V switchable USB 2.0 Ethernet RJ-45 Lens connector 12-pin Hirose Viewfinder connector 20-pin and HDMI Top mount screw hole standard 1/4-20 UNC thread (camera thread) LDX 86 HS/XS HiSpeed/XtremeSpeed HD camera User’s Guide (v1.0) -
Page 121: Dimensions
Rear audio inputs 2x XLR-3, balanced, +48 V phantom power Intercom XLR-5 with channels Engineering, Production and Program DC power input 12 V (11 to 17 V), XLR-4 male LDX 86 HS/XS HiSpeed/XtremeSpeed HD camera User’s Guide (v1.0) -
Page 122: Dimensions
132.7 mm 139 mm 222.1 mm 56.9 mm 75.7 mm Distance from 45.5 mm 55.5 mm lens plate Midplane 5 mm handgrip Lens axis Lens axis quickmount and backpanel 17 mm LDX 86 HS/XS HiSpeed/XtremeSpeed HD camera User’s Guide (v1.0) - Page 123 Chapter 9 - Specifications LDX 86 HS/XS HiSpeed/XtremeSpeed HD camera User’s Guide (v1.0)
- Page 124 Chapter 9 - Specifications LDX 86 HS/XS HiSpeed/XtremeSpeed HD camera User’s Guide (v1.0)
- Page 125 Special Effects filter (FX) Exposure time Transmission systems Filter button Freeze Frame Variable color temperature Video mode Gain V-Shift (vertical acquisition shift) Gamma Gamma correction Gamma curve Gamma presets Image control Knee LDX 86 HS/XS HiSpeed/XtremeSpeed HD camera User’s Guide (v1.0)
- Page 126 Index LDX 86 HS/XS HiSpeed/XtremeSpeed HD camera User’s Guide (v1.0)
- Page 127 LDX 86 HS/XS HiSpeed/XtremeSpeed HD camera User’s Guide (v1.0)
- Page 128 Copyright Grass Valley Nederland B.V.
Need help?
Do you have a question about the LDX 86 HS and is the answer not in the manual?
Questions and answers