Table of Contents
Advertisement
Quick Links
Advertisement
Table of Contents

Related Manuals for RCA VR556


Summary of Contents for RCA VR556
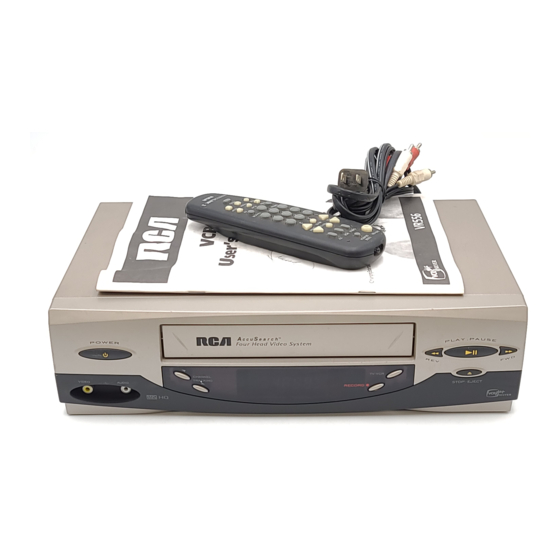
- Page 1 User’s Guide Changing Entertainment. Again. VR556...
-
Page 2: Product Registration
Keep your sales receipt to obtain warranty parts and service and for proof of purchase. Attach it here and record the serial and model numbers in case you need them. The numbers are located on the back of the VCR. VR556 Model No. _______________________________________________________________________________________ Serial No. -
Page 3: Introduction
Description: The VCR’s remote control can operate most brands of TVs with a INFO SEARCH MUTE GO BACK few programming steps. This remote control can operate most RCA, GE, and CLEAR MENU SPEED Proscan TVs without any pr o gramming at all. - Page 4 Introduction ShowSaver™ Memory Protection Description: Set timer programs are stored indefinitely using the VCR’s per m anent memory. This way, you’ll never have to worry about losing your pr ograms due to an extended power outage. Requirements: Store a daily or weekly timer pr o gram in the VCR’s memory. Pro-Tect Plus™...
-
Page 5: Table Of Contents
Table of Contents Product Registration ......................i Introduction ..........................1 Key Features Overview ......................1 Connections & Setup ......................5 Things to Consider Before Connecting Components ............6 Cable Considerations ......................6 Choose Your Connection ...................... 7 Using the RF Coaxial Cable to Connect the VCR to a TV ..........7 TV + VCR .......................... - Page 6 Front Panel .......................... 48 Display Panel ........................49 Back Panel ..........................50 RCA VCR Limited Warranty ....................51 How to Find Your TV’s Video Input Channel ..............52 Advanced Connection ......................53 TV + VCR + Satellite Receiver ..................53 Glossary ..........................
-
Page 7: Connections & Setup
Chapter 1 Connections & Setup Chapter Overview: • Things to Consider Before Connecting • Cable Considerations • Making the Connection • Navigating On-Screen Menus • Completing the QuickSet™ Guide • Basic Recording Changing Entertainment. Again. -
Page 8: Things To Consider Before Connecting Components
Connections & Setup Things to Consider Before Connecting Components Protect Components From Power Surges • Connect all components before plugging any power cor d s into the wall outlet. • Always turn off the TV and other components befor e you connect or disconnect any cables. Position Cables to Avoid Audio Hum or Interference •... -
Page 9: Choose Your Connection
Connections & Setup Using the RF Coaxial Cable to Connect the VCR to a TV The picture on the next page shows the RF coaxial cable supplied with your VCR. This will be the cable used for the basic connections r epresented in this chapter. -
Page 10: Tv + Vcr
Connections & Setup TV (back panel) AUDIO VIDEO L / MONO CABLE/ ANTENNA S-VIDEO ANT. IN AUDIO RF OUT VIDEO From Cable or Antenna TV + VCR Note: Your television back panel may not look exactly like the model shown here. 1. -
Page 11: Tv + Vcr + Satellite Receiver
Connections & Setup AUDIO VIDEO L / MONO CABLE/ ANTENNA S-VIDEO ANT. IN AUDIO RF OUT VIDEO SATELLITE RECEIVER IN FROM ANT OUT TO TV SATELLITE VIDEO S-VIDEO From Cable From or TV Antenna Satellite TV + VCR + Satellite Receiver Note: Your television and satellite receiver back panel may not look exactly like the models shown here. - Page 12 Connections & Setup AUDIO VIDEO L / MONO CABLE/ ANTENNA S-VIDEO ANT. IN AUDIO RF OUT VIDEO CABLE BOX IN FROM ANT OUT TO TV VIDEO From Cable Feed TV + VCR + Cable Box Note: Your television and cable box back panel may not look exactly like the models shown here.
-
Page 13: Set The Vcr's Ch 3/4 Switch
Turn on the TV and pr e ss the VCR button on the r e mote control to turn it on. Note: If you have an RCA, GE, or Proscan TV, your VCR’s remote control may be able to operate it without being programmed. Press the TV button on the remote control and then the ON•OFF button. -
Page 14: Using The Remote Control To Navigate On-Screen Menus
Connections & Setup Using the Remote Control to Navigate On-Screen Menus The technical term is “Navigation” – how you move thr o ugh the on-screen menus. The theory is the same for all the menu screens; use the corresponding number button on the r e mote control select it. -
Page 15: Vcr Basics
Connections & Setup VCR Basics Once your initial settings ar e complete, you can begin using your VCR. In or der to begin, you must first understand some basic concepts. Playing a Tape 1. Tune the TV to your VCR viewing channel (03, 04, or the video line input). 2. - Page 16 This page left blank intentionally...
-
Page 17: Using The Vcr's Menu System
Chapter 2 Using the VCR’s Menu System Chapter Overview: • Setting Up the VCR’s Preferences • Using On-Screen Menus • Cable Box Setup • Setting Time and Date • Setting VCR Preferences Changing Entertainment. Again. -
Page 18: Using On-Screen Menus To Set Up Features
Using On-Screen Menus Using On-Screen Menus to Set Up Features You set up many of the VCR’s featur e s by using the menu system as discussed in the pr evious section. Each feature that appears in the QuickSet Guide is explained in this section as well as a few other features you should set up to get the most out of your VCR. -
Page 19: Vcr Channels List
Using On-Screen Menus 4. Select one of the thr e e choices. If “ALL Channels” is selected, enter the CABLE BOX SETUP output channel of the cable box (usually 03 or 04), or if A/V jacks connect Do you use your cable the VCR to the TV , press the INPUT button on the VCR’s r e mote control. -
Page 20: Changing The Signal Type
Using On-Screen Menus Changing the Signal Type This feature is useful if your cable signal goes out; it allows you to switch to a regular antenna for alternate television reception. 1. Press the MENU button to display the VCR MAIN MENU. 2. -
Page 21: Time And Date
Using On-Screen Menus Time and Date Your VCR gives you two ways to set the time and date; manually or by using the Auto Clock Set feature. Using Auto Clock Set enables the time to be updated each time the VCR is tur ned off by using time and date infor mation carried in certain br oadcast signals. -
Page 22: Setting Daylight-Saving Time
Using On-Screen Menus Setting Daylight-Saving Time 1. Press MENU to display the VCR MAIN MENU. 2. Press 3 to choose TIME. 3. Press 4 to choose SET DAYLIGHT SAVING. 4. Select the appropriate option. SET DAYLIGHT SAVING Notes: DST stands for Daylight–Saving Time. Does your area observe Daylight Saving Time If you choose Automatic for the time zone, the VCR sets the clock using any... -
Page 23: Remote Vcr1/Vcr2 Option
Some universal remote controls have buttons labeled VCR1 and VCR2. These r e motes can operate up to two VCRs. If you have a universal r emote control with this ability, your RCA VCR can be controlled with either the VCR1 or VCR2 button. See the documentation that came with your universal remote control for details about pr o gramming it to contr ol your RCA VCR. -
Page 24: Energysaver
Using On-Screen Menus EnergySaver PREFERENCES 1 Remote Control: VCR1 2 Auto Play: By default, the VCR automatically tur n s off after two hours of inactivity. This can 3 Auto TV/VCR: be changed in the PREFERENCES menu by pressing the 4 button r e peatedly to 4 EnergySaver: 2:00 5 Front Panel:... -
Page 25: Set Auto Repeat
Using On-Screen Menus Set Auto Repeat AUTO REPEAT A tape can be set to play the same segment over and over in a r epeating loop Set the length of time you want the tape to with the Set Auto Repeat featur e . Set Auto Repeat uses the VCR’s memory play in a repeating loop counter to determine the duration of the loop. - Page 26 This page left blank intentionally...
-
Page 27: Using The Remote Control
Chapter 3 Using the Remote Control Chapter Overview: • Buttons on the Remote Control • Programming the Remote Control to Operate Other TVs • Using a Programmed Remote Control Changing Entertainment. Again. -
Page 28: Using The Remote Control
The remote control is capable of contr o lling more than just your VCR. If you have compatible RCA, GE, or Pr o scan TV, you may be able to contr o l it without having to program the remote. If you have another brand of TV , your VCR’s remote control may be able to operate it once it has been pr ogrammed. -
Page 29: Using The Input Button
Reduces pictur e “jitter” during play-pause mode. TV Puts the remote control in TV-operating mode. This button will automatically tur n on most RCA, GE, and Proscan TVs. TV/VCR Toggles the VCR between TV and VCR-viewing modes. VCR Puts the remote control in VCR-operating mode. -
Page 30: Operating A Tv With The Vcr's Remote Control
TV button (this puts the r e mote control into TV operating mode and should automatically tur n on most RCA, GE, and Pr o scan TVs). - Page 31 Electrohome ......06,12 Quasar ........11 Emerson ........06 Radio Shack ....01, 05, 13 Envision ......05, 06 RCA ........ 01, 06, 12 Fisher ........05, 08 Realistic ........05 GE ......00, 01, 06, 11 Sampo ........06 Goldstar .......
- Page 32 This page left blank intentionally...
-
Page 33: Using The Vcr's Features
Chapter 4 Using the VCR’s Features Chapter Overview: • Recording • Express Recording (XPR) • Timer Recordings • Using the VCR Plus+ SILVER System • Copying and Editing Tapes Changing Entertainment. Again. -
Page 34: Recording Features
VCR Features Recording Features Your VCR provides many ways to captur e programming: 1. Recording lets you press one button to r e cord a program. 2. Express Recording (XPR) allows recording to start while a pr o gram is being watched. This feature automatically stops recording after a designated period of time. -
Page 35: Timer Recording
VCR Features Timer Recording You can program up to eight dif f erent broadcasts to be recorded. Notes– In order for a timer recording to work: TIMER RECORDINGS • The VCR’s clock must be set correctly. 1 Create a New Program •... -
Page 36: Vcr Plus+ Silver System
VCR Features VCR Plus+ SILVER System The VCR Plus+ SIL VER system makes VCR set up easier by setting and updating the clock and channel list for you automatically. During the first-time QuickSet Guide setup, the VCR pr ompts you to enter your zip code. Soon after , the VCR clock will set itself and your VCR Plus+ system channel list will be input for you. -
Page 37: Mapping Vcr Plus+ Channels Manually
VCR Features Mapping VCR Plus+ Channels Manually Using the VCR Plus+ SIL VER system can make taping timer r e cordings for cable or off-air antenna easier. If your VCR Plus+ SIL VER system setup failed during the QuickSet, then you will need to map the channels for your local service manually. A worksheet and abbreviated codes for typical cable services in the U.S. -
Page 38: Vcr Features
VCR Features Two-Digit VCR Plus+ System Two-Digit VCR Plus+ System Channel Numbers for Channel Numbers for Cable TV (USA List) Cable TV (Canadian List) 35 ....American Movie Classics 67 ....Allarcom Pay Television/ 39 ......Arts &-Entertainment Superchannel 57 ......Black Entertainment 44 ...... -
Page 39: Vcr Plus+ System Worksheet
VCR Features VCR Plus+ System Worksheet Broadcast or Channel Number VCR Plus+ System Cable-TV You Receive the Channel Number** Station Name Station On* ESPN *Check your local or cable listings for the channel number you receive this station on. **Check your local listings for broadcast or VCR Plus+ channel number assigned. Chapter 4... -
Page 40: Copying And Editing Tapes Using Two Vcrs
VCR Features Copying and Editing Tapes Using Two VCRs Use one VCR as the playback VCR and the other as the recording VCR. Caution: 1. Turn on the TV and VCRs. The unauthorized recording of satellite broadcasts, television 2. Tune the TV to the VCR viewing channel (either 03, 04, or the video line programs, or other copyrighted input). -
Page 41: Slow Motion
VCR Features Slow Motion You can view a tape during play or play-pause mode using slow motion. 1. In pause mode, press the FORWARD or REVERSE button to start slow-motion playback. 2. Press the FORWARD button to increase search speed or the REVERSE button to decr e ase search speed. -
Page 42: Go-To Search
VCR Features 4. Press FORWARD (FWD) to search forward or REVERSE (REV) to sear c h in INDEX SEARCH reverse. The VCR will locate your index mark and begin playback. If you Searching for did not enter a specific index number , the VCR will locate the next index index marks... -
Page 43: Tracking
VCR Features Tracking Your VCR has automatic tracking which r e moves streaks and “noise” from the picture. Automatic tracking is activated when you insert a tape or tur n on the VCR. Occasionally you may need to manually adjust tracking, especially if the tape was r ecorded on a different VCR. Use the TRACKING –/+ buttons to r emove streaks and noise. -
Page 44: On-Screen Displays
VCR Features On-Screen Displays Stop Ch 05 0:30:00 The INFO button displays the status of the VCR (Stop, Play Record, etc.) as well as the channel number , time counter position, date, time, and tape speed on the TV screen. Note: The date and time must be set before they can be displayed. -
Page 45: Other Information
Chapter 5 Other Information Chapter Overview: • Troubleshooting • Specifications • Care and Cleaning • Front, Rear, and Display Panel Diagram • Warranty Information • Finding the TV’s Video Line Input • Glossary • Index Changing Entertainment. Again. -
Page 46: Troubleshooting Tips
Other Information Troubleshooting Tips In this section, you will find answers to common r ecording, playback, and general VCR questions. Consulting with this section first when ther e is problem may help you answer common questions. General VCR Problems No power •... -
Page 47: Recording Problems
Other Information Recording Problems Will not record • Check to make sure there is a tape in the VCR. • Try ejecting and reinserting the cassette. • Check to make sure the tape is not br o ken. • Check to make sure the VCR is not in pause mode. Pr ess PAUSE or PLA Y to return to normal playback. •... - Page 48 Other Information Time counter not working or time counter not working in search modes • The time counter does not advance during unr e corded portions of tape. When an unr e corded segment of tape is encounter e d, the time counter will hold its count until r ecorded material is detected again.
-
Page 49: Specifications
Other Information Specifications Format: Record/Playback Video: 4-head System: Audio: VHS Mono r e cord/playback system Video Signal System: EIA standard: NTSC color Antenna: 75-ohm external VHF/UHF combined antenna terminal Tuner: USA: 181 channels capability* (125 cable channels) Canada: 178 channels capability* (122 cable channels) Type: AutoProgramming frequency synthesis... -
Page 50: Front Panel
Other Information Front Panel CHANNEL•TRACKING and Up ( ) and Down ( ) Selects next higher or lower channel in the VCR’s channel memory. Adjusts tracking when a tape is playing. FWD Fast-forwards the tape when the VCR is in stop mode. Sear ches the picture forward during playback. -
Page 51: Display Panel
Other Information Display Panel Clock/Counter Displays current time, time counter , tape speed, or channel numbers when switching channels. FUNCTION DISPLAYS: dn & Ld (Down and Load) Front panel display alternates between these two wor d s when time data is being downloaded. -
Page 52: Back Panel
Other Information ANT. IN AUDIO RF OUT VIDEO Back Panel ANT. IN jack Receives an antenna or cable system signal when the VCR is attached using RF coaxial cables. AUDIO and VIDEO IN jacks Receives signals from another component (such as a VCR or camcorder) when connected to these jacks. -
Page 53: Rca Vcr Limited Warranty
Pay any Authorized RCA VCR Service Center the labor char ges to repair your VCR. • Pay any Authorized RCA VCR Service Center for the new or , at our option, r efurbished replacement parts required to repair your VCR. -
Page 54: How To Find Your Tv's Video Input Channel
The video line input for TVs varies by brand and model. Below ar e some ON•OFF steps to try to find your TV’s video line input: • If your TV brand is RCA, GE, or Pr oscan, press the TV button on the REVERSE PLAY FORWARD VCR’s remote control, then press the INPUT button. -
Page 55: Advanced Connection
Other Information Advanced Connection TV + VCR + Satellite Receiver – Cables: A/V and RF Coaxial Note: Your satellite receiver and television back panels may not look exactly like the models shown here. This connection can also be used for a cable box. 1. -
Page 56: Glossary
Other Information Glossary A/V Jacks & Cables Commonly called “RCA-type” cables. Impr o ves picture and sound quality over RF Coaxial cables. EnergySaver Automatically turns the VCR off after a user-defined period of inactivity. Express Recording (XPR) A method of timer r ecording which tapes for a set period of time using 30-minute incr ements. -
Page 57: Index
Index Index ADD/REMOVE CHANNELS screen EJECT button 13 ON•OFF button 40 EnergySaver feature 22 On-screen displays 42 AUDIO IN jacks 53 Express Recording (XPR) 1, 32 Overheating 6 Audio/Video (A/V) jacks 17, 50 Auto channel search 17 Auto clock feature 19 Auto play feature 13, 21 F. - Page 58 Index SEARCH button 39 TRACKING buttons Set up 13, 27, 39, 41, 48 auto play feature 21 Troubleshooting 44 auto TV/VCR feature 21 TV button 27, 52 cable box 16 TV•VCR button 21 Daylight-saving 20 TV’s video input channel 52 front panel 22 language feature 16 PREFERENCES menu 20...
- Page 59 This page intentionally left blank...
- Page 60 Please do not send any products to the Indianapolis address listed in this manual or on the carton. This will only add delays in service for your product. Thomson multimedia Inc. 10330 North Meridian Street Indianapolis, IN 46290 ©2001 Thomson multimedia Inc. Trademark(s)®...
Need help?
Do you have a question about the VR556 and is the answer not in the manual?
Questions and answers