Table of Contents
Advertisement
Advertisement
Table of Contents

Related Manuals for RCA VR501


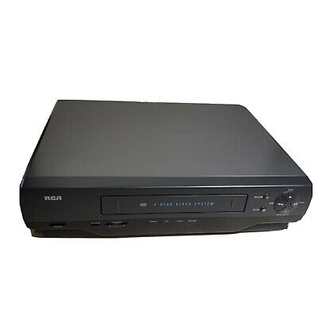
Summary of Contents for RCA VR501
- Page 1 VR501B USER’S GUIDE VIDEO CASSETTE RECORDER...
-
Page 2: Important Information
Do not defeat the safety feature of the plug. The wide blade fits into the wall socket only one way. If you need an extension cord, make sure it matches the plug of the VCR. For U.S.A. — Operate VCR only on 120 volts, 60Hz AC power (normal house power). -
Page 3: Table Of Contents
Recording Pause and Stopping a Recording ______________________ 17 Basic Recording – Operating Instructions ______________________________ 17 Watch a TV Channel While VCR is Recording a Different Channel ________ 17 Express Recording and Stopping an Express Recording _________________ 18 Recording While You're Away... -
Page 4: Hooking Up The Vcr
It is the easier of the two and additional accessories may not be needed. The advanced hookup shows the VCR hooked up to a monitor/receiver (TV with audio and video jacks) using a signal splitter. This connection may improve the picture quality as well as convenience of operation. -
Page 5: Antenna Or Cable System Without A Cable Box
A. Basic hookup. Use this hookup for a simple connection which requires fewer accessories. 1. Set the 3CH.4 switch on back of VCR to either channel 3 or 4. Tune the TV to this channel and use the TV•VCR button to watch the VCR. -
Page 6: Cable System With Cable Box To Unscramble All Channels
A. Basic hookup. Use this hookup for a simple connection which requires fewer accessories. 1. Set the 3CH.4 switch on back of VCR to either channel 3 or 4. Tune the TV to this channel and use the TV•VCR button to watch the VCR. -
Page 7: Cable System With Cable Box To Unscramble Only Pay Channels
A. Basic hookup. Use this hookup for a simple connection which requires fewer accessories. 1. Set the 3CH.4 switch on back of VCR to either channel 3 or 4. Tune the TV to this channel and use the TV•VCR button to watch the VCR. -
Page 8: Connecting Two Vcrs For Copying Tapes
2. Set the 3CH.4 switch on the playback VCR to either channel 3 or 4. Tune the recording VCR to this channel to receive the signal from the playback VCR. 3. Connect as shown. -
Page 9: Setting Up The Vcr
(See TV owner’s manual for details.) 4. Turn on the VCR. A. Press POWER on the remote. The POWER and VCR indicators light in the VCR’s display panel. The TIMER indicator flashes until the time is set. 2 “AA” Batteries... -
Page 10: Place Channels In The Vcr's Memory
Setting Up the VCR Startup 5. Place channels in the VCR’s memory. The first time you turn on the VCR or after a power interruption, the VCR displays a message on the TV screen prompting you to perform AUTO-SEARCH CHANNELS. If the message does not appear, go to step A below. -
Page 11: Select The Language/Seleccione El Idioma
The VCR indicator does not light in the display panel. Change channels using the TV’s remote. D. Return the TV to the VCR viewing channel — CH3 or CH4. E. Press TV•VCR to switch back to the picture from the VCR. -
Page 12: Using The Remote Control
DISPLAY Shows VCR operating displays on the TV screen. Displays the time counter. FF (Fast Forward) Fast forwards the tape when the VCR is stopped. Searches the picture in forward motion during playback. F. ADV (Frame Advance) Lets you view one frame with each press of the button when tape is in stop-action pause. - Page 13 Lets you manually reduce the streaks that may appear on the picture during play or pause. Reduces picture ‘jitter” during stop action playback. TV•VCR Switches the picture signal so that it either comes from the VCR or the TV channel. See page 9.
-
Page 14: Playing A Tape
Safety Tab 3. Press PLAY, if necessary. 4. Press TRACKING up or down on the remote or the VCR to remove any streaks from the picture, if necessary. Details are on page 16. 5. Press STOP•EJECT on the VCR or STOP on the remote. -
Page 15: Using The Playback Features
Playing a Tape Using the Playback Features Auto Play Feature This feature lets you tell the VCR whether to automatically start playing when you insert a tape with its safety tab removed. VCR MAIN MENU 1 TIMER PROGRAMMING 2 REVIEW PROGRAMS... -
Page 16: Display Button
Playing a Tape Using the Playback Features DISPLAY Button 1. Press DISPLAY to display the status of the VCR, channel number, time counter, date, time, and tape speed on the TV screen. You must set the time and date before they can be displayed. -
Page 17: Zero Search
Slow motion works best in the SP or SLP speed. 1. Press SLOW to begin slow-motion playback. 2. Use TRACKING up or down on the remote or the VCR to adjust for the best possible picture. 3. Press SLOW or PLAY to return to playback. -
Page 18: Pause For Stop Action
The VCR has automatic tracking which adjusts the picture when you view a tape recorded on another VCR. Automatic tracking is turned on when a tape is inserted or the VCR’s power is turned on. Manual Tracking Occasionally, you may need to manually adjust tracking on a tape recorded on a different VCR or camcorder. -
Page 19: Recording A Program
Basic Recording – Operating Instructions To Make a Recording Turn on the TV and tune it to the VCR viewing channel, either 3, 4, or the TV’s video input channel. 1. Insert a tape with its safety tab in place. -
Page 20: Express Recording And Stopping An Express Recording
Recording a Program Express Recording Express recording lets you record up to four hours without using the timer program feature. The VCR turns off automatically at the end of the recording. POWER Operating Instructions 1. Turn on the VCR. 2. Insert a tape with its safety tab in place. -
Page 21: Recording While You're Away
(Valid numbers are 01 – 13.) Press CLEAR on the remote to correct an entry. If you connected your cable box to the VCR using the cable box’s audio/video out jacks, press INPUT on the remote to select the VIDEO IN option. -
Page 22: Setting A Timer Recording
Recording a Program Recording While You’re Away (Timer Recording) The timer program feature lets you program the VCR to record up to eight different programs within a one year period. Before setting the timer, make sure that: • The clock is set correctly. -
Page 23: Checking Or Clearing Timer Recordings
To timer record from the component connected to the VCR’s line input, press INPUT on the remote to enter VIDEO IN instead of the channel number on the TV screen during timer programming. -
Page 24: Using Two Vcrs For Copying And Editing Tapes
Copying and Editing Using Compatible Remote If you have a compatible RCA, ProScan, or GE remote with VCR1 and VCR2 buttons, you can program this VCR to respond to VCR1 (VCR2). This lets you control both VCRs with one remote for easier copying and editing. -
Page 25: References
Cleaning the VCR Use a soft cloth or dusting attachment of your vacuum cleaner to dust your VCR. Remove dust from the ventilation holes on the top, back, sides, and bottom of the cabinet. Plastic surfaces are easily scratched and can be marred by alcohol and various solvents. -
Page 26: Location Of Controls
STOP•EJECT Stops the normal functions such as record, playback, rewind, fast-forward, or pause. Press when the VCR is stopped to eject the cassette. TV•VCR Switches the picture signal so that it either comes from the VCR or the TV channel. -
Page 27: Back Panel
VCR or camcorder, when it is connected to these jacks. Use INPUT on the remote to select. VIDEO1 OUT and AUDIO1 OUT Jacks Sends signals from VCR to another component, like a VCR or camcorder, when it is connected to these jacks. POWER TIMER VCR Indicator Lights when using the TV•VCR button. -
Page 28: Trouble Checks
References Trouble Checks Sometimes problems can be easily solved by checking a few basic things. Check below before you call for help or take your VCR to an Authorized RCA VCR Servicenter. Trouble o power VCR does not respond to remote... - Page 29 • Clock was not set accurately (check AM/PM and date). See page 9. • VCR is removing tape from heads. This is normal. The head cylinder inside the VCR continues to rotate for a few minutes after you put the VCR in the stop mode.
-
Page 30: Limited Warranty
Pay any Authorized RCA VCR Servicenter the labor charges to repair your VCR. • Pay any Authorized RCA VCR Servicenter for the new or, at our option, refurbished replacement parts required to repair your VCR. How you get service: •... -
Page 31: Index
Stopping Timer Programs ...21 Table of Contents...1 Time and Date, Setting...9 Time Counter ...14-15 TIMER Indicator ...9,18,20,25 Timer Programs Checking and Clearing ...21 From VCR Line Input ...21 Indicator...18,20,25 Setting...20 Stopping...21 TRACKING Button ...10-11,13,15,16,24 Tracking, Automatic and Manual ...16 Trouble Checks ...26-27 Tuning Mode Feature ...8... - Page 32 P.O. Box 0944 Indianapolis, IN 46206-0944 If your VCR needs service, please contact your dealer or the nearest Servicenter from the yellow pages. Please do not send any products to the Indianapolis address listed in this manual or on the carton. This will only add delays in service for your product.
Need help?
Do you have a question about the VR501 and is the answer not in the manual?
Questions and answers