Table of Contents
Advertisement
Quick Links
Fanvil Product User Manual
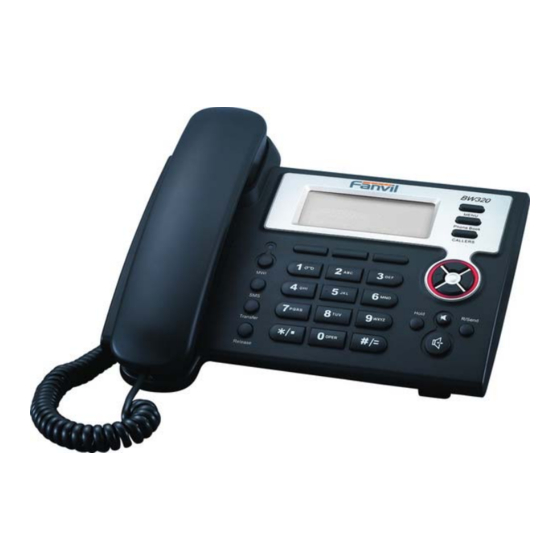
IP Phone
Model: BW320
Version: V1.7.50.40 Feb 13 2009
© 2005 Fanvil technology Co,. Ltd
All rights reserved.
This document is supplied by Fanvil Technology Co., Ltd, No part of this document may
be reproduced, republished or retransmitted in any form or by any means whatsoever,
whether electronically or mechanically, including, but not limited to, by way of
photocopying, recording, information recording or through retrieval systems, without
the express written permission of Fanvil Technology Co., Ltd. Fanvil Technology Co.,
Ltd reserves the right to revise this document and make changes at any time and
without the obligation to notify any person and/or entity of such revisions and/or
changes. Product specifications contained in this document are subject to change
without notice.
Advertisement
Table of Contents

Related Manuals for Fanvil BW320


Summary of Contents for Fanvil BW320
- Page 1 © 2005 Fanvil technology Co,. Ltd All rights reserved. This document is supplied by Fanvil Technology Co., Ltd, No part of this document may be reproduced, republished or retransmitted in any form or by any means whatsoever, whether electronically or mechanically, including, but not limited to, by way of photocopying, recording, information recording or through retrieval systems, without the express written permission of Fanvil Technology Co., Ltd.
-
Page 2: Safety Notices
Safety Notices Please read the following safety notices before installing or using this phone. They are crucial for the safe and reliable operation of the device. Please use the external power supply that is included in the package. Other power supplies may cause damage to the phone, affect the behavior or induce noise. -
Page 3: Table Of Contents
Table of Content INTRODUCING BW320 VOIP PHONE ..................... 5 1.1. T BW320 ..................5 HANK YOU FOR YOUR PURCHASING 1.2. D .......................... 5 ELIVERY ONTENT 1.3. K ............................6 EYPAD 1.4. P ........................7 ORT FOR CONNECTING 2.INITIAL CONNECTING AND SETTING ....................8 2.1. - Page 4 4.3.3.3. STUN Config ..........................32 4.3.3.4. DIAL PEER setting ........................33 4.3.4. Phone ............................ 36 4.3.4.1. DSP Config ............................36 4.3.4.2. Call Service............................37 4.3.4.3. Digital Map Configuration......................38 4.3.4.4. Phone Book ...........................39 4.3.5. Maintenance ......................... 40 4.3.5.1. Auto Provision..........................40 4.3.5.2. Syslog Config ..........................41 4.3.5.3. Config Setting..........................42 4.3.5.4.
-
Page 5: Introducing Bw320 Voip Phone
1. Introducing BW320 VoIP Phone 1.1. Thank you for your purchasing BW320 Thank you for your purchasing BW320, BW320 is a full-feature telephone that provides voice communication over the same data network that your computer uses. This phone functions not only much like a traditional phone, allowing to place and receive calls, and enjoy other features that traditional phone has, but also it own many data services features which you could not expect from a traditional telephone. -
Page 6: Keypad
1.3. Keypad The numeric keypad with the keys 0 to 9, *, and # is used to enter Digits and letters, additionally, the following keys are available: Key mapping: Function Description name Menu In idle state,press the MENU key to call up the menu. -
Page 7: Port For Connecting
Use the key to realize blind transfer or attended Transfer transfer please refer to 3.1.4.-call transfer for more details). In menu, use this key to return to the idle state. And when you are talking, you can use it to end Release the call and then return to the idle state. -
Page 8: Initial Connecting And Setting
2. Initial connecting and Setting 2.1. Connect the phone Step 1: Connect the IP Phone to the corporate IP telephony network. Before you connect the phone to the network, please check if your network can work normally. You can do this in one of two ways, depending on how your workspace is set up. Direct network connection—by this method, you need at least one available Ethernet port in your workspace. -
Page 9: Initial Setting
2.2. Initial Setting This VoIP Phone provides you with rich function and parameters setting. If you have enough knowledge about network and SIP protocol, it is better for you to understand many parameters. But if you know little about network and SIP protocol, you can also easily make initial setting according to the following steps to enjoy rapidly high quality voice and low cost from this VoIP Phone. -
Page 10: Dhcp Mode
Soft2(Enter),screen will show “1 WAN”. 3. Pressing Soft2 (Enter),then pressing key, screen shows“2 Static Set”. 4. Pressing Soft2(Enter) to make screen show“1 IP”,press Soft2(Enter) and then press Soft2(Edit) again, and Soft1(Del) to delete old parameter. Input your IP address and press Soft2 (Save). -
Page 11: Basic Functions
After finishing it, press # and BW320 will send the number and call the number. When you hear a ringback tone and screen shows the callee’s number, it shows that the person you called is ringing. If callee answers the call, you can begin to talk and your phone will keep showing callee’s number... -
Page 12: Ending A Call
Multi line BW320 supports 2 SIP lines max,that is user could use 2 SIP accounts to register and make calls. System will use SIP 1 as default line to call. User can use the select the line to call. -
Page 13: Calling Hold
3.1.8. Call records BW320 supports 100 items of missed call, 100 items of incoming call, and 100 items of outgoing call. If the records are full, the newest will replace the oldest. If phone’s power cut or reboot, call records will be discarded. -
Page 14: The High-Level Operation
3.2. The high-level operation This VoIP Phone provides more advanced functions after setting at the permission scope of SIP server. 3.2.1. SMS function Send message The followings list several methods to send message: 1. Press in standby, then press Soft1 (new) key. After inputting SMS content, press Soft2 (send)key to input callee’s number, next, press Soft2 again to send SMS. -
Page 15: Phonebook Prefix Function
3.2.5. Phonebook prefix function At standby mode, press phonebook button, user can not only select his needed number to call out but also he can add prefix to numbers, then call out. It is convenient for user add prefix numbers that PBX need. 3.2.6. -
Page 16: Join Call
search caller, @1 is using SIP1, user also can configure @2(SIP2),the rest lines can be deduced by analogy, if no use, is 500/p, it will pass the SIP1 line in default, /p means presence function is using. At this moment, press this button, it can show the corresponding phone’s status (on, off, fail,) which LED don’t remind. -
Page 17: Click To Dial
(this link to user B), then user A’s phone will ring, after A hooks off, the phone will dial to B. 4. Setting 4.1. Introduction of configuration 4.1.1. Ways to configure BW320 has three different ways to different users. se phone keypad. se web browser(recommendatory way). se telnet with CLI command. -
Page 18: Configuration Via Web
Wizard Field Name Explanation Please select the proper network mode according to the network condition. BW320 provide three different network settings: Static: If your ISP server provides you the static IP address, please select this mode, and then finish Static Mode setting. If you don’t know about parameters of Static... - Page 19 Mode setting, please ask your ISP for them. DHCP: in this mode, you will get the information from the DHCP server automatically; need not to input this information artificially. PPPoE: in this mode, your must input your ADSL account and password. You can also refer to 2.2.
-
Page 20: Call Log
Static IP MODE。 PPPoE Server It will be provided by ISP. Username Input your ADSL account. Password Input your ADSL password. Notice: Click【Finish】button after finish your setting, IP Phone will save the setting automatically and reboot. After reboot, you can dial by the SIP account. 4.3.1.3. -
Page 21: Network
Get MAC Time Shows the time of getting MAC address Please select the proper network mode according to the network condition. BW320 provide three different network settings: Static: If your ISP server provides you the static IP address, please select this mode, then finish Static Mode setting. -
Page 22: Lan Config
DHCP: In this mode, you will get the information from the DHCP server automatically; need not to input this information artificially. PPPoE: In this mode, your must input your ADSL account and password. You can also refer to 2.2. Initial Setting to speed setting your network. Obtain DNS server Using the DHCP mode to get the DNS address. -
Page 23: Qos Config
LAN Config Field name explanation LAN IP Specify LAN static IP. Netmask Specify LAN Netmask. Select the DHCP server of LAN port or not. After user modify the DHCP Service LAN IP address, phone will amend and adjust the DHCP Lease Table and save the result amended automatically according to the IP address and Netmask. -
Page 24: Qos Configuration
transmitted to the other ports except the send port. For example, a broadcast information is sent out from port 1 then transmitted to port 2,3and 4. In chart 2, red and blue indicate two different VLANs in the switch, and port 1 and port 2 belong to red VLAN, port 3 and port 4 belong to blue VLAN. -
Page 25: Service Port
4) Startup VLAN, if set Voice/Data VLAN differentiated as data untaged, then the packet of the signal/voice will use the Voice VLAN ID as the tag, but the data packets will not take the VLAN tag. 5) If Disable the VLAN, regardless to set the Voice/Data VLAN differentiated or not, all packets will not take the VLAN tag;... -
Page 26: Dhcp Server
4.3.2.5. DHCP SERVER DHCP SERVER Field name explanation DHCP Leased Table IP-MAC mapping table. If the LAN port of the phone connects to a device, this table will show the IP and MAC address of this device. Shows the DHCP Lease Table, the unit of Lease time is Minute. Lease Table Name Specify the name of the lease table Start IP... -
Page 27: Sntp
4.3.2.6. SNTP Setting time zone and SNTP (Simple Network Time Protocol) server according to your location, you can also manually adjust date and time in this web page. SNTP Field name explanation Server Set SNTP Server IP address. Time Zone Select the Time zone according to your location. -
Page 28: Voip
Notice: You need specify the above all items. 4.3.3. VOIP 4.3.3.1. SIP Config Set your SIP server in the following interface. -
Page 29: Sip Config
SIP Config Field name explanation Choose line to set info about SIP, there are 2 lines to choose. You can switch by 【Load】 button. Register Status Shows if the phone has been registered the SIP server or not; or so, show Unapplied; Server Name Set the server name. - Page 30 Long Contact Set more parameters in contact field; connection with SEM server Enable URI Convert Convert # to %23 when send the URI. Dial Without Register Set call out by proxy without registration; Ban Anonymous Call Set to ban Anonymous Call; Select call forward mode, the default is Off Off:Close down calling forward Forward Type...
-
Page 31: Iax2 Config
4.3.3.2. IAX2 Config IAX2 Config Field name explanation Register Status Shows if the phone has been registered the IAX2 server or not. IAX2 Server Addr Input your IAX2 server address. IAX2 Server Port Set your IAX2 server port, the default is 4569. Account Name Input your IAX2 register account name. -
Page 32: Stun Config
4.3.3.3. STUN Config In this web page, you can config SIP STUN. STUN: By STUN server, the phone in private network could know the type of NAT and the NAT mapping IP and port of SIP. The phone might register itself to SIP server with global IP and port to realize the device both calling and being called in private network. -
Page 33: Dial Peer Setting
Local SIP Port Set the SIP port. Choose line to set info about SIP, There are 2 lines to choose. You can switch by 【Load】 button. Use Stun Enable/Disable SIP STUN. Notice: SIP STUN is used to realize SIP penetration to NAT. If your phone configures STUN Server IP and Port (default is 3478), and enable SIP Stun, you can use the ordinary SIP Server to realize penetration to NAT. -
Page 34: Dial Peer
DIAL PEER Field name explanation There are two types of matching conditions: one is full matching, the other is prefix matching. In the Full matching, you need input your desired phone number in this blank, and then you need dial Phone number the phone number to realize calling to what the phone number is mapped. - Page 35 delete length is 3, the phone will delete the first 3 digits then send out the rest digits. You can refer to examples of different alias application to know how to set delete length. Introduction of how to set up dial-peer to implement switch between multi- SIP lines 9T mapping: If you have registered a SIP1 server and set dial-peer according to the above table,all calls will be sent via SIP1 server when you press the numeric key “9”...
-
Page 36: Phone
need Phone Number, Alias and Delete When you dial “0106228”, Length. Phone number is the SIP1 server will receive XXXT and Alias is Rep:xxx “86106228” your dialed phone number starts with your set phone number, the first digits same as your set phone number will... -
Page 37: Call Service
Length Handdown Time Specify the least reflection time of Handdown, the default is 200ms. Output Volume Specify Output (receiver) Volume grade. Ring Volume Specify Ring Volume grade G722 Timestamps 160/20ms or 320/20ms is available G723 Bit Rate 5.3kb/s or 6.3kb/s is available Default Ring Type Set up the ring by default Signal Standard... -
Page 38: Digital Map Configuration
Call Accept Any Call If select it, the phone will accept the call even if the called number is not belong to the phone. Auto Answer If select it, the phone will auto answer when there is an incoming call. Use Record Server Select it or not to Enable or disable Use Record Server. -
Page 39: Phone Book
Digital Map Configuration Field name explanation End with "#" Set Enable/Disable the phone ended with “#” dial. Fixed Length Specify the Fixed Length of phone ending with. Time out Set the timeout of the last dial digit. The call will be sent after timeout. -
Page 40: Maintenance
Phone Book Field name explanation Shows the detail of current phonebook. Name Shows the name corresponding to the phone number Number Shows the phone number Ring Type Shows the ring type of the incoming call. Click “Modify” to change the selected information and click the “Delete” to delete the selected record. -
Page 41: Syslog Config
Version Server Address Set FTP/TFTP/HTTP server IP address for auto update. The address can be IP address or Domain name with subdirectory. Username Set FTP server Username. System will use anonymous if username keep blank. Password Set FTP server Password. Config File Name Set configuration file’s name which need to update. -
Page 42: Config Setting
4.3.5.3. Config Setting Config Setting Field name explanation you can save all changes of configurations. Click the Save button, Save Config all changes of configuration will be saved, and be effective immediately. . Backup Config Right clicks on “Right click here…” and select “Save Target As….” then you will save the config file in .txt format user can restore factory default configuration and reboot the phone. -
Page 43: Account Config
logo picture, ring, mmiset file by web. Server Set the FTP/TFTP server address for download/upload. The address can be IP address or Domain name with subdirectory. Username Set the FTP server Username for download/upload. Password Set the FTP server password for download/upload. File name Set the name of update file or config file. -
Page 44: Reboot
This table shows the current user existed. User Name Set account user name. User Level Set user level, Root user has the right to modify configuration, General can only read. Password Set the password. Confirm Confirm the password. Select the account and click the Modify to modify the selected account, and click the Delete to delete the selected account. -
Page 45: Firewall
Add or delete the IP address segments that access to the phone. Set initial IP address in the Start IP column, Set end IP address in the End IP column, and click Add to add this IP segment. You can also click Delete to delete the selected IP segment. -
Page 46: Nat Config
Field name explanation Select it to Enable in_ access rule In_access enable Select it to Enable out_ access rule out_access enable Input/Output Specify current adding rule by selecting input rule or output rule. Deny/Permit Specify current adding rule by selecting Deny rule or Permit rule. Protocol Type Filter protocol type. - Page 47 DMZ config: In order to make some intranet equipments support better service for extranet, and make internal network security more effectively, these equipments open to extranet need be separated from the other equipments not open to extranet by the corresponding isolation method according to different demands.
-
Page 48: Vpn Config
NAT Configuration Field name explanation IPSec ALG It is an encryption technology. Select it to enable IPSec ALG, the default is enable FTP is a service of connection layer which can transform intranet IP FTP ALG into extranet IP when intranet IP is sending out packet. Select it to enable FTP ALG, the default is enable PPTP ALG Select it enable PPTP ALG, the default is enable... -
Page 49: Vpn Configuration
VPN Configuration Field name explanation VPN IP Shows the current VPN IP address Select UDP Tunnel (VPN Tunnel) or VPN L2TP. You can choose only one for current state. After you select it, you’d better save configuration and reboot your phone. Enable VPN Select it or not to enable or disable VPN;... -
Page 50: Logout
VPN Server Addr Set VPN Server IP Address VPN Server Port Set VPN Server Port VPN Server Addr Set VPN L2TP Server IP address VPN User Name Set User Name access to VPN L2TP Server VPN Password Set Password access to VPN L2TP Server 4.3.7. -
Page 51: Phone Menu
4.4.2. Phone menu Phone main menu:... -
Page 52: Appendix
5. Appendix 5.1. Specification 5.1.1. Device specification Item this VoIP Phone Adapter(Input/Output Input:100-240VAC 50-60Hz Output:DC 5V/1A 10/100Base- T RJ-45 for LAN Port 10/100Base- T RJ-45 for PC Power Consumption Idle:1.5W/Active:1.8W LCD size 74 x 28mm dot-matrix LCD Operation 0~40℃ Temperature Relative Humidity 10~65% Main Chipset... -
Page 53: Maintenance And Management
Support PPPoE for xDSL support VLAN Support NAT penetration, and Stun penetration Support DMZ Support VPN( L2TP. UDP) Support DHCP get IP on WAN port Support DHCP distribute IP on LAN port Qos supports Diffserv. support network tools: contain ping,trace route,telnet client 5.1.4.
Need help?
Do you have a question about the BW320 and is the answer not in the manual?
Questions and answers