Fanvil C58 User Manual
Hide thumbs
Also See for C58:
- Quick installation manual (11 pages) ,
- Quick installation manual (11 pages)
Table of Contents
Advertisement
Quick Links
Fanvil Product User Manual
IP Phone
Model: C58/C58P
Version: V.2.2.0.0
© 2005 Fanvil technology Co., Ltd
All rights reserved.
This document is supplied by Fanvil Technology Co., Ltd, No part of this
document may be reproduced, republished or retransmitted in any form or by
any means whatsoever, whether electronically or mechanically, including, but
not limited to, by way of photocopying, recording, information recording or
through retrieval systems, without the express written permission of Fanvil
Technology Co., Ltd. Fanvil Technology Co., Ltd reserves the right to revise this
document and make changes at any time and without the obligation to notify
any person and/or entity of such revisions and/or changes. Product
specifications contained in this document are subject to change without notice.
Advertisement
Table of Contents

Related Manuals for Fanvil C58


Summary of Contents for Fanvil C58
- Page 1 © 2005 Fanvil technology Co., Ltd All rights reserved. This document is supplied by Fanvil Technology Co., Ltd, No part of this document may be reproduced, republished or retransmitted in any form or by any means whatsoever, whether electronically or mechanically, including, but...
-
Page 2: Safety Notices
Safety Notices Please read the following safety notices before installing or using this phone. They are crucial for the safe and reliable operation of the device. Please use the external power supply that is included in the package. Other power supplies may cause damage to the phone, affect the behavior or induce noise. -
Page 3: Table Of Contents
Table of Content INTRODUCING C58/C58P VOIP PHONE ................6 C58/C58P..............6 HANK YOU FOR YOUR PURCHASING ......................6 ELIVERY ONTENT ..........................7 EYPAD ....................... 8 ORT FOR CONNECTING ......................8 CON INTRODUCTION ......................9 INTRODUCTION INITIAL CONNECTING AND SETTINGS ................11 ...................... - Page 4 EDIAL ......................23 ALL COMPLETION ......................23 EADSET ........................23 OWER IGHT DTMF........................23 5.10 ........................ 23 ASSWORD C58/C58P’S BASIC SETTINGS .................... 24 ........................24 EYBOARD ......................24 CREEN ETTINGS ......................... 24 ETTINGS ......................... 24 OICE OLUME & D ........................24 ......................
- Page 5 8.3.2.6 TIME&DATE ........................42 8.3.3 VOIP..........................44 8.3.3.1 SIP ............................ 44 8.3.3.2 IAX2 ..........................52 8.3.3.3 STUN..........................53 8.3.3.4 DIAL PEER ........................55 8.3.4 PHONE ........................58 8.3.4.1 AUDIO ..........................58 8.3.4.2 FEATURE......................... 59 8.3.4.3 DIAL PLAN........................63 8.3.4.4 CONTACT ........................65 8.3.4.5 REMOTE CONTACT......................
-
Page 6: Introducing C58/C58P Voip Phone
1 Introducing C58/C58P VoIP Phone 1.1 Thank you for your purchasing C58/C58P Thank you for your purchasing C58/C58P, C58/C58P is a full-feature telephone that provides voice communication over the same data network that your computer uses. This phone’s functions not only much like a traditional... -
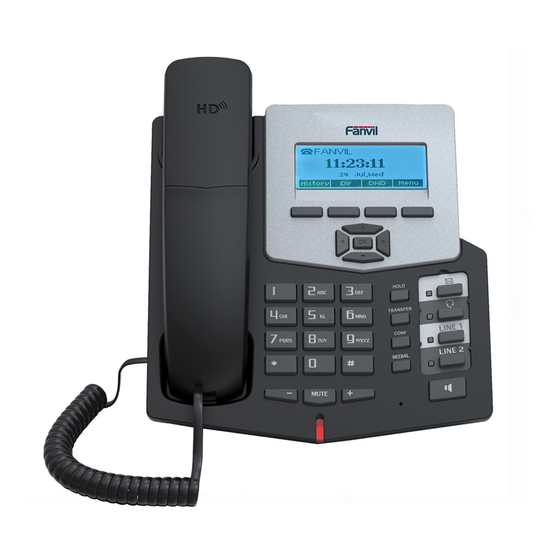
Page 7: Keypad
1.3 Keypad Key name Function Description Navigation key assist users for operating. In desktop, dialer, calling, desktop long pressed state they have special function. Navigation You can configure through the web page according to your patterns of use. Access to phone book, check the record list and add new records and revise the record. -
Page 8: Port For Connecting
DSS keys You can configure them in the web page. 1.4 Port for connecting Port Port name description Power switch Input: 5V AC, 1A 10/100M Connect it to Network 10/100M Connect it to PC Headset Port type: RJ-9 connector Handset Port type: RJ-9 connector 1.5 Icon introduction Icon... -
Page 9: Led Introduction
Contact DND(Do not Disturb) In hand-free mode In handset mode In headset mode Missed call Call forward 1.6 LED introduction Table 1 Programmable key LEDs for BLF LED Status Description Steady green The object is in idle status. Slow blinking red The object is ringing. - Page 10 Table 4 Programmable key LEDs for MWI LED Status Description Blinking red There are new voice mails. There is no new voice mail. Table 5 Power Indication LED LED Status Description Steady red Power on. Fast Blinking red There is an incoming call. Power off.
-
Page 11: Initial Connecting And Settings
2 Initial connecting and Settings 2.1 Connect the phone Connect to network 2.1.1 Step 1: Connect the IP Phone to the corporate IP telephony network. Before you connect the phone to the network, please check if your network can work normally. -
Page 12: Power Adaptor Connection
1. Plug power adaptor to power socket. 2. Plug power adaptor’s DC output to the DC5V port of C58/C58P to start up. 3. There will be displayed black line and “INITIALIZING” on the screen. After finishing startup, phone will show greeting, current date and time and so forth. - Page 13 network as long as there is DHCP server in it. If there is no DHCP server available, phone has to be changed WAN network setting to Static IP or PPPoE. Setting PPPoE mode (for ADSL connection) 1. Get PPPoE account and password first. 2.
-
Page 14: C58/C58P's Basic Function
3 C58/C58P’s basic function 3.1 Making a call Call Device 3.1.1 You can make a phone call via the following devices: 1. Pick up the handset, icon will be showed in the idle screen. 2. Press the Speaker button, icon will be showed in the idle screen. -
Page 15: Dnd
3.3 DND Press DND softkey to active DND Mode. Further incoming calls will be rejected and the display shows: icon. Press DND softkey twice to deactivate DND mode. You can find the incoming call record in the Call History. 3.4 Call Forward This feature allows you to forward an incoming call to another phone number. -
Page 16: Call Transfer
Then the called will not hear you, but you can hear the called. Press it again to get the phone to normal conversation. 3.8 Call transfer 1. Blind Transfer During talk, press the key Transf, and then dial the number that you want to transfer to, and finished by "#". -
Page 17: C58/C58P's Advanced Function
4 C58/C58P’s advanced function 4.1 Call pickup Call pickup is implemented by simulating pickup function of PBX. it’s that, when A calls B, B rings but no answer, at this moment, C can hook off and input an appointed prefix plus B’s number, pick up A’s call and talk with A. -
Page 18: Click To Dial
*3* is appointed prefix code. After making the above configuration, A can dial *3* plus B’s phone number to make the redial function. *4* is appointed prefix code. After configuration, A can dial *4* to cancel redial function. User can set prefix in random, in the case of no affecting current dialing rules. 4.4 Click to dial When user A browses in an appointed Web page, user A can click to call user B via a link (this link to user B), then user A’s phone will ring, after A hooks... -
Page 19: Memo
to send, then Send. 4) If you want to write a message, you can press New and enter message. Use the 2aB softkey to change the Input Method. When you input the message you want to send, press OK, then use the navigation keys to select the line from which you want to send, then Send. - Page 20 Intercom You can configure the key for Intercom code and it is useful in an office environment as a quick access to connect to the operator or the secretary. BLF is also called “Busy lamp field”, and it is used to prompt the user to pay attention to the state of the object than has been subscribed, and used to cooperate with the server to pick up the phone call.
- Page 21 MWI Phonebook Pickup Prefix Redial Release: Pressing the key, you can end the call. SMS Transfer 4. Set the type as Dtmf You can configure the key as Dtmf. This key function allows you to easily dial or edit dial number.
-
Page 22: C58/C58P's Other Function
5 C58/C58P’s other functions 5.1 Auto Handdown Press Menu ->Features-> Enter->Auto Handdown-> Enter. 2. Set the Mode Enable through the navigation key, then set Time, unit is minute, then press Save. 3. When the call ends, after the time that you have set, the phone will back to the idle interface. -
Page 23: Call Completion
Enable, you also need to set Interval and Times, and then press Save. 3. After enable auto redial, calling out someone, if he is in busy, it will pop up a prompt box whether to auto redial, press OK, the phone will call out him according the Interval and Times that you set. -
Page 24: C58/C58P's Basic Settings
6 C58/C58P’s basic settings 6.1 Keyboard 1. Press Menu ->Settings-> Enter->Basic Settings-> Enter->Keyboard->Enter. 2. There are four items: DSS Key settings, Programmable Keys, Desktop Long Pressed, SoftKey, You can set up respectively on them. Press the key Enter to the interface, then use the navigation keys to choose the function for the key according to you want. -
Page 25: Greeting Words
2. You can enter the message and press Save, it will display in the phone screen when the phone start up. 6.7 Language 1. Press Menu ->Settings-> Enter->Basic Settings-> Enter->Language ->Enter. 2. C58/C58P support three languages, you can use the navigation keys to choose. The default two languages are English and Chinese. -
Page 26: C58/C58P's Advanced Settings
7 C58/C58P’s advanced settings 7.1 Accounts Press Menu->Enter->Advanced settings, and then input the password to enter the interface, the default password is 123. You can set it through the web page. Then choose Account then press Enter, you can do some sip settings. -
Page 27: Web Configuration
8 Web configuration 8.1 Introduction of configuration Ways to configure 8.1.1 C58/C58P has three different ways to different users. Use phone keypad. Use web browser (recommendatory way). Use telnet with CLI command. Password Configuration 8.1.2 There are two levels to access to phone: root level and general level. User with root level can browse and set all configuration parameters, while user with general level can set all configuration parameters except SIP (1-2) or IAX2’s... -
Page 28: Configuration Via Web
After you configure the IP phone, you need click save button in config under Maintenance in the left catalog to save your configuration. Otherwise the phone will lose your modification after power off and on. 8.3 Configuration via WEB BASIC 8.3.1 STATUS 8.3.1.1... -
Page 29: Wizard
Wizard Please select the proper network mode according to the network condition. C58/C58P provide three different network settings: Static: If your ISP server provides you the static IP address, please select this mode, and then finish Static Mode setting. If you don’t know about parameters of Static Mode setting, please ask your ISP for them. - Page 30 Choose Static IP MODE, click【NEXT】can config the network and SIP(default SIP1)simply, also can browse too. Click【BACK】can return to the last page. IP Address Input the IP address distributed to you. Subnet Mask Input the Netmask distributed to you. IP Gateway Input the Gateway address distributed to you.
- Page 31 Display Name Set the display name. Server Address Input your SIP server address. Server Port Set your SIP server port. Authentication User Input your SIP register account name. Authentication Input your SIP register password. Password SIP User Input the phone number assigned by your VOIP service provider.
-
Page 32: Call Log
Service Name It will be provided by ISP. User Input your ADSL account. Password Input your ADSL password. Notice: Click【Finish】button after finished your setting, IP Phone will save the setting automatically and reboot, After reboot, you can dial by the SIP account. -
Page 33: Language
LANGUAGE 8.3.1.4 LANGUAGE Field name explanation Language Set the language of phone, English is default. The greeting words will display on LCD when phone Greeting Words is idle. It can support 12 chars. the default chars are VOIP PHONE. Notice: the maximal length of the greeting message is sixteen English characters and five Chinese characters. -
Page 34: Network
NETWORK 8.3.2 8.3.2.1 WAN Status Active IP Address The current IP address of the phone. Current Subnet The current Netmask address. Mask MAC Address The current MAC address of the phone. Current IP Gateway The current Gateway IP address. - Page 35 Please select the proper network mode according to the network condition. C58/C58P provide three different network settings: Static: If your ISP server provides you the static IP address, please select this mode, and then finish Static Mode setting. If you don’t know about parameters of Static Mode setting, please ask your ISP for them.
-
Page 36: Lan
1) Click “Apply” button after finished your setting, IP Phone will save the setting automatically and new setting will take effect. 2) If you modify the IP address, the web wills not response by the old IP address. Your need input new IP address in the address column to logon in the phone. -
Page 37: Qos&Vlan
data stream from the WAN port to the LAN port of the phone. Select Bridge Mode or not: If you select Bridge Mode, Enable Bridge the phone will no longer set IP address for LAN Mode physical port,LAN and WAN will join in the same network. -
Page 38: Qos Configuration
In chart 1, there is a layer 2 that switches without setting VLAN. Any broadcast frame will be transmitted to the other ports except the send port. For example, a broadcast information is sent out from port 1 then transmitted to port 2,3and 4. In chart 2, red and blue indicate two different VLANs in the switch, and port 1 and port 2 belong to red VLAN, port 3 and port 4 belong to blue VLAN. -
Page 39: Service Port
(Qos) Settings Enable DSCP Enable DSCP by selecting it. SIP DSCP Specify the value of the SIP DSCP. Audio RTP DSCP Specify the value of the Audio RTP DSCP. WAN Port VLAN Settings Enable WAN Port Enable WAN Port VLAN by selecting it. VLAN WAN Port VLAN Specify the value of the WAN Port VLAN ID, the... - Page 40 SERVICE PORT Field name explanation Service Port Settings Web Server Type Specify Web Server Type. HTTP Port Set web browser port, the default is 80 port, if you want to enhance system safety, you'd better change it into non-80 standard port; Example: The IP address is 192.168.1.70.
-
Page 41: Dhcp Service
DHCP SERVICE 8.3.2.5 DHCP SERVICE Field name explanation DHCP Lease Table IP-MAC mapping table. If the LAN port of the phone connects to a device, this table will show the IP and MAC address of this device. Shows the DHCP Lease Table, the unit of Lease time is Minute. Lease Table Name Specify the name of the lease table. -
Page 42: Time&Date
Leased Time Set the Lease Time of the lease table. DNS Server Set the default DNS server IP of the lease table; Click Address the Add button to submit and add this lease table. Select name of lease table, click the Delete button will delete the selected lease table from DHCP lease table. - Page 43 TIME&DATE Field name explanation Simple Network Time Protocol (SNTP) Settings Enable SNTP Enable SNTP by selecting it. Enable DHCP Time Enable DHCP Time by selecting it, then the phone will automatically synchronize the standard time. Primary Server Set SNTP Primary Server IP address. Secondary Server Set SNTP Secondary Server IP address.
-
Page 44: Voip
Daylight Saving Time Settings Enable Enable daylight saving time. Offset(minutes) Setup the variety length. Month Setup start and end month. Week Setup start and end week. Setup start and end day. Hour Setup start and end hours. Minute Setup start and end minutes. Manual Time Settings Notice: You need specify the above all items. -
Page 46: Sip Config
SIP Config Field name explanation SIP Line Choose line to set info about SIP, there are 4 lines to choose. You can switch by【Load】button. Basic Settings Status Shows if the phone has been registered the SIP server or not; or so, show Unapplied. Server Address Input your SIP server address. - Page 47 Select call forward mode, the default is Off. Off: Close down calling forward. Forward Type Busy: If the phone is busy, incoming calls will be forwarded to the appointed phone. No answer: If there is no answer, incoming calls will be forwarded to the appointed phone after a specific.
- Page 48 Conference Number Specify the network conference number, please contact your system administrator for the network conference number. Registration Expire(s) Set expire time of SIP server register, default is 60 seconds. If the register time of the server requested is longer or shorter than the expired time set, the phone will change automatically the time into the time recommended by the server, and register again.
- Page 49 will send message to the server, and the server will turn off the function immediately. No Answer CFwd On Set the No Answer CFwd On Code, when you Code choose to enable the on answer forward function on your phone, it will send message to the server, and the server will turn on the function immediately.
- Page 50 Enable PRACK Enable or disable SIP PRACK function, suggest use the default config. Enable Long Contact Set more parameters in contact field; connection with SEM server. Convert URI Convert # to %23 when send the URI. Dial Without Set call out by proxy without registration; Registered Ban Anonymous Call Set to ban Anonymous Call;...
- Page 51 Click to talk Set click to Talk (need practical software support). Enable BLF List Enable BLF List by selecting it, BLF list is a function which can monitor the group status, it is not one to one monitoring, but the information feedback from the server to decide which BLF list will monitor.
-
Page 52: Iax2
IAX2 8.3.3.2 IAX2 Config Field name explanation Status Shows if the phone has been registered the IAX2 server or not. Server Address Input your IAX2 server address. Server Port Set your IAX2 server port, the default is 4569. Account Input your IAX2 register account name. Password Input your IAX2 register password. -
Page 53: Stun
Set echo test number. If IAX2 server supports echo test, Echo Test and echo test number is non- numeric, system could set Number an echo test number to replace the echo test text. So user can dial the numeric number to test echo voice test. This function is provided with server to make endpoint to test whether endpoint could talk through server normally. - Page 54 STUN Field name explanation Simple Traversal of UDP through NATs (STUN) Settings STUN NAT Traversal Shows STUN NAT Transverse estimation, true means STUN can penetrate NAT, while False means not. Server Address Set your SIP STUN Server IP address. Server Port Set your SIP STUN Server Port.
-
Page 55: Dial Peer
Notice: SIP STUN is used to realize SIP penetration to NAT. If your phone configures STUN Server IP and Port (default is 3478), and enable SIP Stun, you can use the ordinary SIP Server to realize penetration to NAT. DIAL PEER 8.3.3.4 This functionality offers you more flexible dial rule, you can refer to the following content to know how to use this dial rule. - Page 56 DIAL PEER Field name explanation Phone number There are two types of matching conditions: one is full matching, the other is prefix matching. In the Full matching, you need input your desired phone number in this blank, and then you need dial the phone number to realize calling to what the phone number is mapped.
- Page 57 4) Rep: It means that phone will replace the number with length and number appointed. You can refer to the following examples of different alias application to know more how to use different aliases and this dial rule. Call Mode Select different signal protocol, SIP or IAX2 Suffix Set suffix, this is optional config item.
-
Page 58: Phone
You need set Phone When you dial Number, Alias and Delete “0106228”, the Length. Phone number is SIP1 server will XXXT and Alias is rep: receive “86106228”. If your dialed phone number starts with your set phone number, the first digits same as your set phone number will be replaced by the alias number specified and... -
Page 59: Feature
AUDIO Configuration Field name explanation First Codec The first preferential DSP codec: G.711A/u, G.722, G.723, G.729. Second Codec The second preferential DSP codec: G.711A/u, G.722, G.723, G.729. Third Codec The third preferential DSP codec: G.711A/u, G.722, G.723, G.729. Fourth Codec The forth preferential DSP codec: G.711A/u, G.722, G.723, G.729. - Page 61 FEATURE Field name explanation Do Not Select DND, the phone will reject any incoming call, the callers Disturb will be reminded by busy, but any outgoing call from the phone will work well. If you select Ban Outgoing to enable it, and you cannot dial out Outgoing any number.
- Page 62 Intercom Mute Enable If the incoming call is intercom call, the phone plays the Intercom intercom tone. Tone Enable Enable Intercom Barge by selecting it, the phone auto answers Intercom the intercom call during a call. If the current call is intercom Barge call, the phone will reject the second intercom call.
-
Page 63: Dial Plan
Action URL Specify the Action URL that Record the operation of phone; Settings send this corresponding information to server, url: http://InternalServer /FileName.xml? (Internal Server is server IP. Filename is name of xml that contains the action message). Block Out Settings Set Add/Delete Limit List. - Page 64 DIAL PLAN Configuration Field name explanation Basic Setting Press "#" to Send Set Enable/Disable the phone ended with “#” dial. Dial Fixed Length Specify the Fixed Length of phone ending with. Set the timeout of the last dial digit. The call will be Send after (3-30)...
-
Page 65: Contact
* Match any single digit that is dialed. . Match any arbitrary number of digits including none. Tn Indicates an additional time out period before digits are sent of n seconds in length. n is mandatory and can have a value of 0 to 9 seconds. Tn must be the last 2 characters of a dial plan. - Page 66 Contact Field name explanation Phonebook Table Name Shows the name corresponding to the phone number. Shows the detail of current phonebook. Notice: the maximum capability of the phonebook is 500 items, you can select many or a contact to add to group and add to blacklist, and delete many or a contact, and delete all contacts.
- Page 67 Name Specify the name corresponding to the phone number. Office Number Specify the office number. Mobile Number Specify the mobile number. Other Number Specify the other number. Ring Type Specify the ring type for the phone number. Line Specify the sip line for the each number. Group setting Select the group from the unselected group to selected list for the contact;...
-
Page 68: Remote Contact
You need to match a XML Phonebook address and you can directly access to the corresponding remote phonebook on the phone. For example: Set the Phonebook Name as fanvil, Server URL is tftp://192.168.1.3/admin/phonebook/index.xml. Or Set the Phonebook Name as ldap, Server URL is ldap://192.168.1.3/dc=winline,dc=com. -
Page 69: Function Key
Dial, if you want to finish the talk, press Hang-up. FUNCTION KEY 8.3.5 FUNCTION KEY 8.3.5.1 Function Key Field name explanation Contrast Set contrast of screen. Enable Backlight Set enable/disable backlight. Line Key Settings Line: select Auto, SIP1, SIP2 or IAX2 in function key type. After you set it, you pick up handset or hands-free, press this function key, and then you can use the corresponding SIP line. - Page 70 Show the function key's serial number. Type Memory Key: settings can be stored in key storage for each number, the standby or off-hook, select the function keys on the keyboard can call this number. Line, set the dial mode (Auto, SIP1, SIP2, IAX2).Key Event functions, monitor state.
-
Page 71: Softkey
SOFTKEY 8.3.5.2 SOFTKEY You can configure different functions in different screens for every softkey. -
Page 72: Maintenance
Auto Provision 8.3.6.1 Fanvil endpoint supports PnP and DHCP and Phone Flash to obtain the parameters. The PnP and DHCP and Phone Flash are all deployed, endpoint will go by the following process to try to obtain the server address and other parameters, when it boots up: DHCP option ... -
Page 73: Auto Provision
Auto Provision Field name explanation Auto Update Setting Current Config Show the current config file’s version. If the version Version of the configuration downloaded is higher than the version of the running configurations, the auto provision would upgrade, or stop here. If the endpoints confirm the configuration by Digest method, the endpoints wouldn’t upgrade configuration unless the configuration in the server is different with the... -
Page 74: Syslog
when it boots up. Any SIP server understanding that message will reply with a SIP NOTIFY message containing the Auto Provisioning Server URL where the phones can request their configuration. PnP Server Specify the PnP Server. PnP Port Specify the PnP Server. PnP Transport Specify the PnP Transfer protocol. -
Page 75: Syslog Configuration
Level 3---error: The error will affect your system working. Level 4---warning: There are some potential dangers. But your system can work. Level 5---notice: Your system works well in special condition, but you need to check its working environment and parameter. Level 6---info: the daily debugging info. -
Page 76: Config
CONFIG 8.3.6.3 Config Setting Field name Explanation Save Configuration You can save all changes of configurations. Click the Save button, all changes of configuration will be saved, and be effective immediately. Backup Right clicks on “Right click here…” and select “Save Configuration Target As config File(.txt)”... - Page 77 Update Field name Explanation Web Update Click the browse button, find out the config file saved Web Update before or provided by manufacturer, download it to the phone directly, press “Update” to save. You can also update downloaded update file, logo picture, ring, mmiset file by web.
-
Page 78: Access
1. Application update: download system update file. 2. Config file export: Upload the config file to FTP/TFTP server, name and save it. 3. Config fie import: Download the config file to phone from FTP/TFTP server. The configuration will be effective after the phone is reset. 4. -
Page 79: Access Configuration
Access Configuration Field name explanation Keyboard Password Set the password for entering the setting menu of the phone by the phone‘s key board. The password is digit. This table shows the current user existed. User Set account user name. User Level Set user level, Root user has the right to modify configuration, General can only read. -
Page 80: Reboot
REBOOT 8.3.6.6 If you modified some configurations which need the phone’s reboot to be effective, you need click the Reboot, then the phone will reboot immediately. Notice: Before reboot, you need confirm that you have saved all configurations. SECURITY 8.3.7 WEB FILTER 8.3.7.1 WEB Filter... -
Page 81: Firewall
column, and click Add to add this IP segment. You can also click Delete to delete the selected IP segment. Web Filter setting Select it or not to enable or disable Web Filter. Click Apply to make it effective. Notice: Do not set your visiting IP outside the Web filter range, otherwise, you cannot logon through the web. -
Page 82: Nat
packets. Each kind of list could be added 10 items. We will give you an instance for your reference. Field name explanation Enable Input Rules Select it to Enable Input Rules. Enable Output Select it to Enable Output Rules. Rules Input / Output Specify current adding rule by selecting input rule or output rule. - Page 83 DMZ config: In order to make some intranet equipment support better service for extranet, and make internal network security more effectively, these equipment open to extranet need be separated from the other equipment not open to extranet by the corresponding isolation method according to different demands. We can provide the different security level protection in terms of the different resources by building a DMZ region which can provide the network level protection for the equipment environment, reduce the risk which is caused by providing...
- Page 84 NAT Configuration Field name explanation IPSec ALG It is an encryption technology. Select it to enable IPSec ALG, the default is enabled. FTP is a service of connection layer which can FTP ALG transform intranet IP into extranet IP when intranet IP is sending out packet.
-
Page 85: Vpn
8.3.7.4 This web page provides us a safe connect mode by which we can make remote access to enterprise inner network from public network. That is to say, you can set it to connect public networks in different areas into inner network via a special tunnel. -
Page 86: Security
VPN Configuration Field name explanation VPN IP Shows the current VPN IP address. Select L2TP. You can choose only one for current state. After you select it, you’d better save configuration and reboot your phone. Enable VPN Select it or not to enable or disable VPN. VPN Server Set VPN L2TP Server IP address. -
Page 87: Logout
LOGOUT 8.3.8 Click Logout, and you will exit web page. If you want to enter it next time, you need input user name and password again. -
Page 88: Appendix
9 Appendix 9.1 Specification Hardware 9.1.1 Item C58/C58P(P) Adapter Input: 100-240V (Input / Output) Output: 5V 1A port 10/100Base- T RJ-45 1 PORT 10/100Base- T RJ-45 1 PORT Power Idle: 2.5W/Active: 2.8W Consumption LCD Size 128x48 74 x 28mm Operation 0~40℃... -
Page 89: Network Features
Automatically select calling line, if one line can’t be connected, the phone can automatically switch to other line to call. 9 kinds of ring types and 3 user-defined music rings DTMF Relay: support SIP info, DTMF Relay, RFC2833 ... -
Page 90: Maintenance And Management
Wan Port supports main DNS and secondary DNS server can select dynamically to get DNS in DHCP mode or statically set DNS address. Support DHCP client on WAN Support DHCP server on LAN QoS with DiffServ ...
Need help?
Do you have a question about the C58 and is the answer not in the manual?
Questions and answers