Wincor Nixdorf TH320 User Manual
Hide thumbs
Also See for TH320:
- Programmer's manual (157 pages) ,
- Quick reference (8 pages) ,
- User manual (55 pages)
Table of Contents
Advertisement
Quick Links
Advertisement
Table of Contents

Subscribe to Our Youtube Channel
Related Manuals for Wincor Nixdorf TH320


Summary of Contents for Wincor Nixdorf TH320
- Page 1 TH320 Thermal Printer Users Gui de Edi ti on May 2010...
- Page 2 Mi cro soft and Wind ows NT are re gis te red Tra de marks of Mi cro soft Cor po ra ti on in the U.S.A. and/or ot her coun tries BEET LE® is a re gis te red tra de mark of the Win cor Nix dorf In ter na tio nal GmbH, Ger ma ny Co py right ©...
-
Page 3: Table Of Contents
Contents Manufacturer’s De cla ra ti on and Ap pro val ......1 Ge ne ral Aut ho ri za ti on .................1 FCC-Class A De cla ra ti on................1 User In for ma ti on ..................1 Sa fe ty In for ma ti on..................2 In struc tions for Main ten an ce ...............3 War ran ty .....................3 Re cy cling ....................3... - Page 4 Te sting the prin ter ..................22 Test Pro ce du re..................23 ................24 Test Prin tout Prin ter con fi gu ra tions ................25 Con fi gu ring the prin ter ................26 Com mu ni ca ti on in ter fa ce..............28 Di ag nos tic mo des ..................30 En ab le or dis ab le data sco pe mode ............30 En ab le or dis ab le re ceipt test mode ............31...
-
Page 5: Manufacturer's Declaration And Approval
This class A digital apparatus complies with Canadian ICES-003. Cet appareil numerique de la classe A est conforme à la norme NMB-003 du Canada. Ad di tio nal ly, the TH320 has re cei ved the cUL and UL ap pro val. User Information... -
Page 6: Sa Fe Ty In For Ma Ti On
SA FE TY IN FOR MA TI ON that have been made to the de vi ces. Fur ther mo re, ca bles or ot her de vi ces that have not been ap pro ved by Win cor Nix dorf may not be con nec ted to the de vi ce. -
Page 7: Instructions For Maintenance
Instructions for Maintenance Cle an your TH320 regularly with an ap pro pria te sur fa ce clea ning pro duct. Make sure that the de vi ce is swit ched off, con nec tor ca bles are un plug ged and that no moi stu re is al lo wed to get into the in si de of the de vi ce. -
Page 8: Voluntary Control Council For Interference (Vcci) Radio Frequency Interference Statement
Re cy cling Cen ter, which is cer ti fied pur su ant to ISO 9001. So don’t sim ply throw your TH320 on the scrap heap when it has ser ved its time, but take ad van ta ge of the en vi ron men tal ly smart up-to-date re cy cling... -
Page 9: About This Guide
ABOUT THE PRINTER About This Guide What is in this guide The four chapters that follow are organized according to what you want to learn about the printer, learn about the set up, operation, and routine testing and servicing of the printer. Chapter About the Printer What the printer does How it communicates... -
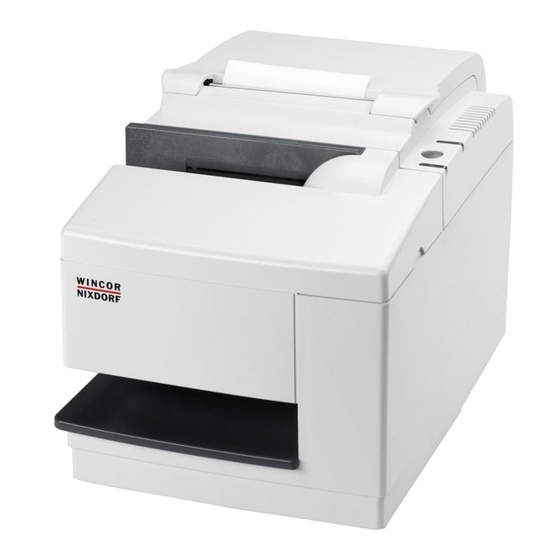
Page 10: About The Printer
Slip in Light (green) Front Cover Slip of Check The TH320 is a low-cost, high-efficiency, point-of-sale (POS) printer that boasts the smallest footprint of any hybrid printer. It features fast two-color receipt printing plus a drop in validation print monochrome or station. - Page 11 WHAT IS IN THIS GUIDE The TH320 fits easily in spaces where no other hybrid printer can and connects to most host computers via the 25-pin RS-232 interface or USB or PoweredUSB interface. The printer’s standard command set allows it to work with software written for Wincor Nixdorf or other compliant printers.
-
Page 12: User Controls
USER CONTROLS User Controls On-line, Pa per Sta tus, Er ror light Re ceipt Cover (green) Pa per Feed But ton Receipt Slip in Light (green) Re set Button Front Cover Slip of Check The printer has the following controls: The Paper Feed button (1) advances the receipt paper and is used in navigating configuration menus. -
Page 13: Au Di Ble Beeps
AVAILABLE PRINTER CONFIGURATIONS Au di ble Beeps After power is applied or after reset, the printer normally emits a single beep. This indicates that the printer has successfully completed its startup and self-test routine. If, after startup or reset, the beeping continues in a single, double, or triple pattern, an internal failure has occurred. -
Page 14: Printer Specifications
PRINTER SPECIFICATIONS Printer Specifications Printer Output Receipt Station Slip Station Print Method Direct Thermal, 203 DPI 9-Pin Impact Character Cell Size 13 X 24, 10 X 24 7 X 7, 12 X 7, 5 X 9 15.6 & 20.3 13.9 & 16.8 Print Columns 44 &... - Page 15 PRINTER SPECIFICATIONS User Memory 2 to 12 MB: (optional) shared for graphics, logos, user defined characters, user data storage, and electronic jounal Communication Board Architecture supports: 25-pin RS232, USB, Powered USB Printer Drivers OLE POS for Windows XP and XP embedded, Java POS, USB Thermal Paper Requirements Paper Type Direct Thermal, POS Grade(s), special requirements for color printing...
-
Page 16: Setting Up The Printer
16,5 cm (6,5 in.) Choose a location The TH320 printer being only 16,5 cm (6.5 inches) wide requires very little counter space and may be set on or near the host computer. With the RS-232C interface, you can place the printer up to 15 m (50 feet) (with the USB interface up to 5 m (15 feet), PoweredUSB 3.8 m (12.5 feet) from the... -
Page 17: Unpack The Printer
UNPACK THE PRINTER Place the printer on a level surface, and make sure there is enough room to open the receipt cover to change the paper and to open the front cover to change the impact printer’s ribbon cassette. Devices such as CRT monitors or large metal surfaces can affect the printer’s magnetic field and cause intermittent check reading errors. -
Page 18: Check The Pa Cking List
UNPACK THE PRINTER Remove and save the cardboard supports from the slip path after you have placed the printer in its user position. Check the pa cking list Before installation, check that all the items on this list are included (printers shipped in bulk may not include all these items): Printer (enclosed in a plastic bag with corrugated pack) Test printout protecting the printhead (inside receipt bucket) -
Page 19: Installing New Receipt Paper
INSTALLING NEW RECEIPT PAPER Installing new receipt paper If the online paper status error light blinks, Change the paper as soon as convenient to avoid running out of paper part way through a transaction. If the On-line, Paper Status, Error light blinks fast, the paper is out. Change the paper immediately or data may be lost. -
Page 20: Installing Or Replacing The Ribbon Cassette
INSTALLING OR REPLACING THE RIBBON CASSETTE Close the receipt cover while holding the paper over the front of the cabinet. Remove the excess paper by tearing it against the tear-off blade. Press the paper feed button to advance the paper if necessary. Installing or replacing the ribbon cassette Change the impact printer’s ribbon cassette if it is printing lightly or produces marks, lines or other inconsistent printing on the slip. -
Page 21: Installing A New Ribbon Cassette
INSTALLING A NEW RIBBON CASSETTE Installing a new ribbon cassette Open the front cover (1) by grasping the cover on each side at the bottom and swing up. Unwrap the new ribbon cassette and tighten the ribbon by turning the knob on the cassette in the direction of the arrow. -
Page 22: Connect The Cables
CONNECT THE CABLES Connect the cables Cable connections are made at the back of the printer. The cash drawer cable connects the printer to one or two cash drawers. Be careful to connect the USB cable only to point A (below). Attempts to connect the USB cable at point B can cause permanent damage to the communications circuitry Connector panel varies with printer configuration (25-pin serial and Powered... -
Page 23: Com Mu Ni Ca Ti On Ca Bles
CONNECT THE CABLES Y-cable Cash drawer Printer Cash drawer Prin ter con nec tor (stan dard pho ne jack) Com mu ni ca ti on ca bles The communication cable connects the printer to the host computer. 25-pin RS-232C Po wer supp ly con nec tor com mu ni ca ti on connector Turn off the BEETLE/host computer. -
Page 24: If In Stal Ling The Usb Com Mu Ni Ca Ti On Cable
CONNECT THE CABLES If in stal ling the USB com mu ni ca ti on cable USB com mu ni ca ti on con nec tor panel Po wer supp ly connector USB connector Prin ter end of Computer end of USB cable USB cable Turn off the host computer. -
Page 25: Power Supply Cable
After you have connected the printer, you may need to set the printer internal parameters for Ethernet operation. See “Ethernet terminology and setup” section of the TH320 Programming Guide. Power supply cable To avoid damage to the printer, connect the power supply cable last. -
Page 26: Ca Ble Rou Ting
TESTING THE PRINTER Plug the power cord into the power supply, then plug the power supply into an outlet. The green light on the top cover will light up. Ca ble rou ting Prevent the printer from being accidentally unplugged by making sure the cables are routed as shown in the illustration below. -
Page 27: Test Pro Ce Du Re
TESTING THE PRINTER Push and hold Open re ceipt pa per feed but - cover ton whi le clo sing re ceipt cover Test Pro ce du re To run the test, open the receipt cover (1); then, while holding down the paper feed button, close the receipt cover (2). -
Page 28: Test Prin Tout
TESTING THE PRINTER Test Prin tout... -
Page 29: Printer Configurations
PRINTER CONFIGURATIONS Pa per type can be chan ged in the con fi gu ra ti on menu. Pa per ty pes and gra des avai la ble: Type 0 - Mo no chro me gra des Kan za ki P-310 Type 1 - Two-co lor gra des Kan za ki P-310 RB Type 4 - Two-co lor gra des Kan za ki P-320 BB Type 5 - Two-co lor gra des Kan za ki P-320 RB... -
Page 30: Configuring The Printer
CONFIGURING THE PRINTER Receipt test Slip test MICR test Check flip test Emulation/software options Printer emulations Printer ID Receipt Options De fault li nes per inch Car ria ge return usa ge De fault font Font size Slip op tions Hard wa re options sub-menu Print he ad setting Pa per type... - Page 31 CONFIGURING THE PRINTER The prin ter pau ses and waits for a main menu se lec ti on to be made (see sam ple prin tout be low.) Switch 1 is shown in the on position 2-po si ti on DIP switches back of prin ter Follow the printed instructions on the scrolling menu by pressing the paper feed button as indicated below to make selections.
-
Page 32: Com Mu Ni Ca Ti On In Ter Fa Ce
CONFIGURING THE PRINTER If you wish to save, se lect “Yes”, then re turn DIP switch 1 to the Off po si ti on (up). Press the re set but ton. The prin ter re sets with the new se lec tions. You can ve ri fy the set ting by pres sing the pa per feed but ton to print out a di ag nos tics form or by hol ding the pa per feed but ton and ope ning and closing the receipt co ver. - Page 33 CONFIGURING THE PRINTER Press the paper feed button as instructed to select the communication interface you want. Communication interface RS-232C interface USB (USB or Powered USB) RS-232C se ri al in ter fa ce set tings To change the RS-232C serial interface settings, enter the configuration menu, select “Set Communication Interface”...
-
Page 34: Diagnostic Modes
DIAGNOSTIC MODES Alternate DTR/DSR Enabled Disabled Press the paper feed button for at least one second to validate the selection. Diagnostic modes To change the diagnostic modes enter the configuration menu, select “Set Diagnostic Modes” from the main menu and select one of the following modes: Normal: normal operating mode of the printer. -
Page 35: En Ab Le Or Dis Ab Le Re Ceipt Test Mode
DIAGNOSTIC MODES To run the data sco pe mode After you have enabled the data scope mode, exit the configuration menu. Run a transaction from the BEETLE or host computer. All commands and data sent from the BEETLE/host computer will be printed as hexadecimal characters as shown in the illustration. -
Page 36: En Ab Le Or Dis Ab Le Micr Test Mode
DIAGNOSTIC MODES To run the slip test mode Enable the slip test mode in the configuration menu. Exit the configuration menu. Insert a slip into the slip station. Push the paper feed button. Two code pages will be printed. To repeat this test, preform steps 3 and 4 again. To exit the slip test mode Enter the configuration menu again. -
Page 37: Set Ting The Prin Ter Emu La Tions And Soft Wa Re Op Tions
This function determines the ID value returned by the printer in response to a Transmit printer ID command (1D 49 n). The printer can be configured to send back the ID of the TH320, TH420, A758 or A756. Carriage return usage... -
Page 38: Setting Up The Printer
Failure to observe this rule may result in a printer service call or voiding the printer warranty. Running at a higher energy level reduces the printhead life. Consult your Wincor Nixdorf technical support specialist if you have any questions. Print density (monochrome papers only) Ad justs print he ad ener gy le vel to dar ken prin tout or ad just for pa per va ria - tions. - Page 39 (stan dard), 75-watt power supply (Enables printer to op ti mi ze speed at higher dot co ver age.) Alternate reset fea tu re This feature allows you to reset the TH320 by ope ning and closing the front cover instead of using the dip switch or reset but ton. Paper low sensor Al lows the user to en ab le or dis ab le the pa per low sen sor.
-
Page 40: Using The Printer
Electronic check Check printing (printing the date, payee, and amount on the check face) Check endorsement The TH320 can also print on multi-part forms up to four parts thick. Use either the front insertion or drop in method, described below. Check... -
Page 41: Dro Pin Me Thod
PRINTING ON FORMS OR CHECKS Follow the instructions from the host computer. The printer begins printing. Remove the form or check after it has been ejected. Follow the instructions from the host computer to finish the transaction. Dro pin me thod In sert the form or check (as shown on the right abo ve) into the slot from the top or side with the print side to ward you. - Page 42 PRINTING ON FORMS OR CHECKS Glu ed edge Front in ser ti on prin ting - glu ed edge lea ding Top or side slip-in prin ting - No per fo ra ti on ho les to right side...
-
Page 43: Verifying And Validating Checks (Optional)
VERIFYING AND VALIDATING CHECKS (OPTIONAL) Verifying and validating checks (optional) The printer’s MICR check reader enables check verification and validation by inserting the check from either the front or the top of the printer. To ensure that checks are properly verified and validated, they must be free of folds and wrinkles and inserted correctly into the MICR printer. - Page 44 VERIFYING AND VALIDATING CHECKS (OPTIONAL) Hold the check to the right, against the check guide and release it as soon as the printer begins to run. Follow the instructions on the host computer to complete the MICR process: Upon instruction from the host, the check is fed into the printer, read and backed out to a position ready for endorsement, if desired.
-
Page 45: Tips For Avoiding Problems
TIPS FOR AVOIDING PROBLEMS Tips for Avoiding Problems Pre vent over hea ting of the print he ad Overheating of the thermal printhead is one of the most common causes of serious printer problems. To prevent overheating, certain duty cycle restrictions need to be applied because of the heat generated by the thermal printhead, particularly when it is printing logos. -
Page 46: Avoid Harsh En Vi Ron Ments
A solid black line is 100% dot coverage. Avoid Harsh En vi ron ments The TH320 printer is a durable piece of equipment and can withstand a range of physical environments. However, the printer’s internal mechanical components are vulnerable to airborne contaminants, particularly in certain harsh areas, such as home improvement stores, garden shops, and warehouse environments. -
Page 47: Troubleshooting
STATUS INDICATORS Troubleshooting The simple design of TH320 requires virtually no periodic servicing. However, if problems do occur, they can usually be diagnosed readily by checking the light status indicators, below, then referring to appropriate section of the Troubleshooting guide on the pages that follow. -
Page 48: Prin Ter Beeps
STATUS INDICATORS Light behavior Printer status No power Fast blink Firmware download Fast blink Level 0 diagnostics (occurs at power on and on reset) Fast blink Cover open (receipt or slip) Paperout Carriage jam Slip jam Knifejam Slow blink Paper low Temperature error Voltage error Steady On... -
Page 49: On-Line, Pa Per Sta Tus, Er Ror Light Flas Hes
STATUS INDICATORS Printer doesn’t have power Power supply may be If the power supply is plugged (light not on) defective. in, but does not come on, you need to order a new power supply. See “Power supply and power cords.” Printer has power but Cables may not be Check all cable connections. -
Page 50: Slip-In Light Does Not Ope Ra Te
STATUS INDICATORS The on-line, paper Thermal print head The print head may overheat when status, error light is temperature is out of printing in a room where the temperature blinking and the range. is above the recommended operating printer won’t print. temperature or when printing high density graphics continuously, regardless of the room temperature. -
Page 51: Re Ceipt Print Qua Li Ty Poor
STATUS INDICATORS Forms print is light or spotty. Form not inserted in See “Printing on forms or correctly. checks.” Impact print head is dirty or Contact a service defective. representative. Improper platen gap. Contact a service representative. Ribbon cassette is defective See “Installing or re placing the ribbon cassette.”... -
Page 52: Slip Sta Ti On And Micr Pro Blems
STATUS INDICATORS Print is light or spotty. Paper roll loaded Check that the paper is loaded properly. incorrectly. Thermal printhead is Use recommended thermal receipt dirty. paper. Clean the thermal printhead with an alcohol pen prior to going back to an approved paper. -
Page 53: The Kni Fe Does Not Operate
STATUS INDICATORS Forms or checks skew There is an Open the front cover and check for or catch in the slip obstruction or paper jams or other obstruction in the station. paperjam in the slip slip station. Clear the jammed paper or station. -
Page 54: Other Conditions
OTHER CONDITIONS Other conditions The following problems all need to be corrected by a qualified service representative. MICR check reader not operating properly Forms not feeding into the slip/forms area properly Missing dots in slip or forms printing Printer will not cycle or stop when required Illegible characters Paper will not feed Knife will not cycle or cut... - Page 55 Herausgegeben von/Published by Wincor Nixdorf International GmbH D-33094 Paderborn...
Need help?
Do you have a question about the TH320 and is the answer not in the manual?
Questions and answers