Sign In
Upload
Manuals
Brands
Wincor Nixdorf Manuals
Printer
TH320
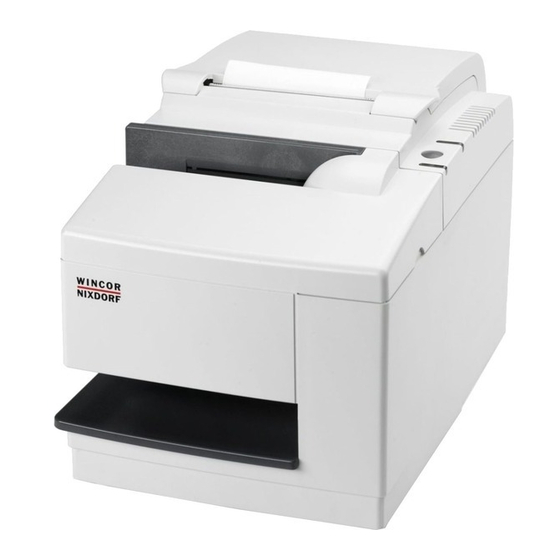
Wincor Nixdorf TH320 Manuals
Manuals and User Guides for Wincor Nixdorf TH320. We have
3
Wincor Nixdorf TH320 manuals available for free PDF download: Programmer's Manual, User Manual, Quick Reference
Wincor Nixdorf TH320 Programmer's Manual (157 pages)
Two-Color Thermal / Impact Hybrid Printer
Brand:
Wincor Nixdorf
| Category:
Printer
| Size: 1 MB
Table of Contents
Table of Contents
4
Printer Status and Indicators
9
Startup Diagnostics
9
Runtime Diagnostics
9
Remote Diagnostics
10
Indicators
11
Moving from the A756 to the TH320
12
Moving from the A756, A758 and TH420 to the TH320 (Slip Differences)
13
Commands
14
Emulation Commands
14
Set Printer ID Mode
14
Set Printer ID
14
Set Printer Emulation
14
TH320 Configuration Commands
15
Select Slip Lines Per Inch
15
Select TH320 Narrow Slip Configuration Option to Ignore N Leading Spaces
15
Select TH320 Narrow Slip 51 -Column Compressed Print Option
15
Select TH320 Delete Slip Trailing Spaces Option
16
Select TH320 (21 and 25-Line) Rotated Slip Print Options
16
Select TH320 Slip Stop Options
16
TH320 Configurable Slip Commands
17
Two-Color Commands
18
Moving from A756/A758 to TH320
18
Programming the Printer
20
Overview of Printing Characteristics
20
Character Appearance
20
Receipt Character Specification
20
Print Zones
21
Print Zones for Receipt Station 80 MM Paper
21
Print Zones for Slip Station TH320
21
Print Zones for Slip, Validation TH320
22
Print Zones for Slip Station TH420
23
Rotated Printing Commands
24
Command Descriptions
25
Command Conventions
25
Printer Actions
25
Clear Printer
25
Close Form
26
Open Form
26
Perform Partial Knife Cut
26
Return Home
26
Select Peripheral Device (for Multi-Drop)
26
Initialize Printer
27
Set Slip Paper Eject Length
27
Select Receipt or Slip for Printing; Slip for MICR Read
27
Select Receipt or Slip for Setting Line Spacing
28
Select Paper Sensors to Output Paper End Signals
28
Select Sensors to Stop Printing
28
Enable or Disable Panel Button
29
Set Slip Paper Waiting Time
29
Generate Pulse to Open Cash Drawer
29
Release Paper
30
Set Current Color
30
Select Slip Station
30
Select Receipt Station
30
Select Cut Mode and Cut Paper
31
Feed and Cut Mode
31
Set Paper Type
31
Set Interpretation of "Set Current Color" Command
32
Print Test Form
32
Print and Paper Feed
33
Print and Feed Paper One Line
33
Print and Eject Slip
33
Print and Carriage Return
33
Feed N Print Lines
33
Feed N Dot Rows
34
Print
34
Print and Feed Paper
34
Print and Reverse Feed Paper
34
Print and Feed N Lines
35
Print and Reverse Feed N Lines
35
Reverse Feed N Lines
35
Reverse Feed N Dots
35
Vertical and Horizontal Positioning
36
Horizontal Tab
36
Add N Extra Dot Rows
36
Set Column
38
Set Absolute Starting Position
38
Set Vertical Line Spacing To1/6 Inch
38
Set Vertical Line Spacing
39
Set Horizontal Tab Positions
39
Set Relative Print Position
40
Select Justification
41
Set Left Margin
41
Set Horizontal and Vertical Minimum Motion Units
42
Set Printing Area Width
43
Turn Smoothing Mode On/Off
44
Text Characteristics Commands
44
Select Double-Wide Characters
44
Select Single-Wide Characters
44
Select 90 Degree Counter-Clockwise Rotated Print
45
Select Pitch (Column Width)
45
Set Right-Side Character Spacing
46
Select Print Mode
46
Select or Cancel User-Defined Character Set
47
Define User-Defined Character Set
47
Select or Cancel Underline Mode
48
Copy Character Set from ROM to RAM
49
Cancel User-Defined Character
49
Select or Cancel Emphasized Mode
49
Select Double-Strike
50
Cancel Double-Strike
50
Select or Cancel Italic Print
50
Select International Character Set
51
Select Character Code Table
51
Selector Cancel 90 Degree Clockwise Rotated Print
51
Selector Cancel Upside-Down Print Mode
52
Select Character Size
52
Selector Cancel White/Black Reverse Print Mode
53
Reverse Color Text Mode
53
Text Strike - through Mode
54
Select Super Script or Subscript Modes
54
Graphics
54
Download BMP Logo
54
Select Bit Image Mode
55
Select Double-Density Graphics
56
Select the Current Logo (Downloaded Bit Image)
57
Define Downloaded Bit Image
57
Print Downloaded Bit Image
58
Print Raster Monochrome Graphics
59
Print Raster Color Graphics
59
Download Logo Image
60
Apply Shading to Logo
60
Merge Watermark Mode
61
Monochrome Shade Mode
61
Color Shade Mode
61
Logo Print with Color Plane Swap
62
Form and Merge Real-Time Surround Graphic
62
Save Graphics Buffer as Logo
63
Background Logo Print Mode
63
Shade and Store Logo
63
Logo Print with Knife Cut
64
Apply Margin Message Mode
64
Set Temporary Max Target Speed
65
Set Colorization
65
Set Attribute Mapping
68
Convert 6-Dots/ MM Bitmap to 8-Dots/ MM Bitmap
69
Enable Constant Speed Logos
70
Allocate Extra RAM for Character Build
70
Status Command
71
Transmit Peripheral Device Status
71
Transmit Paper Sensor Status
72
Transmit Printer ID
72
Transmit Printer ID, Remote Diagnostic Extension
73
Transmit Status
76
Slip Paper Status (N = 3 or N = 51)
78
Real-Time Commands
79
Send Printer Software Version
80
Busy Line and Fault Conditions
81
Real-Time Status Transmission
81
Real-Time Request to Printer
83
Real-Time Printer Status Transmission
84
Real-Time Commands Disable
84
Unsolicited Status Mode
85
Select or Cancel Unsolicited Status Mode (USM)
85
Recognizing Data from the Printer
87
Barcodes
88
Select Printing Position of HRI Characters
88
Select Pitch of HRI Characters
88
Select Bar Code Height
88
Print Barcode
89
Set Gs1Databar (RSS) Parameters
91
Print Gs1Databar (RSS), Data Length Specified
91
Print Gs1Databar (RSS Barcode), Null Terminated
92
Select PDF 417 Parameters
92
Select Bar Code Width
93
Page Mode
94
Print and Return to Standard Mode
94
Cancel Print Data in Page Mode
94
Select Page Mode
95
Select Standard Mode
96
Select Print Direction in Page Mode
96
Set Print Area in Page Mode
97
Set Absolute Vertical Print Position in Page Mode
98
Set Relative Vertical Print Position in Page Mode
98
Macros
99
Select or Cancel Macro Definition
99
Execute Macro
100
MICR Commands (TH320 MICR Models Only)
101
Read MICR Data and Transmit
101
Transmit Last MICR Read
101
MICR Parsing
101
Define Parsing Format, Save in NVRAM
101
Define Parsing Format, Do Not Save Permanently
102
Parsing Parameter String Options
102
Sample Parsing Formats
103
Check Serial Number
105
Loading the Exception Table
106
Exception Table Entry Format
106
Maintaining the Exception Table
108
User Data Storage
108
Write to User Data Storage
108
Read from User Data Storage
108
Read from Non-Volatile Memory
108
Write to Non-Volatile Memory (NVRAM)
109
Select Memory Type (Sram/Flash) Where to Save Logos or User-Defined Fonts
109
Flash Memory User Sectors Allocation
109
Erase User Flash Sector
110
User Storage Status
111
Flash Download
112
Switch to Flash Download Mode
112
Return Boot Sector Firmware Part Number
112
Return Segment Number Status of Flash Memory
113
Select Flash Memory Sector to Download
113
Get Firmware CRC
113
Return Microprocessor CRC
113
Erase All Flash Contents Except Boot Sector
114
Return Main Program Flash CRC
114
Erase Selected Flash Sector
114
Download to Active Flash Sector
115
Download Paper Type Description
115
Reset Firmware
116
Return Paper Type Description
116
Appendix
117
Commands Listed by Hexadecimal Code
117
Character Sets
121
Character Code 437: USA, Standard Europe
121
Codepage 737 (Greek)
122
Codepage 850 (Multilingual)
123
Codepage 852 (Slavic)
124
Codepage 857 (Turkish)
125
Codepage 858 (with Euro Symbol)
126
Codepage 860 (Portuguese)
127
Codepage 862 (Hebrew)
128
Codepage 863 (French Canadian)
129
Codepage 865 (Nordic)
130
Codepage 866 (Cyrillic)
131
Codepage 1252 (Windows Latin 1)
132
Codepage 1251 (Cyrillic)
133
Codepage 1255 (Hebrew)
134
Electronic Journal
135
Electronic Journal Storage Commands
137
0A C1
137
0A C2
137
0A C3 Clear Journal
137
0A C4 Print Journal
137
0A C5 Return Journal Status
137
0A C6
137
0A C7
138
0A C8
138
0A C9
138
1F 0A Ca
138
1F 0A Cb
138
Print Journal Entry Mode
139
Print Journal Entry Considerations in Auto Journal Mode
139
Print Journal Entry Considerations in Direct Journal Mode
139
Entry Mode Commands
140
0A D1
140
0A D2
140
0A D3
140
0A D4
140
0A D5
140
0A D6
140
0A D7 N
141
0A D8 N
141
0A D9 N Print N Lines
141
1F 0A da
141
0A DB Enable Journal Cut
141
0A DC Disable Journal Cut
141
TH420: Additional Features
142
Comparison to A756
143
Two-Color Commands (Comparison A758 to TH420)
144
Colorization Commands
145
Width Specifications
145
Emulation Modes
146
Status
147
Advertisement
Wincor Nixdorf TH320 User Manual (55 pages)
Brand:
Wincor Nixdorf
| Category:
Printer
| Size: 2 MB
Table of Contents
Table of Contents
3
Manufacturer's Declaration and Approval
5
General Authorization
5
FCC-Class a Declaration
5
User Information
5
Sa Fe Ty in for Ma Ti on
6
Instructions for Maintenance
7
Warranty
7
Recycling
7
Voluntary Control Council for Interference (VCCI) Radio Frequency Interference Statement
8
About this Guide
9
What Is in this Guide
9
About the Printer
10
User Controls
12
Au DI Ble Beeps
13
Available Printer Configurations
13
Prin Ter con Fi Gu Ra Ti on Iden Ti Fi Ca Ti on
13
Com Mu ni Ca Ti on in Ter Fa Ces
13
Printer Specifications
14
Setting up the Printer
16
Getting Started
16
Choose a Location
16
Unpack the Printer
17
Keep the Pa Cka Ging
17
Check the Pa Cking List
18
Re Mo Val of in Ter Nal Re Straint Items
18
Installing New Receipt Paper
19
Installing or Replacing the Ribbon Cassette
20
Replacing a Used Ribbon Cassette
20
Installing a New Ribbon Cassette
21
Connect the Cables
22
Cash Dra Wer Ca Bles
22
Com Mu ni Ca Ti on Ca Bles
23
If in Stal Ling the USB Com Mu ni Ca Ti on Cable
24
If in Stal Ling the Po We Red USB Ca Ble
24
Power Supply Cable
25
Ca Ble Rou Ting
26
Testing the Printer
26
Test Pro Ce du Re
27
Test Prin Tout
28
Printer Configurations
29
Configuring the Printer
30
Com Mu ni Ca Ti on in Ter Fa Ce
32
Diagnostic Modes
34
En Ab Le or Dis Ab Le Data Sco Pe Mode
34
En Ab Le or Dis Ab Le Re Ceipt Test Mode
35
En Ab Le or Dis Ab Le Slip Test Mode
35
En Ab Le or Dis Ab Le MICR Test Mode
36
Set Ting the Prin Ter Emu la Tions and Soft Wa Re Op Tions
37
Slip Op Tions
37
Setting up the Printer
38
Using the Printer
40
Printing on Forms or Checks
40
Front in Ser Ti on Me Thod
40
Dro Pin Me Thod
41
Pro Per in Ser Ti on of Mul Ti-Part Forms
41
Verifying and Validating Checks (Optional)
43
Tips for Avoiding Problems
45
Pre Vent over Hea Ting of the Print He Ad
45
Avoid Harsh en VI Ron Ments
46
Troubleshooting
47
Status Indicators
47
Ty Pi Cal Re Me Dy Pro Ce du Re
47
Prin Ter Beeps
48
Prin Ter will Not Print
48
On-Line, Pa Per Sta Tus, er Ror Light Flas Hes
49
Slip-In Light Does Not Ope Ra te
50
Check Print Qua Li Ty Poor
50
Re Ceipt Print Qua Li Ty Poor
51
Slip Sta Ti on and MICR Pro Blems
52
The Kni Fe Does Not Operate
53
Other Conditions
54
Wincor Nixdorf TH320 Quick Reference (8 pages)
Brand:
Wincor Nixdorf
| Category:
Printer
| Size: 0 MB
Advertisement
Advertisement
Related Products
Wincor Nixdorf TH230
Wincor Nixdorf TH210
Wincor Nixdorf TH180
Wincor Nixdorf TH420
Wincor Nixdorf TH200E
Wincor Nixdorf TH210-3
Wincor Nixdorf TH200
Wincor Nixdorf TH250
Wincor Nixdorf TH230+
Wincor Nixdorf TH210-3 for MF
Wincor Nixdorf Categories
Touch terminals
Monitor
Printer
Motherboard
Cash Register
More Wincor Nixdorf Manuals
Login
Sign In
OR
Sign in with Facebook
Sign in with Google
Upload manual
Upload from disk
Upload from URL