AEG Voxtel S100 User Manual
Hide thumbs
Also See for Voxtel S100:
- Quick start manual (198 pages) ,
- Quick start manual (24 pages) ,
- Quick start manual (37 pages)
Table of Contents
Advertisement
Quick Links
Advertisement
Table of Contents

Related Manuals for AEG Voxtel S100


Summary of Contents for AEG Voxtel S100
- Page 1 USER GUIDE CORDLESS TELEPHONE Voxtel S100/105...
-
Page 3: Important Safety Instructions
BECAUSE WE CARE Thank you for purchasing this product. This product has been designed and assembled with utmost care for you and the environment. This is why we supply this product with a quick installation guide to reduce the number of paper (pages) and therefor save trees to be cut for making this paper. -
Page 4: Unpacking Your Phone
9. Use only the supplied NiMH (Nickel Metal Hydride) batteries! The operation periods for the handsets are only applicable with the default battery capacities. 10. The use of other battery types or non-rechargeable batteries/primary cells can be dangerous. These may cause interference and/or damage to the unit or surroundings. -
Page 5: Getting To Know Your Phone
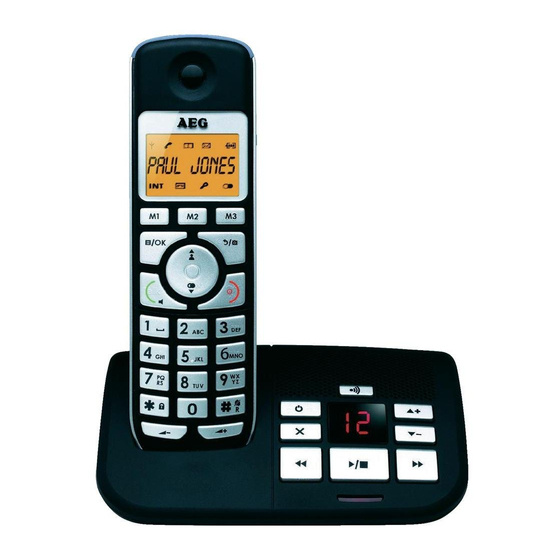
GETTING TO KNOW YOUR PHONE Handset overview (see P1) Meaning M1/M2/M3 - Direct memory keys In idle mode: press and hold to dial the stored number Clear In main menu mode: press to go back to idle screen In sub-menu mode: press to go back to previous level In sub-menu mode: press and hold to go back to idle screen In editing / predialling mode: press to clear a... - Page 6 Alphanumeric keypad Press to insert a digit / character / * / # 1-9 keys in idle mode: Press and hold to dial out pre- stored fast-key memories * key in idle mode: press and hold to enable or disable the keypad lock.
- Page 7 Amplify During a call: press to turn on or off the audio boost. Earpiece Display icons and symbols (see P2) The LCD display gives you information on the current status of the telephone. Meaning Steady on when the handset is within range of the base. Flashes when the handset is in marginal range of the base.
- Page 8 On when you have a new Voice Mail message. (This is a caller display service from the network) Indicates when there are more characters or numbers in front of those being displayed. Indicates when there are more characters or numbers after those being displayed.
- Page 9 Play / stop Press to play the message. Press again to stop the message playback. Skip backward Press to repeat playing the current message from the beginning. Press twice to skip backward to the previous message. Delete Press once to delete the message during playback. Press and hold to delete all the messages.
- Page 10 XX steady on: playing the current XX old recorded message. XX flashing: playing the current XX new recorded incoming message. Steady on: playing the current outgoing message (OGM) A1/A2 where A1 is the answer & record OGM and A2 is the answer only OGM.
-
Page 11: Installing Your Phone
Press to delete the last character. Press and hold to delete the entire text string. press press press press press press Space ‘ & INSTALLING YOUR PHONE Connecting the base station (see P5) Plug the power adapter and line cord into the base station. Plug the power adapter into a 210 - 230 V ac, 50/60 Hz mains socket and the other end of the line cord into your telephone line socket. -
Page 12: Using Your Phone
Installing and charging the batteries (see P3) Slide open the battery compartment cover. Place the 2 batteries with the correct polarity, as shown. Slide the battery compartment cover back. Put the handset on the base and charge for 15 hours before first time use. - Page 13 7.1.5 Call from the redial list Press to access the redial list and press to select the desired redial number. Press to dial out the selected redial number. Press it again to turn on the speakerphone. 7.1.6 Call timer Your handset automatically times the duration of every call. The call timer is displayed as soon as you answer a call or 15 seconds after dialling and remains on the screen for 5 seconds after the end of the call.
- Page 14 To turn off the audio boost feature and return the handset volume back to normal, press again and the handset top indicator light turns off. >The audio boost feature will be turned off automatically when the call is ended. End a call During a call press to end the call.
- Page 15 In keypad lock mode, press and hold * to turn off the keypad lock. >The keypad lock icon will turn off. 7.10 Redial the last number You can redial any of the 5 last numbers called. If you have stored a name in the contacts list to go with the number, the name will be displayed instead.
- Page 16 7.10.4 Delete all redial list entries Follow steps 1 and 2 in section “7.10.1 Redial a number from the redial list”. Press to select “DEL ALL”. Press to display “CONFIRM?”. Press again to confirm. >All entries will be deleted and the display will show “EMPTY”. 7.11 Find the handset You can locate the handset by pressing the find key...
- Page 17 Note: If there is an external call while you are on an intercom call, you‘ll hear warning beeps, and will have to end the intercom call before you can answer the external call. 7.12.2 Call all handsets In idle mode, press and the registered handset numbers will display.
-
Page 18: Private Phonebook
Press and hold the * key on the calling handset to establish the conference call. Either handset can exit the conference by pressing , leaving the other handset still connected to the external call. PRIVATE PHONEBOOK Each handset can store up to 20 private phonebook entries with names and numbers. - Page 19 Note: If number is more than 8 digits, press digits the * key or # key to view the remaining. Edit a contacts entry From idle model, press to show “CONTACTS” and then press enter the contacts list. Press to select the desired contact entry. Press to select “EDIT”.
-
Page 20: Caller Display (Network Dependent)
Set the fast dial numbers Up to 8 of your contact entries can be allocated to a fast dial key (from 2 to 9), where you can dial the number from idle mode by simply pressing and holding the appropriate digit key for more than 2 seconds. If no fast dial number is stored, you will hear a double-beep tone when the key is held down. - Page 21 If the call is from someone who withheld their number, “WITHHELD“ will display. If the call is from someone whose number is unavailable, e.g. an international call or from a private exchange, “OUT AREA“ will display. If you‘ve got new caller display records, the handsets will display “X CALLS“...
-
Page 22: Phone Settings
Delete all call log entries Follow steps 1 and 2 in section “9.1 View the call log”. Press to show “DEL ALL”. Press to display “CONFIRM?”. Press to confirm. All entries will be deleted and the display will show EMPTY. Call log category You can set the handset to record all received calls or only missed calls in the call log. - Page 23 10.1.3 Set the time Press to show “CLOCK”. Press to select “SET TIME”. Press and then to enter the time information in 24 hour format. Press to confirm your setting. Note: If time has been set before, the current time will display, otherwise, “HH:MM”...
- Page 24 An alarm tone will be emitted from the earpiece to alert the user the alarm time is reached. Once the user presses any key or presses and holds to disable the alarm, the display will revert to the call duration. >During paging or ringing, the alarm will not sound when the alarm time is reached.
- Page 25 Press to select “EXT RING”. Press to select the ringtone you want to hear for external calls. Note: There are 10 ring tones, and each will play as you step through the list. Press to confirm 10.3.3 Set the ringer volume Press to select “HS SET”.
- Page 26 10.3.5 Set the equalizer The phone has three different frequency range filters (NORMAL, BASS, TREBLE) that you can set, to adjust the sound in the earpiece to suit your preference. Press to select “HS SET”. Press to select “EQLIZER”. Press to select “NORMAL”...
- Page 27 Press to select “DISPLAY”. Press to select “HS NAME” or “TIME”. Press to confirm. 10.3.10 Set the auto answer If you turn on the Auto Answer, you can answer a call automatically by just lifting the handset off the base or charger, without having to press any key. Press to select “HS SET”.
- Page 28 Note: The respective ringer melody will be played while browsing the melody list. Press to confirm. 10.4.2 Set the ringer volume Press to select “BS SET”. Press to select “RING VOL”. Press to select the desired ringer volume (a total of 6 ringer volume levels including “OFF”).
- Page 29 Press to select your desired recall (flash) time (“SHORT”, “MID”, “LONG”). Press to confirm. 10.4.5 Change the system PIN code A 4-digit system PIN code is used for changing the system settings of the base station. It is used to protect your phone against unauthorised use. The default system PIN code is 0000.
- Page 30 Press to display “BASE 1“. Press to select which base number you want to use. (Note: a * will be shown next to any base numbers the handset is already registered with, and if selected the new registration will overwrite it.) Press to display “PIN?------“.
- Page 31 11.1 Turn on/off the answering machine You can turn the answering machine on or off using the base or the handset. When the answering machine is set to “ON”, calls will be answered after the set answer delay and if the answer and record mode is set, the caller can then leave you a message.
- Page 32 Note: If there are no new messages, “00” will display steadily in the message counter on the base. Pressing will have no effect. Listen new messages through the handset: Press to select “TAM”. Press to select “PLAYBACK”. Press to start message playback through the handset loudspeaker and the screen displays the date of the message received.
- Page 33 PREVIOUS Repeat playing the current message from the beginning. The date or time information of the current message will display. DELETE Delete the current message and start playing the next message. Press to confirm the function. Note: Alternatively, you can use the following shortcut keys to control different operations during message playback.
- Page 34 11.4 Record memo You can record your memo message for another user. When you record a memo, the message counter will increase by one and the message can be played back in the same way as answering machine messages. Memo recording can still function even when the answering machine is turned off.
- Page 35 Press to select “SETTINGS”. Press to select “OGM SET”. Press to select “ANS&REC” or “ANSONLY”. Press to select “RECORD”. Press to start recording your personalised OGM and “RECORD” is displayed on the screen. Press to stop recording your personalised OGM. >Your new OGM will playback automatically.
- Page 36 11.5.4 Set the answer delay You can set the number of rings before the answering machine answers and starts playing your OGM. You can set the answering machine to answer after two to eight rings or time saver (TS). If time saver (TS) is set, the answering machine will answer after 6 rings if there are no new messages already recorded, or after 2 rings if there is a new message, so if you call in for remote access and it doesn‘t answer after 2 or 3 rings, you can hang up and save on call charges.
- Page 37 Press to select “TAM”. Press to select “SETTINGS”. Press to select “COMPRESS”. Press to select your desired compression rate. (The currently selected option is indicated with a *.) to confirm. Press 11.5.7 Activate remote access Your phone lets you check your messages, or otherwise operate your answering machine, by calling the answering machine when you are away from home and then entering a 4-digit remote access PIN from a tone- calling phone.
- Page 38 Press to confirm. Access your answering machine remotely You can ring your phone from another tone-dialling phone to switch the answering machine on or off and/or listen to your messages remotely. Place a call from a tone-dialling phone to your phone. When the answering machine answers the call and starts playing the OGM, press *.
- Page 39 Keys Functions Play the message Stop the current message playback Skip to play the next message Turn on the answering machine Turn off the answering machine Note: If your answering machine is switched off, the phone will answer the call after 10 rings.
-
Page 40: Troubleshooting
If you don‘t want to pick up the call, you can press again to listen through the handset earpiece, or press to stop the screening and return the display to “SCREEN?“. TROUBLESHOOTING Problem Cause Solutions No dialling tone The connection Check the cord of the base connections. - Page 41 Problem Cause Solutions No display Empty battery Recharge battery Answering Machine Problem Cause Solutions The unit does The answering Turn on the machine is answering machine. not record new turned off. messages. The caller cannot The answering Turn on the leave a message.
-
Page 42: Guarantee And Service
Disconnect the base unit from the telephone line and plug a different phone into the master telephone socket. If this works the line is ok. If the call does not work, and you are using a two-way socket adapter, remove it and plug a telephone directly into the socket. If the call now works, the adapter may be faulty. -
Page 43: Technical Details
TECHNICAL DETAILS Standard Digital Enhanced Cordless (DECT) Frequency range 1.88 to 1.9 GHz (bandwidth = 20 MHz) Channel bandwidth 1.728 MHz Operating range Up to 300 m outdoors; Up to 50 m indoors Operating time Standby: 100 hours, Talking: 10 hours Battery charge time:15 hours Temperature range Operating 0°... -
Page 44: Disposal Of The Device (Environment)
DISPOSAL OF THE DEVICE (ENVIRONMENT) At the end of the product lifecycle, you should not throw this product into the normal household garbage but bring the product to a collection point for the recycling of electrical and electronic equipment. The symbol on the product, user guide and/or box indicate this. - Page 46 © 2012 Binatone Electronics International Limited All rights reserved Subject to avaibility. Rights of modification reserved. AEG is a registered trademark used under license from AB Electrolux (publ) www.aegtelephones.eu...
Need help?
Do you have a question about the Voxtel S100 and is the answer not in the manual?
Questions and answers