Table of Contents
Advertisement
Advertisement
Table of Contents

Related Manuals for InFocus IN5555L


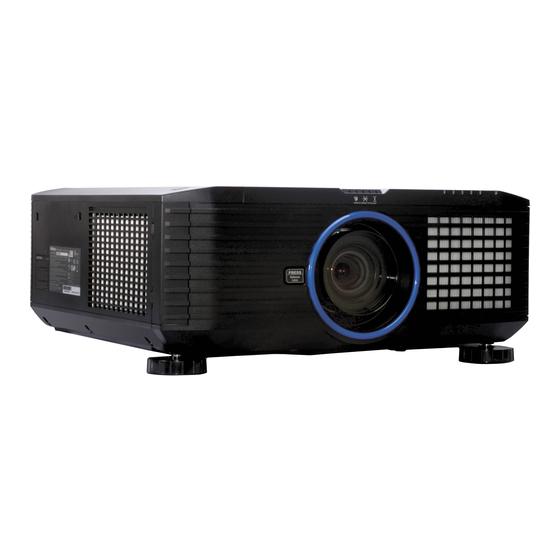
Summary of Contents for InFocus IN5555L
- Page 2 Input ratings: AC 110-240V, 9-4A, 50-60Hz InFocus reserves the right to alter product offerings and specifications at any time without notice.
-
Page 3: Table Of Contents
Table of Contents Introduction Positioning the projector Ceiling Mount Connecting power Connecting a computer source Displaying an image Adjusting the image Connecting a video device Video device connections Shutting down the projector Troubleshooting your setup Using the remote control Using the keypad buttons Using the menus Input menu Picture menu... - Page 4 Locate the projector at least 4' (1.2m) away from any heating or cooling vents. • Only genuine InFocus lamps are tested for use in this projector. Use of non • Do not block ventilation openings. Locate the projector in a well-ventilated InFocus lamps may cause electrical shock and fire, and may void the projector area without obstructions to intake or exhaust vents.
-
Page 5: Introduction
Optional Accessories Optional accessories include optional lenses and a ceiling mount. These items and other accessories can be found on our website at www.infocus.com or at your Your new digital projector is simple to connect, easy to use, and straightforward to maintain. - Page 6 Wired remote jack • RS-232 connector for serial control. Command control codes are in the Appendix and on our support website at www.infocus.com/support. 12V Screen Trigger output RS-232 The 3.5mm mini-jack screen trigger provides a 12 volt, 0.25 amp DC output. It turns on when the lamp is lit.
-
Page 7: Positioning The Projector
Positioning the Projector To determine where to position the projector, consider the size and shape of your Vertical Image Offset is -60-% ~ +20% screen, the location of your power outlets, and the distance between the projector and the rest of your equipment. Here are some general guidelines: •... -
Page 8: Ceiling Mount
It is not recommended you install the projector yourself. • We strongly recommend using InFocus approved ceiling mounts for proper fitting, ventilation and installation. Refer to the ceiling mount installation guide for more information. The warranty does not cover any damage caused 10º... -
Page 9: Connecting Power
Connecting power Connect the black power cord to the Power connector on the side of the projector Connect power cord and to your electrical outlet. Turn on the power switch. The Power LED on the top of the projector (page 12) turns red. NOTES: Note: Connection to a circuit with a minimum of 20A capacity is recommended. -
Page 10: Displaying An Image
Displaying an image Press Power button Touch the Power button on the keypad or the remote. The Power button blinks green and the fans start to run. When the lamp turns on, the start up screen will display and the Power button will become solid green. It can take a minute for the image to achieve full brightness. -
Page 11: Adjusting The Image
Adjusting the image Adjust distance Position the projector to the desired distance from the screen at a 90 degree angle to the screen. See the Appendix for screen sizes and distances associated with the various lens options. Adjust zoom, focus and If the image is square but not centered on the screen or viewing area, adjust Zoom lens shift. -
Page 12: Connecting A Video Device
If your video device has a 15-pin VGA output, plug one end of the included computer cable into the VGA connector on your video source. Plug the computer No video cables are provided with the projector. You can order cables from InFocus cable into the RGB connector on the projector. -
Page 13: Shutting Down The Projector
The projector is too hot. Make sure the vents aren’t blocked (see page 18). Turn the projector off and wait one minute, then turn the projector on again. Contact Technical Support if the problem persists. Visit www.infocus.com/support to contact service. Shutter The shutter is closed. - Page 14 Problem Solution Result Plug the power cord into the projector, turn No start up screen. Correct image. on the power switch and press the power button. Press the Input button to Computer image projected. Only the start up screen appears. activate the laptop’s external port.
- Page 15 Problem Solution Result No computer image, just the words “Signal Computer image projected. Press the Auto Sync button on the keypad or remote. To adjust computer refresh rate, go to Control Panel > out of range.” Display > Settings > Advanced > Adapter (location varies by operating system).
- Page 16 Problem Solution Result Image fuzzy or cropped Set your computer’s display resolution to the Image clear and not cropped. native resolution of the projector (Start > Settings > Control Panel > Display > Settings tab). For a laptop, disable laptop monitor or turn-on dual- display mode...
- Page 17 Problem Solution Result Image not square. Adjust the angle of the projector, so that it is Square image. square with the screen. Image not sharp. Adjust Sharpness in the Picture menu. Correct image. INPUT PICTURE LAMPS ALIGNMENT CONTROL SERVICE Picture Mode <...
- Page 18 Problem Solution Result Image upside down. Turn Projection Mode to Front in the Alignment Correct image. menu. INPUT PICTURE LAMPS ALIGNMENT CONTROL SERVICE Projection Mode < Front > Fan Mode < Normal > Lens Control Enter Lens Memory Enter Center Lens Execute Warp Enter...
- Page 19 Problem Solution Result The video embedded in my PowerPoint Turn off the internal LCD display on your laptop. Embedded video plays correctly. presentation does not play on the screen. Lamp won’t turn on and the Temp LED is on. Make sure vents aren’t blocked, turn the Lamp turns on.
- Page 20 Replace lamps Still need assistance? If you need assistance, visit our support website at www.infocus.com/support or call us. Check out the How To section for additional information on using this projector for home theater or gaming applications. This product is backed by a limited warranty. An extended warranty plan may be purchased from your dealer.
-
Page 21: Using The Remote Control
Using the remote control To operate, point the remote at the projector (not at the computer). The range of optimum operation is about 30’ (9m). The remote uses two (2) AA batteries (not included). Install batteries by removing Press the remote’s Power On and Off buttons to turn the projector on and off the cover from the remote’s back, aligning the + and - ends of the batteries, sliding (see page 12 for shutdown information). - Page 22 Wired Remote Option press the button which corresponds with the projector ID number set in Step #1. For example, pressing ID Set and “3” on the remote will set the remote ID If the wireless range of the remote is not sufficient, the remote can be wired directly into the projector’s Wired Remote connector.
-
Page 23: Using The Keypad Buttons
Using the keypad buttons Most buttons are described in detail in other sections, but here is an overview of their functions: Power–turns the projector on and off (page 8). Input–changes the active source (page 8). Auto Sync–resynchronizes the projector to the source. Aspect - toggles between different aspect ratio modes. -
Page 24: Using The Menus
Using the menus INPUT PICTURE LAMPS ALIGNMENT CONTROL SERVICE To open the menus, press the Menu button on the keypad or remote. Use the left INPUT PICTURE LAMPS ALIGNMENT CONTROL SERVICE Input Selection Enter Picture Mode < High Bright > Enter Contrast <... - Page 25 Background: Allows you to select a blank blue, black or white startup screen instead of the default InFocus logo. Video Standard: Allows you to select a video standard that has been specifically tuned for the input signal. When Auto is selected, the projector automatically determines the standard.
-
Page 26: Picture Menu
Picture menu Picture Mode: Presets are provided that optimize the projector for displaying INPUT PICTURE LAMPS ALIGNMENT CONTROL SERVICE Picture Mode < High Bright > computer presentations and video images under certain conditions. Select Contrast < > Brightness < > between High Bright, Presentation and Video. -
Page 27: Lamps Menu
Lamps menu Mode: Allows you to choose between single and dual lamp modes. Note: When INPUT PICTURE LAMPS ALIGNMENT CONTROL SERVICE using single lamp mode, the lamp with the least number of lamp hours turns on. Mode < High Bright >... -
Page 28: Alignment Menu
Alignment menu Projection Mode: Allows you to change the orientation of the image for ceiling INPUT PICTURE LAMPS ALIGNMENT CONTROL SERVICE mounted, rear-projection and table-top orientations. Projection Mode < Front > Fan Mode < Normal > Fan Mode: Allows you to manually select the fan tilt position. By default, the Lens Control Enter Lens Memory... -
Page 29: Control Menu
Network: Press Enter button to review the current network settings. Note: Network configuration and operation are made via the LAN Configuration Utility. Start Up Logo: When this feature is on, the projector will display the InFocus logo upon start-up. Trigger: If you enable this feature and connect your projection screen to this... -
Page 30: Service Menu
Service menu Model: Displays the model number of the projector (read-only). INPUT PICTURE LAMPS ALIGNMENT CONTROL SERVICE Serial Number: Displays the serial number of the projector (read-only). Model : IN5552L Serial Number : C277XXXX00807 Software Version : ME01-GE02-Ub02-5050-39-DPNE02-P03-E07 Software Version: Displays the current firmware version the projector is using Active/PiP Source : / Off Pixel Clock :... -
Page 31: Using Projector Web Controls
Using Projector Web Controls Logging in To log into Projector Web Controls, follow these steps: Projector Web Controls allow you to configure and control a networked projector Make sure the projector is connected to the network and connected to AC via a web browser. - Page 32 Using Projector Web Controls Lens Adjustments Submenu: allows you to adjust the lens zoom, focus and position. Changes you make are applied immediately. To change a numeric setting (e.g. Brightness): Click the corresponding up • or down button. To perform a command (e.g. Source): Click the corresponding button. •...
- Page 33 Edge Blend Submenu: allows you to adjust edge blend, blend width, black level Configuration Menu uplift and black level uplift. IP Configuration Submenu: allows you to manually enter the IP address con- figuration for your projector. Consult with your network administrator before mak- ing any changes on this page;...
- Page 34 Information Submenu: displays a read-only page of projector information. To upgrade Projector Network Firmware: Upgrades the firmware for the projector's network features (this firmware is separate from the regular projector firmware). Key in the IP address followed by “/firmwareUpdate.htm” on the URL box to activate the firmware update procedure.
-
Page 35: Maintenance
When the lamp time has expired, the Lamp LED (Lamp1 or Lamp2) on top of the projector will light solid red. Turn the projector off and unplug the power cord. NOTE: Be sure to use the InFocus lamp module designed for this projector. • You can order new lamps from www.infocus.com (in select areas), your Apply a non-abrasive camera lens cleaner to a soft, dry cloth. - Page 36 Turn the projector off and unplug the power cord. Wait 60 minutes to allow the projector to cool thoroughly. Wait 60 minutes Remove the lamp doors by loosening 2 captive screws on each lamp door and pulling the doors straight off being careful not to damage the ground wires connecting the doors to the projector.
-
Page 37: Replacing The Lens
Replacing the lens This projector is shipped without a lens. You can order a lens from www.infocus.com (in select areas), your retailer or your dealer. Turn the projector off and unplug the power cord. Wait 60 minutes to allow the projector to cool thoroughly. -
Page 38: Replacing The Filters
Replacing the filters It is recommended that you clean the filters every 250 hours (or as needed depending on your room environment) and replace the filters at the same time as you replace the lamps. Follow the instructions below. Turn the projector off and unplug the power cord. Wait 60 minutes to allow the projector to cool thoroughly. -
Page 39: Changing The Color Wheel
Replacing the color wheel The color wheel of your projector is user replaceable. The color wheel which was installed by the factory is designed for maximum color brightness and has 6 color segments (RYGCWB). The optional color wheel which came as an accessory is designed for fully saturated color and contains 6 color segments (RGBCMY). -
Page 40: Using The Security Lock
Using the security lock The projector has a security lock for use with a Cable Lock System. Refer to the information that came with the lock for instructions on how to use it. Security lock... -
Page 41: Appendix
Appendix • Lens Shift Position: -20% ~ +60% Vertical; +/-10% Horizontal • F-Number: 1.7 - 1.9; Focal Length: 26 - 34mm Optional Lenses • Zoom Ratio: 1.3:1 • Throw Distance Ratio: 1.43-1.88:1 (XGA); 1.53-2.02:1 (WXGA); 1.46-1.92:1 Standard Zoom Lens Features and Specifications (LENS-074): (WUXGA). - Page 42 Wide Fixed Lens Features and Specifications (LENS-075): • Focal Length: 11.6mm • Zoom Ratio: n/a • Motorized Focus • Throw Distance Ratio: 0.63:1 (XGA); 0.68:1 (WXGA); 0.64:1 (WUXGA) • Lens Shift Position: 0% • F-Number: 1.85 Wide Fixed Lens WXGA WUXGA Throw Distance Image Size (Width) +/-10%...
- Page 43 Wide Zoom Lens Features and Specifications (LENS-076): • Focal Length: 18.7-26.5mm • Zoom Ratio: 1.41:1 • Motorized Zoom and Focus • Throw Distance Ratio: 1.04-1.48:1 (XGA); 1.11-1.59:1 (WXGA); 1.06-1.72:1 • Lens Shift Position: -20% ~ +60% Vertical; +/-10% Horizontal (WUXGA) •...
- Page 44 Long Zoom 1 Lens Features and Specifications (LENS-077): • Focal Length: 52.8-79.1mm • Zoom Ratio: 1.5:1 • Motorized Zoom and Focus • Throw Distance Ratio: 2.97-4.46:1 (XGA); 3.19-4.78:1 (WXGA); 3.04-4.56:1 • Lens Shift Position: -20% ~ +60% Vertical; +/-10% Horizontal (WUXGA) •...
- Page 45 Long Zoom 2 Lens Features and Specifications (LENS-078): • Focal Length: 78.5-121.9mm • Zoom Ratio: 1.55:1 • Motorized Zoom and Focus • Throw Distance Ratio: 4.4-6.85:1 (XGA); 4.71-7.26:1 (WXGA); 4.50-7.00:1 • Lens Shift Position: -20% ~ +60% Vertical; +/-10% Horizontal (WUXGA) •...
- Page 46 Semi Long Zoom Lens Features and Specifications (LENS-079): • Focal Length: 32.9-54.2mm • Zoom Ratio: 1.65:1 • Motorized Zoom and Focus • Throw Distance Ratio: 1.84-3.05 (XGA); 1.98-3.27:1 (WXGA); 1.88-3.11:1 • Lens Shift Position: -20% ~ +60% Vertical; +/-10% Horizontal (WUXGA) •...
-
Page 47: Pip Compatibility
PiP Compatibility source image displayed on top of the primary source in one of four placement options. See page 24 for details. The following source combinations (marked with PiP allows two distinct sources to be displayed simultaneously. Switch primary an “X”) are supported: sources, make picture adjustments and choose one of multiple display options: either two side by side horizontal or vertical source regions, or a small secondary HDMI... -
Page 48: Rs-232 Commands
For network control, you can access the projector through Port 23 (Telnet). Function Command Response We use the same control codes on serial as we do over the network. InFocus network control Brightness (BRT100) Sets the brightness to uses the Telnet packet structure. - Page 49 Error Conditions Auto Source Not all commands are supported for all projectors. If an unsupported command is issued, the 0: Disable; 1: Enable command will be ignored. If a command is received that is not understood, a ‘?’ character will be returned indicating the command was not understood.
- Page 50 Color Temp Source Edge Blend Black Level 0,4,8, 0: 5000K (Warmest) Specific Uplift Right 12,16 2: 6500K (Warm) ,20,2 3: 7800K 4,28, 4: 9300K (Cool) 5: Native (Bright) Edge Blend Black Level 0,8,1 Contrast Uplift Top 6,24, Custom Lamp Power Edge Blend Blue DHCP Enable Edge Blend Green...
- Page 51 Error Condition Green Gain 0: No error Green Offset 1: Lamp not lit after 5 attempts High Altitude Mode 3: Lamp went out unexpectedly Horz. Keystone -350 4: Fan failure 5: Overtemperature Horz. Refresh Rate string 6: Low voltage Horz. Total ?: Query Horz.
- Page 52 Lamp 2 Status Lens Vertical Shift Up 0: Off 0: Fine Step 1: On 1: Large Step Lamp Power Model string 0: Eco Noise Reduction 1: Normal 2: Dimming Overscan 0: Off; 1: Zoom; 2: Crop Language 0: English (5 for China Picture-in-Picture Enable 1: French models)
- Page 53 Power Saving Mode Red Gain 0: ECO standby mode Red Offset 1: Standard standby mode Resolution string Presets Source 0: High Bright Specific Rotate Image 1: Presentation 2: Video Search Screen 0: Logo Projection Mode 1: Blue 0: Front 2: Black 1: Rear 3: White 2: Ceiling + Front...
- Page 54 Video Standard Test Pattern 0: Color Bar 0: Auto 1: Cross Hatch 1: PAL 2: Burst 2: SECAM 3: Red 3: NTSC 4: Green 5: Blue W2 Recover 6: White Warp Bottom Left Corner -192 7: Black 8: Cross Mark 9: Cross Hatch + Mark Warp Bottom Left Corner -120...
-
Page 55: Index
INDEX YPbPr 5 Control commands 47 Control menu 28 Accessories 4 Control panel 22 Adjusting the image 10 Alignment menu 27 Displaying an image 9 DVI-D 5, 8 BNC 8 Focus 10, 20, 22 Cable box 11 Ceiling mount 7, 27 Cleaning the lens 34 HDMI 5, 8, 11 Color Wheel, replacement 38... - Page 56 SDI 5, 11 Maintenance 34–38 Security lock 39 Menu system (OSD) 23 Serial communication configuration 47 Serial control 5 Service menu 29 Network communication configuration 47 Shutter 20, 22 Network functions 30 Shutting down the projector 12 S-video 5, 11 Optimizing computer image 23 Optional lenses 40–45 Troubleshooting...
- Page 57 VGA 5, 8, 11 Video device connections 11 Warranty 19 Wired remote 5, 21 YPbPr 5 Zoom 10, 20, 22...
Need help?
Do you have a question about the IN5555L and is the answer not in the manual?
Questions and answers