Table of Contents
Advertisement
Quick Links
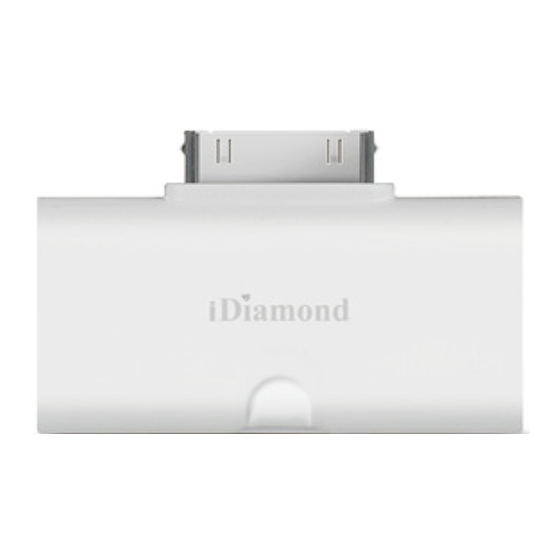
FORA iDiamond Blood
Glucose Monitoring
System
Owner's Manual
Dear FORA iDiamond System Owner:
Thank you for purchasing the FORA iDiamond
Blood Glucose Monitoring System. This manual
provides important information to help you to use
the system properly. Before using this product,
please read the following contents thoroughly
and carefully.
Regular monitoring of your blood glucose levels
can help you and your doctor gain better control
of your diabetes. Due to its compact size and
easy operation, you can use the FORA iDiamond
Blood Glucose Monitoring System to easily
monitor your blood glucose levels by yourself
anywhere, any time.
If you have other questions regarding this
product, please contact the place of purchase.
IMPORTANT SAFETY
PRECAUTIONS
READ BEFORE USE
1. Use this device ONLY for the intended use
described in this manual.
2. Do NOT use accessories which are not
specified by the manufacturer.
3. Do NOT use the device if it is not working
properly or if it is damaged.
4. Do NOT use the equipment in places where
aerosol sprays are being used or where
oxygen is being administered.
5. Do NOT under any circumstances use the
device on newborns or infants.
6. This device does NOT serve as a cure for any
symptoms or diseases. The data measured is
for reference only.
With iFORA
Version 1.0 2013-02
Advertisement
Table of Contents

Related Manuals for Fora DM40


Summary of Contents for Fora DM40
- Page 1 Regular monitoring of your blood glucose levels can help you and your doctor gain better control of your diabetes. Due to its compact size and easy operation, you can use the FORA iDiamond Blood Glucose Monitoring System to easily monitor your blood glucose levels by yourself anywhere, any time.
-
Page 2: Table Of Contents
Contents 1. Getting Started ● About the FORA iDiamond Blood Glucose Monitoring System ● Test Strip ● How to Install and Update the FORA iDiamond Diabetes Manager App ● Important Health-related Information ● Intended Use ● Test Principle 2. Important Information About Performing Control Solution Tests ●... -
Page 3: Getting Started
► Uploading Results onto TeleHealth System ► Data Transmission Via Bluetooth 6. Error Messages and Troubleshooting 7. Reference Plasma Glucose Range 8. Caring for Your FORA iDiamond Meter Set 9. FORA iDiamond Meter Specifications 10.Symbols Getting Started About the FORA iDiamond Blood... -
Page 4: How To Install And Update The Fora
NOTE: The FORA iDiamond monitor should only be used with FORA iDiamond Test Strips. Using other test strips with this meter can produce inaccurate results. ATTENTION: The front side of test strip should face up when inserting test strip. Test results might be wrong if the contact bar is not fully inserted into the test slot. -
Page 5: Important Health-Related Information
Important Health-related Information ● Severe dehydration and excessive water loss may cause readings which are lower than actual values. If you believe you are suffering from severe dehydration, consult a healthcare professional immediately. ● If your blood glucose results are lower or higher than usual, and you do not have any symptoms of illness, first repeat the test. -
Page 6: Intended Use
Intended Use This system is intended for use outside the body (in vitro diagnostic use) by people with diabetes at home and by health care professionals in clinical setting as an aid to monitoring the effectiveness of diabetes control. It is intended to be used for the quantitative measurement of glucose (sugar) in fresh whole blood samples (from the finger, palm, forearm, upper arm, calf... -
Page 7: How To Perform A Control Solution Test
3. Control Solution Connecting 1. Plug in FORA iDiamond Connect FORA iDiamond with the iOS device, a “connecting” message will appear on the screen and follows by the message “insert the test strip into the meter”. Please follow the instruction and insert the test strip into FORA iDiamond. - Page 8 You can select the required mode by: selecting between and QC mode. When “QC” is selected, the control solution test result will appear on the screen however the meter will not store the test result in the memory of the iOS device.
-
Page 9: Important Information About Testing Your Blood Glucose Level
● The control solution range printed on the test strip vial is for control solution use only. It is not a recommended range for your blood glucose level. ● See the Caring for Your FORA iDiamond Meter Set section for important information about your control solutions. -
Page 10: Fingertip Testing
Blood from a site that has not been rubbed exhibits a measurably different glucose concentration than blood from the finger. When the puncture site was rubbed prior to blood extraction, the difference was significantly reduced. Please follow the suggestions below before obtaining a drop of blood: ●... -
Page 11: How To Test Your Blood Glucose Level
4. Lancet Connecting 1. Insert the test strip in to the meter Connect FORA iDiamond with the iOS device, a “connecting” message will appear on the screen and follows by the message “insert the test strip into the meter”. Please follow the instruction and insert the test strip into FORA iDiamond. - Page 12 before meal about 2 hours after a meal wake up in the morning in the late evening or before going to bed testing with the control solution Correct Incorrect 3. Obtaining a blood sample Use the pre-set lancing device to puncture the desired site.
-
Page 13: Obtaining A Blood Sample From Alternative Sites
NEVER try to add more blood samples to the test strip after the blood absorption process has been completed. Discard the used test strip and retest with a new one. ● If you are experiencing trouble with filling the confirmation window, please contact your health care professional or the local customer service for more assistance. -
Page 14: Viewing Test Results
Alternative Site Testing (AST) AST function can provide you to test the blood glucose other than the fingertips. When to use AST? Food, medication, illness, stress and exercise can affect blood glucose levels. Capillary blood at the fingertip reflects these changes faster than capillary blood at other sites. - Page 15 Data Navigation Guide (Motion) - Navigate between different functions simply by swiping up, down, left and right. Data Record—by swiping left or right of the data you can switch between current and previous data. Swipe up to see the next function—Record List Record List—by swiping left or right of the log you can switch between all the data recorded...
- Page 16 Logbook—by swiping left or right of the log you can switch between current 7 days of glucose testing data to the previous weekly log records. Swipe up to see the next function- Trend Graph Trend Graph—select the enlarge button on the top right corner to switch between 7-14-30 days view.
-
Page 17: Data
By swiping to the left or right you can switch between the glucose control ratio pie charts of current 7 days, 14 days and 30 days under 4 measuring modes. DATA If using the meter for the first time, a message will appear reminding the user to connect the device with the application to start recording. - Page 18 Data Record Screen Blood Glucose Test Result Result Blood glucose unit Help Delete notes Note displays Symbol indication of time To add notes 1.Select the Data Record mode from the Main Menu Bar. Select Data in the main menu bar to enter. The first reading you see is the last blood glucose result along with the reading, date, time and the measurement mode.
- Page 19 3-2 Delete Notes: You also can delete the note if needed. (a) In canned message management page...
-
Page 20: Reviewing Record List
(b) In data record page Reviewing Record List Record Titles Enlarge to see each entry in detail 1.Select the Record List mode from the Floating Menu. Select Record List in the Floating Menu to enter. You will see the recent individual measurement data, and you can switch to all Record List from different times by swiping left or right. -
Page 21: Reviewing Logbook
2.Click at any data record to find out more information Detailed information will pop up with a semi- transparent window. Reviewing Logbook Date Sections of testing times Page Indications 1.Select the Logbook mode from the Floating Menu. Select Logbook in the Floating Menu to enter. The first page you see is the current 7 days of glucose testing data under the measurement 4 different modes. -
Page 22: Reviewing Trend Graph
Reviewing Trend Graph Help Zoom In and Out option for 7-14-30 Days view 7-14-30 Days Glucose Test Trend Graphs Pre-Meal Post-Meal Before Bed Morning 1.Select the Trend Graph mode from the Floating Menu. Select Trend Graph in Floating Menu to enter. The first page you will see is the 7-Days data record of the blood glucose test results under the four measuring modes. -
Page 23: Reviewing Target Pie Charts
2.Zoom in or out to review The first entering page is 7 Days. you can select the enlarge button on the top right corner to zoom out for 14 Days and 30 Days view. NOTE: ● Control solution results are NOT included. Reviewing Target Pie Chart Glucose Control Ratio in Percentage... -
Page 24: Plan
Select the Target Pie Chart mode from the Floating Menu. Select Target Pie Chart in Floating Menu to enter. You will see the current 7-Days of glucose control ratio in percentage under 4 measuring modes. You can see the percentage in 3 duration times of current 7-14-30-ays;... -
Page 25: Current Plan
Duration period Total overall percentage of personal monitoring achievement during this period Different goals achieved during this period Self-monitoring/diet/ exercise/prescription achievements during this period Current Plan 1.Select Plan on the Main Menu Bar to see your Current Plan. If you have already set up a plan before, the first page you will see is the total overall percentage of personal monitoring achievement during this period. -
Page 26: Diary Management
3.If you have historical plan but have not set up a new current plan. You will see a dialogue window inviting you to enter a new current plan. If select “yes”, you will be direct to set up a new current plan; if select “no”, exit the dialogue window and return to the Plan List. -
Page 27: Faq
** Please check with your health provider or insurance company if you are eligible for the TeleHealth program** If you are eligible to join the TeleHealth program, please follow the instruction below to register your FORA iDiamond to the system. - Page 28 1.Go to your health provider with your iDiamond and the mobile device. They should assist you to set up your own TeleHealth patient account and to register your iDiamond to the TeleHealth system for you. 2.Please make sure that the iFORA App, under the Setting, should have the correct Server URL for the TeleHealth so that the data will be uploaded onto the correct server when you update your data.
- Page 29 Bluetooth Indicator on the Blood Glucose Monitor: BLUETOOTH STATUS INDICATOR The meter is searching the device of Bluetooth Flash fast signal. The meter is pairing with the device of Flash slowly Bluetooth. The meter is transmitting the data Lit solid now the connection is established.
- Page 30 Error Messages and Troubleshooting If you follow the recommended action but the problem persists, or error messages other than the ones below appear, please call your local customer service. Do not attempt to repair yourself and never try to disassemble the meter under any circumstances.
-
Page 31: Error Messages
Error Messages ERROR ERROR ERROR WHAT TO MESSAGE TYPE CODE DISPLAY Please Hardware error Err42 contact the Hardware customer service for Unknown error ErrUnknown assistance. Temperature System Err25 is too low operation range is 10°C to 40°C (50°F to 104°F). Repeat the Temperature test after... - Page 32 (Supplement 1): S1–S100. Please consult your doctor to determine a target range that works best for you. Caring for Your FORA iDiamond Meter Set To avoid the meter and test strips attracting dirt, dust or other contaminants, please wash and dry...
-
Page 33: Important Control Solution Information
If swallowed, promptly see a doctor for help. For further information, please refer to the test strip package insert. Important Control Solution Information ● Use only FORA control solutions with your meter. - Page 34 2°C to 30°C (35.6°F to 86°F). Do NOT freeze. FORA iDiamond Meter Specifications Model No.: DM40 Dimension & Weight: 55 (L) x 36 (W) x 12.10 (H) mm, 13.6 g Power Source: iOS device. Memory: Control by iOS device.
- Page 35 Symbol Referent In vitro diagnostic medical device Consult instructions for use Temperature limitation Use by/ Expiry date Batch code Manufacturer Serial number Biological Risks ForaCare Suisse AG For self-testing CH-9000 St. Gallen www.foracare.ch 0459...
Need help?
Do you have a question about the DM40 and is the answer not in the manual?
Questions and answers