Table of Contents
Advertisement
Advertisement
Table of Contents

Related Manuals for Monoprice 10707


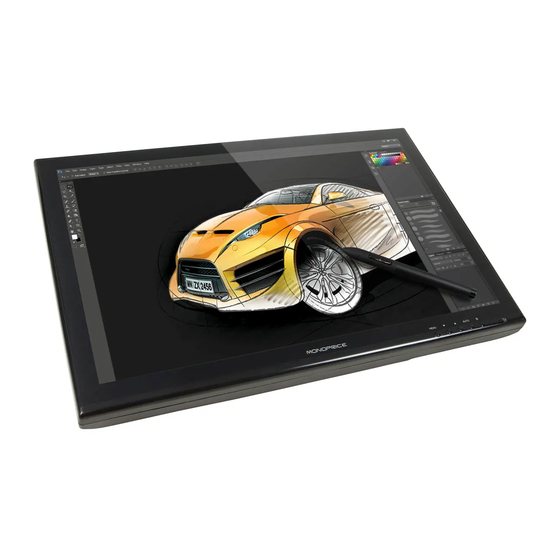
Summary of Contents for Monoprice 10707
- Page 1 MONOPRICE 10594 Windows User's Manual...
-
Page 2: Table Of Contents
MONOPRICE 10594 Windows User's Manual CONTENTS I. General Information ..................1 1. Safety Warnings and Guidelines ................1 2. Package Contents ....................2 3. System Requirements ..................2 4. Technical Support ....................2 5. Controls ........................ 3 6. Connections ......................3 7. -
Page 3: General Information
MONOPRICE 10707 Windows User's Manual I. General Information 1. Safety Warnings and Guidelines For your safety and the continued operation of your equipment, please read and heed the following safety warnings and guidelines: 1. Do not expose this device to water or moisture of any kind. Do not place drinks or other containers with moisture on or near the device. -
Page 4: Package Contents
CD-ROM or internet connection for driver installation 4. Technical Support Monoprice is pleased to provide free, live, online technical support to assist you with any questions you may have about installation, setup, troubleshooting, or product recommendations. If you ever need assistance with your new product, please come online to talk to one of our friendly and knowledgeable Tech Support Associates. -
Page 5: Controls
MONOPRICE 10707 Windows User's Manual 5. Controls MENU: Press this button to access the monitor's internal On Screen Display (OSD) menu system. When the menu is displayed, the MENU button functions as a Select or OK button. Minus (-): The Minus (-) button moves the menu cursor/highlight down one entry. If an entry has been selected for editing, the Minus (-) button decreases the selected value. -
Page 6: Software Installation
MONOPRICE 10707 Windows User's Manual 8. Software Installation Important! Do not plug the monitor into your PC until after you have installed the driver software. Unless your computer is running Windows 8, which has built-in touch-screen/tablet support, you will need to install the device driver and utility. To install the driver, perform the installation steps below: 1. - Page 7 MONOPRICE 10707 Windows User's Manual 3. The default install directory is C:\Program Files (x86)\Monoprice 10707. Click the OK button to begin the installation process. 4. If prompted by Windows Security to verify the driver source, click the Install button to continue the installation. Repeat this process as needed until the installation is complete.
-
Page 8: Hardware Installation
MONOPRICE 10707 Windows User's Manual 9. Hardware Installation Note: This Pen Monitor does not function properly in a Windows multi-monitor configuration. For proper operation in Windows, it must be the only monitor connected to the system. After you have installed the software driver and utility to your system and after you have powered it off, perform the following steps to connect the monitor to your system. - Page 9 MONOPRICE 10707 Windows User's Manual 8. Once your computer has completed its startup procedure, right-click the desktop to access the Context menu. If you are using Windows XP, select the Properties option. If you are using Windows Vista or Windows 7, select the Screen Resolution option.
-
Page 10: Pen Operation
MONOPRICE 10707 Windows User's Manual 10. Plug one end of the included USB cable into the USB port on the monitor and the other into an available USB port on your computer. Windows will then finalize the installation of the monitor and its driver. -
Page 11: Usage Tips
MONOPRICE 10707 Windows User's Manual 11. Usage Tips The following guidelines will help obtain the best results in using this Graphic Tablet: Double Tapping: A quick double tap of the pen tip is the equivalent of a double- click on a mouse. -
Page 12: Configuration
MONOPRICE 10707 Windows User's Manual II. Configuration The configuration utility allows you to modify pressure sensitivity, monitor selection, customize the buttons, etc. Locate the tablet icon in the system tray and click it to open the Pen Tablet Settings application. Alternatively, you can run the application directly from the installation directory. -
Page 13: The Monitor Setting Tab
MONOPRICE 10707 Windows User's Manual 2. The Monitor Setting Tab Monitor Mapping: This displays which parts of the monitor(s) are active for pen/tablet operations. Drop-Down List Box: The drop-down list box at the bottom of the dialog allows you to select the how much of the monitor is to be covered by pen/tablet operations. The only selectable option is Monitor 1. -
Page 14: The Button Tab
MONOPRICE 10707 Windows User's Manual 3. The Button Tab The Button tab allows you to modify the functions of the pen tip and two barrel buttons to any of the functions available on a 3-button mouse. 1. To change the functionality of the pen tip or one of the two barrel buttons, first use the Button Name drop-down list box to select the tip or button to be modified. -
Page 15: The Pressure Tab
MONOPRICE 10707 Windows User's Manual 4. The Pressure Tab This dialog allows you to test the pressure sensitivity of the pen and to adjust the sensitivity of the pen's "click" function. Pressure Test: Use your pen within this area to test the pressure sensitivity. -
Page 16: The Calibration Tab
MONOPRICE 10707 Windows User's Manual 5. The Calibration Tab This dialog allows you to calibrate the pen and monitor, to ensure that it points accurately to the various locations on the screen. Calibration Check Box: To enable calibration, first click here to put a check mark... -
Page 17: Pen Storage And Maintenance
MONOPRICE 10707 Windows User's Manual III. Pen Storage and Maintenance 1. Storing the Digital Pen The digital pen should be stored in such a way that nothing touches the tip. Prolonged pressure on the tip, even a slight pressure, can damage the ability of the pen to use the full range of pressure sensitivity. -
Page 18: Replacing The Pen Tip
MONOPRICE 10707 Windows User's Manual 3. Replacing the Pen Tip If the pen tip needs replacing or removal due to long-term storage, perform the following steps as applicable: 1. Open the pen holder and remove the metal Pen Clip. 2. Position the Pen Clip over the exposed portion of the pen tip. Squeeze the clip with your fingers to provide a firm grip on the tip.
Need help?
Do you have a question about the 10707 and is the answer not in the manual?
Questions and answers