
Related Manuals for Electrolux EI24EW35LS


Summary of Contents for Electrolux EI24EW35LS
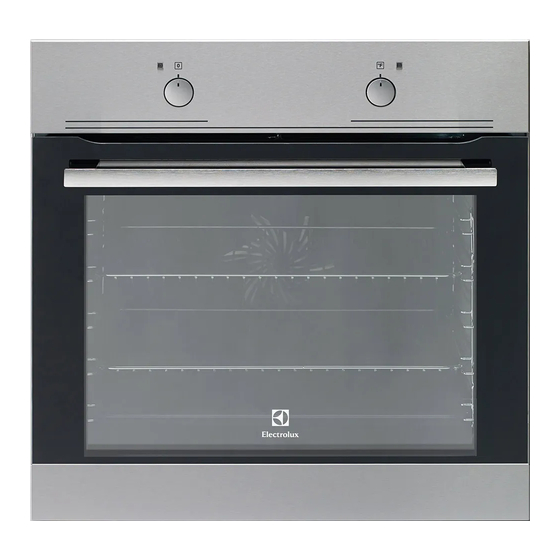
- Page 1 ..................... EI24EW35LS EN OVEN USER MANUAL...
-
Page 2: Table Of Contents
13. ENVIRONMENT CONCERNS ..........27 WE’RE THINKING OF YOU Thank you for purchasing an Electrolux appliance. You’ve chosen a product that brings with it decades of professional experience and innovation. Ingenious and stylish, it has been designed with you in mind. -
Page 3: Safety Information
ENGLISH 1. SAFETY INFORMATION Before the installation and use of the appliance, carefully read the supplied instructions. The manufacturer is not responsible if an incorrect installation and use causes in- juries and damages. Always keep the instructions with the appliance for future reference. 1.1 Children and vulnerable people safety WARNING! Risk of suffocation, injury or permanent disability. -
Page 4: Safety Instructions
• Do not use harsh abrasive cleaners or sharp metal scrapers to clean the glass door since they can scratch the surface, which may result in shattering of the glass. • To remove the shelf supports first pull the front of the shelf support and then the rear end away from the side walls. -
Page 5: Care And Cleaning
ENGLISH • Use this appliance in a household envi- – be careful when you remove or install ronment. the accessories. • Do not change the specification of this • Discoloration of the enamel has no ef- appliance. fect on the performance of the appli- ance. -
Page 6: Product Description
• Cut off the mains cable and discard it. 2.5 Disposal • Remove the door catch to prevent chil- WARNING! dren and pets to get closed in the ap- Risk of injury or suffocation. pliance. • Disconnect the appliance from the mains supply. -
Page 7: Daily Use
ENGLISH • Clean the appliance before first use. Refer to chapter "Care and Clean- ing". 5. DAILY USE WARNING! Knob symbol, indicator or Refer to "Safety information" lamp (depends on the model - chapter. refer to the product description): To use the appliance, press the control •... -
Page 8: Using The Accessories
Oven function Application Turbo Grilling To roast larger joints of meat or poultry on one level. Also for browning food e.g. gratin. 6. USING THE ACCESSORIES WARNING! Refer to "Safety information" chapter. 6.1 Inserting the Oven Accessories The wire shelf has side edges. These... -
Page 9: Baking On One Level
ENGLISH • If you cannot find the settings for a spe- • Cakes and pastries at different heights cial recipe, look for the one that is al- do not always brown equally at first. If most the same. this occurs, do not change the temper- ature setting. - Page 10 10 www.electrolux.com Cakes / pastries / breads on baking trays Type of bak- Oven func- Shelf posi- Temperature Time in min. tion tion °F Plaited bread / Conventional 340 - 380 30 - 40 bread crown Cooking Christmas Conventional 50 - 70...
- Page 11 ENGLISH Biscuits Type of bak- Oven func- Shelf posi- Temperature Time in min. tion tion °F Short pastry True Fan 300 - 320 10 - 20 biscuits Cooking Short bread / True Fan Short bread / 20 - 35 Cooking Pastry Stripes Short bread / Conventional...
-
Page 12: Multileveled Baking
12 www.electrolux.com 8.3 Multileveled Baking Cakes / pastries / breads on baking trays True Fan Cooking Type of bak- Temperature Shelf position Time in min. in °F 2 levels 3 levels Cream puffs / 1 / 4 25 - 45... - Page 13 ENGLISH 8.4 Tips on baking Baking results Possible cause Remedy The bottom of the cake is The shelf position is in- Put the cake on a lower not browned sufficiently. correct. shelf. The cake sinks and be- The next time you bake, The oven temperature is comes soggy, lumpy or set a slightly lower oven...
-
Page 14: Roasting With Turbo Grilling
14 www.electrolux.com Oven func- Shelf posi- Temperature Dish Time in min. tion tion °F Conventional Fish bakes 360 - 400 30 - 60 Cooking Turbo Grilling Stuffed vege- or True Fan 320 - 340 30 - 60 tables Cooking 1) Preheat the oven •... - Page 15 ENGLISH Oven Shelf po- Tempera- Type of meat Quantity Time min. function sition ture °F Pork knuckle 750 g - 1 Turbo Grill- 300 - 340 90 - 120 (precooked) Veal Type of Quantity Oven Shelf posi- Tempera- Time min. meat function tion...
- Page 16 16 www.electrolux.com Type of Quantity Oven Shelf posi- Tempera- Time min. meat function tion ture °F Duck 1.5 - 2 kg Turbo Grill- 360 - 400 80 - 100 Goose 3.5 - 5 kg Turbo Grill- 320 - 360 120 - 180 Turkey 2.5 - 3.5 kg...
-
Page 17: Pizza Setting
ENGLISH Time in min. Food to be gril- Shelf position 1st side 2nd side Fillet steaks, veal 7 - 10 6 - 8 steaks 1 - 3 1 - 3 Toast / Toast Toast with topping 6 - 8 1) Preheat the oven 8.8 Pizza Setting Type of baking Shelf position... - Page 18 18 www.electrolux.com Defrosting Further defrost- Dish Comment time (min.) ing time (min.) Meat, 500 g 90 - 120 20 - 30 Turn halfway through. Trout, 150 g 25 - 35 10 - 15 Strawberries, 300 g 30 - 40 10 - 20...
-
Page 19: Care And Cleaning
ENGLISH Cooking time Continue to Temperature in Preserve until simmering cook at 220 °F in °F in min. min. Kohlrabi, peas, as- 320 - 340 50 - 60 15 - 20 paragus 1) Leave standing in oven when switched off For best results: deactivate the appliance 8.11 Drying - True Fan Cooking after half the time required. -
Page 20: Shelf Supports
20 www.electrolux.com • Clean all accessories after each use agents, sharp-edged objects or a dish- and let them dry. Use a soft cloth with washer. It can cause damage to the warm water and a cleaning agent. nonstick coating. • If you have nonstick accessories, do not clean them using aggressive 9.1 Shelf supports... -
Page 21: Cleaning The Oven Door
ENGLISH WARNING! Hold the heating element with two Deactivate the appliance before hands at the front. you fold down the heating ele- Pull it forwards against the spring ment. Make sure that the appli- pressure and out along the supports ance is cold. -
Page 22: What To Do If
22 www.electrolux.com Hold the door trim (B) on the top edge of the door at the two sides and push inwards to release the clip seal. Pull the door trim to the front to re- move it. Hold the door glass panels on their top edge one by one and pull them up out of the guide. -
Page 23: Installation
ENGLISH Product number (PNC) ......... Serial number (S.N.) ......... 11. INSTALLATION WARNING! The built-in unit must meet the Refer to "Safety information" stability requirements of DIN chapter. 68930. min. 3 mm min. 50 mm... - Page 24 24 www.electrolux.com 560 min. 20 min. ! 530 min. 560 min. 530 min. 590 min.
- Page 25 ENGLISH alternativ 100 max. R1200 mm H05VV-F H05RR-F min. 1600 mm 90 º 2x3,5x25...
-
Page 26: Guarantee/Customer Service Centres
26 www.electrolux.com 12. GUARANTEE/CUSTOMER SERVICE CENTRES 12.1 EURO-LINE APPLIANCES INC. LENGTH OF WARRANTY EURO-LINE WILL PAY FOR: TWO YEAR FULL WARRANTY Replacement parts and/or labour to re- from original date of purchase, includ- pair defects in materials or workman- ing parts and labour, to the first pur- ship. -
Page 27: Environment Concerns
ENGLISH If service is required, contact the Service Center: EURO-PARTS, CANADA EURO-PARTS, USA Tel: 1–800–678–8352 Tel: 1-800-561-4614 Fax: 1-519-528-5001 Fax: 1-519-528-5001 DISTRIBUTED BY: EURO-LINE APPLI- Tel: 905-829-3980 ANCES INC. Fax: 905-829-3985 2278 SPEERS ROAD OAKVILLE, ON, www.euro-line-appliances.com CANADA L6L 2X8 1-800-421-6332 13. - Page 28 www.electrolux.com/shop...
Need help?
Do you have a question about the EI24EW35LS and is the answer not in the manual?
Questions and answers