Table of Contents
Advertisement
Available languages
Available languages
Installation Manual
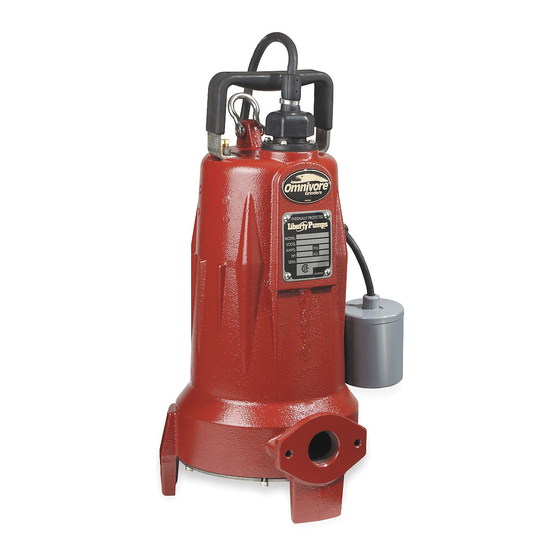
Omnivore Sewage and Grinder Pumps
Models:
LSG202A
2 hp, 208-230V, 1 phase, Automatic
LSG202M
2 hp, 208-230V, 1 phase, Manual
LSG203M
2 hp, 208-230V, 3 phase, Manual
LSG204M
2 hp, 460V, 3 phase, Manual
LSGX202A
2 hp, 2-Stage, 208-230V, 1 phase, Automatic
LSGX202M
2 hp, 2-Stage, 208-230V, 1 phase, Manual
LSGX203M
2 hp, 2-Stage, 208-230V, 3 phase, Manual
LSGX204M
2 hp, 2-Stage, 460V, 3 phase, Manual
*Do not throw away or lose this manual. Keep it with the
installation and refer to it often.
Contents
•
General Information
•
Introduction
•
Mechanical Installation
•
Electrical Connection
•
Operation
•
Warranty
7000 Apple Tree Avenue
Bergen, Ny 14416
Phone: (800) 543-2550
Fax: (585) 494-1839
www.libertypumps.com
©Copyright 2008 Liberty Pumps Inc. All rights reserved
IMPORTANT:
Prior to installation, record Model, Serial
Number, and Code Number from pump
nameplate for future reference.
MODEL _____________________
SERIAL _____________________
CODE
_____________________
INSTALLATION
DATE
_____________________
5647000F
Advertisement
Table of Contents

Related Manuals for Liberty Pumps LSG202A


Summary of Contents for Liberty Pumps LSG202A
- Page 1 2 hp, 208-230V, 1 phase, Manual LSG203M 2 hp, 208-230V, 3 phase, Manual LSG204M 2 hp, 460V, 3 phase, Manual LSGX202A 2 hp, 2-Stage, 208-230V, 1 phase, Automatic LSGX202M 2 hp, 2-Stage, 208-230V, 1 phase, Manual LSGX203M 2 hp, 2-Stage, 208-230V, 3 phase, Manual LSGX204M 2 hp, 2-Stage, 460V, 3 phase, Manual *Do not throw away or lose this manual.
-
Page 2: Table Of Contents
Table of Contents SECTION GENERAL INFORMATION------------------------------------------------------------------------------ 3 SECTION INTRODUCTION-------------------------------------------------------------------------------------------- 4 SECTION MECHANICAL INSTALLATION ----------------------------------------------------------------------- 4-6 SECTION ELECTRICAL CONNECTION-------------------------------------------------------------------------- 6-8 SECTION OPERATION ------------------------------------------------------------------------------------------------ 8 TROUBLESHOOTING CHART ------------------------------------------------------------------------ 9 PANEL INSTALLATION SHEET----------------------------------------------------------------------- 10 TYPICAL INSTALLATION DRAWING-----------------------------------------------------------------11 PERFORMANCE CURVE------------------------------------------------------------------------------- 12 SECTION WARRANTY------------------------------------------------------------------------------------------------- 13 ©Copyright 2008 Liberty Pumps Inc. -
Page 3: Section 1 General Information
Do not use these pumps in water over 140° F. • The Uniform Plumbing Code (UPC) states that sewage systems shall have an audio and visual alarm that signals a malfunction of the system, to reduce the potential for property damage. Model Volts LSG202A 208/230 LSG202M 208/230 LSG203M 208/230... -
Page 4: Section 2 Introduction
Customer Service Department to report any damage or shortage of parts. Turn the hex socket head cap screw at the center of the cutter wheel on the bottom of the grinder several rotations clockwise. This will insure that the impeller and cutter are free of any seizure due to prolonged storage. If the impeller is not rotated manually prior to installation, the pump may fail to activate. - Page 5 • Grinder pumps must be installed in a tank that is vented in accordance with local plumbing codes. Installation should be at a sufficient depth to ensure that all plumbing is below the frost line. If this is not feasible, remove the check valve and size the basin and/or adjust pump differential to accommodate the additional backflow volume.
-
Page 6: Section 4 Electrical Connection
IMPORTANT: For 3-phase pumps, check for proper rotation before installing pump into basin. See figure A for proper rotation. Fig. A – Proper impeller rotation, three phase models Electrical Connection AFTER THE PUMP IS INSTALLED, THE ELECTRICAL CHECKS OF SECTION 4 MUST BE PERFORMED. - Page 7 “LEAD PUMP ON” float tilts. This switch closes, starting the lead pump. The pump runs until the liquid level falls below the “PUMP OFF” float, emptying the wet well. ©Copyright 2008 Liberty Pumps Inc. All rights reserved Refer to panel or switch instructions for proper electrical (AUTOMATIC MODELS LSG202A & LSGX202A) (MANUAL MODELS) - 7 -...
-
Page 8: Section 5 Operation
On the next rise of the liquid level, the other pump will start on the “LEAD PUMP ON” signal. The pumps will continue to alternate their cycles. NOTE: No ON/OFF float switch differential should be set that will exceed 12 starts per hour. If the liquid level rises to the “LAG PUMP ON"... -
Page 9: Troubleshooting Chart
SYMPTOM PUMP WILL NOT START REPEATED TRIPPING PUMP WILL NOT SHUT LOW FLOW WATER IN OIL CHAMBER WATER INSIDE MOTOR CASING IF SYMPTOMS CONTINUE, CONSULT THE LIBERTY PUMPS PRODUCT SERVICE DEPT. ©Copyright 2008 Liberty Pumps Inc. All rights reserved TROUBLESHOOTING CHART: LSG200 POSSIBLE CAUSE Power supply failure Burned out fuse or tripped circuit... - Page 10 FIGURE 2 CONTROL PANEL INSTALLATION ©Copyright 2008 Liberty Pumps Inc. All rights reserved - 10 -...
- Page 11 FIGURE 3 TYPICAL INSTALLATION WITHOUT GUIDE RAIL WITH GR20 GUIDE RAIL ©Copyright 2008 Liberty Pumps Inc. All rights reserved - 11 -...
-
Page 12: Performance Curve
PERFORMANCE CURVE Omnivore Grinders In order to ensure sufficient fluid velocity to carry solids, (generally accepted to be 2 feet per second) 1-1/4" PIPE 1-1/2" PIPE FlOW (GPM) ©Copyright 2008 Liberty Pumps Inc. All rights reserved Maximum Total Dynamic Head is dependent on friction factors of the piping system. -
Page 13: Bergen, Ny
2 Year Limited Warranty Liberty Pumps, Inc. warrants that pumps of its manufacture are free from all factory defects in material and workmanship for a period of 2 years from the date of purchase. The date of purchase shall be determined by a dated sales receipt noting the model and serial number of the pump. - Page 14 2 HP, 208-230V, monofásica, manual LSG203M 2 HP, 208-230V, trifásica, manual LSG204M 2 HP, 460V, trifásica, manual LSGX202A 2 HP, 2 etapas, 208-230V, monofásica, automática LSGX202M 2 HP, 2 etapas, 208-230V, monofásica, manual LSGX203M 2 HP, 2 etapas, 208-230V, trifásica, manual LSGX204M 2 HP, 2 etapas, 460V, trifásica, manual...
- Page 15 Contenido SECCIÓN INFORMACIÓN GENERAL ------------------------------------------------------------------------------ 3 SECCIÓN INTRODUCCIÓN ------------------------------------------------------------------------------------------- 4 SECCIÓN INSTALACIÓN MECÁNICA ----------------------------------------------------------------------------- 4-6 SECCIÓN CONEXIÓN ELÉCTRICA--------------------------------------------------------------------------------- 6-8 SECCIÓN OPERACIÓN ------------------------------------------------------------------------------------------------ 8 DIAGNÓSTICO DE PROBLEMAS --------------------------------------------------------------------- 9 HOJA DE INSTALACIÓN DEL PANEL --------------------------------------------------------------- 10 GRÁFICO DE UNA INSTALACIÓN TÍPICA --------------------------------------------------------- 11 CURVA DE RENDIMIENTO ----------------------------------------------------------------------------- 12 SECCIÓN GARANTÍA --------------------------------------------------------------------------------------------------- 13...
- Page 16 El Código uniforme de plomería (UPC) de Estados Unidos exige que todos los sistemas de saneamiento dispongan de una alarma visual y sonora que indique averías del sistema con el fin de evitar daños a la propiedad. Modelo Voltios LSG202A 208-230 LSG202M 208-230...
- Page 17 Introducción INTRODUCCIÓN El propósito de este manual es ayudarle a instalar, operar y mantener la bomba Liberty. Léalo totalmente antes de instalar el sistema. Antes de poner la bomba en funcionamiento, asegúrese de entender todo el contenido, incluidos los capítulos sobre instalación y operación. Las bombas Liberty requieren un mantenimiento mínimo.
- Page 18 ALMACENAMIENTO ANTES DEL USO Las bombas Liberty vienen ya listas de fábrica para su instalación y uso. Si la estación de bombeo no está terminada, tendrá que almacenar la bomba. Pero si necesita almacenarla, no la saque de la caja. Guárdela en un almacén o caseta limpia y seca a temperatura estable y cubra la caja y el recipiente para protegerlos contra el agua, el polvo, etc.
- Page 19 IMPORTANTE: en el caso de una bomba trifásica, compruebe que la rotación vaya en la dirección correcta antes de instalarla en la cubeta. La Figura A muestra la rotación correcta. Fig. A – Rotación correcta del rotor, modelos trifásicos Conexión eléctrica CUANDO HAYA INSTALADO LA BOMBA, COMPRUEBE LAS CONEXIONES ELÉCTRICAS COMO SE INDICA EN LA SECCIÓN 4.
- Page 20 4-4.1 SECUENCIA DEL FLOTADOR-EN CASCADA (MODELOS AUTOMÁTICOS LSG202A Y LSGX202A) El flotador se va inclinando a medida que sube el nivel del sumidero inundado, con lo que cierra el interruptor. Esto hace arrancar la bomba.
- Page 21 Cuando vuelva a subir el nivel, la otra bomba arrancará con la señal de encendido principal. Las bombas alternarán sus ciclos de esta manera. NOTA: Nunca se debe configurar el diferencial del interruptor de flotador de encendido por encima de los 12 rranques por hora.
- Page 22 PROBLEMA LA BOMBA NO ARRANCA DISYUNTOR SALTA REPETIDAMENTE LA BOMBA NO SE APAGA CAUDAL INSUFICIENTE AGUA EN LA CÁMARA DE ACEITE AGUA EN EL CÁRTER DEL MOTOR SI EL PROBLEMA CONTINÚA, CONSULTE CON EL DEPARTAMENTO DE SERVICIO DE LIBERTY PUMPS. ©Copyright 2008 Liberty Pumps Inc.
- Page 23 FIGURA 2 INSTALACIÓN DEL PANEL DE CONTROL ©Copyright 2008 Liberty Pumps Inc. Todos los derechos reservados - 10 -...
- Page 24 FIGURA 3 INSTALACIÓN TÍPICA SIN GUIADERA CON GUIADERA GR20 ©Copyright 2008 Liberty Pumps Inc. Todos los derechos reservados - 11 -...
- Page 25 PERFORMANCE CURVE CURVA DE RENDIMIENTO Omnivore Grinders Bombas trituradoras Omnivore n order to ensure sufficient fluid A fin de garantizar la suficiente velocidad del líquido para trasladar sólidos (la cual elocity to carry solids, (generally se acepta generalmente como de 60 cm cepted to be 2 feet per second) por segundo) 1-1/4"...
- Page 26 Garantía limitada de 2 años Liberty Pumps, Inc. garantiza que las bombas que fabrica están libres de defectos en los materiales y la mano de obra por un período de 2 años a partir de la fecha de compra. La fecha de compra se determinará con el recibo de compra fechado, que incluya el modelo y el número de serie de la bomba.
- Page 27 2 hp, 460V, triphasée, manuelle LSGX202A 2 hp, 2 positions, 208-230 V, monophasée, automatique LSGX202M 2 hp, 2 positions, 208-230 V , monophasée, manuelle LSGX203M 2 hp, 2 positions, 208-230 V , triphasée, manuelle LSGX203M 2 hp, 2 positions, 460V, triphasée, manuellel *Ne pas jeter ni perdre ce manuel.
- Page 28 Table des matières SECTION RENSEIGNEMENTS GÉNÉRAUX ------------------------------------------------------------------- 3 SECTION INTRODUCTION--------------------------------------------------------------------------------------------4 SECTION INSTALLATION MÉCANIQUE ------------------------------------------------------------------------ 4-6 SECTION RACCORDEMENT ÉLECTRIQUE-------------------------------------------------------------------- 6-8 SECTION FONCTIONNEMENT ------------------------------------------------------------------------------------ 8 TABLEAU DE DÉPANNAGE --------------------------------------------------------------------------- 9 FEUILLET D'INSTALLATION DU PANNEAU ------------------------------------------------------ 10 SCHÉMA D’INSTALLATION TYPE------------------------------------------------------------------- 11 COURBES DE RENDEMENT-------------------------------------------------------------------------- 12 SECTION GARANTIE -------------------------------------------------------------------------------------------------- 13 ©Copyright 2008 Liberty Pumps Inc.
- Page 29 Le Uniform Plumbing Code (UPC, Code de plomberie universel) indique que les systèmes d’égout doivent être munis d’une d’alarme sonore et visuelle qui signale tout mauvais fonctionnement du système, afin de réduire les risques de dommages à la propriété. Modèle Volts LSG202A 208-230 LSG202M 208-230 LSG203M...
- Page 30 Introduction INTRODUCTION Ce manuel est destiné fournir les renseignements nécessaires à l’installation, l’utilisation et l’entretien de la pompe Liberty. Il est recommandé de lire entièrement les directives avant d'installer la pompe. S’assurer d’être familier avec le contenu et de bien comprendre les chapitres relatifs à l’installation et l’utilisation de la pompe avant de la faire fonctionner. Les pompes Liberty sont conçues pour ne nécessiter qu’un entretien minimal.
- Page 31 ENTREPOSAGE AVANT UTILISATION Les pompes Liberty sont expédiées de l’usine prêtes à être installées et utilisées. Elles devraient être entreposées si la station de pompage n’est pas complète. S'il est nécessaire d'entreposer la pompe, celle-ci devrait demeurer dans son contenant d'expédition. Elle devrait être conservée dans un entrepôt o dans un endroit propre et sec dont la température est stable.
- Page 32 Fig. A – Bonne rotation du rotor, modèles triphasés Raccordement électrique UNE FOIS LA POMPE INSTALLÉE, IL FAUT EFFECTUER LES VÉRIFICATIONS ÉLECTRIQUES DE LA SECTION 4. FONCTIONNEMENT DE L’INTERRUPTEUR SIAMOIS Brancher l’interrupteur siamois dans une prise 6-20R. La prise doit être reliée à...
- Page 33 électrique approprié. 4-4.1 SÉQUENCE DU FLOTTEUR – SIAMOIS (MODÈLE AUTOMATIQUE LSG202A ET LSGX202A) À mesure que le niveau de liquide monte dans la bâche d’aspiration, le flotteur bascule et ferme l’interrupteur. Cela fait démarrer la pompe.
- Page 34 La deuxième pompe démarre lorsque le niveau de liquide monte au niveau « POMPE LATENTE EN MARCHE ». Les deux pompes tourneront jusqu’à ce que le niveau de liquide descende en-dessous du niveau « POMPE ARRÊTÉE » du flotteur, vidant la bâche d'aspiration. En cas de mauvais fonctionnement de l'interrupteur à...
- Page 35 SYMPTÔME LA POMPE REFUSE DE DÉMARRER LE DISJONCTEUR SAUTE DE MANIÈRE RÉPÉTÉE LA POMPE REFUSE DE S’ARRÊTER DÉBIT FAIBLE EAU DANS LE COMPARTIMENT D’HUILE EAU À L’INTÉRIEUR DU BOÎTIER DU MOTEUR SI LES SYMPTÔMES PERSISTENT, CONSULTER LE SERVICE D’ENTRETIEN DES PRODUITS LIBERTY PUMPS. ©Copyright 2008 Liberty Pumps Inc.
- Page 36 FIGURE 2 INSTALLATION DU PANNEAU DE COMMANDE ©Copyright 2008 Liberty Pumps Inc. Tous droits réservés - 10 -...
- Page 37 FIGURE 3 INSTALLATION TYPE SANS RAIL DE GUIDAGE AVEC RAIL DE GUIDAGE GR20 ©Copyright 2008 Liberty Pumps Inc. Tous droits réservés - 11 -...
- Page 38 PERFORMANCE CURVE COURBES DE RENDEMENT Omnivore Grinders Pompes omnivores broyeuses n order to ensure sufficient fluid Afin d'assurer un débit de liquide suffisant pour transporter des matières solides elocity to carry solids, (generally (débit de 61 cm (2 pi) par seconde cepted to be 2 feet per second) généralement admis) TUYAU DE 1¼...
- Page 39 Garantie limitée de 2 ans Liberty Pumps, Inc. garantit que les pompes sortant de son usine sont exemptes de tout défaut de matériau et de fabrication pour une période de 2 ans à partir de la date d’achat. La date d'achat sera établie par une facture d’achat datée indiquant les numéros de modèle et de série de la pompe.
Need help?
Do you have a question about the LSG202A and is the answer not in the manual?
Questions and answers