Table of Contents
Advertisement
Advertisement
Table of Contents

Subscribe to Our Youtube Channel
Related Manuals for Zanussi ZWT 71201 WA


Summary of Contents for Zanussi ZWT 71201 WA
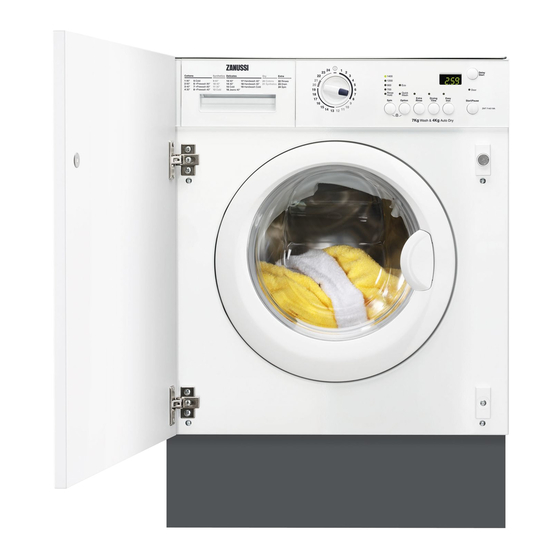
- Page 1 User manual Washer Dryer ZWT 71201 WA...
-
Page 2: Table Of Contents
• Make sure that small pets and children do not climb use. Serious damage can occur to the product and to into the drum. To avoid this, please check into the property if this is not adhered to. See relevant section drum before using. in the user manual. www.zanussi.com... - Page 3 If the groove is vertical. • Never tumble dry items that have had contact with necessary use a coin. chemicals such as dry cleaning fluid. These are of a volatile nature and could cause an explosion. Only www.zanussi.com...
-
Page 4: Product Description
Control panel On the following page there is a picture of the control panel. It shows the programme selector dial as well as the buttons, pilot lights and the display. These are presented by relevant numbers on the following pages. www.zanussi.com... - Page 5 Quick Wash Start Pause A very short cycle for lightly soiled items or for laundry This button allows you to start or to interrupt the selected which needs only freshening up. We recommend you to programme. reduce the fabrics loading. www.zanussi.com...
- Page 6 7 start flashing. • End of programme When the programme has finished the flashing zero ( ) is displayed, the pilot light 9 and the pilot light of button 7 go out and the door can be opened. www.zanussi.com...
-
Page 7: Washing Programmes
Long spin at 3 rpm Max. load 3 kg With this programme it is possible to wash items like pants, shirts or jackets in denim and also jersey realized with hi- tech materials. (The Extra Rinse option will be activated automatically). www.zanussi.com... - Page 8 1) If you select the Super Quick option by pressing button 3, we recommend that you reduce the maximum load as indicated. Full loading is possible however with somewhat reduced cleaning results. 2) This option can be selected at the temperature of 40°C or higher only. 3) If using liquid detergents, a programme without PREWASH must be selected. www.zanussi.com...
-
Page 9: Drying Programmes
Stubborn stains may not be removed by just water and de- with methylated spirits. Treat any residual marks with tergent. It is therefore advisable to treat them prior to bleach. washing. 1) do not use acetone on artificial silk www.zanussi.com... -
Page 10: Drying Hints
• Garments padded with foam-rubber or materials simi- • Particularly delicate items such as synthetic curtains, lar to foam-rubber must not be machine dried; they woollen and silk, garments with metal inserts, nylon represent a fire hazard. stockings, bulky garments such as anoraks, bed cov- www.zanussi.com... -
Page 11: First Use
6 seconds buttons 2 and 3 until on the display, the Child safety lock icon appears or disappears. This device permits you to leave the appliance unattended so you do not need to worry that children might be injured www.zanussi.com... -
Page 12: Daily Use
Err is displayed for a few seconds and the red pilot light of Turn the programme selector dial to the required pro- this button blinks 3 times. gramme. The green pilot light of button 7 starts to flash. The selec- tor dial can be turned either clockwise or anticlockwise. www.zanussi.com... - Page 13 Start the new programme another wash, close the water tap. Leave the door open to by pressing button 7 again. prevent the formation of mildew and unpleasant smells. The washing water in the tub will be not emptied out. www.zanussi.com...
-
Page 14: Use - Drying
Start the programme by pressing button 7. The time Remove the laundry from the drum. remaining is updated every minute on the display. The different type of cottons (towelling, sheets, shirts, and so on) or any laundry items rolling up www.zanussi.com... -
Page 15: Care And Cleaning
Replace the drawer and run the rinse programme with- out any clothes in the drum. www.zanussi.com... - Page 16 • Turn off the water tap. Clean the filter under a tap, to remove any traces of fluff. • Unscrew the hose from the tap. • Clean the filter in the hose with a stiff brush. www.zanussi.com...
-
Page 17: What To Do If
If after all checks, the problem light of button 7 blinks, one of the following alarm codes persists, contact your local Service Centre. appears on the display and some acoustic signals sound every 20 seconds to indicate that the machine is not work- ing: www.zanussi.com... - Page 18 An option or a programme that ends with the water still in the tub or a that does not spin: eliminates all the spinning phases has been selected. • Select the draining or spinning programme. The laundry is not evenly distributed in the drum. • Redistribute the laundry. www.zanussi.com...
- Page 19 • Check the correct levelling of the appliance. The machine vibrates is noisy: The laundry is not evenly distributed in the drum. • Redistribute the laundry. Maybe there is very little laundry in the drum. • Load more laundry. www.zanussi.com...
- Page 20 Machines based on modern technology operate very economically using very No water is visible in the drum: little water without affecting performance. www.zanussi.com...
-
Page 21: Technical Data
EEC 92/75 standards. The consumption data shown on this chart is to be considered purely indicative, as it may vary depending on the quantity and type of laundry, on the inlet water temperature and on the ambient temperature. www.zanussi.com... -
Page 22: Installation
Install the machine on a flat hard floor. Make sure that air some time, run off a reasonable amount of water to flush circulation around the machine is not impeded by carpets, out any debris that may have collected www.zanussi.com... - Page 23 There should be a minimum vertical distance of 5.02 m (16.5 ft) between the appliance’s inlet and the bottom of the water storage tank. Water drainage This appliance is designed to be permanently plumbed in- to your home's drainage system using one of the follow- ing methods. www.zanussi.com...
-
Page 24: Building In
SURFACE WATER FOUL SEWERS DRAINS & SEWERS SEWAGE TREATMENT UNTREATED WORKS DISCHARGE TREATED DISCHARGE RIVER RIVER Building in This appliance has been designed to be built into the kitchen furniture. The recess should have the dimensions shown in picture A. www.zanussi.com... - Page 25 The machine is originally prearranged for the assembly of a door opening from right to left. In this case it is sufficient to screw in the hinges (1) and the counter-magnet (6) provided with the appliance, at the right level (Fig. B). www.zanussi.com...
-
Page 26: Front View
(4) on the appliance strips of timber are glued and screwed to the underside (see picture D). of the base (see Fig. F). Graphic G 600-605 Front edge Top view Caution! Do not remove the screw 8! www.zanussi.com... -
Page 27: Electrical Connection
By ensuring this product is or the shop where you purchased the product. disposed of correctly, you will help prevent potential www.zanussi.com... - Page 28 To save water, energy and to help protect the environment, we recommend that you follow these tips: • Normally soiled laundry may be washed without pre- washing in order to save detergent, water and time (the environment is protected too!). www.zanussi.com...
- Page 29 www.zanussi.com...
- Page 30 www.zanussi.com...
- Page 31 www.zanussi.com...
- Page 32 www.zanussi.com/shop...
Need help?
Do you have a question about the ZWT 71201 WA and is the answer not in the manual?
Questions and answers