Table of Contents
Advertisement
Quick Links
Overview
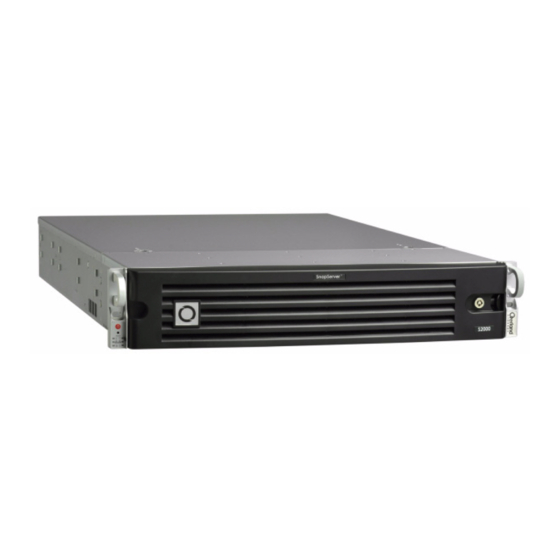
This document describes how to unpack an SnapServer
SAN S2000 appliance from Overland Storage and install
it into a four-post, 32-inch depth, EIA-310 rack.
WARNING: To reduce the risk of electric shock or damage
to equipment, always remove any power cords while
working with the unit.
AVERTISSEMENT: pour réduire le risque de choc
électrique ou endommagement de l'équipement, retirez
toujours les cordons électriques en travaillant avec l'appareil.
CAUTION:
While working with the unit, observe standard
Electrostatic Discharge (ESD) precautions to prevent
damage to micro-circuitry or static-sensitive devices.
Register First
Before starting, it is essential that you activate your
Overland warranty. Technical and warranty support are
not available until this is done:
1. Go to the Overland Storage web site
(http://www.overlandstorage.com/).
2. Click the Service & Support tab.
3. Select My Products tab > Register New Product.
4. At the
Site
Login, enter your e-mail address and
password
(Figure
1).
NOTE: If you are not yet a member, click "New member?"
and follow the instructions given. It's free and easy!
Figure 1. Support Site Login
5. Fill in the information and click Submit.
Within three business days, you will receive an e-mail
from Overland with your warranty certificate. Follow the
instructions included to complete the process.
10400276-003 06/2010
SnapServer
Quick Start Guide
Rack Installation
Before installing the disk drives, it is recommended that
the unit first be secured in the rack.
personal injury.
renversement accidentel de la crémaillère, pour éviter
dommages et blessures.
The rail kit included with the S2000 is adaptable for
installation in the two major types of hardware racks:
squared-holed and round-holed EIA-310 racks.
NOTE: A two-post telco-style rack or any rack that is less than
29-inches in depth will not support this appliance. Also, for
threaded-hole racks, Overland Storage recommends using a
shelf.
The rails are not universal. They are stamped LH (left)
and RH (right) and must be mounted on the appropriate
side (when facing the rack front).
Attach Inner Rails to Chassis
This procedure is required for all rack types:
1. Mark the screw holes on the rack where the rails will
be installed.
NOTE: Be sure rear holes are horizontally in line with the
front holes to ensure the unit remains level.
2. Remove the inner rail
Middle Member Latch
Outer Member
a. Fully extend the rail set.
b. Push the inner member latch down, and remove
©2010 Overland Storage, Inc.
®
SAN S2000
WARNING: Use care during rack installation or removal to
prevent accidental tipping of the rack causing damage or
AVERTISSEMENT: soyez prudent lors de l'installation ou
de l'enlèvement du support afin d'empêcher le
(Figure
Inner Member Latch
(Hidden)
Middle Member
Figure 2. Inner Rail Release Latch
the inner rail.
2) from the rail set:
Page 1 of 6
Advertisement
Table of Contents

Related Manuals for Overland Storage SnapServer SAN S2000


Summary of Contents for Overland Storage SnapServer SAN S2000
-
Page 1: Quick Start Guide
This document describes how to unpack an SnapServer Before installing the disk drives, it is recommended that SAN S2000 appliance from Overland Storage and install the unit first be secured in the rack. it into a four-post, 32-inch depth, EIA-310 rack. - Page 2 2. Facing the rack, position the left rail in the rack, aligning the adaptor holes with the front left rack holes being used (Figure 8 on page Hooks Figure 5. Attaching Front of Rail 10400276-003 06/2010 Page 2 of 6 ©2010 Overland Storage, Inc.
-
Page 3: Disk Drives
Install the Unit in the Rack Recommended Drive Configurations Before installing or adding drives to a SAN S2000 server, WARNING: It is recommended that a mechanical lifter (or the following must be observed: at least two people) be used during rack installation or removal to prevent injury. -
Page 4: Installing Drives
6. Follow the on-screen instructions. Power Up the SAN S2000 IMPORTANT: Always turn on any EXP E2000 expansion units on before powering up your SAN S2000. This enables the head unit to discover the attached expansions. Figure 14. Attaching the Bezel 1. -
Page 5: Configuration Information
When the wizard finishes, the Windows SAN Manager Home screen is displayed. Configuration Information Power Button At this point, your SAN S2000 is ready to be configured Reset for your specific environment and needs. The Windows Access SAN Manager software provides easy access to the Overland storage systems on the network. -
Page 6: Additional Information
Contact Us web page. User Guide To search for more service information, visit our Expert For detailed information on configuring your SAN S2000, Knowledge Base System. refer to the SnapServer SAN S2000 User Guide. It is available online at: http://support.overlandstorage.com/support/ snapserver-san.htm...
Need help?
Do you have a question about the SnapServer SAN S2000 and is the answer not in the manual?
Questions and answers