Table of Contents

Related Manuals for Ricoh Priport 1250


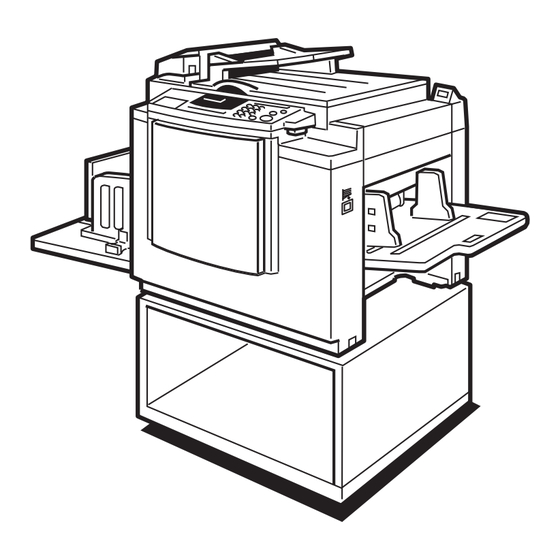
Summary of Contents for Ricoh Priport 1250
- Page 1 SilverV-gb.book Page 1 Monday, May 15, 2000 3:32 PM JP1210/1250 Operating Instructions Read this manual carefully before you use this product and keep it handy for future reference. For safety, please follow the instructions in this manual.
- Page 2 Phone: +31-(0)20-5474111 37139 Verona Phone: +39-045-8181500 United Kingdom Hong Kong RICOH UK LTD. Ricoh House, RICOH HONG KONG LTD. 1 Plane Tree Crescent, Feltham, 23/F., China Overseas Building, Middlesex, TW13 7HG 139, Hennessy Road, Phone: +44-(0)181-261-4000 Wan Chai, Hong Kong...
- Page 3 For good print quality, Ricoh recommends that you use genuine Ricoh master and ink. Ricoh shall not be responsible for any damage or expense that might result from the use of parts other than genuine Ricoh parts in your Ricoh office product.
- Page 4 “The Product complies with the requirements of the EMC Directive 89/336/EEC and the Low Voltage Directive 73/23/EEC.” In accordance with IEC 60417, this machine uses the following symbols for the main switch: a means POWER ON. b means POWER OFF. Copyright © 2000 Ricoh Co., Ltd.
-
Page 5: Safety Information
SilverV-gb.book Page i Monday, May 15, 2000 3:32 PM Safety Information When using your equipment, the following safety precautions should always be followed. Safety During Operation In this manual, the following important symbols are used: R WARNING: Indicates a potentially hazardous situation which, if instructions are not followed, could result in death or serious injury. - Page 6 SilverV-gb.book Page ii Monday, May 15, 2000 3:32 PM R CAUTION: • Protect the equipment from dampness or wet weather, such as rain, snow, and so on. • Unplug the power cord from the wall outlet before you move the equipment. While moving the equipment, you should take care that the power cord will not be damaged under the equipment.
-
Page 7: How To Read This Manual
SilverV-gb.book Page iii Monday, May 15, 2000 3:32 PM How to Read this Manual Symbols In this manual, the following symbols are used: R WARNING: This symbol indicates a potentially hazardous situation that might result in death or serious injury when you misuse the machine without following the in- structions under this symbol. -
Page 8: What You Can Do With This Machine
SilverV-gb.book Page iv Monday, May 15, 2000 3:32 PM What You Can Do with this Machine Below is a quick summary of this machine's features and where to look in this manual for more information Standard Printing See ⇒ P.5 “Standard Printing”. Adjusting the Print Image Position See ⇒... - Page 9 SilverV-gb.book Page v Monday, May 15, 2000 3:32 PM Erasing Centre and Edge Margins See ⇒ P.18 “Centre/Edge Erase—Erasing centre and Edge Margins”. GRMARG0E Erasing Edge Margins See ⇒ P.20 “Edge Erase—Erasing Edge Margins”. Erasing the Shadow of Pasted Originals See ⇒...
- Page 10 SilverV-gb.book Page vi Monday, May 15, 2000 3:32 PM Group Printing from Different Originals See ⇒ P.30 “Memory Mode—Group Printing from Different Originals”. GRCLAS1E Combining Originals onto One Print See ⇒ P.33 “Combine—Combining 2 Originals onto One Print”. ZCTX050E ZCTX040E Skip Feed Printing See ⇒...
-
Page 11: Machine Exterior
SilverV-gb.book Page vii Monday, May 15, 2000 3:32 PM Machine Exterior Front door Paper feed side plates Open for access to the inside of the ma- Use to prevent paper skew. chine. Paper feed tray Operation panel Set paper on this tray for printing. Operator controls and indicators are lo- Side tray fine adjusting dial cated here. -
Page 12: Machine Interior
SilverV-gb.book Page viii Monday, May 15, 2000 3:32 PM Machine Interior Document feeder (Option) Main switch Original inserted into the document feed- Use to turn the power on or off. er are individually and automatically fed Drum unit onto and removed from the exposure The master is wrapped around this unit. - Page 13 SilverV-gb.book Page ix Monday, May 15, 2000 3:32 PM Options 30 Originals document feeder TSLP015E Note Other options: • Colour Drum: LG drum • Colour Drum: A4 drum • Colour Drum: B4 drum • Tape Dispenser • Key Counter...
-
Page 14: Operation Panel
SilverV-gb.book Page x Monday, May 15, 2000 3:32 PM Operation Panel Keys { { { { Security} } } } key { { { { Center/Edge Erase} } } } key Press to make prints of secret documents. Press to print book originals that have a sol- See ⇒... - Page 15 SilverV-gb.book Page xi Monday, May 15, 2000 3:32 PM { { { { Fine} } } } key { { { { W W W W } } } } and { { { { V V V V } } } } keys (Speed keys) Press to select the fine image.
- Page 16 SilverV-gb.book Page xii Monday, May 15, 2000 3:32 PM Indicators Error indicators These indicators are lit when a non- standard condition occurs within the ma- chine. Memory/Class indicator Shows the number entered in Memory or Class mode. Speed indicators These indicators show the printing speed that is selected.
-
Page 17: Table Of Contents
SilverV-gb.book Page xiii Monday, May 15, 2000 3:32 PM TABLE OF CONTENTS 1. Operation Printing Paper .................... 1 Originals ..................... 2 Preparation for Printing ................3 Loading Paper....................3 Setting Up the Paper Delivery Tray............... 4 Standard Printing ..................5 Restoring Paper Feed and Paper Delivery Trays ........ - Page 18 SilverV-gb.book Page xiv Monday, May 15, 2000 3:32 PM Storing Your Settings .................. 38 Recalling a Program..................39 Protecting a Program .................. 40 Removing Program Protection ..............41 Security Mode—Printing Secret Documents ........42 2. Optional Functions Printing Using the Optional 30 Originals Document Feeder ....43 Document Feeder Exterior ................
- Page 19 SilverV-gb.book Page xv Monday, May 15, 2000 3:32 PM “x” + “ORIGINAL JAM. REMOVE ORIGINAL” .......... 84 “x” +“PAPER FEED JAM. REMOVE JAMMED PAPER” ......87 “x”+ “MASTER FEED JAM. REMOVE JAMMED MASTER”..... 90 “x” +“PAPER WRAP JAM. REMOVE JAMMED PAPER” ......92 “x”...
- Page 20 SilverV-gb.book Page xvi Monday, May 15, 2000 3:32 PM...
-
Page 21: Operation
SilverV-gb.book Page 1 Monday, May 15, 2000 3:32 PM 1. Operation Printing Paper The following types of print paper are not recommended for this machine. • Paper smaller than 90mm × 148mm, 3.6" × 5.9" • Paper larger than 268mm × 388mm, 10.5" ×15.2" •... -
Page 22: Originals
SilverV-gb.book Page 2 Monday, May 15, 2000 3:32 PM Operation Originals Note Originals that can be set on the exposure glass are as follows: • Maximum size: 257 × 364mm, 10.2" × 14.4" • Maximum total thickness: 30mm, 1.1" • Maximum total weight: 5kg, 11.0 lb If you use paste-up originals, make sure the pasted parts hold firmly to the base sheet and press the {Paste Shadow Erase} key. -
Page 23: Preparation For Printing
SilverV-gb.book Page 3 Monday, May 15, 2000 3:32 PM Preparation for Printing Preparation for Printing Note Loading Paper Correct the paper curl before setting the paper. If you cannot Carefully open the paper feed do so, stack the paper with the tray. -
Page 24: Setting Up The Paper Delivery Tray
SilverV-gb.book Page 4 Monday, May 15, 2000 3:32 PM Operation Lift the paper delivery end plate Setting Up the Paper Delivery and move it to match the print pa- Tray per size. Open the paper delivery tray. TSLH01ZE Turn on the main switch. TSLH01YE Reference When the prints are not deliv-... -
Page 25: Standard Printing
SilverV-gb.book Page 5 Monday, May 15, 2000 3:32 PM Standard Printing Standard Printing Set the original face down on the exposure glass. original - Printing should be centred according to In this manual, the word, “Printing” the size marks on the right scale. is used as opposed to “Copying”... - Page 26 SilverV-gb.book Page 6 Monday, May 15, 2000 3:32 PM Operation Press the { { { { Proof} } } } key and check Press the { { { { Print} } } } key. the image density and the image position of the proof print.
-
Page 27: Restoring Paper Feed And Paper Delivery Trays
SilverV-gb.book Page 7 Monday, May 15, 2000 3:32 PM Restoring Paper Feed and Paper Delivery Trays Restoring Paper Feed and Paper Delivery Trays Remove the paper from the paper Move the end plate until the plate feed tray. handle is flush with the end of the tray. -
Page 28: Energy Saver Mode - Saving Energy
SilverV-gb.book Page 8 Monday, May 15, 2000 3:32 PM Operation Energy Saver Mode — Saving Energy If you do not operate the machine for a certain period after printing, or when you press and hold the {Clear Modes/Energy Saver} key for three seconds, the panel display turns off and the machine enters Energy Saver mode. -
Page 29: Adjusting The Print Image Position
SilverV-gb.book Page 9 Monday, May 15, 2000 3:32 PM Adjusting the Print Image Position Adjusting the Print Image Position After master making, you can adjust Note the print image position to suit your When you shift the image for- needs. There are two ways: wards, leave a margin (more than 5mm, 0.2") at the leading Shifting the Image Position Forward... -
Page 30: Shifting The Print Image Position To The Right Or Left
SilverV-gb.book Page 10 Monday, May 15, 2000 3:32 PM Operation Note Shifting the Print Image The image position can be shift- Position to the Right or Left ed up to about 10mm, 0.4" each way. Each division on the scale is 2mm, 0.08". -
Page 31: Adjusting The Print Image Density
SilverV-gb.book Page 11 Monday, May 15, 2000 3:32 PM Adjusting the Print Image Density Adjusting the Print Image Density You can adjust the print image densi- After Making a Master ty to suit your needs. There are two ways: Press the { { { { W W W W } } } } or { { { { V V V V } } } } key. To in- Before Making a Master crease the speed, press the { { { { V V V V } } } } Adjust the image density using the... -
Page 32: Tint Mode-Halftone Printing
SilverV-gb.book Page 12 Monday, May 15, 2000 3:32 PM Operation Tint Mode—Halftone Printing Check the image position of the trial or proof print. Note If the image position is not cor- rect, adjust it using the {Image Position} keys (see ⇒ P.9 “Ad- justing the Print Image Position”) or the side tray fine adjusting GRTINT0E... -
Page 33: Fine Mode-Making Clear Prints
SilverV-gb.book Page 13 Monday, May 15, 2000 3:32 PM Fine Mode—Making Clear Prints Fine Mode—Making Clear Prints Use the {Fine} key to make clear Enter the number of prints with prints. the number keys. Press the { { { { Fine} } } } key to select Fine Press the { { { { Print} } } } key. -
Page 34: Changing The Printing Speed
SilverV-gb.book Page 14 Monday, May 15, 2000 3:32 PM Operation Changing the Printing Speed Use the {W W W W } or {V V V V } key to adjust the speed of the machine with the image density and printing paper. Press the { { { { V V V V } } } } key to increase the speed and press the { { { { W W W W } } } } key to re- duce the speed. -
Page 35: Stopping The Machine During The Multi-Print Run
SilverV-gb.book Page 15 Monday, May 15, 2000 3:32 PM Stopping the Machine during the Multi-print Run Stopping the Machine during the Multi- print Run When You Want to Stop the When You Want to Change the Machine during the Multi-print Number of Prints Entered or Run and Print the Next Check the Completed Prints... -
Page 36: Preset Reduce/Enlarge-Reducing And Enlarging Using Preset Ratios
SilverV-gb.book Page 16 Monday, May 15, 2000 3:32 PM Operation Preset Reduce/Enlarge—Reducing and Enlarging Using Preset Ratios You can select a preset ratio for print- Prints can be reduced or enlarged ing. as follows: Reduction (Metric version) Reduc- Original Print Size tion Ratio Size 93 %... - Page 37 SilverV-gb.book Page 17 Monday, May 15, 2000 3:32 PM Preset Reduce/Enlarge—Reducing and Enlarging Using Preset Ratios Enlargement (Metric version) Press the { { { { Start} } } } key. Enlarge- Original Print Size ment Ratio Size 141 % 122 % 115 % TSLS012E Check the image position of the...
-
Page 38: Centre/Edge Erase-Erasing Centre And Edge Margins
SilverV-gb.book Page 18 Monday, May 15, 2000 3:32 PM Operation Centre/Edge Erase—Erasing centre and Edge Margins When printing from thick books, or Press the { { { { Center/Edge Erase} } } } key similar originals, the binding margin twice to select the Centre/Edge at the centre and the edges might ap- Erase mode. - Page 39 SilverV-gb.book Page 19 Monday, May 15, 2000 3:32 PM Centre/Edge Erase—Erasing centre and Edge Margins When you reach the desired paper Check the image position of the size and direction, press the { { { { q q } } } } trial or proof print.
-
Page 40: Edge Erase-Erasing Edge Margins
SilverV-gb.book Page 20 Monday, May 15, 2000 3:32 PM Operation Edge Erase—Erasing Edge Margins If you want to erase edge margins of a Press the { { { { } } } } or { { { { } } } } key to se- book original, follow the steps below. - Page 41 SilverV-gb.book Page 21 Monday, May 15, 2000 3:32 PM Edge Erase—Erasing Edge Margins Press the { { { { Start} } } } key. TSLS012E Check the image position of the trial or proof print. Note If the image position is not cor- rect, adjust it using the {Image Position} keys (see ⇒...
-
Page 42: Paste Shadow Erase-Erasing The Shadow Of Pasted Originals
SilverV-gb.book Page 22 Monday, May 15, 2000 3:32 PM Operation Paste Shadow Erase—Erasing the Shadow of Pasted Originals If you want to erase the shadow of Enter the number of prints with pasted originals, follow the steps be- the number keys. low. -
Page 43: Printing On Thick Or Thin Paper
SilverV-gb.book Page 23 Monday, May 15, 2000 3:32 PM Printing on Thick or Thin Paper Printing on Thick or Thin Paper When you make prints on thick (127.9 In the case of paper smaller than " × 8 to 209.3g/m , 34.0 to 55.6 lb), stand- B5, 5 "... -
Page 44: Selecting Original Type
SilverV-gb.book Page 24 Monday, May 15, 2000 3:32 PM Operation Selecting Original Type Select one of the following three types Press the { { { { Image Density} } } } key to ad- to match your originals: just the image density. Photo mode Delicate tones of photographs and pictures can be reproduced with... -
Page 45: Economy Mode-Saving Ink
SilverV-gb.book Page 25 Monday, May 15, 2000 3:32 PM Economy Mode—Saving Ink Economy Mode—Saving Ink When you want to save ink, select Check the image position of the Economy mode. trial or proof print. Note Note Prints will come out lighter. If the image position is not cor- rect, adjust it using the {Image Press the { { { { Tint/Economy} } } } key to se-... -
Page 46: Auto Cycle-Printing From Several Originals At Once
SilverV-gb.book Page 26 Monday, May 15, 2000 3:32 PM Operation Auto Cycle—Printing from Several Originals at Once Use the {Auto Cycle} key to process Press the { { { { Start} } } } key. masters and make prints at one stroke. - Page 47 SilverV-gb.book Page 27 Monday, May 15, 2000 3:32 PM Auto Cycle—Printing from Several Originals at Once If you use the optional tape dis- penser, turn on the tape dispenser power switch. O f f TSLP013E Press the { { { { Print} } } } key. Note Repeat steps A through C until all originals are printed when...
-
Page 48: Class Mode-Group Printing From The Same Original
SilverV-gb.book Page 28 Monday, May 15, 2000 3:32 PM Operation Class Mode—Group Printing from the Same Original Use the {Memory/Class} key to make With the number keys, enter the sets of prints from the same original. number of prints for each set to be The same number of prints is made made from the original. - Page 49 SilverV-gb.book Page 29 Monday, May 15, 2000 3:32 PM Class Mode—Group Printing from the Same Original Turn on the optional tape dis- Make your prints. penser power switch. O f f TSLS014E TSLP013E Note After the last page of each print- Set one original face down on the ing set is fed out to the paper de- exposure glass or in the optional...
-
Page 50: Memory Mode-Group Printing From Different Originals
SilverV-gb.book Page 30 Monday, May 15, 2000 3:32 PM Operation Memory Mode—Group Printing from Different Originals Use the {Memory/Class} key to make With the number keys, enter the sets of prints from different originals. desired number of prints for the first original. - Page 51 SilverV-gb.book Page 31 Monday, May 15, 2000 3:32 PM Memory Mode—Group Printing from Different Originals With the number keys, enter the Set the first original face down on number of prints for the second the exposure glass. original. TSLH010E TSLS011E Note Press the { { { { q q } } } } key.
- Page 52 SilverV-gb.book Page 32 Monday, May 15, 2000 3:32 PM Operation Press the { { { { Print} } } } key. Turn on the optional tape dis- penser power switch. O f f TSLS014E TSLP013E Note After the first set is fed to the pa- Press the { { { { Auto Cycle} } } } key.
-
Page 53: Combine-Combining 2 Originals Onto One Print
SilverV-gb.book Page 33 Monday, May 15, 2000 3:32 PM Combine—Combining 2 Originals onto One Print Combine—Combining 2 Originals onto One Print You can print 2 separate originals on Note a single sheet of paper. The following The following tables list the repro- diagrams show the available paper duction ratios used. - Page 54 SilverV-gb.book Page 34 Monday, May 15, 2000 3:32 PM Operation Press the { { { { Combine} } } } key once or Minimum Maximum more to select the type of combine A4 drum 91 mm, 198 mm, (see below). model 3.6"...
- Page 55 SilverV-gb.book Page 35 Monday, May 15, 2000 3:32 PM Combine—Combining 2 Originals onto One Print Press the { { { { Start} } } } key. To Choose a Custom Reproduction Ratio A Press the { { { { Center/Edge Erase} } } } key twice.
- Page 56 SilverV-gb.book Page 36 Monday, May 15, 2000 3:32 PM Operation Enter the number of prints with the number keys. TSLS011E Make your prints.
-
Page 57: Skip Feed Printing
SilverV-gb.book Page 37 Monday, May 15, 2000 3:32 PM Skip Feed Printing Skip Feed Printing If the backs of prints are dirty, you Press the { { { { Start} } } } key. can increase the time between two prints using the {Skip Feed} key. -
Page 58: Program-Storing Your Print Settings In Memory
SilverV-gb.book Page 38 Monday, May 15, 2000 3:32 PM Operation Program—Storing Your Print Settings in Memory You can store up to 9 frequently used Enter “0” with the number key. print job settings in machine memory, and recall them for future use. Note The stored programs are not cleared when you turn off the main... -
Page 59: Recalling A Program
SilverV-gb.book Page 39 Monday, May 15, 2000 3:32 PM Program—Storing Your Print Settings in Memory Select the program number you Note want to store the settings in with Numbers already containing a the number keys. program are displayed on the guidance display. -
Page 60: Protecting A Program
SilverV-gb.book Page 40 Monday, May 15, 2000 3:32 PM Operation Press the { { { { Start} } } } key. Press the { { { { q q } } } } key. TSLS012E TSLS01JE Note Protecting a Program The numbers of the programs which are not protected will be If you want to prevent someone from... -
Page 61: Removing Program Protection
SilverV-gb.book Page 41 Monday, May 15, 2000 3:32 PM Program—Storing Your Print Settings in Memory Select the program number you Removing Program Protection want to remove protection from with the number keys. While holding down the { { { { Clear/ Stop} } } } key, press the { { { { Program} } } } key. -
Page 62: Security Mode-Printing Secret Documents
SilverV-gb.book Page 42 Monday, May 15, 2000 3:32 PM Operation Security Mode—Printing Secret Documents This function prevents others from making prints of secret documents from the master. For example, if you want to print some documents with sensitive information, use this func- tion after making your prints so that nobody can access that master again. -
Page 63: Optional Functions
SilverV-gb.book Page 43 Monday, May 15, 2000 3:32 PM 2. Optional Functions Printing Using the Optional 30 Originals Document Feeder Insert a stack of originals in the document feeder. They will be fed automatically. Document Feeder Exterior TSLP018E Original tray Original used to make masters are deliv- ered to this tray. -
Page 64: Originals
SilverV-gb.book Page 44 Monday, May 15, 2000 3:32 PM Optional Functions Originals Setting the following originals in the document feeder might cause original mis- feeds or damage to the originals. Set these originals on the exposure glass. • Originals heavier than 90g/m , 23.9 lb (when setting a stack of originals) •... -
Page 65: Setting Originals In The Document Feeder
SilverV-gb.book Page 45 Monday, May 15, 2000 3:32 PM Printing Using the Optional 30 Originals Document Feeder Setting Originals in the Document Feeder Note If you set one original into the document feeder while another original is still on the exposure glass, the original set into the document feeder will be scanned first. -
Page 66: Combine Copies With The Document Feeder
SilverV-gb.book Page 46 Monday, May 15, 2000 3:32 PM Optional Functions Set the desired settings and press the { { { { Start} } } } key. TSLS012E Make your prints. Note If the next original has been set in the document feeder before the machine stops, that original is fed automatically and a trial print is delivered to the paper delivery tray after the print of the first original is completed. - Page 67 SilverV-gb.book Page 47 Monday, May 15, 2000 3:32 PM Printing Using the Optional 30 Originals Document Feeder Press the { { { { Combine} } } } key to select your desired mode. Reference For the details of this function, See ⇒ P.33 “Combine—Combining 2 Origi- nals onto One Print”.
-
Page 68: Memory Mode With The Document Feeder
SilverV-gb.book Page 48 Monday, May 15, 2000 3:32 PM Optional Functions Enter the number of prints with the number keys. TSLS011E Make your prints. Memory Mode with the Document Feeder Note To prevent original misfeeds, do not set originals of different sizes. Do not set more than 30 originals at one time in the optional 30 originals doc- ument feeder. - Page 69 SilverV-gb.book Page 49 Monday, May 15, 2000 3:32 PM Printing Using the Optional 30 Originals Document Feeder Press the { { { { q q } } } } key. This stores the number of prints to be made for the first original in memory 1. TSLS01JE Note When the number of prints in each set is the same, it is not necessary to in-...
- Page 70 SilverV-gb.book Page 50 Monday, May 15, 2000 3:32 PM Optional Functions Check the image position of the trial or proof print. Note If the image position is not correct, adjust it using the {Image Position} keys (see ⇒ P.9 “Shifting the Print Image Position Forward or Backward”) or the side tray fine adjusting dial (see ⇒...
- Page 71 SilverV-gb.book Page 51 Monday, May 15, 2000 3:32 PM Printing Using the Optional 30 Originals Document Feeder Press the { { { { Print} } } } key. TSLS014E Note After the last page of each set is fed out to the paper delivery tray, the tape dispenser drops a strip of paper on the top of the paper stack.
-
Page 72: Colour Printing Using The Optional Colour Drum
SilverV-gb.book Page 52 Monday, May 15, 2000 3:32 PM Optional Functions Colour Printing Using the Optional Colour Drum Colour drum units (red, blue, green, Note brown, yellow, purple, navy, ma- If the image position is not cor- roon, orange, teal and gray) are avail- rect, adjust it using the {Image able as options in addition to the Position} keys (see ⇒... - Page 73 SilverV-gb.book Page 53 Monday, May 15, 2000 3:32 PM Colour Printing Using the Optional Colour Drum Pull out the drum unit handle. Insert the colour drum unit along the guide rail. TSLH01LE TSLH01PE Note Slide in the drum unit until it If you cannot pull out the drum locks in position.
-
Page 74: Printing In Two Colours
SilverV-gb.book Page 54 Monday, May 15, 2000 3:32 PM Optional Functions Check the image position of the Printing in Two colours trial or proof print. After printing in one colour, you can Note print in another colour on the same If the image position is not cor- side of the print. - Page 75 SilverV-gb.book Page 55 Monday, May 15, 2000 3:32 PM Colour Printing Using the Optional Colour Drum Remove the prints from the paper delivery tray and set them on the paper feed tray again as shown in the illustration. TSLY019E Exchange the drum unit. See ⇒ ⇒ ⇒ ⇒ P.52 “Changing the colour Drum Unit”.
- Page 76 SilverV-gb.book Page 56 Monday, May 15, 2000 3:32 PM Optional Functions...
-
Page 77: Service Program Mode
SilverV-gb.book Page 57 Monday, May 15, 2000 3:32 PM 3. Service Program Mode Accessing Service Programs The service programs can be set by With the number keys, enter the following this procedure. desired service program number (SP No.). Reference For the service program menu, see ⇒... -
Page 78: Changing The Settings Of Service Programs
SilverV-gb.book Page 58 Monday, May 15, 2000 3:32 PM Service Program Mode Changing the Settings of Service Programs After entering the desired SP No., press the { { { { q q } } } } key. TSLS01JE The value or mode set at the factory will be displayed at the end of the second line on the guidance display. -
Page 79: Service Program Menu
SilverV-gb.book Page 59 Monday, May 15, 2000 3:32 PM Changing the Settings of Service Programs When you want to leave the service program mode A Press the { { { { Clear Modes/Energy Saver} } } } key. Service Program Menu SP No. - Page 80 SilverV-gb.book Page 60 Monday, May 15, 2000 3:32 PM Service Program Mode SP No. Mode Function Set Language If you want to change the language used by the guid- ance display, select the language version. Note Default: 1 Adjustable value: •...
- Page 81 SilverV-gb.book Page 61 Monday, May 15, 2000 3:32 PM Changing the Settings of Service Programs SP No. Mode Function Clear 2 In 1 By default, when master making is finished in Com- bine Copies mode, this mode stays selected for the next master making.
- Page 82 SilverV-gb.book Page 62 Monday, May 15, 2000 3:32 PM Service Program Mode SP No. Mode Function Print Speed Specifies the printing speed at power on. Note Default: 2 Adjustment value: • 1: 80 sheets/minute • 2: 100 sheets/minute • 3: 130 sheets/minute Auto Cycle Mode Specifies whether Auto Cycle mode is selected at power on.
- Page 83 SilverV-gb.book Page 63 Monday, May 15, 2000 3:32 PM Changing the Settings of Service Programs SP No. Mode Function Memory Print Each print set or stack will contain the number of prints you program in Memory mode. If set to Memory, Memory mode will work. If set to Stack, Stack mode will work.
- Page 84 SilverV-gb.book Page 64 Monday, May 15, 2000 3:32 PM Service Program Mode SP No. Mode Function User Code Mode Selects user code mode. When you set this function, you have to also specify the auto reset time. For de- tails about user code mode, see ⇒ P.66 “User Codes”. Note Default: •...
- Page 85 SilverV-gb.book Page 65 Monday, May 15, 2000 3:32 PM Changing the Settings of Service Programs SP No. Mode Function Side Ers. Adjust the default side edge margin width in Edge Erase and Centre/Edge Erase mode. Note Default: • Metric Version: 5mm •...
-
Page 86: User Codes
SilverV-gb.book Page 66 Monday, May 15, 2000 3:32 PM Service Program Mode User Codes If the machine is set to use the User Hold down the { { { { Clear/Stop} } } } key Code function, operators must input for at least 3 seconds. -
Page 87: How To Use User Code Mode
SilverV-gb.book Page 67 Monday, May 15, 2000 3:32 PM User Codes Specify the Auto Reset time. En- How to Use User Code Mode ter the desired setting with the number keys and press the { { { { q q } } } } Input your assigned 3-digit user key. -
Page 88: How To Check The User Code Counter (# 121)
SilverV-gb.book Page 68 Monday, May 15, 2000 3:32 PM Service Program Mode Enter “121” with the number keys How to Check the User Code and press the { { { { q q } } } } key. Counter (# 121) Reference If you want to check the total mas- ters and prints made under all user... -
Page 89: How To Clear The User Code Counter (# 122)
SilverV-gb.book Page 69 Monday, May 15, 2000 3:32 PM User Codes Enter “122” with the number keys How to Clear the User Code and press the { { { { q q } } } } key. Counter (# 122) Reference If you want to clear every user code counter, see ⇒... -
Page 90: How To Check The Total Number Of Masters And Prints Made Under All User Codes (# 123)
SilverV-gb.book Page 70 Monday, May 15, 2000 3:32 PM Service Program Mode Enter “123” with the number keys How to Check the Total and press the { { { { q q } } } } key. Number of Masters and Prints Made Under All User Codes (# 123) Press the { { { { Clear Modes/Energy Sav-... -
Page 91: How To Clear The User Code Total Counter (# 124)
SilverV-gb.book Page 71 Monday, May 15, 2000 3:32 PM User Codes Enter “1” (Yes) with the number How to Clear the User Code keys and press the { { { { q q } } } } key. Total Counter (# 124) Press the { { { { Clear Modes/Energy Sav- er} } } } key. - Page 92 SilverV-gb.book Page 72 Monday, May 15, 2000 3:32 PM Service Program Mode...
-
Page 93: Replenishing Supplies
SilverV-gb.book Page 73 Monday, May 15, 2000 3:32 PM 4. Replenishing Supplies Loading Paper on the Paper Feed Tray The Load Paper indicator (B) lights Note when the paper feed tray runs out of The paper feed tray will lower paper. -
Page 94: Changing The Paper Size
SilverV-gb.book Page 74 Monday, May 15, 2000 3:32 PM Replenishing Supplies Place the paper on the paper feed Changing the Paper Size tray. Remove the paper from the paper feed tray. TSLY013E Note Correct any paper curl before TSLY016E setting the paper. The paper feed tray will lower. -
Page 95: When The Add Ink Indicator (J) Lights
SilverV-gb.book Page 75 Monday, May 15, 2000 3:32 PM When the Add Ink Indicator (j) Lights When the Add Ink Indicator (j) Lights The Add Ink indicator (j) lights when it is time to supply ink. R CAUTION: • If ink comes into contact with your eyes, rinse immediately in running water. In the case of any abnormal symptoms, consult a doctor. - Page 96 SilverV-gb.book Page 76 Monday, May 15, 2000 3:32 PM Replenishing Supplies Remove the cap of the new ink cartridge. TSLT012E Insert the new cartridge into the ink holder. TSLT013E Return the ink holder to its original position until it clicks. Note Always supply ink of the same colour.
-
Page 97: Master Roll Replacement
SilverV-gb.book Page 77 Monday, May 15, 2000 3:32 PM Master Roll Replacement Master Roll Replacement The Master End indicator (C) is lit Remove the used master roll and when it is time to replace the master pull out both spools. Then, insert roll. - Page 98 SilverV-gb.book Page 78 Monday, May 15, 2000 3:32 PM Replenishing Supplies Set the paper edge of the master Return the original tray to its orig- roll as shown. inal position. TSLH01UE TSLH025E Note Rotate the spools backward to take up any slack in the master. Close the plotter cover.
-
Page 99: Placing A New Roll Of Tape In The Tape Dispenser (Option)
SilverV-gb.book Page 79 Monday, May 15, 2000 3:32 PM Placing a New Roll of Tape in the Tape Dispenser (Option) Placing a New Roll of Tape in the Tape Dispenser (Option) Note Feed the leading edge of the roll in the dispensing slot until it stops. - Page 100 SilverV-gb.book Page 80 Monday, May 15, 2000 3:32 PM Replenishing Supplies...
-
Page 101: What To Do If Something Goes Wrong
SilverV-gb.book Page 81 Monday, May 15, 2000 3:32 PM 5. What to do If Something Goes Wrong If Your Machine does not Operate as You Want If a malfunction or a misfeed occurs within the machine, the following indicators will light. x ) lights When the misfeed indicator (x Indicator... - Page 102 SilverV-gb.book Page 82 Monday, May 15, 2000 3:32 PM What to do If Something Goes Wrong R CAUTION: • Be careful not to cut yourself on any sharp edges when you reach inside the machine to remove misfed sheets of paper or masters. Note To prevent misfeeds, do not leave any torn scraps of paper within the ma- chine.
- Page 103 SilverV-gb.book Page 83 Monday, May 15, 2000 3:32 PM If Your Machine does not Operate as You Want When one of the following messages is displayed on the guidance display Guidance Display Meaning The maximum number of prints that can be RE-ENTER COPY NUMBER MAXIMUM entered is specified by the Service Program IS XXX...
-
Page 104: Clearing Misfeeds
SilverV-gb.book Page 84 Monday, May 15, 2000 3:32 PM What to do If Something Goes Wrong x Clearing Misfeeds Important When clearing misfeeds, do not turn off the main switch. If you do, your print settings are cleared. - After clearing misfeeds Press the {Clear Modes/Energy Saver} key to reset the error indicators. - Page 105 SilverV-gb.book Page 85 Monday, May 15, 2000 3:32 PM x Clearing Misfeeds Pull out the original gently. TSLY011E If you cannot remove the misfed original, pull out the original from the side of the original tray and remove the original. TSLY017E If you still cannot remove the misfed paper, press the ADF open lever and open the ADF unit to remove the original.
- Page 106 SilverV-gb.book Page 86 Monday, May 15, 2000 3:32 PM What to do If Something Goes Wrong - To prevent original misfeeds: • Originals heavier than 90g/m , 23.9 lb (when setting a stack of originals) • Originals lighter than 50g/m , 13.3 lb (when setting a stack of originals) •...
-
Page 107: X" +"Paper Feed Jam. Remove Jammed Paper
SilverV-gb.book Page 87 Monday, May 15, 2000 3:32 PM x Clearing Misfeeds x ” +“PAPER FEED JAM. REMOVE JAMMED PAPER” “x R CAUTION: • Be careful not to cut yourself on any sharp edges when you reach inside the machine to remove misfed sheets of paper or masters. Misfeed in the paper feed section Slowly but firmly pull out the paper. - Page 108 SilverV-gb.book Page 88 Monday, May 15, 2000 3:32 PM What to do If Something Goes Wrong Re-insert the drum unit until the drum unit locks in position and put the lever back in place. TSLH028E Close the front door. - To prevent paper misfeeds: If the paper is curled or the originals leading edge margin is too narrow, the fol- lowing action is necessary.
- Page 109 SilverV-gb.book Page 89 Monday, May 15, 2000 3:32 PM x Clearing Misfeeds • If you cannot correct the paper curl, stack the paper with the curl face down as shown. GRMARU0E GRBATS0E • When the leading edge margin of the original is less than 5mm, 0.2" or there is a solid image on the leading edge, insert the original with the widest mar- gin first or make a leading edge margin by making a copy.
-
Page 110: X"+ "Master Feed Jam. Remove Jammed Master
SilverV-gb.book Page 90 Monday, May 15, 2000 3:32 PM What to do If Something Goes Wrong x ”+ “MASTER FEED JAM. REMOVE JAMMED MASTER” “x Open the original tray. TSLH01SE Note Lift the original tray release lever and slide the original tray all the way to the left. - Page 111 SilverV-gb.book Page 91 Monday, May 15, 2000 3:32 PM x Clearing Misfeeds If you could not remove the misfed master in steps B B B B and C C C C , take out the drum and remove the misfed master from the inside. TSLH01BE Reference For how to take out the drum unit, see ⇒...
-
Page 112: X" +"Paper Wrap Jam. Remove Jammed Paper
SilverV-gb.book Page 92 Monday, May 15, 2000 3:32 PM What to do If Something Goes Wrong x ” +“PAPER WRAP JAM. REMOVE JAMMED PAPER” “x R CAUTION: • Be careful not to cut yourself on any sharp edges when you reach inside the machine to remove misfed sheets of paper or masters. - Page 113 SilverV-gb.book Page 93 Monday, May 15, 2000 3:32 PM x Clearing Misfeeds - To prevent paper misfeeds: If the paper is curled or the original's leading edge margin is too narrow, the fol- lowing action is necessary. • When you use curled paper, correct the curl as shown. GRCURL0E •...
-
Page 114: X" +"Master Eject Jam. Remove Jammed Master
SilverV-gb.book Page 94 Monday, May 15, 2000 3:32 PM What to do If Something Goes Wrong • When the leading edge margin of the original is less than 5mm, 0.2" or there is a solid image on the leading edge, insert the original with the widest mar- gin first or make a leading edge margin by making a copy. - Page 115 SilverV-gb.book Page 95 Monday, May 15, 2000 3:32 PM x Clearing Misfeeds B Remove the misfed master. TSLY018E Note Be careful not to stain your hands with ink when you touch used mas- ters. C Return the master eject box to its original position. When a master misfeed occurs on the drum A Lift the lever to unlock the drum unit and pull out the unit.
-
Page 116: X" +"Delivery Jam. Remove Jammed Paper
SilverV-gb.book Page 96 Monday, May 15, 2000 3:32 PM What to do If Something Goes Wrong C Pull the master out of the master clamp. TSLH031E D Re-insert the drum unit until the drum unit locks in position and put the lever back in place. -
Page 117: When The Open Cover/Unit Indicator (M) Lights
SilverV-gb.book Page 97 Monday, May 15, 2000 3:32 PM When the Open Cover/Unit Indicator (M) Lights When the Open Cover/Unit Indicator (M) Lights MMake sure that the following door/units are closed. Original Tray Close the original tray until it locks in position. TSLH025E Front Door Close the front door completely. - Page 118 SilverV-gb.book Page 98 Monday, May 15, 2000 3:32 PM What to do If Something Goes Wrong Make sure that the drum is completely set in position. • Set the drum unit completely until it locks in position. TSLH028E...
-
Page 119: When The Master Eject Indicator (K) Lights
SilverV-gb.book Page 99 Monday, May 15, 2000 3:32 PM When the Master Eject Indicator (k) Lights When the Master Eject Indicator (k) Lights The Master Eject indicator (k) and the Reset indicator light when it is time to empty master eject box or when you need to set the master eject box. Take out the master eject box and remove the used masters. -
Page 120: When Other Indicators Light
SilverV-gb.book Page 100 Monday, May 15, 2000 3:32 PM What to do If Something Goes Wrong When Other Indicators Light The key counter (option) is not set. Insert the key counter. Set the key counter... -
Page 121: When The Prints Are Thrown Over The Paper Delivery Tray
SilverV-gb.book Page 101 Monday, May 15, 2000 3:32 PM When the Prints are Thrown Over the Paper Delivery Tray When the Prints are Thrown Over the Paper Delivery Tray Reduce the printing speed by pressing the { { { { W W W W } } } } key. Note If a jam occurs with the current printing speed, reduce the paper delivery speed. -
Page 122: Poor Printing
SilverV-gb.book Page 102 Monday, May 15, 2000 3:32 PM What to do If Something Goes Wrong Poor Printing Dirt on the Back Side of Paper GRDIRT0E Note When you use paper smaller than the original, select the proper reduction ra- tio. - Page 123 SilverV-gb.book Page 103 Monday, May 15, 2000 3:32 PM Poor Printing Clean the pressure roller with a clean cloth. TSLH01NE With a clean cloth, remove any ink that has accumulated on the trailing edge of the drum unit. TSLH02CE Insert the drum unit until it locks in position, then lower the drum unit lock lever.
-
Page 124: Dirt On The Front Side Of Paper (Black Line/Stain)
SilverV-gb.book Page 104 Monday, May 15, 2000 3:32 PM What to do If Something Goes Wrong Turn on the main switch. Dirt on the Front Side of Paper (Black Line/Stain) GRBLAC1E Note When black lines or stains still appear on prints even if you clean the above, contact your service representative. -
Page 125: White Prints Or Incomplete Prints
SilverV-gb.book Page 105 Monday, May 15, 2000 3:32 PM Poor Printing White Prints or Incomplete Prints GRWHIT0E • Make sure that the paper feed side plates touch the paper lightly. Put back the lock lever. TSLY015E • When you use the optional document feeder, make sure that the original guides contact the originals lightly. - Page 126 SilverV-gb.book Page 106 Monday, May 15, 2000 3:32 PM What to do If Something Goes Wrong Remove the master from the drum. TSLH02BE Remove paper that is stuck to the drum. TSLH031E Insert the drum unit until it locks in position, then lower the drum unit lock lever.
-
Page 127: Remarks
SilverV-gb.book Page 107 Monday, May 15, 2000 3:32 PM 6. Remarks Operation Notes General Cautions • While printing, do not turn off the main switch. • While printing, do not open the door or covers. • While printing, do not unplug the power cord. •... - Page 128 SilverV-gb.book Page 108 Monday, May 15, 2000 3:32 PM Remarks • If the machine is not used for a long period, the image density might decrease because the ink on the drum might dry. Make extra prints until the image density recovers.
-
Page 129: Print Paper
SilverV-gb.book Page 109 Monday, May 15, 2000 3:32 PM Operation Notes • The image density varies according to the printing speed and the room tem- perature. So, adjust the printing speed or increase the room temperature. • When you make a lot of prints from a small image, ink might ooze out from the edges of the master, especially under high temperature and when print- ing in two or more colours. - Page 130 SilverV-gb.book Page 110 Monday, May 15, 2000 3:32 PM Remarks • Under the following conditions, the machine might not detect the original on the exposure glass. If you press the {Start} key again, the machine will start making a master anyway: •...
-
Page 131: Where To Put Your Machine
SilverV-gb.book Page 111 Monday, May 15, 2000 3:32 PM Where to Put Your Machine Where to Put Your Machine Your machine's location should be carefully chosen because environmental con- ditions greatly affect its performance. Environmental Conditions Optimum environmental conditions R CAUTION: •... -
Page 132: Power Connection
SilverV-gb.book Page 112 Monday, May 15, 2000 3:32 PM Remarks Power Connection R WARNING: • Only connect the machine to the power source described on the inside front cover of this manual. Connect the power cord directly into a wall outlet and do not use an extention cord. -
Page 133: Maintaining Your Machine
SilverV-gb.book Page 113 Monday, May 15, 2000 3:32 PM Maintaining Your Machine Maintaining Your Machine To maintain high print quality, clean Platen Cover the following parts and units regular- Lift the platen cover. Main Frame Clean the platen cover with a damp cloth and wipe it with a dry cloth. -
Page 134: Optional Document Feeder
SilverV-gb.book Page 114 Monday, May 15, 2000 3:32 PM Remarks Optional Document Feeder Separation Roller Open the ADF unit. Clean the separation roller with a damp cloth and wipe it with a dry cloth. TSLH016E Note If you do not clean the separa- tion roller, original misfeeds tend to occur. -
Page 135: Combination Chart
SilverV-gb.book Page 115 Monday, May 15, 2000 3:32 PM Combination Chart Combination Chart This combination chart shows which modes can be used together. means that these modes can be used together. × means that these modes cannot be used together. 10 11 12 13 14 ×... - Page 136 SilverV-gb.book Page 116 Monday, May 15, 2000 3:32 PM Remarks...
-
Page 137: Specification
SilverV-gb.book Page 117 Monday, May 15, 2000 3:32 PM 7. Specification Main Frame Configuration: Desk top Printing Process: Full automatic one drum system Original Type: Sheet/Book Original Size: Maximum 257mm × 364mm, 10.2" × 14.4" Pixel Density: 300dpi (in Fine mode 400dpi) Image Mode: Photo mode (Sand pattern) Letter mode (Standard mode) - Page 138 SilverV-gb.book Page 118 Monday, May 15, 2000 3:32 PM Specification Printing Paper Size: Maximum 268mm × 388mm, 10.5" × 15.2" Minimum 90mm × 148mm, 3.6" × 5.9" Leading Edge Margin: 5mm ± 3mm, 0.2" ± 0.12" Print Paper Weight: 47.1g/m to 209.3g/m , 12.5 lb to 55.6 lb Print Speed:...
- Page 139 SilverV-gb.book Page 119 Monday, May 15, 2000 3:32 PM Main Frame Dimensions (W × × × × D × × × × H): Width Depth Height Stored 607mm, 23.9" 651mm, 32.6" 567mm, 22.4" Stored with document 607mm, 23.9" 651mm, 32.6" 617mm, 24.3"...
- Page 140 SilverV-gb.book Page 120 Monday, May 15, 2000 3:32 PM Specification Power Consumption: Stand-by Less than 0.01kW Master Making Less than 0.24kW Printing: Speed 1 Less than 0.14kW Printing: Speed 2 Less than 0.16kW Printing: Speed 3 Less than 0.20kW Optional Equipment: •...
-
Page 141: 30 Originals Document Feeder
SilverV-gb.book Page 121 Monday, May 15, 2000 3:32 PM 30 Originals Document Feeder 30 Originals Document Feeder Original Type: Sheet Original Weight: • When setting a stack of originals: 50 – 90g/m , 13.3 – 23.9 lb • When setting one sheet at a time: 40 –... -
Page 142: Consumables
SilverV-gb.book Page 122 Monday, May 15, 2000 3:32 PM Specification Consumables Name Size Remarks Master for LG drum Length: 125m, 410ft/roll 260 masters can be made per roll Width: 240mm, 9.5" 2 Rolls/case Master for A4 drum Length: 125m, 410ft/roll 300 masters can be made per roll Width: 240mm, 9.5"... -
Page 143: Index
SilverV-gb.book Page 123 Monday, May 15, 2000 3:32 PM INDEX Accessing Service Programs , 57 Economy Mode , 25 Access to machine , 112 Edge Erase , 20 {Enlarge} key , x , 17 ADF unit , 43 ADF unit open lever , 43 Enlargement , 16 {Enter} key , xi Adjusting the Print Image Density , 11... - Page 144 SilverV-gb.book Page 124 Monday, May 15, 2000 3:32 PM Master Eject Indicator , 99 Master Roll Replacement , 77 Recalling a Program , 39 Memory/Class indicator , xii {Reduce} key , x , 17 {Memory/Class} key , xi , 28 , 30 Reduction , 16 Memory Mode , 30 Removing Program Protection , 41...
Need help?
Do you have a question about the Priport 1250 and is the answer not in the manual?
Questions and answers