Table of Contents
Advertisement
Advertisement
Table of Contents

Related Manuals for Fluke 1504


Summary of Contents for Fluke 1504
- Page 1 Hart Scientific 1504 Thermometer Readout User’s Guide Rev. 571202 ENG...
- Page 2 Limited Warranty & Limitation of Liability Each product from Fluke's Hart Scientific Division ("Hart") is warranted to be free from defects in mate- rial and workmanship under normal use and service. The warranty period is three years for the Thermom- eter Readout.
-
Page 3: Table Of Contents
Table of Contents 1 Before You Start ......1 Symbols Used ......1 Safety Information . - Page 4 Serial Interface ......25 7.1.1 Setting the Baud Rate ......25 7.1.2 Automatic Transmission of Measurements .
- Page 5 12 V DC power source polarity ..... 13 Figure 3 1504 Front Panel ......15 Figure 4 1504 Back Panel .
- Page 6 Tables Table1 International Electrical Symbols ..... 1 Table 2 Typical Values for Thermistor Coefficients ....20 Table 3 Setting Coefficients a, b, and c .
-
Page 7: Before You Start
1 Before You Start Symbols Used Before You Start Symbols Used Table 1 lists the symbols that may be used on the instrument or in this manual Table1 International Electrical Symbols and the meaning of each symbol. Symbol Description AC (Alternating Current) AC-DC Battery Complies with European Union Directives... -
Page 8: Safety Information
1504 Thermometer Readout User’s Guide Symbol Description Canadian Standards Association OVERVOLTAGE (Installation) CATEGORY II, Pollution Degree 2 per IEC1010-1 re- fers to the level of Impulse Withstand Voltage protection provided. Equipment of OVERVOLTAGE CATEGORY II is energy-consuming equipment to be supplied from the fixed installation. - Page 9 1 Before You Start Safety Information Before initial use, or after transport, or after storage in humid or semi-humid environments, or anytime the instrument has not been energized for more than 10 days, the instrument needs to be energized for a “dry-out” period of 2 hours before it can be assumed to meet all of the safety requirements of the IEC 1010-1.
-
Page 10: Cautions
Low Voltage Indicator is lit. Authorized Service Centers Please contact one of the following authorized Service Centers to coordinate service on your Hart product: Fluke Corporation, Hart Scientific Division 799 E. Utah Valley Drive American Fork, UT 84003-9775... - Page 11 22 Jianguomenwai Dajie Chao Yang District Beijing 100004, PRC CHINA Phone: +86-10-6-512-3436 Telefax: +86-10-6-512-3437 E-mail: xingye.han@fluke.com.cn Fluke South East Asia Pte Ltd. Fluke ASEAN Regional Office Service Center 60 Alexandra Terrace #03-16 The Comtech (Lobby D) 118502 SINGAPORE Phone: +65 6799-5588 Telefax: +65 6799-5588 E-mail: antng@singa.fluke.com...
- Page 12 1504 Thermometer Readout User’s Guide When contacting these Service Centers for support, please have the following information available: • Model Number • Serial Number • Voltage • Complete description of the problem...
-
Page 13: Introduction
2 Introduction Introduction The 1504 Thermometer Readout is a low-cost high-accuracy digital thermome- ter readout designed to be used with thermistors or RTDs with a nominal resis- tance of 1,000Ω or greater. Its unique combination of features makes it suitable for a wide variety of applications from laboratory measurement to industrial processes. -
Page 14: Specifications And Environmental Conditions
3 Specifications and Environmental Conditions Specifications Specifications and Environmental Conditions Specifications Resistance range 0 to 1 MΩ, auto-ranging Resistance accuracy, one 0 to 5 kΩ: 0.5Ω year 5 kΩ to 200 kΩ: 0.01% (100 ppm) of reading 200 kΩ to 1 MΩ: 0.03% (300 ppm) of reading Resistance accuracy, short 0 to 5 kΩ: 0.25Ω... -
Page 15: Environmental Conditions
Short-term accuracy includes nonlinearity and noise uncertainties. It does not include drift or calibration uncertainties. The temperature range may be limited by the sensor. Temperature accuracy is for the 1504 only. It does not include probe uncertainty or probe characteriza- tion errors. Accuracies are typical with 10 kΩ NTC thermistors. Environmental Conditions Although the instrument has been designed for optimum durability and trou- ble-free operation, it must be handled with care. -
Page 16: Quick Start
3.1, Specifications. The IEC type power cord connects to the back of the 1504. The cord must be plugged in to a grounded outlet. The power switch is located at the back of the 1504. The instrument can also be powered with a DC battery option (see Section 4.4, DC Power Option). -
Page 17: Dc Power Option
12 V battery or other 12 V DC power source. The DC power socket is located on the rear panel of the 1504 above the AC power jack. The 1504 ac- cepts a 7/32 inch diameter, two-conductor DC power plug such as Switchcraft®... -
Page 18: Figure 2 12 V Dc Power Source Polarity
1504. It includes a 1.2 amp-hr 12V sealed lead-acid battery, a DC power cord that plugs into the 1504’s DC input, a carry- ing bag, and a battery charger. The battery pack can provide three to eight hours of operation with each charge depending on whether the power saver fea- ture is enabled (see Section6.6). - Page 19 1504 Thermometer Readout User’s Guide NOTE: The DC power option includes a low voltage indicator. The low voltage indicator needs to be plugged into the instrument with the battery option plugged in to the low voltage indicator. The low voltage indicator light illuminates when the voltage drops below a safe operating range.
-
Page 20: Parts And Controls
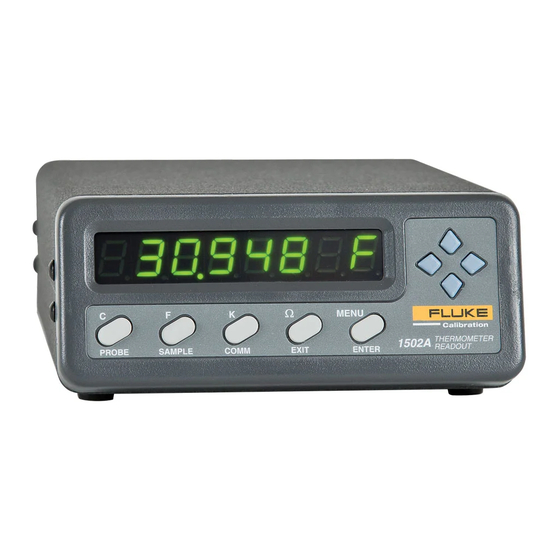
The selected digit flashes. U and D— When editing a parameter, these buttons increase or decrease the value of the parameter or a selected digit. 84.9814 C MENU THERMOMETER 1504 READOUT PROBE SAMPLE COMM EXIT ENTER Figure 3 1504 Front Panel... -
Page 21: Rear Panel
IEEE-488 Port (optional) - The GPIB connector is for interfacing the ther- mometer to a computer or terminal with IEEE-488 communications. IEEE-488 – + FLUKE HART SCIENTIFIC www.hartscientific.com 12 V 1.0 A POWER RS-232 115 VAC 50/60 Hz 10 W PROBE NO USER SERVICABLE PARTS 201811 Figure 4 1504 Back Panel... -
Page 22: General Operation
6 General Operation Selecting Units General Operation This section explains basic operation of the 1504 Thermometer. Selecting Units Temperature can be displayed in degrees Celsius (indicated with “C”), degrees Fahrenheit (indicated with “F”), or Kelvin (indicated with “A” for absolute). -
Page 23: Figure 5 Parameter Menu Structure
1504 Thermometer Readout User’s Guide Menu Probe Sample Comm (Cal) Set probe type Set filter Set clock Enter password Pr= thr FI= 4 11.23.30 PA= 0000 Set coefficients Set time stamp Set menu lockout Set power saver ts= OFF LO=CaL... -
Page 24: Selecting The Probe Characterization
Selecting the Probe Characterization Before the 1504 can measure temperature accurately it must know how to cal- culate temperature from the resistance of the sensor. You must enter the proper characterization coefficients. The coefficients are determined when the probe is calibrated. -
Page 25: Steinhart-Hart Characterization
0. Following are some examples showing how to set the 1504 parameters from coefficients given on the thermistor calibration certificate. -
Page 26: Callendar-Van Dusen (Rtd) Conversion
Table 4 Setting Coefficients a, b, c, and d 1504 Coefficient Certificate Value Example 2: A thermistor’s calibration certificate gives coefficients a=-4.2501569E00, b=3.8997001E03, and c=-1.4225654E07. Set the 1504 parameters with values from the certificate as follows. Table 3 Setting Coefficients a, b, and c 1504 Coefficient Certificate Value 6.4.4... -
Page 27: Testing The Coefficients
U and D buttons to move between digits and the L and R buttons to change a digit. After setting the resistance press Enter. The 1504 will calcu- late and display the temperature corresponding to the resistance you entered. - Page 28 6 General Operation Power Saver play as an indication that the 1504 is still operating. Pressing any button on the front panel restores the display. You can program the power saver to activate af- ter a specified period of time from 5 minutes to 60 minutes in intervals of 5 minutes.
-
Page 29: Digital Communications Interface
The 1504 is equipped with an RS-232 serial port. The RS-232 interface is use- ful for connecting the 1504 to most any microcomputer. The RS-232 socket is located on the back panel of the 1504. Wiring of the interface cable should be as shown in Figure 6 below. -
Page 30: Automatic Transmission Of Measurements
7.1.3 Time Stamp and System Clock The 1504 has a built-in system clock that counts hours, minutes, and seconds while the power is on. The clock can be used to time stamp measurement data read from the communications interfaces. When the power is switched on the clock is set to 00:00:00. -
Page 31: Duplex Mode And Linefeed
SH1, T6, L4, DC1 (TE0, LE0, SR0, RL0, PP0, DT0). Refer to “IEEE Std 488.1-1987". The 1504 can talk and listen and accepts the DCL and SDC clear commands. The 1504 does not respond to trigger (GET), serial poll, parallel... -
Page 32: Setting The Address
The IEEE-488 bus requires that each device has a unique address. The default address of the 1504 is 22 but can be changed if necessary. The IEEE-488 ad- dress of the 1504 is set within the Comm menu after the serial linefeed param- eter. -
Page 33: Table 5 Command List
7 Digital Communications Interface Remote Commands Table 5 Command List Command Description Measurement Commands read measurement (includes label, unit, and time) F[ETCH?] read measurement value (SCPI compatible) SA[=[[[hh:]mm:]ss] read [or set] serial sample period U=C|F|K|O select units ST[=ON/OF] read [or set] the time stamp CL[=hh:mm:ss] read [or set] the system clock Probe Characterization Commands... -
Page 34: Reading Temperature
FETCH?<EOS> returns the value of the most recent measurement 7.3.1.2 Automatically transmitting measurements By setting the sample period, the 1504 can be programmed to automatically transmit measurements from the RS-232 port at specified intervals. The sample period can be set remotely using the commands: SA=[[hh:]mm:]ss<EOS>... -
Page 35: Selecting The Unit Of Measurement
7 Digital Communications Interface Remote Commands SA=5:00<EOS> sets the sample period to 5 minutes SA=1:00:00<EOS> sets the sample period to 1 hour 7.3.1.3 Selecting the Unit of Measurement The selected unit is used in displaying measurements on the front panel and in reading measurements from the communications interfaces. -
Page 36: Testing The Characterization
The following command can be used to test the probe characterization: CO=<value><EOS> returns a temperature calculated from resistance The 1504 will respond with a temperature value computed from the given resis- tance value. The temperature is given in the currently selected unit. As an ex-... -
Page 37: Setting The Duplex Mode
When the RS-232 duplex mode is set to FULL all commands received by the 1504 from the RS-232 port are echoed back. Setting the mode to HALF dis- ables the echo. The duplex mode can be set remotely using the commands: DU=F<EOS>... -
Page 38: Setting The Serial Number
1504 Thermometer Readout User’s Guide 7.3.5.4 Setting the Serial Number The following command is used to set the serial number of the 1504: *SN=<value><EOS> sets the instrument’s serial number 7.3.6 Other Commands Remaining commands are described below. 7.3.6.1 Instrument Identification... -
Page 39: Calibration Procedure
Accessing the Calibration Parameters Calibration Procedure The 1504 uses a three-point calibration scheme with a quadratic polynomial correction function to maintain the accuracy of its resistance measurement. The three calibration points are at 0Ω, 10 kΩ, and 100 kΩ. Three calibration pa- rameters determine the correction function: CAL0, CAL10, and CAL100. - Page 40 1504 Thermometer Readout User’s Guide Calibration Procedure Calibration requires four-wire 10 kΩ and 100 kΩ resistors of 25 ppm uncer- tainty and a 0Ω resistor (or short). For verification, 4 kΩ and 40 kΩ resistors of 25 ppm uncertainty, and a 1 MΩ resistor of 75 ppm uncertainty are also re- quired.
-
Page 41: Maintenance
9 Maintenance Maintenance • The calibration instrument has been designed with the utmost care. Ease of operation and simplicity of maintenance have been a central theme in the product development. Therefore, with proper care the instrument should require very little maintenance. Avoid operating the instrument in an oily, wet, dirty, or dusty environments. -
Page 42: Troubleshooting
• The selected conversion type is incorrect. Check to make sure the cor- rect conversion type (thermistor or RTD) is selected. • The measurement is out of range. The 1504 may not be able to calcu- late temperature accurately if the resistance is outside the valid range. The measured resistance may be too low or too high if the actual temperature is too low or too high or if there is a problem with the sensor (see below). -
Page 43: Ce Comments
The 1504 reports an error during the power up self-test. On power up the 1504 performs a self-test of several of its key components. A failure of a component will cause an error message to be displayed such as “Err 4”. -
Page 44: Immunity Testing
10 Troubleshooting CE Comments 10.1.1.1 Immunity Testing The instrument was tested to the requirements for industrial locations. This al- lows the instrument to be used in all types of locations from the laboratory to the factory floor. Criterion C was used for Electrostatic Discharge (ESD, IEC 61000-4-2) and Electric Fast Transit (EFT, Burst, IEC 61000-4-4).
Need help?
Do you have a question about the 1504 and is the answer not in the manual?
Questions and answers