
Subscribe to Our Youtube Channel
Related Manuals for Billion BiPAC 6200NXL


Summary of Contents for Billion BiPAC 6200NXL
-
Page 1: User Manual
BiPAC 6200NXL 3.75G Wireless-NBroadband Router User Manual Version release: 1.02i.r1 Last revised: 2010-9-27... -
Page 2: Table Of Contents
Table of Contents Chapter 1: Introduction ........................1 Introduction to your Router ......................1 Features ............................2 Operating Environment ....................... 5 Chapter 2: Product Overview ......................6 Important note for using this router ....................8 Package Contents........................... 8 Device Description .......................... 9 Cabling............................11 Chapter 3: Basic Installation...................... - Page 3 Configuration..........................44 LAN (Local Area Network)......................44 Ethernet ..........................45 IP Alias........................... 45 Wireless ..........................46 Wireless Security ........................48 WPS ............................51 DHCP Server ......................... 63 WAN (Wide Area Network)......................65 WAN Interface(EWAN)......................65 WAN Interface(3G) ........................ 65 WAN Interface(Dual WAN)..................... 66 WAN Profile ...........................
- Page 4 DMZ............................. 120 Wake on LAN .......................... 122 Time Schedule ........................123 Advanced ..........................124 Static Route ......................... 125 Static ARP..........................125 Dynamic DNS ........................126 Device Management......................127 IGMP ........................... 134 SNMP Access Control......................135 Remote Access........................137 Save Configuration to Flash ....................138 Restart.............................
-
Page 5: Chapter 1: Introduction
Chapter 1: Introduction Introduction to your Router Thank you for purchasing the BiPAC 6200NXL Router. Your new router is an all-in-one unit that combines a Broadband modem, Ethernet network switch and two USB ports to provide everything you need to get the machines on your network connected to the Internet over a 3G broadband connection. -
Page 6: Features
10Base-T and 100Base-TX ports, with auto detection allowing you to use either straight or cross-over Ethernet cables. EWAN BiPAC 6200NXL offers a WAN port to connect to Cable Modems and fibre optic lines. This alternative, yet faster method to connect to the internet will provide users more flexibility to get online. USB Server BiPAC 6200NXL supports two USB 2.0 ports, Using the integrated USB 2.0 ports, the device offers... - Page 7 6200NXL can connect with your network devices using the built-in USB port. 3G Management Center Monitoring your 3G connection status is easy with the BiPAC 6200NXL. The unique Billion 3G Management Center is a web-based utility tool, displaying visually its current 3G-signal status for users to maximize their connection.
- Page 8 DDNS service such as http://www.dyndns.org/. PPP over Ethernet (PPPoE) The BiPAC 6200NXL provides an embedded PPPoE client function to establish a connection. You get greater access speed without changing the operation concept, while sharing the same ISP account and paying for one access account.
-
Page 9: Operating Environment
subnet masks and DNS IP addresses and distributes them to local computers. This provides an easy way to manage the local IP network. Rich Packet Filtering This feature filters the packet based on IP addresses as well as Port numbers. Filtering packets to and from the Internet provides a higher level of security control. -
Page 10: Chapter 2: Product Overview
These features are perfect for office situations where constant connection is paramount. The BiPAC 6200NXL can also serve as multi-function servers with its USB port to help you set up your own network. You can share the printer in your office network, monitor your house with a Webcam and share files with your colleagues or friends. - Page 11 Keep the number of walls and ceilings between the BiPAC 6200NXL and other network devices to a minimum - each wall or ceiling can reduce your BiPAC 6200NXL wireless product’s range from 3-90 feet (1-30 meters.)
-
Page 12: Important Note For Using This Router
Important note for using this router Package Contents BiPAC 6200NXL 3.75G Wireless-N Broadband Router CD containing the online manual Ethernet Cable AC-DC power adapter Quick Start Guide Antennas (2 pcs) -
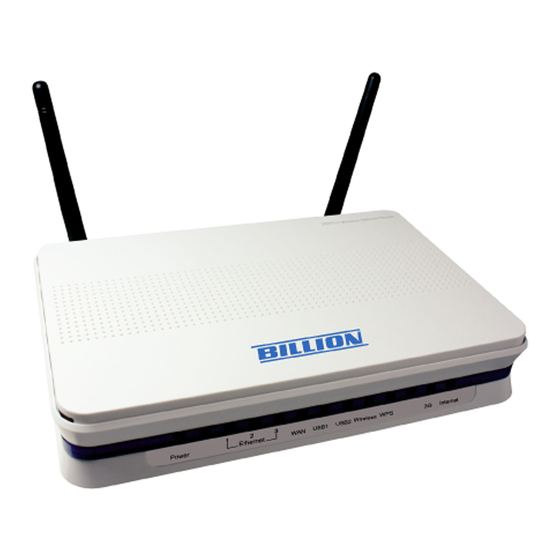
Page 13: Device Description
Lit green when the device is ready. Power Lit red means system failure. Restart the device or contact Billion for support. Lit when one of LAN ports is connected to an Ethernet device. Ethernet Lit green when the speed of transmission hits 100Mbps; Lit Port orange when the speed of transmission hits 10Mbps. - Page 14 The Rear Ports Antenna Connect the detachable antenna to this port. Connect the USB cable to this port. 3G/ HSDPA USB modem backup for Internet access, can also connect with printer, Webcam and HDD serve as multi-function servers with to help set up your own network. (The function of USB1 is the same with USB2 )...
-
Page 15: Cabling
Cabling The most common problem associated with Ethernet is bad cabling. Make sure that all connected devices are turned on. On the front of the product is a bank of LEDs. Verify that the LAN Link and WAN Link LEDS are lit. If they are not, verify that you are using the proper cables. -
Page 16: Chapter 3: Basic Installation
Chapter 3: Basic Installation You can configure the BiPAC 6200NXL router through the convenient and user-friendly interface of a web browser. Most popular operating systems such as Linux and Windows 98/NT/2000/XP/Me include a web browser as a standard application. PCs must have a properly installed Ethernet interface which connects to the router directly or through an external repeater hub. -
Page 17: Network Configuration
Network Configuration Configuring a PC in Windows 7 Start. Click Control Panel. Then click on Network and Internet. When the Network and Sharing Center window pops up, select and click on Change adapter settings on the left window panel. Select Local Area Connection, and right click... - Page 18 Select Internet Protocol Version 4 (TCP/IPv4) then click Properties. In the TCP/IPv4 properties window, select the Obtain address automatically and Obtain Server address automatically radio buttons. Then click OK to exit the setting. Click OK again in the Local Area Connection Properties window to apply the new configuration.
-
Page 19: Configuring A Pc In Windows Vista
Configuring a PC in Windows Vista Start. Click Network. Then click on Network and Sharing Center at the top bar. When the Network and Sharing Center window pops up, select and click on Manage network connections on the left window pane. Select Local Area... - Page 20 Select Internet Protocol Version 4 (TCP/IPv4) then click Properties. In the TCP/IPv4 properties window, select the Obtain an IP address automatically and Obtain DNS Server address automatically radio buttons. Then click OK to exit the setting. Click OK again in the Local Area Connection Properties window to apply...
-
Page 21: Configuring A Pc In Windows Xp
Configuring a PC in Windows XP 1. Go to Start. Click on Control Panel. 2. Then click on Network and Internet. 3. In the Local Area Connection Status window, click Properties. 4. Select Internet Protocol (TCP/IP) and click Properties. 5. Select the Obtain an IP address automatically and the Obtain DNS server address automatically radio buttons. -
Page 22: Configuring A Pc In Windows 2000
Configuring a PC in Windows 2000 1. Go to Start / Settings / Control Panel. In the Control Panel, double-click on Network and Dial-up Connections. 2. Double-click Local Area Connection. 3. In the Local Area Connection Status window click Properties. 4. -
Page 23: Configuring Pc In Windows 98/Me
Configuring PC in Windows 98/Me 1. Go to Start / Settings / Control Panel. In the Control Panel, double-click on Network and choose the Configuration tab. 2. Select TCP/IP ->NE2000 Compatible, or the name of your Network Interface Card (NIC) in your PC. 3. - Page 24 Configuring PC in Windows NT4.0 1. Go to Start / Settings / Control Panel. In the Control Panel, double-click on Network and choose the Protocols tab. 2. Select TCP/IP Protocol and click Properties. 3. Select the Obtain an IP address from a DHCP server radio button and click OK.
-
Page 25: Factory Default Settings
Factory Default Settings Before configuring the BiPAC 6200NXL router, you need to know the following default settings. Web Interface: (Username and Password) Username: admin Password: admin The default username and password are “admin” and “admin” respectively. If you ever forget the username/password to login to the router, you may press the RESET button up to 6 seconds then release it to restore the factory default settings. -
Page 26: Information From Your Isp
Information from your ISP Before configuring this device, you have to check with your ISP (Internet Service Provider) what kind of services are provided, such as PPPoE, Obtain an IP Address Automatically, Fixed IP address. Gather the information as illustrated in the following table and keep it for reference. Username, Password, Service Name, and Domain Name System (DNS) IP address (it can be automatically assigned PPPoE... -
Page 27: Configuring With Your Web Browser
Account Type, then click Login. When you are authorised, you will access to the router.The default username and password are “admin” and “admin” respectively for the Administrator account type. Congratulations! You have successfully logged on to your BiPAC 6200NXL Router! -
Page 28: Chapter 4: Basic Configuration
Chapter 4: Basic Configuration Once you have logged on to your BiPAC 6200NXL Router via your web browser, you can begin to set it up according to your requirements. On the configuration homepage, the left navigation pane links you directly to the setup pages, which includes:... -
Page 29: Status
Status Device Information Model Name: Provide a name for the router for identification purposes. System Up-Time: Record system up-time. Software Version: Firmware version. Port Status Port Status:User can look up to see if they are connected to Ethernet, EWAN, and Wireless. Port: Name of the WAN connection. -
Page 30: Quick Start
Quick Start Set Wireless configuration WLAN Service: Default setting is set to Enable. ESSID: The ESSID is the unique name of a wireless access point (AP) to be distinguished from another. For security purpose, change to a unique ID name to the AP which is already built-in to the router’s wireless interface. -
Page 31: Wan
EWAN APN: An APN is similar to a URL on the WWW, it is what the unit makes a GPRS / UMTS call. The service provider is able to attach anything to an APN to create a data connection. Requirements for APN assignment varies between different service providers. - Page 32 Auth. Protocol: Manually specify CHAP (Challenge Handshake Authentication Protocol) or PAP (Password Authentication Protocol) if you know which authentication type the server is using (when acting as a client), or the authentication type you want the clients to use when tehy are connecting to you (when acting as a server).
-
Page 33: Wlan
WLAN WLAN Service: Default setting is set to Enable. ESSID: The ESSID is the unique name of a wireless access point (AP) to be distinguished from another. For security propose, change to a unique ID name to the AP which is already built-in to the router’s wireless interface. - Page 34 key size should be in the range between 8 and 63 characters. Group Key Renewal: The period of renewal time for changing the security key between wireless client and Access Point (AP). This process is done automatically. WPA2 Pre-Shared Key WPA Shared Key: The key for network authentication The input format is in character style and key size should be in the range between 8 and 63 characters.
- Page 35 WEP Authentication: To prevent unauthorized wireless stations from accessing data transmitted over the network, the router offers secure data encryption, known as WEP. If you require high security for transmissions, there are three options to select from: Open System, Share key or Both. Default Used WEP Key: Select the encryption key ID;...
-
Page 36: Chapter 5: Advanced Configuration
Chapter 5: Advanced Configuration Once you have logged on to your BiPAC 6200NXL Router via your web browser, you can begin to set it up according to your requirements. On the configuration homepage, the left navigation pane links you directly to the setup pages, which include:... -
Page 37: Status
Status Device Information Model Name: Display the model name. Host Name: Provide a name for the router for identification purposes. Host Name lets you change the router name. System Up-Time: Record system up-time. Current time: Set the current time. See the Time Zone section for more information. Software Version: Firmware version. -
Page 38: 3G Status
3G Status This section displays the 3G Card overall status with information such as the current signal strength, statistics of current data transmission and total data transmission. Status: The current status of the 3G card. Click this link to configure 3G. For detail, turn to Page 70 for help. -
Page 39: Usb Status
USB Status This section displays the status of USB such as the USB device Status, the USB Storage Status and the USB Server Status which give users a overall view of the USB configuration. USB Server Status Samba Server: display the current status of the Samba, enable or disable. FTP Server: display the current status of the FTP Server, enable or disable. -
Page 40: Arp Table
Used: display how much has been used. Free Space: display the remaining space available. %Used: display the percentage of used space to the all space. Mount on: display which partition path the device is mounted on. Refresh: to get the latest message. ARP Table This section displays the router’s ARP (Address Resolution Protocol) Table, which shows the mapping of Internet (IP) addresses to Ethernet (MAC) addresses. -
Page 41: System Log
System Log Display system logs accumulated up to the present time. You can trace historical information with this function. Firewall Log Firewall Log displays log information of any unexpected action with your firewall settings. This page displays the router’s Firewall Log entries. The log shows log entries when you have enabled Intrusion Detection or Block WAN PING in the Configuration - Firewall section of the interface. -
Page 42: Upnp Portmap
UPnP Portmap The section lists all port-mapping established using UPnP (Universal Plug and Play). Please see the Advanced section of this manual for more details on UPnP and the router’s UPnP configuration options. Name: the name of this UPnP mapping. Protocol: the protocol used by this mapping. -
Page 43: Quick Start
Quick Start Connect mode: 3G TEL No.: The dial string to make a GPRS / 3G user internetworking call. It may be provided by your mobile service provider. Username: Enter the username provided by your service provider. APN: An APN is similar to a URL on the WWW, it is what the unit makes a GPRS / UMTS call. The service provider is able to attach anything to an APN to create a data connection. - Page 44 Obtain an IP Address Automatically When connecting to the ISP, BiPAC 6200NXL also functions as a DHCP client. BiPAC 6200NXL can automatically obtain an IP address, subnet mask, gateway address, and DNS server addresses if the ISP assigns this information via DHCP.
- Page 45 Fixed IP Address Select this option to set static IP information. You will need to enter in the Connection type, IP address, Netmask, and gateway address, provided to you by your ISP. Each IP address entered in the fields must be in the appropriate IP form, which are four IP octets separated by a dot (x.x.x.x). The Router will not accept the IP address if it is not in this format.
- Page 46 PPPoE PPPoE (PPP over Ethernet) provides access control in a manner similar to dial-up services using PPP. Protocol: The current ATM protocol in the device Username: Enter the username provided by your ISP. You can input up to 128 alphanumeric characters (case sensitive).
- Page 47 Set Wireless configuration WLAN Service: Default setting is set to Enable. ESSID: The ESSID is the unique name of a wireless access point (AP) to be distinguished from another. For security propose, change to a unique ID name to the AP which is already built-in to the router’s wireless interface.
-
Page 48: Configuration
Configuration Click this item to access the following sub-items that configure the 3G router: LAN, WAN, System, USB, Firewall, Download Tool, QoS, Virtual Server, Wake on LAN, Time Schedule and Advanced. These functions are described in the following sections. LAN (Local Area Network) A Local Area Network (LAN) is a shared communication system to which many computers are attached and is limited to the immediate area, usually the same building or floor of a building. -
Page 49: Ethernet
Ethernet The router supports more than one Ethernet IP addresses in the LAN, and with distinct LAN subnets through which you can access the Internet at the same time. Users usually only have one subnet in their LAN. The default IP address for the router is 192.168.1.254. IP Address: The default IP on this router. -
Page 50: Wireless
Wireless Parameters WLAN Service: Default setting is set to Enable. Mode: The default setting is 802.11g+n (Mixed mode). If you do not know or have both 11g and 11n devices in your network, then keep the default in mixed mode. From the drop-down manual, you can select 802.11g if you have only 11g card. - Page 51 will be able to locate the Access Point (AP) of your router. Disable: When Disable is selected, you can allow anybody with a wireless client to be able to locate the Access Point (AP) of your router. Regulation Domain: Select the America (N.America). Channel ID: Select the ID channel that you would like to use.
-
Page 52: Wireless Security
Wireless Security You can disable or enable with WPA or WEP for protecting wireless network. The default mode of wireless security is Disable. SSID No.: Choose the SSID you want to set. Security Mode: There are five security modes for you to choose. WPA Pre-Shared Key WPA Algorithms: TKIP (Temporal Key Integrity Protocol) / AES (Advanced Encryption Standard) utilizes a stronger encryption method and incorporates Message Integrity Code (MIC) to provide... - Page 53 WPA2 Pre-Shared Key WPA Algorithms: TKIP (Temporal Key Integrity Protocol) / AES (Advanced Encryption Standard) utilizes a stronger encryption method and incorporates Message Integrity Code (MIC) to provide protection against hackers. WPA Shared Key: The key for network authentication The input format is in character style and key size should be in the range between 8 and 63 characters.
- Page 54 WEP Authentication: To prevent unauthorized wireless stations from accessing data transmitted over the network, the router offers secure data encryption, known as WEP. If you require high security for transmissions, there are three options to select from: Open System, Share key or Both. Default Used WEP Key: Select the encryption key ID;...
-
Page 55: Wps
WPS (WiFi Protected Setup) feature is a standard protocol created by Wi-Fi Alliance. This feature greatly simplifies the steps needed to create a Wi-Fi network for a residential or an office setting. WPS supports 2 types of configuration methods which are commonly known among consumers: PIN Method &... - Page 56 Wi-Fi Network Setup PIN Method: Configure AP as Registrar 1. Jot down the client’s Pin (e.g. 16837546). 2. Enter the Enrollee’s PIN number and then press Start. 3. Launch the wireless client’s WPS utility (eg. Ralink Utility). Set the Configure Mode as Enrollee, press the WPS button on the top bar, select the AP (eg.
- Page 57 4. The client’s SSID and security setting will now be configured to match the SSID and security setting of the registrar.
- Page 58 PIN Method: Configure AP as Enrollee 1. In the WPS configuration page, change the Role to Enrollee. Then press Start. 2. Jot down the WPS PIN (e.g. 25879810). 3. Launch the wireless client’s WPS utility (e.g. Ralink Utility). Set the Config Mode as Registrar. Enter the PIN number in the PIN Code column then choose the correct AP (eg.
- Page 59 4. The router’s (AP’s) SSID and security setting will now be configured to match the SSID and security setting of the registrar.
- Page 60 5. Now to make sure that the setup is correctly done, cross check to see if the SSID and the security setting of the registrar setting match with the parameters found on both Wireless Configuration and Wireless Security Configuration page.
- Page 61 the parameters on both Wireless Configuration and Wireless Security Configuration page are as follows:...
- Page 62 PBC Method: 1. Press the PBC button of the AP. 2. Launch the wireless client’s WPS Utility (eg. Ralink Utility). Set the Config Mode as Enrollee. Then press the WPS button and choose the correct AP (eg. wlan-ap) from the WPS AP List section before pressing the PBC button to run the scan.
- Page 63 3. When the PBC button is pushed, a wireless communication will be established between your router and the PC. The client’s SSID and security setting will now be configured to match the SSID and security setting of the router.
- Page 64 Wi-Fi Network Setup with Windows Vista WCN: 1. Jot down the AP PIN from the Web (eg. 25879810). 2. Access the Wireless configuration of the web GUI. Set the WPS State to Unconfigured then click Apply.
- Page 65 3. In your Vista operating system, access the Control Panel page, then select Network and Internet > View Network Computers and Devices. Double click on the router icon and enter the AP PIN in the column provided then press Next. 4.
- Page 66 5. Enter the passphrase then click Next. 6. When you have come to this step, you will have completed the Wi-Fi network setup using the built-in WCN feature in Windows Vista.
-
Page 67: Dhcp Server
DHCP Server You can disable or enable the DHCP (Dynamic Host Configuration Protocol) server or enable the router’s DHCP relay functions. The DHCP protocol allows your router to dynamically assign IP addresses to PCs on your network if they are configured to obtain IP addresses automatically. DHCP Server Mode: Disable To disable the router’s DHCP Server, check Disabled and then click Apply. - Page 68 DHCP Server Mode: DHCP Server To configure the router’s DHCP Server, check DHCP Server. You can then configure parameters of the DHCP Server including the IP pool (starting IP address and ending IP address to be allocated to PCs on your network), lease time for each assigned IP address (the period of time the IP address assigned will be valid), DNS IP address and the gateway IP address.
-
Page 69: Wan (Wide Area Network)
WAN (Wide Area Network) A WAN (Wide Area Network) is an outside connection to another network or the Internet. There are two items within the WAN section: WAN interface and WAN Profile. WAN Interface(EWAN) Connect Mode: Select the main port from the drop-down menu. Click Apply to confirm the change. -
Page 70: Wan Interface(Dual Wan)
WAN Interface(Dual WAN) Connect Mode: Select the Dual WAN from the drop-down menu. Main WAN: Choose EWAN or 3G as main WAN. Click the link to go to WAN Profile page to configure its parameters. Backup WAN: Choose the left as backup WAN. Click the link to go to WAN Profile page to configure its parameters. -
Page 71: Wan Profile
WAN Profile Main Port – EWAN BiPAC 6200NXL offers a WAN port to connect to Cable Modems and fiber optic lines. This alternative, yet faster method to connect to the internet will provide users with more flexibility to get online. - Page 72 PPPoE (EWAN) PPPoE (PPP over Ethernet) provides access control in a manner similar to dial-up services using PPP. Username: Enter the username provided by your ISP. You can input up to 128 alphanumeric characters (case sensitive). This is in the format of “username@ispname” instead of simply “username”.
- Page 73 Fixed IP Address (EWAN) Select this option to set static IP information. You will need to enter in the Connection type, IP address, netmask, and gateway address, provided to you by your ISP. Each IP address entered in the fields must be in the appropriate IP form, which is four IP octets separated by a dot (x.x.x.x).
- Page 74 Main Port - 3G The router allows you to insert a 3G/HSDPA card to its USB slot, enabling you to use a 3G/ HSDPA, UMTS, EDGE, GPRS, or GSM Internet connection, makes downstream rates of to 14.4 Mbps*. ISP Mode: Choose 3G service provider. TEL No.: The dial string to make a GPRS / 3G user internetworking call.
- Page 75 PIN: PIN stands for Personal Identification Number. A PIN code is a numeric value used in certain systems as a password to gain access, and authentication. In mobile phones a PIN code locks the SIM card until you enter the correct code. If you enter the PIN code incorrectly into the phone 3 times in a row, then the SIM card will be blocked and a PUK code will be required from your network / service provider to unlock it.
- Page 76 Click Usage Allowance to go to the Usage Allowance configuration page. In order to query online time or volume used, you can set the following options. Mode: Two methods are provided, that is, Volume-based and Time-based. Volume-based: If choosing Volume-based, you can view the volume you have used. Only Download: Only make statistics of Download Traffic.
- Page 77 Time-based: If choosing Time-based, you can view the online hours you have used. You can also assign the billing period. Over usage allowance action: If the online time or traffic you have used exceeds the usage allowance you set. The system will do the followings operations. Save the statistics to ROM: Choose the time interval for saving statistics.
-
Page 78: System
System There are five items within the System section: Time Zone, Firmware Upgrade, Backup/Restore, Restart, User Management and Mail Alert. Time Zone The router does not have a real time clock on board; instead, it uses the Simple Network Time Protocol (SNTP) to get the current time from an SNTP server outside your network. -
Page 79: Firmware Upgrade
Firmware Upgrade Your router’s “firmware” is the software that allows it to operate and provides all its functionality. Think of your router as a dedicated computer, and the firmware as the software it runs. Over time this software may be improved and modified. Your router allows you to upgrade the software it runs to take advantage of these changes. -
Page 80: Backup / Restore
Backup / Restore These functions allow you to save and backup your router’s current settings to a file on your PC, or to restore a previously saved backup. This is useful if you wish to experiment with different settings, knowing that you have a backup handy in the case of any mistakes. It is advisable to backup your router’s settings before making any significant changes to your router’s configuration. -
Page 81: Restart Router
Restart Router Click Restart with option Current Settings to reboot your router and save the current configuration to device. If you wish to restart the router using the factory default settings (for example, after a firmware upgrade or if you have saved an incorrect configuration), select Factory Default Settings to reset to factory default settings. -
Page 82: User Management
User Management In order to prevent unauthorized access to your router’s configuration interface, it requires all users to login with a password. You can set up multiple user accounts, each with their own password. You are able to Edit existing users and Add new users who are able to access the device’s configuration interface. -
Page 83: Mail Alert
Mail Alert Mail alert is designed to keep system administrator or other relevant personnel alerted of any unexpected events that might have occurred to the network computers or server for monitoring efficiency. With this alert system, appropriate solutions may be tackled to fix problems that may have arisen so that the server can be properly maintained. - Page 84 Recipient’s Email (3G Overran Allowance): Enter the email address that will receive the alert message once 3G overran allowance was detected. Alert Mail Time (Intrusion Detection): The time interval of sending Email. Recipient’s Email (Intrusion Detection): Enter the email address that will receive the alert message once intrusion has been detected.
-
Page 85: Usb Server
USB Server Besides connecting to 3G modem, USB 2.0 port can also be connected to Printer, Webcam or HDD. USB Server has integrated FTP Server, Printer Server and WebCam supervisory functions. Through FTP Server, Samba Server user can management the account, set the authority of download and upload. - Page 86 Add/Delete User 1. Enter username and password 2. Click Add. The new user account will display below. 3. Choose the account which you want to edit then you can change the account’s parameters, click Edit/Delete to confirm changes. 4. Choose the account which you want to delete, click Edit/Delete to remove it.
- Page 87 5. Access from web browser. Open your web browser, enter the IP address of your router, Enter the user name and password that your administrator has set for you and select Guest from the Account Type list, and then click Login.
- Page 88 When you are authorised, you will access to the router. Congratulations! You have successfully logged on.
-
Page 89: Storage
Storage Storage page display the information of storage device which plugged in USB port, such as directory, partition and so on. You can also setup the storage. Directory Setup: Enter the directory name which you wish to create in the Directory Name field. Partition Setup: Choose the partition of disk which you want to edit. - Page 90 Add/Delete directory 1. Enter directory name in the directory name field and choose partition path which the directory will located. 2. Click Add. The New directory will display below.
- Page 91 3. Choose the directory which you want to delete then click Delete to romove this directory.
-
Page 92: Samba Server
Samba Server... - Page 93 Samba Server Setup SAMBA Service: Enable or Disable SAMBA Server function. Default setting is set to Disable. Workgroup: Enter the workgroup name in this field and default name is workgroup. NetBIOS Name: Enter NetBIOS name in this field and default name is NetBIOS. Click Apply to confirm the configuration.
- Page 94 Add/Delete directory 1. Enter mapping directory name in the directory name field, choose access user and partition path. 2. Click Add. The New directory will display below. Click Apply to confirm configuration. 3. Choose the directory which you want to delete then click Delete to romove this directory.
-
Page 95: Ftp Server
FTP Server FTP Server: Enable or Disable FTP Server function Default setting is set to disable. Enable Ftp Access From WAN: Enable or Disable access FTP Server from WAN Default setting is set to disable. Enable this function, both WAN and LAN can use FTP server. Anonymous Login: Enable or disable Anonymous Login. -
Page 96: Printer Server
Printer Server Printer Server provides a simple and efficient network printing solution. Connect one end of the printer server to the printer and one end to the network, then anywhere the printer is in the network, users can print easily. IPP, short for Internet Printing Protocol, provides a set of network printing services which give printing a more efficient and secure environment. - Page 97 Set up of Printer client Step 1: Click Start and select ’’Printer and Faxes’’. Step 2: Click ‘’Add a Printer’’.
- Page 98 Step 3: To continue, click “Next” Step 4: Select network printer and apply “Next” button.
- Page 99 Step 5: Select ”Connect to a printer on the Internet or on a home or office network“ then enter the printer’s URL: http://LAN IP/printers/ printername or http://WAN IP:631/printers/ printername. Make sure printer’s name is the same with you set in web page. Step 6: Click “Next”...
- Page 100 Step 7: Click “Finish” to complete the add printer.
-
Page 101: Webcam
Webcam Enable Webcam Server: Enable or Disable Webcam Server function. Default setting is set to disable. Enable Webcam Server From WAN: Enable or disable this function. Default setting is set to disable. Enable this function, both WAN and LAN can see the image. Image Format:Choose the size of the image you will see. -
Page 102: Firewall And Access Control
Firewall and Access Control Your router includes a full SPI (Stateful Packet Inspection) firewall for controlling Internet access from your LAN, as well as helping to prevent attacks from hackers. In addition to this, when using NAT (Network Address Translation) the router acts as a “natural” Internet firewall, since all PCs on your LAN use private IP addresses that cannot be directly accessed from the Internet. - Page 103 Firewall Security and Policy (General Settings): Inbound direction of Packet Filter rules prevent unauthorized computers or applications accessing your local network from the Internet. Intrusion Detection: Enable Intrusion Detection to detect, prevent, and log malicious attacks. MAC Filter rules: Prevents unauthorized computers accessing the Internet. URL Filter: Blocks PCs on your local network from unwanted websites.
-
Page 104: Packet Filter
Packet Filter Packet filtering enables you to configure your router to block specified internal/external users (IP address) from Internet access, or you can disable specific service requests (Port number) to /from Internet. This configuration program allows you to set up to 6 different filter rules for different users based on their IP addresses or their network Port number. - Page 105 Log: Choose “log” if you wish to generate logs when the filer rule is applied to a packet. Add: Click this button to add a new packet filter rule and the added rule will appear at the bottom table. Edit: Check the Rule No. you wish to edit, and then click “Edit”. Delete: Check the Rule No.
-
Page 106: Mac Filter
MAC Filter A MAC (Media Access Control) address is the unique network hardware identifier for each PC on your network’s interface (i.e. its Network Interface Card or Ethernet card). Using your router’s MAC Address Filter function, you can configure to block specific machines from accessing your LAN. There are no pre-defined MAC address filter rules;... -
Page 107: Intrusion Detection
Intrusion Detection Check Enable if you wish to detect intruders accessing your computer without permission. The router automatically detects and blocks a DoS (Denial of Service) attack if a user enables this function. This kind of attack is not to access confidential data on the network; instead, it aims to disrupt specific equipment or the entire network. - Page 108 For SYN Flood, ICMP Echo Storm and ICMP flood, IDS will just warn the user in the Event Log but it will not be able to protect against such attacks. Hacker attack types recognized by the IDS Type of Block Intrusion Name Detect Parameter Blacklist Drop Packet Show Log...
- Page 109 Block WAN PING Check Enable if you wish to exclude outside PING requests from reaching this router. URL Filter URL (Uniform Resource Locator – e.g. an address in the form of http://www.example.com ) filter rules allow you to prevent users on your network from accessing particular websites from their URL. There are no pre-defined URL filter rules;...
- Page 110 Domains Filtering Checks the domain name in URLs accessed against your list of domains to block or allow. If it matches, the URL request is sent (Trusted) or dropped (Forbidden). The checking procedure is: 1. Check the domain in the URL to determine if it is in the trusted list. If yes, the connection attempt is sent to the remote web server.
-
Page 111: Download Tool
Download Tool FTP Client Parameters FTP/HTTP Client: select whether to enable or disable the FTP/ Http Client. URL: Enter the URL of the file you want to download, it must be a complete one. Save Directory: Enter the Directory you want to save to. The directory is one of the USB directories. If not existed, a new one with the name will be created. - Page 112 Active: Check the checkbox to active the downloading task. Status: Display the status of the downloading task. File Name: Display the File Name you set to the downloading file. File Size: Display the size of the file. Download Progress: Display the download progress of the task. Remaining time: Display the remaining time of the task.
- Page 113 Set up a download task: You can set a http or ftp connection, here take http client for example. Enter the necessary information of the task, leave the others as default as you like, then press Start Download. Then the task will be listed in the Downloading task list table. Check the Active checkbox to temporarily stop the downloading task and recheck the Active box to active the downloading task.
- Page 114 You can press Refresh to view the latest information especially the download progress. And when the task is finished, it will be listed in the Downloaded task list. Here you have finished the downloading task. Delete the task: press the Delete radio button beside the item you want to delete, then press the Reload/Delete button to delete it.
- Page 115 Edit and Reload the task: If there task unable to download, you can reedit for reloading. Enter the necessary message and press Reload/Delete.
-
Page 116: Qos (Quality Of Service)
QoS (Quality of Service) Quality of Service Introduction If you’ve ever found your ‘net’ speed has slowed to a crawl because another family member is using a P2P file sharing program, you’ll understand why the Quality of Service features in the routers is such a breakthrough for home users and office users. - Page 117 LAN to WAN or WAN to LAN.) Protocol: The Protocol will be controlled. For GRE protocol, there is no need to specify the IP addresses or Application ports in this page. For other protocols, at least one value shall be given. ANY: No protocol type is specified.
- Page 118 The DSCP Mapping Table DSCP Mapping Table 3G Router Standard DSCP Disabled None Best Effort Best Effort (000000) Premium Express Forwarding (101110) Gold service (L) Class 1, Gold (001010) Gold service (M) Class 1, Silver (001100) Gold service (H) Class 1, Bronze (001110) Silver service (L) Class 2, Gold (010010) Silver service (M)
- Page 119 For the sample priority assignment for different policies, it is served in a First-In-First-Out way. Internal IP Address: The IP address values for Local LAN machines you want to control. (For IP packets from LAN to WAN, it is the source IP address. For IP packages from WAN to LAN, it is the destination IP address.) Internal Port: The Application port values for local LAN machines you want to control.
-
Page 120: Virtual Server
Virtual Server In TCP and UDP networks a port is a 16-bit number used to identify which application program (usually a server) incoming connections should be delivered to. Some ports have numbers that are pre-assigned to them by the IANA (the Internet Assigned Numbers Authority), and these are referred to as “well-known ports”. - Page 121 Well-known and Registered Ports Port Number Protocol Description FTP Data FTP Control TCP & UDP SSH Remote Login Protocol Telnet SMTP (Simple Mail Transfer Protocol) TCP & UDP DNS (Domain Name Server) TFTP (Trivial File Transfer Protocol) World Wide Web HTTP POP3 (Post Office Protocol Version 3) NEWS (Network News Transfer Protocol) NTP (Network Time Protocol)
-
Page 122: Port Mapping
Port Mapping Application: Select the service you wish to configure. Protocol: Automatic when you choose Application from list-box or select a protocol type which you want. External Port & Internal Port: Enter the public port number & range you wish to configure. Internal IP Address: Enter the IP address of a specific internal server to which requests from the specified port is forwarded. - Page 123 Since NAT acts as a “natural” Internet firewall, your router protects your network from access by outside users, as all incoming connection attempts point to your router unless you specifically create Virtual Server entries to forward those ports to a PC on your network. When your router needs to allow outside users to access internal servers, e.g.
-
Page 124: Dmz
The DMZ Host is a local computer exposed to the Internet. When setting a particular internal IP address as the DMZ Host, all incoming packets are checked by the Firewall and NAT algorithms, it is then passed to the DMZ host when a packet received does not use a port number in use by any other Virtual Server entries. - Page 125 2. Click Add. The new except port will display below. 3. Click Delete to delete the one which you want to remove from the except list. Using port mapping does have security implications, since outside users are able to connect to PCs on your network. For this reason you are advised to use specific Virtual Server entries just for the ports your application requires instead of simply using DMZ or creating a Virtual Server entry for “All”...
-
Page 126: Wake On Lan
Wake on LAN Wake on LAN (WOL, sometimes WoL) is an Ethernet computer networking standard that allows a computer to be turned on or woken up remotely by a network message. Select: Select MAC address of the computer that you want to wake up or turn on remotely. Add: After selecting, click Add then you can perform the Wake-up action. -
Page 127: Time Schedule
Time Schedule The Time Schedule supports up to 16 time slots which helps you to manage your Internet connection. In each time profile, you may schedule specific day(s) i.e. Monday through Sunday to restrict or allowing the usage of the Internet by users or applications. This Time Schedule correlates closely with router’s time, since router does not have a real time clock on board;... -
Page 128: Advanced
Advanced Configuration options within the Advanced section are for users who wish to take advantage of the more advanced features of the router. Users who do not understand the features should not attempt to reconfigure their router, unless advised to do so by support staff. There are seven items within the Advanced section: Static Route, Static ARP, Dynamic DNS, Device Management, IGMP, SNMP Access Control and Remote Access. -
Page 129: Static Route
Static Route Destination: The destination subnet IP address. Netmask: Subnet mask of the destination IP addresses based on above destination. Gateway: The gateway IP address to which packets are forwarded. Interface: Select the interface through which packets are forwarded. Cost: Represents the cost of transmission for routing purposes. The number need not be precise, but it must be between 0 and 65535. -
Page 130: Dynamic Dns
Dynamic DNS The Dynamic DNS function lets you alias a dynamic IP address to a static hostname, so if your ISP does not assign you a static IP address you can still use a domain name. This is especially useful for hosting servers via your 3G connection, so that anyone wishing to connect to you may use your domain name, rather than having to use your dynamic IP address, which changes from time to time. -
Page 131: Device Management
Device Management The Device Management advanced configuration settings allow you to control your router’s security options and device monitoring features. Embedded Web Server HTTP Port: The port number of the router’s embedded web server (for web-based configuration uses. The default value is the standard HTTP port, 80. You may specify an alternative if, for example, you are running a web server on a PC within your LAN. - Page 132 Installing UPnP in Windows Example Follow the steps below to install the UPnP in Windows Me. Step 1: Click Start and Control Panel. Double-click Add/Remove Programs. Step 2: Click on the Windows Setup tab and select Communication in the Components selection box. Click Details.
- Page 133 Follow the steps below to install the UPnP in Windows XP. Step 1: Click Start and Control Panel. Step 2: Double-click Network Connections. Step 3: In the Network Connections window, click Advanced in the main menu and select Optional Networking Components …. The Windows Optional Networking Components Wizard window displays.
- Page 134 Step 5: In the Networking Services window, select the Universal Plug and Play check box. Step 6: Click OK to go back to the Windows Optional Networking Component Wizard window and click Next. Auto-discover Your UPnP-enabled Network Device Step 1: Click start and Control Panel. Double-click Network Connections. An icon displays under Internet Gateway.
- Page 135 Step 3: In the Internet Connection Properties window, click Settings to see the port mappings that were automatically created. Step 4: You may edit or delete the port mappings or click Add to manually add port mappings.
- Page 136 Step 5: Select Show icon in notification area when connected option and click OK. An icon displays in the system tray Step 6: Double-click on the icon to display your current Internet connection status.
- Page 137 Step 3: Select My Network Places under Other Places. Step 4: An icon describing each UPnP-enabled device shows under Local Network. Step 5: Right-click on the icon of your BiPAC 6200NXL and select Invoke. The web configuration login screen displays.
-
Page 138: Igmp
IGMP IGMP, known as Internet Group Management Protocol, is used to management hosts from multicast group. IGMP Proxy: Accepting multicast packet. Default is set to Disable. IGMP Snooping: Allowing switched Ethernet / Wireless to check and make correct forwarding decisions. Default is set to Disable. -
Page 139: Snmp Access Control
SNMP Access Control Software on a PC within the LAN is required in order to utilize this function - Simple Network Management Protocol. SNMP V1 and V2 Read Community: Specify a name to be identified as the Read Community, and an IP address. This community string will be checked against the string entered in the configuration file. - Page 140 From RFC 1213 (MIB-II): System group Interfaces group Address Translation group IP group ICMP group TCP group UDP group EGP (not applicable) Transmission SNMP group From RFC1650 (EtherLike-MIB): dot3Stats From RFC 1493 (Bridge MIB): dot1dBase group dot1dTp group dot1dStp group (if configured as spanning tree) From RFC 1471 (PPP/LCP MIB): pppLink group pppLqr group...
-
Page 141: Remote Access
Remote Access Remote Access Control Enable: Select Enable to allow management access from remote side (mostly from internet). Duration: Set how many minutes to allow management access from remote side. Zero means always Allowed Access IP Address Range Valid: Select Valid to allow remote management from these IP ranges. IP Address Range: Specify what IP address to be allowed to access device from remote side. -
Page 142: Save Configuration To Flash
Save Configuration to Flash After changing the router’s configuration settings, you must save all of the configuration parameters to FLASH to avoid losing them after turning off or resetting your router. Click “Save Config” and click “Apply” to write your new configuration to FLASH. -
Page 143: Restart
Restart Click Restart with option Current Settings to reboot your router (and restore your last saved configuration). If you wish to restart the router using the factory default settings (for example, after a firmware upgrade or if you have saved an incorrect configuration), select Factory Default Settings to reset to factory default settings. -
Page 144: Logout
Logout To exit the router’s web interface, choose Logout. Please ensure that you have saved the configuration settings before you logout. Be aware that the router is restricted to only one PC accessing the configuration web pages at a time. Once a PC has logged into the web interface, other PCs cannot get access until the current PC has logged out of the web interface. -
Page 145: Chapter 6: Troubleshooting
Chapter 6: Troubleshooting If your 3G Router is not functioning properly, you can refer first to this chapter for simple troubleshooting before contacting your service provider support. This can save you time and effort but if symptoms persist, consult your service provider. Problems starting up the router Problem Corrective Action... - Page 146 Problems with the Samba Problem Corrective Action Can’t change First, use net use command to see the current network connection. Such account to access as we find the resource is: then use net use \\192.168.1.254\IPC$ Samba \\192.168.1.254\IPC$ /del to delete the connection which need password. Reaccess and you can change the account.
-
Page 147: Appendix: Product Support & Contact
Appendix: Product Support & Contact If you come across any problems please contact the dealer from where you purchased your product. Contact Billion Worldwide: http://www.billion.com FCC STATEMENT 1. This device complies with Part 15 of the FCC Rules. Operation is subject to the following two conditions: (1) This device may not cause harmful interference.
Need help?
Do you have a question about the BiPAC 6200NXL and is the answer not in the manual?
Questions and answers