
Related Manuals for Pride Mobility Jazzy 1100


Summary of Contents for Pride Mobility Jazzy 1100
- Page 1 Owner’s Manual ATTENTION: Please read the content of your owner’s manual before operating your power chair. Exeter, PA St. Catharines, ON 1-800-800-8586 www.pridemobility.com...
- Page 2 WARNING! Failure to heed the warnings in this owner’s manual may result in personal injury. CAUTION! Failure to heed the cautions in this owner’s manual may result in damage to your power chair. Copyright © 2003 Pride Mobility Products Corp. INFMANU1012...
-
Page 3: Table Of Contents
C O N T E N T S INTRODUCTION ........................4 SAFETY ............................6 III. EMI/RFI ............................. 14 THE JAZZY 1100 ......................... 16 ASSEMBLY ..........................21 COMFORT ADJUSTMENTS ..................... 23 VII. DISASSEMBLY ........................28 VIII. OPERATION ..........................29 BATTERIES AND CHARGING ..................42 CARE AND MAINTENANCE .................... -
Page 4: Introduction
I N T R O D U C T I O N INTRODUCTION Welcome to Pride Mobility Products Corporation (Pride). Congratulations on the purchase of your new Pride Power Chair. The Pride Power Chair design combines the most advanced state-of-the-art components with modern, attractive styling. -
Page 5: I. Introduction
Name:_______________________________________________________________________________ Address:_____________________________________________________________________________ Phone Number:________________________________________________________________________ Purchase Date:________________________________________________________________________ NOTE: If you ever lose or misplace your product registration card or your copy of this manual, contact us and we will be glad to send you a new one immediately. Jazzy 1100/RevJ/Feb03 www.pridemobility.com... -
Page 6: Safety
Get to know the feel of your power chair and its capabilities. Pride recommends that you perform a safety check before each use to make sure your power chair operates smoothly and safely. See X. “Care and Maintenance.” www.pridemobility.com Jazzy 1100/RevJ/Feb03... -
Page 7: Ii. Safety
When driving down a ramp, keep the power chair’s speed adjustment set to the slowest speed setting to ensure a safely controlled descent. See VIII. “Operation.” n Avoid sudden stops and starts. Jazzy 1100/RevJ/Feb03 www.pridemobility.com... - Page 8 1. Regenerative — uses electricity to rapidly slow the vehicle when the joystick returns to the center/stop position. 2. Disc Park Brake — activates mechanically after regenerative braking slows the vehicle to near stop, or when power is removed from the system for any reason. www.pridemobility.com Jazzy 1100/RevJ/Feb03...
- Page 9 Your power chair is equipped with a manual freewheel lever to allow for manual maneuverability by a trained attendant. For more information about how to place your power chair into and out of freewheel mode, see IV. “The Jazzy 1100.” WARNING! Do not use your power chair in freewheel mode without an attendant present.
-
Page 10: Stairs And Escalators
Determine if the door opens toward or away from you. n Drive your power chair gently and slowly forward to push the door open. Or drive your power chair gently and slowly backward to pull the door open. www.pridemobility.com Jazzy 1100/RevJ/Feb03... -
Page 11: Motor Vehicle Transport
Turn the power off. See VIII. “Operation.” n Ensure your power chair is not in freewheel mode. See IV. “The Jazzy 1100.” n Turn both caster wheels toward the transfer destination to improve power chair stability during transfer. -
Page 12: Positioning Belts
Keep your hands away from the tires when driving. Batteries In addition to following the warnings below, be sure to comply with all other battery handling information. For more information about your power chair’s batteries, see IX. “Batteries and Charging.” www.pridemobility.com Jazzy 1100/RevJ/Feb03... -
Page 13: Removable Parts
Removable Parts WARNING! Do not attempt to lift or move a power chair by any of its removable parts. Personal injury and/or damage to the power chair may result. Jazzy 1100/RevJ/Feb03 www.pridemobility.com... -
Page 14: Emi/Rfi
Has anyone been hurt from erratic, unintended motion of powered wheelchairs? The FDA has reports of injuries that resulted from the apparent uncontrolled motion of powered wheel- chairs. However, it is unclear how many of these incidents were actually caused by radio wave interference. www.pridemobility.com Jazzy 1100/RevJ/Feb03... -
Page 15: Iii. Emi/Rfi
If unintended motion or brake release occurs, turn the powered wheelchair off as soon as it is safe to do so. If my powered wheelchair moves unexpectedly, where should I report this? Call Pride at 1-800-824-8205 to report the incident. Jazzy 1100/RevJ/Feb03 www.pridemobility.com... -
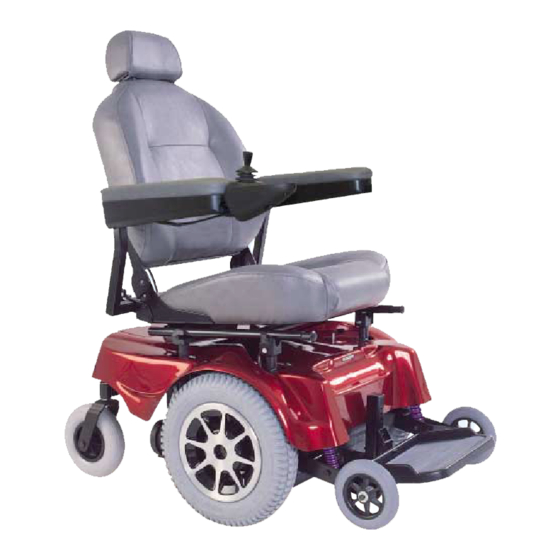
Page 16: The Jazzy 1100
1 1 0 0 THE JAZZY 1100 The Jazzy 1100 has two main assemblies: the seat and the power base. See figures 3 and 3a. There are a variety of seating options that are designed to accommodate most users. Typically, the seating assembly includes the armrests, seatback, seat base, and joystick controller. - Page 17 ARMREST WIDTH ADJUSTMENT KNOBS Figure 3a. Rear View PILOT CONTROLLER HARNESS CONNECTORS POWER SEAT CONNECTOR (OPTIONAL) AMMETER BATTERY CHARGER CORD Figure 4. Utility Tray Figure 6. Europa Controller Harness Figure 5. Remote Plus Controller Harness Connector Connector Jazzy 1100/RevJ/Feb03 www.pridemobility.com...
- Page 18 See figure 4. n Main circuit breaker: The main circuit breaker is a safety feature built into your Jazzy 1100. See figure 7. When the batteries and the motors are heavily strained (e.g., from excessive loads), the main circuit breaker trips to prevent damage to the motors and the electronics.
-
Page 19: Freewheel Levers
CAUTION! It is important to remember that when your Jazzy 1100 is in freewheel mode, the braking system is disengaged. If a lever is difficult to move in either direction, rock your Jazzy 1100 back and forth slightly. The lever should then move to the desired position. - Page 20 70-amp P & G Remote Plus Controller 70-amp Dynamic Europa Controller Weight Capacity: 300 lbs. Base: 81 lbs. Jazzy Weights: Seat: 29 lbs. Batteries: 44 lbs. Lifetime limited warranty on frame Warranty: Two-year warranty on electronics Eighteen-month warranty on drive motor www.pridemobility.com Jazzy 1100/RevJ/Feb03...
-
Page 21: Assembly
A S S E M B L Y To reduce the possibility of shipping damage, your Jazzy 1100’s seat is removed from the power base, and the seatback is removed from the seat assembly before your Jazzy is shipped. The joystick may also have been removed from the armrest. -
Page 22: V. Assembly
2. Push the seat lever backward. VERSA SEAT OR VERSA TILT OPTION If your Jazzy is equipped with a Versa Seat or Versa Tilt, please refer to the instruction manual supplied with the Versa Seat/ Versa Tilt. Figure 16. Power Seat Actuator www.pridemobility.com Jazzy 1100/RevJ/Feb03... -
Page 23: Armrest Width
DETENT PIN and angle, armrest height and angle, footrest height and angle, and joystick position. WARNING! If your Jazzy 1100 was configured at your authorized Pride provider or service cen- ter, please consult your health care professional before changing the seat position or making any Figure 17. -
Page 24: Joystick Position
See fig- ures 22 and 23. JOYSTICK POSITION The standard joystick can be mounted to the left or right side of your Jazzy. Contact your authorized Pride provider. Figure 23. Swing-away Joystick (Retracted Position) www.pridemobility.com Jazzy 1100/RevJ/Feb03... -
Page 25: Comfort Adjustments
0 and 70 degrees for the leg angle and a footrest adjustment range of 15 – 20 in. To adjust the ELR angle: 1. Press the release lever. See figure 27. 2. Move the leg rest to the desired angle. Figure 26. Swing-away Footrests Jazzy 1100/RevJ/Feb03 www.pridemobility.com... - Page 26 WARNING! Do not allow the motor to run more than a few seconds after the mechanism reaches the top or bottom limit. LEG REST RELEASE LEVER ADJUSTMENT SCREWS LEG REST ADJUSTMENT BOLT Figure 27. Elevating Leg Rests Figure 28. Elevating Leg Rests www.pridemobility.com Jazzy 1100/RevJ/Feb03...
- Page 27 C O M F O R T A D J U S T M E N T S POWER SEAT OPERATION n Read your Jazzy 1100 owner’s manual thoroughly be- fore operating your Jazzy. n The power seat option is intended for use while your Jazzy is on level surfaces only.
-
Page 28: Disassembly
6. Lift the body shroud straight up. The body shroud is attached to the metal frame by reusable fasteners. The body shroud should lift up easily. NOTE: Your Jazzy 1100 batteries weigh approximately 48 lbs. each. Lifting weight beyond your capability could result in injury. -
Page 29: Pilot Controller
WARNING! Unless faced with an emergency situation, do not use the on/off push button to stop the chair. This will cause the power chair to stop abruptly. WARNING! Always turn the power off when you are stationary to prevent unexpected movement. Jazzy 1100/RevJ/Feb03 www.pridemobility.com... -
Page 30: Viii. Operation
Pilot when the battery charger is on. The charger inhibit connector is coded with colored dots. The dots are positioned so that you align the flat side of the male connector with the flat side of the female connector before making the connection. www.pridemobility.com Jazzy 1100/RevJ/Feb03... - Page 31 Unplug charger. Check connections. Right Motor Wiring Fault Check right motor wiring. Right Motor Disconnected Check right motor wiring. Left Motor Wiring Fault Check left motor wiring. Left Motor Disconnected Check left motor wiring. Low Battery Voltage Check batteries/battery wiring. Jazzy 1100/RevJ/Feb03 www.pridemobility.com...
- Page 32 Unless the joystick is damaged, this action should stop your power chair. Keypad The keypad is located directly in front of the joystick. See figure 35. It contains keys that you will use to control your power chair. www.pridemobility.com Jazzy 1100/RevJ/Feb03...
- Page 33 Red and yellow lights lit: Charge battery if possible; controller and electrical system OK. n Red lights only lit or slow flash: Charge battery as soon as possible; controller and electrical system OK. n Rapid flash of lights: Indicates a fault in the controller or the electrical system. Jazzy 1100/RevJ/Feb03 www.pridemobility.com...
-
Page 34: Speed Settings
12 amps. Contact your authorized Pride provider for more information. CAUTION! Only chargers with Neutrik NC3MX plugs should be connected to the off-board charger/programming socket. See your authorized Pride provider for more information. www.pridemobility.com Jazzy 1100/RevJ/Feb03... -
Page 35: Power Module
For instance, if the first light is flashing rapidly, the battery voltage is nearly depleted. The following is a list of the possible errors signified by the rapidly flashing meter. When you get a trouble code, contact your authorized Pride provider. Jazzy 1100/RevJ/Feb03 www.pridemobility.com... - Page 36 Check connections. Right Motor Wiring Fault Check right motor wiring. Right Motor Disconnected Check right motor wiring. Left Motor Wiring Fault Check left motor wiring. Left Motor Disconnected Check left motor wiring. Low Battery Voltage Check batteries/battery wiring. www.pridemobility.com Jazzy 1100/RevJ/Feb03...
- Page 37 See “Fault Codes.” Keypad The keypad is located directly in front of the joystick. It contains keys that you will use to control your power chair. See figure 37. Jazzy 1100/RevJ/Feb03 www.pridemobility.com...
- Page 38 If the battery has at least 85% of its rated capacity, all of the lights will be on. As the battery voltage drops, the number of lights reduces from right to left. When the battery capacity drops to 10% or below, all of the lights will flash once every second. www.pridemobility.com Jazzy 1100/RevJ/Feb03...
- Page 39 Europa. See figure 36. If you use and off-board charger, the charger current should not exceed 8 amps. Contact your authorized Pride provider for more information. CAUTION! Only chargers with Neutrik NC3MX plugs should be connected to the off-board charger/programming socket. Jazzy 1100/RevJ/Feb03 www.pridemobility.com...
- Page 40 (2 seconds). If more than one fault exists, then the fault having the highest priority is indicated. The controller must be turned off and then on again even if the source of the fault is removed. If you cannot resolve the problem, contact your authorized Pride provider. www.pridemobility.com Jazzy 1100/RevJ/Feb03...
- Page 41 Check that the battery wiring is secure. •••••••—•••••••— CANL fault See your authorized Pride provider. •••••••—•••••••— CANA fault See your authorized Pride provider. •••••••—•••••••— Stall timeout Turn unit on, then off. •••••••—•••••••— Module mismatch See your authorized Pride provider. Jazzy 1100/RevJ/Feb03 www.pridemobility.com...
-
Page 42: Charging The Batteries
Wash hands after handling. CHARGING THE BATTERIES The battery charger is essential in providing long life for your Jazzy 1100 batteries. See figure 38. The battery charger is designed to optimize your Jazzy 1100’s performance by charging the batteries safely, quickly, and easily. -
Page 43: Ix. Batteries And Charging
1. Fully recharge any new battery prior to its initial use. This brings the battery up to about 90% of its peak performance level. 2. Operate your Jazzy 1100 about the house and yard. Move slowly at first, and don’t stray too far until you become accustomed to the controls and break in the batteries. -
Page 44: Batteries And Charging
Daily Use If you use your Jazzy 1100 on a daily basis, charge the batteries as soon as you are finished. Your Jazzy 1100 will be ready each morning to give you a full day’s service. It is recommended that you charge the batteries 8 to 14 hours after daily use. - Page 45 They do not have a “memory” like nickel-cadmium batteries. We work closely with our battery manufacturer to provide a battery that best suits your Jazzy 1100’s spe- cific demands. Fresh batteries arrive regularly at Pride and are promptly shipped with a full charge. During shipping, the batteries encounter temperature extremes that may influence initial performance.
- Page 46 A cold or frozen battery should be warmed for several days prior to recharging. NOTE : If you are storing a Jazzy 1100 for an extended period of time, you may wish to block the unit up with several boards under the frame. This keeps the tires off the ground and prevents the possibility of flat spots developing.
-
Page 47: Care And Maintenance
1. Dry your Jazzy 1100 as thoroughly as possible with a dry towel. 2. Allow your Jazzy 1100 to sit in a warm, dry place for 12 hours to allow unseen water to evaporate. 3. Check the joystick operation and the brakes before using your Jazzy again. -
Page 48: Daily Checks
You can do this for both the Remote Plus and Pilot controllers. n Check the brakes. This test should be carried out on a level surface with at least three feet of clearance around your Jazzy. www.pridemobility.com Jazzy 1100/RevJ/Feb03... - Page 49 When storing, disconnect the batteries from the Jazzy. See IX. “Batteries and Charging” in this manual. WARNING! If you fail to store the unit properly, the frame can rust and the electronics can be damaged. Figure 41. Anti-Scuff Decal Jazzy 1100/RevJ/Feb03 www.pridemobility.com...
-
Page 50: Cleaning Instructions
41. TIRES AND TUBES DRIVE WHEEL NUT If your Jazzy 1100 is equipped with pneumatic tires, you should Figure 42. Drive Wheel check the air pressure at least once a week. This prolongs the life of your tires and helps ensure the perfect operation of your chair. -
Page 51: Battery Replacement
Figure 43. Motor Brush Cap 9. Replace the batteries. 10. Install the batteries into your Jazzy 1100 with the terminal sides of the batteries facing inward, towards each other. 11. Connect the wire marked (+) to the closest positive (red) battery terminal. -
Page 52: Corrective Maintenance
WHEN TO SEE YOUR JAZZY PROVIDER FOR SERVICE The following symptoms could indicate a serious problem with your Jazzy 1100. If necessary, contact an authorized Pride provider. When calling, have the model number, serial number, nature of the problem, and the trouble code if available. -
Page 53: Optional Accessories
WARNING! The positioning belt is not designed for use as a seat belt in a motor vehicle. Nor is your Jazzy 1100 suitable for use as a seat in any vehicle. Anyone traveling in a vehicle should be properly belted into seats approved by the vehicle manufacturer. - Page 54 The standard lighting package consists of headlights and taillights. See figures 44 and 45. The light switch is located on the body shroud. See figure 46. HEADLIGHT Figure 44. Standard Lighting Package TAILLIGHT LIGHT SWITCH Figure 46. Standard Lighting Package Light Switch Figure 45. Standard Lighting Package www.pridemobility.com Jazzy 1100/RevJ/Feb03...
- Page 55 When the unit is powered off, the light switch activates the flashers. Figure 47. Full Lighting Package (Front) HEADLIGHT TURN SIGNAL LIGHT LIGHT SWITCH TURN SIGNAL LIGHTS TAILLIGHTS Figure 49. Full Lighting Package Light Switch Figure 48. Full Lighting Package (Rear) Jazzy 1100/RevJ/Feb03 www.pridemobility.com...
-
Page 56: Warranty
LIFETIME LIMITED WARRANTY For the lifetime of your Jazzy 1100, from the date of purchase, Pride will repair or replace at our option to the original purchaser, free of charge, any of the following parts found upon examination by an authorized... -
Page 57: Xii. Warranty
This warranty gives you specific rights, and you may also have other rights which vary from state to state. Please fill out and return the product registration card to Pride. This aids Pride in providing the best possible technical and customer service. Jazzy 1100/RevJ/Feb03 www.pridemobility.com... - Page 58 N O T E S www.pridemobility.com Jazzy 1100/RevJ/Feb03...
- Page 59 N O T E S...
- Page 60 Quality Control- Model 1100 Thank you for making the Pride Jazzy your choice in Power Chairs. We have thoroughly inspected your Jazzy. The following checkmarks indicate that it has been test driven and inspected. Controller Model #______________ Controller Serial # Serial #______________ Inclusion of all Parts Fit and Finish...
Need help?
Do you have a question about the Jazzy 1100 and is the answer not in the manual?
Questions and answers
How to hook up new batteries?
To hook up new batteries for the Pride Mobility Jazzy 1100:
1. Ensure the replacement batteries match the voltage, terminals, and dimensions of the original ones.
2. Use your existing cabling and hardware; the replacement batteries do not include these.
3. Carefully disconnect the old batteries, noting the wiring configuration.
4. Connect the new batteries using the same wiring setup.
5. Secure the batteries in place.
Note: These are sealed lead acid (AGM) batteries. Always verify compatibility before installation.
This answer is automatically generated
Where can I find a battery charger lid for the 1100