
Related Manuals for Belkin Dual Video Docking Stand


Summary of Contents for Belkin Dual Video Docking Stand
-
Page 1: User Manual
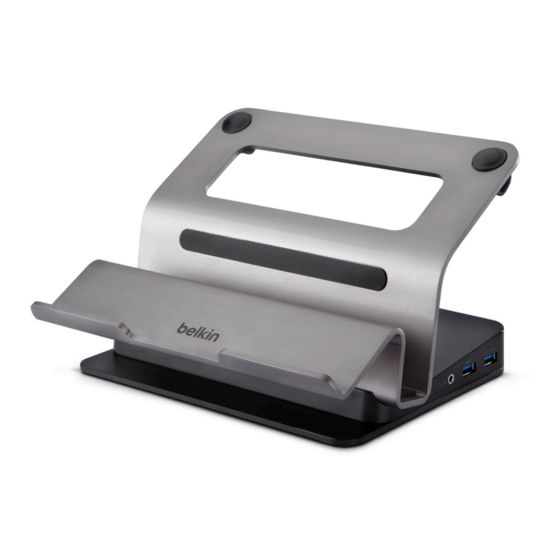
USB 3.0 Dual Video Docking Stand for Ultrabooks and MacBook® Computers User Manual B2B044eaC00 • 8820-01436 Rev. A00... -
Page 2: Table Of Contents
Use with the Lid Closed ......12 USB 3.0 Dual Video Docking Stand for Ultrabooks and MacBook® Computers... -
Page 3: Introduction
SECTIONS Introduction Package Contents Thank you for purchasing the Belkin USB 3.0 Dual Video Docking Stand. This Docking Stand is designed for use on USB 3.0-enabled ultrabook laptops and other thin ultraportable laptops. This Docking Stand offers a single SuperSpeed USB 3.0 connection between a laptop and desktop peripherals, •... -
Page 4: Overview
• Single SuperSpeed USB 3.0 connection between laptop computer and Docking Stand This USB 3.0 Dual Video Docking Stand is compatible with USB 3.0-enabled • Supports dual high-resolution video outputs computers running on, but not limited to, the following OS platforms: o DVI-I and DisplayPort 1.1... -
Page 5: Unit Display Diagrams
Monitors Supported: DisplayPort 1.2, DVI-I and VGA (via included adapter) Maximum Resolution Supported: 2048x1152 USB 3.0 Ports: 2 USB 2.0 Ports: 2 RJ45 Gigabit Ethernet Ports: 1 Audio Ports: 1 Combo Port Country of Origin: China USB 3.0 Dual Video Docking Stand for Ultrabooks and MacBook® Computers... -
Page 6: Pre-Configuration Steps
Pre-Configuration Steps Where to place the Stand: The USB 3.0 Dual Video Docking Stand is designed for placement on a desk, in proximity to external monitors that will connect to the Stand. Consider the following when deciding where to put the Stand: •... -
Page 7: Connection And Installation Procedures
4. After downloading the latest drivers, click on the “setup.exe” file to start the installation. If an administrator password is required, enter your administrator credentials. 5. Click on “I Accept” to accept the End User License Agreement. USB 3.0 Dual Video Docking Stand for Ultrabooks and MacBook® Computers... -
Page 8: Software Removal
Mac OS X (or greater): Navigate to “Finder > Applications > DisplayLink” and then double-click DisplayLink Software Uninstaller. 2. Select “Yes” to continue the procedure. 3. Select “Yes” to restart your computer. USB 3.0 Dual Video Docking Stand for Ultrabooks and MacBook® Computers... -
Page 9: Docking Stand Installation And Configuration
CONNECTION AND INSTALLATION PROCEDURES Connection and SECTIONS Installation Procedures Docking Stand Installation and Configuration Follow the illustrations below to connect the USB 3.0 Dual Video Docking Stand to your computer. Cable Management Clips Cable Management Clips Combo Audio Socket for Headphones and speakers USB 3.0 for External Storage,... -
Page 10: Configuration Of External Displays
Click the Utility icon in the Windows System Tray. Note: The may be hidden in the Windows System Tray. Click the Arrow icon to bring up more icons if this happens. USB 3.0 Dual Video Docking Stand for Ultrabooks and MacBook® Computers... - Page 11 The secondary monitor will change to Extended Mode if selecting this option while in Mirror Mode. Audio Setup Enable the Windows Audio Configuration page Video Setup Enable the Windows Screen Resolution page USB 3.0 Dual Video Docking Stand for Ultrabooks and MacBook® Computers...
-
Page 12: Multi-Monitor Mode
Note: For Mac OS X or greater, navigate to “Settings > Display > Arrangement.” Alternatively, in a Windows OS, click on the Utility icon in the Windows System Tray, and then select Display Link Manager or Video Setup. USB 3.0 Dual Video Docking Stand for Ultrabooks and MacBook® Computers... -
Page 13: Extended Mode
4. Click “Apply” to confirm and close the settings screen. 5. Once the setting is completed, simply drag and drop the application icons, or open windows to the secondary monitor. Note: Some applications may not support extended desktop. USB 3.0 Dual Video Docking Stand for Ultrabooks and MacBook® Computers... -
Page 14: Mirror Mode
Applications,” grab the white bar on the primary display, and drag it to the “Mirror Displays.” extended display you wish to be the new primary display. 5. Click “Apply” to confirm and close the settings screen. USB 3.0 Dual Video Docking Stand for Ultrabooks and MacBook® Computers... -
Page 15: Configuring A Windows Laptop For Use With The Lid Closed
3. Under the “When I Close the Lid” heading, set both the “On Battery” and “Plugged In” options to “Do nothing.” 4. Click the “Save Changes” button and close all applicable Windows that were opened to navigate to this section. USB 3.0 Dual Video Docking Stand for Ultrabooks and MacBook® Computers... -
Page 16: Frequently Asked Questions
FREQUENTLY ASKED QUESTIONS Frequently Asked Questions SECTIONS Q: Where can I find the most up-to-date driver for my Dual Video Docking Stand? Q: The Dual Video Docking Stand is not working properly or is unresponsive. What can I do? A: www.displaylink.com/support/downloads A: If the Docking Stand is not working properly or not at all, check the status in the Device Manager in the Windows OS. - Page 17 Frequently Asked Questions SECTIONS Q: I want to connect the Dual Video Docking Stand to my TV, but it only Q: When I use the Windows shortcut “Windows Key” + “P”, I am only able to supports HDMI. Can I use an HDMI to DisplayPort Adapter? configure the second monitor, not the third.
- Page 18 A: In Windows 8, when you launch the Tile screen it only displays on your primary monitor, which allows you to continue to view or access applications independently on the other displays. USB 3.0 Dual Video Docking Stand for Ultrabooks and MacBook® Computers...
-
Page 19: Regulatory Compliance
B2B044-C00, to which this declaration relates, is in conformity with Emissions Standard EN55022 and with Immunity Standard EN55024, LVP We, Belkin International, Inc., of 12045 E. Waterfront Drive, Playa Vista, CA EN61000-3-2, and EN61000-3-3. 90094, declare under our sole responsibility that the product: B2B044-C00, to which this declaration relates: Has been tested and found compliant with Part 15 of the FCC Rules. -
Page 20: Warranty Information
THE SALE OR USE OF ANY BELKIN PRODUCT, EVEN IF ADVISED OF THE POSSIBILITY OF SUCH DAMAGES. Belkin will repair or replace, at its option, any defective product free of charge (except for shipping charges for the product). Belkin reserves the right to... -
Page 21: Technical Support
TECHNICAL SUPPORT SECTIONS Technical Support http://www.belkin.com/support USB 3.0 Dual Video Docking Stand for Ultrabooks and MacBook® Computers... - Page 22 © 2013 Belkin International, Inc. All rights reserved. All trade names are registered trademarks of respective manufacturers listed. Windows and Windows Vista are either registered trademarks or trademarks of Microsoft Corporation in the United States and/or other countries. Mac, Mac OS, MacBook, and MacBook Air are trademarks of Apple Inc., registered in the U.S. and other countries.
- Page 23 Double station d‘accueil vidéo USB 3.0 pour ordinateurs ultrabooks et MacBook® User Manual B2B044eaC00 • 8820-01436 Rev. A00...
- Page 24 TABLE DES MATIÈRES SECTIONS Table des matières Introduction ..........1 Foire aux questions .
-
Page 25: Introduction
Ce manuel de l’utilisateur contient toutes les informations dont vous avez • Adaptateur DVI-I vers VGA besoin pour installer et utiliser votre nouvelle double station d’accueil vidéo USB 3.0 de Belkin ainsi que des conseils d’expert pour la résolution des • Manuel de l’utilisateur problèmes. -
Page 26: Présentation
PRÉSENTATION SECTIONS Présentation Caractéristiques Configuration système requise Plateformes de système d’exploitation (SE) • Connexion USB 3.0 SuperSpeed unique entre l’ordinateur portable et la station d’accueil Cette double station d’accueil vidéo USB 3.0 prend en charge les ordinateurs • Prend en charge les sorties vidéo haute résolution doubles compatibles USB 3.0 fonctionnant, sans caractère limitatif, sous les plateformes SE suivantes : o DVI-I et DisplayPort 1.2... -
Page 27: Illustrations De L'appareil
PRÉSENTATION SECTIONS Présentation Illustrations de l’appareil Spécifications Référence : B2B044-C00 Station : Alimentation Entrée CA : 5 V/4 A Nombre d’ordinateurs pris en charge : 1 Moniteurs pris en charge : DisplayPort 1.2, DVI-I et VGA (via l’adaptateur inclus) Résolution maximale prise en charge : 2 048 x 1 152 Ports USB 3.0 : 2 Ports USB 2.0 : 2 Ports RJ45 Gigabit Ethernet : 1... -
Page 28: Étapes De Préconfiguration
ÉTAPES DE PRÉCONFIGURATION SECTIONS Étapes de préconfiguration Où placer la station : La double station d’accueil vidéo USB 3.0 a été conçue pour être installée sur un bureau, à proximité de moniteurs externes qui seront connectés à la station. Prenez en considération les éléments suivants avant de placer la station : •... -
Page 29: Procédures De Connexion Et D'installation
PROCÉDURES DE CONNEXION ET D’INSTALLATION Procédures de connexion SECTIONS et d’installation Installation du logiciel exe » pour démarrer l’installation. Si un mot de passe administrateur est nécessaire, saisissez vos informations d’identification d’administrateur. 5. Cliquez sur « J’accepte » afin d’accepter le contrat de licence utilisateur final. Pour les utilisateurs de Windows 7/Windows 8 6. -
Page 30: Suppression Du Logiciel
PROCÉDURES DE CONNEXION ET D’INSTALLATION Procédures de connexion SECTIONS et d’installation Suppression du logiciel Windows 8 Cliquez avec le bouton droit sur l’écran de vignettes de Windows 8 et sélectionnez Toutes les applications. 2. Accédez à Panneau de configuration > Désinstaller un programme, puis double-cliquez sur DisplayLink Graphics. -
Page 31: Installation Et Configuration De La Station D'accueil
PROCÉDURES DE CONNEXION ET D’INSTALLATION Procédures de connexion SECTIONS et d’installation Installation et configuration de la station d’accueil Référez-vous aux illustrations ci-dessous pour connecter la double station d’accueil vidéo USB 3.0 à votre ordinateur. Clips serre-câbles Clips serre-câbles Prise audio combinée pour casque et haut-parleurs Port USB 3.0 pour périphériques de stockage Port de charge rapide 2,1 A... -
Page 32: Configuration D'écrans Externes
PROCÉDURES DE CONNEXION ET D’INSTALLATION Procédures de connexion SECTIONS et d’installation Configuration d’écrans externes 2. Sélectionnez l’option de votre choix (voir tableau ci-après), puis cliquez dessus. Configuration d’écrans Remarque : Les captures d’écran suivantes contenues dans cette section sont issues du système d’exploitation Windows 7. Il se peut qu’elles ne correspondent pas à... - Page 33 PROCÉDURES DE CONNEXION ET D’INSTALLATION Procédures de connexion SECTIONS et d’installation Description des paramètres Option Description DisplayLink ++Manager Active la page de résolution d’écran de Windows. ++Rechercher les mises à jour Recherche le dernier pilote et le télécharge (le cas échéant). ++Station vidéo USB 3.0 C liquez pour sélectionner une résolution d’écran disponible.
-
Page 34: Mode Multimoniteur
PROCÉDURES DE CONNEXION ET D’INSTALLATION Procédures de connexion SECTIONS et d’installation Station d’accueil Mode multimoniteur Si un moniteur est déjà connecté directement à l’ordinateur portable, il est possible de connecter un moniteur supplémentaire via la double station d’accueil vidéo USB 3.0. Une fois le moniteur connecté, il est possible de le configurer en mode étendu, miroir ou moniteur principal. -
Page 35: Mode Étendu
PROCÉDURES DE CONNEXION ET D’INSTALLATION Procédures de connexion SECTIONS et d’installation 3. Étendez le Bureau sur l’affichage supplémentaire : Mode étendu • Sous Windows 7 et Windows 8, sélectionnez Affichages multiples > Étendre ces affichages. Reportez-vous à la section « Mode multimoniteur » pour ouvrir la page de configuration. -
Page 36: Mode Miroir
PROCÉDURES DE CONNEXION ET D’INSTALLATION Procédures de connexion SECTIONS et d’installation Mode miroir Mode moniteur principal Reportez-vous à la section « Mode multimoniteur » pour ouvrir la page de Reportez-vous à la section « Mode multimoniteur » pour ouvrir la page de configuration. -
Page 37: Configuration D'un Ordinateur Portable Windows Pour Une Utilisation Capot Fermé
PROCÉDURES DE CONNEXION ET D’INSTALLATION Procédures de connexion SECTIONS et d’installation Configuration d’un ordinateur portable Windows pour une Raccourci Windows utilisation capot fermé Windows 7/Windows 8 Windows 8 Appuyez sur « (Windows) » + bouton « P » pour afficher le menu 1. -
Page 38: Foire Aux Questions
FOIRE AUX QUESTIONS Foire aux questions SECTIONS Q : Où puis-je trouver le dernier pilote à jour pour ma double station d’accueil Q : La double station d’accueil vidéo présente un dysfonctionnement ou ne vidéo ? répond pas. Que puis-je faire ? R : www.displaylink.com/support/downloads R : Si la station d’accueil présente un dysfonctionnement ou ne fonctionne pas du tout, consultez son état dans le Gestionnaire de périphériques du... - Page 39 R : Oui. Contactez votre administrateur informatique ou rendez-vous sur le micro-ondes dégradent le signal. site de la société Belkin pour connaître les solutions pour tous vos besoins de connectivité. Q : Lorsque j’utilise le raccourci Windows « touche Windows » + « P », je ne peux configurer que le deuxième moniteur, mais pas le troisième.
- Page 40 FOIRE AUX QUESTIONS Foire aux questions SECTIONS Q : Avec mon moniteur principal défini comme mon affichage d’ordinateur portable, la résolution sur le deuxième écran est très petite lorsque je sélectionne l’option de duplication des moniteurs 1 et 2. Pourquoi ? R : Lorsque vous dupliquez l’affichage principal de votre ordinateur portable sur un affichage externe, l’affichage externe reçoit les mêmes paramètres de résolution, ce qui rend la résolution bien plus petite que celle qu’il peut...
-
Page 41: Conformité À La Réglementation
Déclaration FCC Déclaration de conformité CE DÉCLARATION DE CONFORMITÉ À LA RÉGLEMENTATION FCC EN Belkin International, Inc., déclare sous sa propre et unique responsabilité que le produit B2B044-C00, auquel se réfère la présente déclaration, a été élaboré MATIÈRE DE COMPATIBILITÉ ÉLECTROMAGNÉTIQUE en conformité... -
Page 42: Informations Sur La Garantie
Couverture offerte par la garantie : LOI, Y COMPRIS MAIS SANS S’Y LIMITER, LES GARANTIES IMPLICITES Belkin International, Inc. (« Belkin ») garantit à l’acheteur initial de ce produit AFFÉRENTES À LA QUALITÉ LOYALE ET MARCHANDE ET À L’ADÉQUATION Belkin que le produit est exempt de défauts de conception, de montage, de À... -
Page 43: Assistance Technique
ASSISTANCE TECHNIQUE SECTIONS Assistance technique États-Unis http://www.belkin.com/support Double station d’accueil vidéo USB 3.0 pour ordinateurs ultrabooks et MacBook®... - Page 44 © 2013 Belkin International, Inc. Tous droits réservés. Toutes les raisons commerciales sont des marques déposées par leurs fabricants respectifs. Windows et Windows Vista sont des marques de commerce ou des marques déposées de Microsoft Corporation aux États-Unis et/ou dans d‘autres...
- Page 45 USB 3.0 Zweifach-Videoständer für Ultrabooks und MacBook® Computer Benutzerhandbuch B2B044eaC00 • 8820-01436 Rev. A00...
- Page 46 INHALTSVERZEICHNIS SECTIONS Inhaltsverzeichnis Einleitung ..........1 Häufig gestellte Fragen .
-
Page 47: Einleitung
EINLEITUNG SECTIONS Einleitung Verpackungsinhalt Vielen Dank für den Kauf Ihres Belkin USB 3.0 Zweifach-Videoständers mit Docking-Funktion. Dieser Docking-Ständer eignet sich für USB 3.0-fähige Ultrabooks, Laptops und andere flache, besonders mobile Laptops. Dieser Docking-Ständer bietet eine SuperSpeed USB 3.0-Einzelverbindung • Belkin USB 3.0 Doppeldocking-Videoständer zwischen einem Laptop und Desktop-Peripherie wie zwei hochauflösenden... -
Page 48: Übersicht
ÜBERSICHT SECTIONS Übersicht Merkmale Systemanforderungen Betriebssysteme • SuperSpeed USB 3.0-Einzelverbindung zwischen Laptop und Docking-Ständer Dieser USB 3.0 Doppeldocking-Videoständer ist mit USB 3.0-fähigen • Unterstützt hochauflösende Zweikanal-Videoausgabe Computern kompatibel, die z. B. mit einem der folgenden Betriebssysteme ausgestattet sind: DVI-I und DisplayPort 1.1 •... -
Page 49: Bestandteile
ÜBERSICHT SECTIONS Übersicht Bestandteile Technische Daten Artikelnummer: B2B044-C00 Ständer: Stromversorgung Netzeingang: 5 V; 4 A Anzahl unterstützter Computer: 1 Unterstützte Bildschirme: DisplayPort 1.2, DVI-I und VGA (mit enthaltenem Adapter) Unterstützte maximale Bildschirmauflösung: 2048x1152 USB 3.0-Anschlüsse 2 USB 2.0-Anschlüsse 2 RJ45 Gigabit-Ethernet-Anschlüsse: 1 Audioschnittstellen: 1 Kombi-Anschluss Herkunftsland: China USB 3.0 Zweifach-Videoständer für Ultrabooks und MacBook®... -
Page 50: Vorbereitung
VORBEREITUNG SECTIONS Vorbereitung Aufstellungsort: Der USB 3.0 Doppeldocking-Videoständer kann auf dem Schreibtisch neben externen Bildschirmen aufgestellt werden, die mit dem Ständer verbunden werden. Bitte beachten Sie bei der Aufstellung des Ständers Folgendes: • Länge der Kabel von Tastaturen, Bildschirmen und Mäusen •... -
Page 51: Anschließen Und Installieren
ANSCHLIESSEN UND INSTALLIEREN Anschließen und SECTIONS Installieren Software-Installation 5. Klicken Sie auf «I Accept» (Annehmen), um den Endbenutzer-Lizenzvertrag anzunehmen. 6. Hinweis: Die Installation nimmt einige Zeit in Anspruch. Schalten Sie den Für Windows 8/Windows 7 Computer nicht ab! Bis zum Abschluss der Installation können einige Netzkabel an Docking-Ständer anschließen Minuten vergehen. -
Page 52: Software Deinstallieren
ANSCHLIESSEN UND INSTALLIEREN Anschließen und SECTIONS Installieren Software deinstallieren Windows 8 Klicken Sie mit der rechten Maustaste auf den Windows 8 Kachel-Bildschirm, und wählen Sie «Alle Apps». 2. Navigieren Sie zu «Systemsteuerung» > «Programm deinstallieren», und klicken Sie dann auf «DisplayLink Graphics». 3. -
Page 53: Docking-Ständer Installieren Und Konfigurieren
ANSCHLIESSEN UND INSTALLIEREN Anschließen und SECTIONS Installieren Docking-Ständer installieren und konfigurieren Folgen Sie den nachstehenden Abbildungen, um den USB 3.0 Doppeldocking- Videoständer mit Ihrem Computer zu verbinden. Kabelführungsclips Kabelführungsclips Audio-Kombibuchse für Kopfhörer und Lautsprecher USB 3.0 für Massenspeicher, Schnelllade-Anschluss 2,1 A Drucker und andere USB-Geräte Netzteilanschluss DVi-I/... -
Page 54: Externe Bildschirme Konfigurieren
ANSCHLIESSEN UND INSTALLIEREN Anschließen und SECTIONS Installieren Externe Bildschirme konfigurieren 2. Wählen Sie die gewünschte Option (siehe nachstehende Tabelle), und klicken Sie dann mit der Maus darauf. Bildschirm konfigurieren Hinweis: Die folgenden Bildschirmfotos basieren auf dem Betriebssystem Windows 7. Auch wenn Sie ein anderes Betriebssystem nutzen, sind die Schaltflächen, Registerkarten und Menüs weitgehend gleich. - Page 55 ANSCHLIESSEN UND INSTALLIEREN Anschließen und SECTIONS Installieren Definition der Einstellungen OptionBeschreibung DisplayLink Manager Aktiviert die Seite für die Windows-Bildschirmauflösung Updates suchen Überprüft den aktuellen Treiber und lädt ihn gegebenenfalls herunter USB 3.0 Video Dock Bildschirmauflösung V erfügbare Auflösung wählen. Hinweis: Diese Funktion ist im Spiegel-Modus nicht verfügbar, da die Auflösung für den primären Bildschirm definiert wird.
-
Page 56: Mehrfach-Bildschirmmodus
ANSCHLIESSEN UND INSTALLIEREN Anschließen und SECTIONS Installieren Docking-Ständer Multi-Monitor Mode (Mehrfach-Bildschirmmodus) Ein zusätzlicher Bildschirm kann über den USB 3.0 Doppeldocking- Videoständer angeschlossen werden, wenn bereits ein Bildschirm direkt am Laptop angeschlossen ist. Nach dem Anschließen kann der zusätzliche Bildschirm für den erweiterten Modus, den Spiegel-Modus oder den Primär- Bildschirmmodus konfiguriert werden. -
Page 57: Erweiterter Modus
ANSCHLIESSEN UND INSTALLIEREN Anschließen und SECTIONS Installieren 3. Erweitern Sie den Desktop auf den zusätzlichen Bildschirm: Erweiterter Modus • Wählen Sie unter Windows 8 oder Windows 7 die Option «Mehrere Anzeigen > Diese Anzeigen erweitern». Öffnen Sie die Konfigurationsseite, wie im Abschnitt «Mehrfach-Monitormodus»... -
Page 58: Spiegel-Modus
ANSCHLIESSEN UND INSTALLIEREN Anschließen und SECTIONS Installieren Spiegel-Modus Primär-Bildschirmmodus Öffnen Sie die Konfigurationsseite, wie im Abschnitt Öffnen Sie die Konfigurationsseite, wie im Abschnitt «Mehrfach-Monitormodus» beschrieben. «Mehrfach-Monitormodus» beschrieben. 2. Wählen Sie im Dropdownmenü «Display» (Anzeige) den gewünschten 2. Wählen Sie im Dropdownmenü «Display» (Anzeige) den gewünschten Bildschirm aus. -
Page 59: Windows-Laptop Für Nutzung Mit Geschlossenem Deckel Konfigurieren
ANSCHLIESSEN UND INSTALLIEREN Anschließen und SECTIONS Installieren Windows-Verknüpfung Windows-Laptop für Nutzung mit geschlossenem Deckel konfigurieren Windows 8/Windows 7 Windows 8 Drücken Sie die Tastenkombination < (Windows)> + <P>, um das nachstehende Menü zu öffnen, und wählen Sie dann die gewünschte Option. 1. -
Page 60: Häufig Gestellte Fragen
HÄUFIG GESTELLTE FRAGEN Häufig gestellte Fragen SECTIONS F: Wo finde ich den jeweils aktuellen Treiber für meinen A: Für das Betriebssystem befindet sich der Cursor immer noch im zweiten Doppeldocking-Videoständer? Bildschirm, auch wenn er nicht mehr verbunden ist. Ziehen Sie die Maus daher vom sekundären Bildschirm in Richtung primären Bildschirm, A: www.displaylink.com/support/downloads damit der Cursor wieder sichtbar wird. - Page 61 DisplayPort-Adapter nutzen? Kupferverbindungskabel. Elektromagnetische Störungen (EMI) durch A: Ja. Wenden Sie sich an Ihren IT-Administrator, oder besuchen Sie Belkin andere Geräte in Ihrer Nähe wie drahtlose Geräte, große Maschinen und Business online. Dort finden Sie eine Liste mit Lösungen für jeden Mikrowellengeräte können das Signal verschlechtern.
- Page 62 HÄUFIG GESTELLTE FRAGEN Häufig gestellte Fragen SECTIONS A: Diese Einschränkung liegt im Betriebssystem, nicht im Docking-Ständer. Die Fenster und offenen Anwendungen werden zur leichteren Handhabung auf das primäre Gerät zurückgegeben, wenn Sie den Docking-Ständer trennen. Wenn Sie die Verbindung wiederherstellen, kann Windows nicht mehr feststellen, auf welchen Bildschirmen sich die Fenster vorher befanden.
-
Page 63: Regelkonformität
Artikel B2B044-C00, auf den sich diese Erklärung bezieht, in Einklang mit der Fachgrundnorm Störaussendung EN55022 und der Fachgrundnorm Wir, Belkin International, Inc., 12045 East Waterfront Drive, Playa Vista, CA Störfestigkeit EN55024 sowie LVP EN61000-3-2 und EN61000-3-3 steht. 90094, USA, erklären alleinverantwortlich, dass der Artikel B2B044-C00, auf den sich diese Erklärung bezieht,... -
Page 64: Garantieinformationen
übernimmt keine begrenzte Garantie für die Reparatur oder den VERKAUF ODER DIE BENUTZUNG VON EINEM BELKIN-PRODUKT Ersatz solcher ausgelaufenen Produkte. Wenn Belkin nicht in der Lage ist, das ENTGANGEN SIND, AUCH WENN SIE AUF DIE MÖGLICHKEIT SOLCHER Produkt zu reparieren oder zu ersetzen (z. B. weil es sich um ein Auslaufmodell SCHÄDEN AUFMERKSAM GEMACHT WORDEN SIND. -
Page 65: Technischer Support
TECHNISCHER SUPPORT SECTIONS Technischer Support http://www.belkin.com/support USB 3.0 Zweifach-Videoständer für Ultrabooks und MacBook® Computer... - Page 66 © 2013 Belkin International, Inc. Alle Rechte vorbehalten. Alle Produktnamen sind eingetragene Marken der angegebenen Hersteller. Windows und Windows Vista sind in den Vereinigten Staaten und/oder in anderen Ländern eingetragene Marken bzw. Marken der Microsoft Corporation. Mac, Mac OS, MacBook und MacBook Air sind Marken der Apple Inc., die in den USA und anderen Ländern eingetragen sind.
Need help?
Do you have a question about the Dual Video Docking Stand and is the answer not in the manual?
Questions and answers