Table of Contents
Advertisement
Quick Links
A Division of Snow Joe, LLC
IMPORTANT!
Safety Instructions
All Operators Must Read These
Instructions Before Use
Any electrical appliance can be dangerous if used incorrectly.
Some of the safety precautions given in this manual apply
generally to many appliances. Other warnings are specific
to the use of this snow thrower. Keep this manual for future
reference.
General Safety WARNINGS!
You and any other operator of this snow thrower must read,
understand and follow these instructions in their entirety, and
should reread them at the start of each snow season. Failure
to follow these instructions may result in ELECTRIC SHOCK,
FIRE and/or serious PERSONAL INJURY.
Notice the personal safety alert symbol
manual to draw your attention to a WARNING given along
with the particular operating instruction. This means that
the operation requires special ATTENTION, CAUTION, and
AWARENESS.
1. Work Area
a. Keep work area clean and well lit. Cluttered, dark
areas invite accidents.
b. Do not operate snow thrower in an explosive
atmosphere, such as in the presence of flammable
liquids, gases, or dust. Electrical appliances create
sparks that may ignite the dust or fumes.
c. Keep children, pets, and bystanders away from
work area. Be aware that the normal noise of the
machine when turned on may make it difficult for
you to hear approaching people. Visitors should
wear safety glasses and be kept a safe distance
from work area. Do not let visitors contact snow
thrower or extension cord.
2. Electrical Safety
a. Electrical plugs must match the outlet. Never
modify the plug in any way. Do not use any adapter
plugs with grounded appliances. Unmodified plugs
and matching outlets will reduce risk of electric
shock.
b. Avoid body contact with earthed or grounded
surfaces such as upper and lower water pipes,
radiators, ranges, refrigerators, microwave oven, and
outer frame of heating equipment, or in a place that
is locked. Be cautious to avoid electric shock. There
© 2012 by Snow Joe, LLC
All rights reserved. Original instructions.
Electric Snow Thrower
Electric Snow Thrower
Model No. SJ622E/623E
m
used in this
is an increased risk of electric shock if your body is
earthed or grounded.
c. Do not abuse the cord. Keep cord away from
heat, oil, sharp edges or moving parts. Never carry
the snow thrower by its cord or yank the cord to
disconnect it from the electrical outlet. Damaged or
entangled cords increase the risk of electric shock.
If cord is damaged in any manner while plugged in,
pull plug from wall receptacle.
d. Replace or properly repair damaged cords. If cord
is damaged in any manner while plugged in, pull the
extension cord plug from the wall receptacle.
e. Contact with water while operating the snow
thrower can result in electric shock and serious
bodily injury. Do not use the snow thrower in damp
or wet locations or expose to rain. Do not handle
the plug or the appliance with wet hands or while
standing in water.
f.
Extension Cord – WARNING – Only use a UL rated
extension cord for OUTDOOR, all-weather use.
To prevent the extension cord from disconnecting
during operation, See page 7 Figure 12.
g. Turn off the power switch and disconnect the
power cable before making any adjustments,
inspecting, servicing, changing accessories, or
cleaning the snow thrower as well as any other
conditions in which dangerous factors exist. Any
such operation should be performed after revolving
parts inside the snow thrower stop completely.
Such preventive safety measures reduce the risk of
starting the power tool accidentally.
h. If you find the main power cable or the extension
cable damaged, please pull out the plug from the
socket and disconnect the power immediately.
Repair the cable or replace it if necessary.
i.
When replacing any parts, you must strictly
observe the instructions and procedures
described in this User Manual. Special care
should be paid to any rubber parts, since these
parts may increase the engine load and decrease its
mechanical power if damaged.
j.
Do not move or transport the snow thrower when
the plug is connected to the power socket and
the switch is turned on.
k. When using the snow thrower, if you notice it is
running in an unstable state or hear abnormal
sounds from the engine, please stop the machine
and disconnect the power immediately and
contact your service center.
SAVE THESE INSTRUCTIONS
1
Meijer.com
Form No. SJ622E/623E-880E
OPERATOR'S MANUAL
Advertisement
Table of Contents

Related Manuals for SNOWJOE Ultra SJ622E


Summary of Contents for SNOWJOE Ultra SJ622E
-
Page 1: Safety Instructions
Meijer.com Electric Snow Thrower Electric Snow Thrower Model No. SJ622E/623E Form No. SJ622E/623E-880E OPERATOR’S MANUAL A Division of Snow Joe, LLC IMPORTANT! is an increased risk of electric shock if your body is earthed or grounded. Safety Instructions c. Do not abuse the cord. Keep cord away from heat, oil, sharp edges or moving parts. -
Page 2: Figure
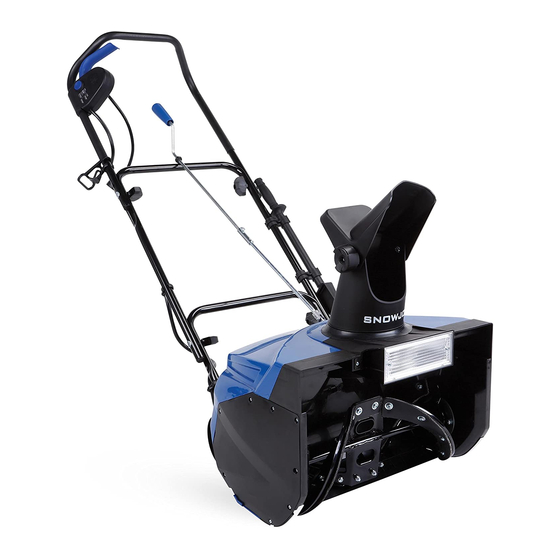
G - Chute Deflector O - Polarized Cable Plug H - Discharge Chute P - Handle Bar I - Main Cover Q - ON/OFF Switch Lever R - Clean-Out Tool Note: The only difference of SJ622E and SJ623E is halogen light system. -
Page 3: Technical Data
12V 20W disconnect the power immediately, and contact your No-load speed 2450 min¯' original distributor. Weight (SJ622E) 31.83 lbs/14.44 Kg Noise control – When using the snow thrower, you Weight (SJ623E with light) 34.04 lbs/15.44 Kg must respect local laws and regulations regarding Working width 18"/45.7 cm... -
Page 4: Safety Symbols
Meijer.com Safety Symbols SYMBOLS DESCRIPTIONS The following table describes safety symbols that may appear The rotating part will continuously run on this product. Read, understand, and follow all instructions for several seconds after you turn off on the machine before attempting to assemble and operate. the machine. -
Page 5: Figure
Meijer.com Assembly 2. Secure the connection of lower frame and middle frame by fastening the knobs on each side (Fig. 3). CAUTION Inspect wiring, which, if damaged during shipping, may cause serious bodily injury during equipment use. If any damage is seen or suspected, do not assemble. Instead, contact Snow Joe Customer Service (1-866-766-9563) for assistance. -
Page 6: Table Of Contents
Meijer.com 2. Lift the chute deflector and lock securely onto the 2. Loosen the screw on the lower chute crank by hand discharge chute (Fig. 6). (Fig. 9). Figure 6 Figure 9 3. Slide the upper chute crank into the lower chute crank 3. -
Page 7: Figure
Meijer.com Operation 3. Connect the female end of extension cord to the male plug in the cable/plug (Fig. 13). Note: Before using this machine, make sure that the power source you will use complies with the specifications detailed in this manual. Before inserting the plug into the socket, verify that the snow thrower’s roll shaft and rubber plates are firmly secured with screws, and that the rubber plates are facing the correct direction. -
Page 8: Figure
Meijer.com Powering On and Off 4. On SJ623E, the halogen light could be used to lighten the forward road in the dark by turning on the switch on the 1. To power on, first press the Safety Switch Button found backside of snow thrower (Fig. -
Page 9: Figure
Meijer.com 3. When moving the snow thrower, use the wheels on one 1. The discharge chute can be adjusted 180 degrees by side as the pivot point. Slightly tilt the snow thrower on rotating the chute crank. Rotate the chute control crank this pivot point to move it forward or backward. -
Page 10: Position
Meijer.com 2. The chute deflector on the top of the discharge chute Lifetime Lubrication (Motor and Auger) controls the height of the snow stream. Loosen the knob to raise or lower the deflector to the desired height of Lubrication is not necessary and may damage the unit. The snow you wish to throw. - Page 11 Meijer.com 2. Loosen the middle 2 sets of nuts and bolts to change the 3. Install the new scraper bar and fasten it securely to the worn rubber plate, assemble and tighten it on reverse step snow thrower with 2 screws (Fig. 26). (Fig.
-
Page 12: Figure
Serial #: Figure 30 Automatic Reset The Snow Joe SJ622E/SJ623E has a built in automatic reset function. In the event of a major obstruction halting the auger, simply unplug your unit, clear auger obstruction, wait 60 seconds and resume use. - Page 13 Meijer.com NOTES...
- Page 14 Snow Joe seller. If in the event your efforts are unsatisfactory, please write to the Snow Joe Center at the above address. If you have any questions about your product warranty, please call 1-866-SNOW-JOE or visit us online at www.snowjoe.com.
Need help?
Do you have a question about the Ultra SJ622E and is the answer not in the manual?
Questions and answers