Table of Contents
Advertisement
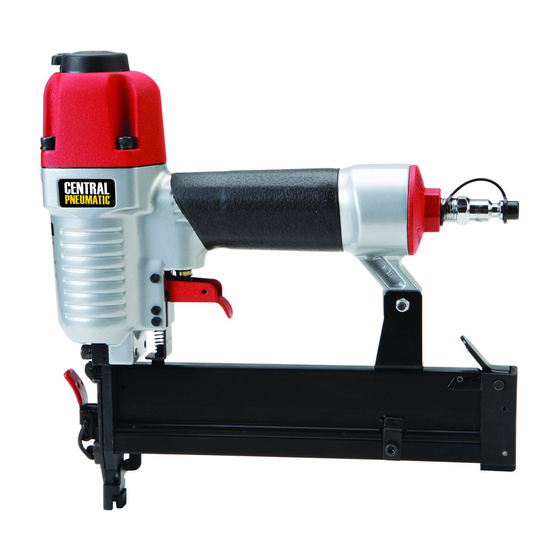
20 GAUGE WIDE CROWN
SET UP AND OPERATING INSTRUCTIONS
Visit our website at: http://www.harborfreight.com
Read and understand tool labels and
manual. Failure to follow warnings could
result in DEATH or SERIOUS INJURY.
SAVE THIS MANUAL.
©
Copyright
2010 by Harbor Freight Tools
contained herein may be reproduced in any shape or form without the express written consent of
Harbor Freight Tools. Diagrams within this manual may not be drawn proportionally. Due to continuing
improvements, actual product may differ slightly from the product described herein. Tools required for
assembly and service may not be included.
For technical questions or replacement parts, please call 1‑800‑444‑3353.
AIR STAPLER
Model
®
. All rights reserved. No portion of this manual or any artwork
68029
Advertisement
Table of Contents

Related Manuals for Central Pneumatic 68029


Summary of Contents for Central Pneumatic 68029
- Page 1 Harbor Freight Tools. Diagrams within this manual may not be drawn proportionally. Due to continuing improvements, actual product may differ slightly from the product described herein. Tools required for assembly and service may not be included.
-
Page 2: Symbol Definitions
TO A RISK OF FIRE, ELECTRIC could result in minor or moderate injury. SHOCK, OR INJURY TO PERSONS NOTICE is used to address practices not related to personal injury. Page 2 For technical questions, please call 1‑800‑444‑3353. SKU 68029... -
Page 3: Work Area
WARNING – Remove finger from the trigger when not driving fasteners. SKU 68029 For technical questions, please call 1‑800‑444‑3353. Page 3... -
Page 4: Air Source
Such maintained tools. There is a risk of gases are capable of explosion and bursting if the tool is damaged. serious injury to persons. Page 4 For technical questions, please call 1‑800‑444‑3353. SKU 68029... - Page 5 11. Disconnect the tool from the air supply an elevated location, and secure air when: hose to prevent falls from bystanders a. Unattended. accidentally pulling on it. b. Performing any maintenance or repair. SKU 68029 For technical questions, please call 1‑800‑444‑3353. Page 5...
- Page 6 If abnormal common sense and caution are factors vibration occurs, stop immediately. which cannot be built into this product, but must be supplied by the operator. SAVE THESE INSTRUCTIONS. Page 6 For technical questions, please call 1‑800‑444‑3353. SKU 68029...
-
Page 7: Specifications
Assembly Diagram near the end of Attach an air hose to the compressor’s this manual. air outlet. Connect the air hose to the air inlet of the tool. Other components, such SKU 68029 For technical questions, please call 1‑800‑444‑3353. Page 7... - Page 8 Air Tool & Spray Gun Portable Setup Page 8 For technical questions, please call 1‑800‑444‑3353. SKU 68029...
- Page 9 Air Tool & Spray Gun Stationary Setup SKU 68029 For technical questions, please call 1‑800‑444‑3353. Page 9...
-
Page 10: Work Piece And Work Area Set Up
10. If the tool will not be used at this time, nearby that will present a hazard while turn off and detach the air supply, safely working. discharge any residual air pressure, and Page 10 For technical questions, please call 1‑800‑444‑3353. SKU 68029... -
Page 11: Loading The Tool
If an automatic oiler is not used, add a few drops of Pneumatic Tool Oil to the airline connection before use. Add a few drops more after each hour of continual use. SKU 68029 For technical questions, please call 1‑800‑444‑3353. Page 11... -
Page 12: Clearing Jams
Magazine Bar (38) all the way flammable, causing an explosion. back to the engaged position. Use a Note: These procedures are in addition to screwdriver to release the jammed the regular checks and maintenance Page 12 For technical questions, please call 1‑800‑444‑3353. SKU 68029... -
Page 13: Troubleshooting
3. Replace damaged components. 4. Dirty, worn or damaged valve. 4. Clean or replace valve assembly. Follow all safety precautions whenever diagnosing or servicing the tool. Disconnect air supply before service. SKU 68029 For technical questions, please call 1‑800‑444‑3353. Page 13... -
Page 14: Please Read The Following Carefully
Note: If product has no serial number, record month and year of purchase instead. Note: Some parts are listed and shown for illustration purposes only, and are not available individually as replacement parts. Page 14 For technical questions, please call 1‑800‑444‑3353. SKU 68029... - Page 15 Assembly Diagram SKU 68029 For technical questions, please call 1‑800‑444‑3353. Page 15...
- Page 16 Limited 1‑Year Warranty Harbor Freight Tools Co. makes every effort to assure that its products meet high quality and durability standards, and warrants to the original purchaser that this product is free from defects in materials and workmanship for the period of one year from the date of purchase (90 days if used by a professional contractor or if used as rental equipment).
Need help?
Do you have a question about the 68029 and is the answer not in the manual?
Questions and answers
I am looking for the parts to load the staples on a 68029 Central pnuematic stapler
To load staples in a Central Pneumatic 68029 stapler, the relevant parts involved are:
- Drive Guide (Part 35)
- Upper Magazine (Part 37)
- Magazine Bar (Part 38)
- Push Rod (Part 41)
- Push Rod Spring (Part 42)
- Magazine Release (Part 49)
These parts work together to hold and guide the staples during loading and operation.
This answer is automatically generated
I am looking for the load spring for a Central pneumatic stapler. I also need any parts to load the staples
The available load spring and staple loading parts for the Central Pneumatic stapler model 68029 include:
- Push Rod (Part 41)
- Push Rod Spring (Part 42)
- Spring Hook (Part 43)
- Magazine Bar (Part 38)
- Upper Magazine (Part 37)
- Magazine Release (Part 49)
These parts are involved in loading and holding the staples in place during tool operation.
This answer is automatically generated