
Related Manuals for Lorex LHD200


Summary of Contents for Lorex LHD200
- Page 1 DIGITAL VIDEO SURVEILLANCE RECORDER Instruction Manual C O N N E C T I V I T Y English Version 1.0 RETAIL INDUSTRY BUSINESS HOME BUSINESS OUTDOOR LHD200 ECO HD SERIES www.lorextechnology.com Copyright © 2013 Lorex Technology Inc.
- Page 2 Thank you for purchasing the ECO HD Series Digital Video Surveillance Recorder. This manual refers to the following models: • LHD204 (4-channel) • LHD208 (8-channel) For the latest online manual, downloads and product updates, and to learn about our complete line of accessory products, please visit our website at: www.lorextechnology.com CAUTION...
-
Page 3: Need Help
For all other matters, visit www.lorextechnology.com By Phone: North America: : 1-888-425-6739 Customer Service (for warranty matters) (1-888-42-LOREX) : 1-877-755-6739 Tech Support (for technical/installation issues) (1-877-75-LOREX) Mexico: 001-800-681-9263, 001-800-514-6739 International: +800-425-6739-0 (Example: From the UK, dial 00 instead of +) - Page 4 1-888-425-6739 (1-888-42-LOREX) Asistencia técnica Soutien technique (para asuntos técnicos o de instalación) (pour les questions d’ordre technique ou relatives à 1-877-755-6739 (1-877-75-LOREX) : 1-877-755-6739 (1-877-75-LOREX) l’installation) Mexique : 001-800-681-9263, 001-800-514-6739 Mexico: 001-800-681-9263, 001-800-514-6739 Internacional: +800-425-6739-0 International : +800-425-6739-0 (par exemple : à partir du Royaume-Uni, composez le 00 au lieu de +)
- Page 5 Please make sure to register your product at www.lorextechnology.com to receive product updates and technical support THIS PRODUCT MAY REQUIRE PROFESSIONAL INSTALLATION LOREX IS COMMITTED TO FULFILLING YOUR SECURITY NEEDS • We have developed user friendly products and documentation. Please read the Quick Start Guide and User Manual before you install this product.
- Page 6 ESTE PRODUCTO PUEDE EXIGIR UNA IN- CE PRODUIT PEUT NÉCESSITER UNE STALACIÓN PROFESIONAL INSTALLATION PROFESSIONNELLE LOREX S’ENGAGE À RÉPONDRE À VOS LOREX SE COMPROMETE A SATISFACER BESOINS EN MATIÈRE DE SÉCURITÉ SUS NECESIDADES EN SEGURIDAD • Favor de leer la guía de instalación rápida y la •...
-
Page 7: Important Safeguards
Important Safeguards In addition to the careful attention devoted to quality standards in the manufacture process of your product, safety is a major factor in the design of every instrument. However, safety is your responsibility too. This sheet lists important information that will help to ensure your enjoyment and proper use of the product and accessory equipment. - Page 8 Installation (Continued) Service Ventilation Servicing - Slots and openings in the case are - Do not attempt to service this product provided for ventilation to ensure reliable operation of yourself, as opening or removing covers may expose the product and to protect it from overheating. These you to dangerous voltage or other hazards.
- Page 9 NOTICES FCC/IC Notice: This equipment has been tested and found to comply with the limits for a Class B digital device, pursuant to Part 15 of the FCC Rules. These limits are designed to provide reasonable protection against harmful interference in a residential installation. This equipment generates, uses, and can radiate radio frequency energy and, if not installed and used in accordance with the instruction, may cause harmful interference to radio communications.
- Page 10 All trademarks belong to their respective owners. No claim is made to the exclusive right to use the trademarks listed, other than the trademarks owned by Lorex Technology Inc. We reserve the right to change models, configurations or specifications without notice or liability. Product may not be exactly as shown. Images are simulated.
-
Page 11: Table Of Contents
Lorex Stratus Connectivity ........ - Page 12 Recording........... . . 21 Event Recording .
- Page 13 Configuring DDNS settings ............44 Alarm .
- Page 14 Lorex Player 11 Interface Overview ........
- Page 15 Lorex Player Mac Interface ........
-
Page 17: Getting Started
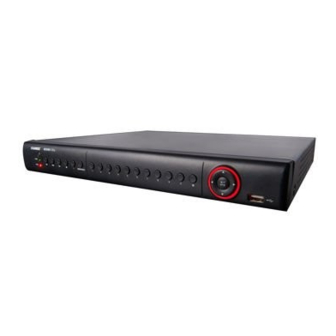
Getting Started The system comes with the following components: DVR (DIGITAL VIDEO RECORDER) REMOTE CONTROL 12V DC POWER SUPPLY (may not be exactly as (may not be exactly as shown) shown) USB MOUSE ETHERNET CABLE HDMI CABLE QUICKSTART GUIDES DOCUMENTATION CD HARD DRIVE SIZE, NUMBER OF CHANNELS, AND CAMERA CONFIGURATION MAY VARY BY MODEL. -
Page 18: Front Panel
Front Panel IR Sensor: IR receiver for the remote control. LED Indicators: • PWR: Power LED. • HDD: Hard disk activity LED. Menu & Playback Controls: • : In Playback Mode, press to rewind. Press repeatedly to increase rewind speed. ... - Page 19 Navigation Buttons: • : Press to move cursor up. • : Press to move cursor down. • : Press to move cursor left. • : Press to move cursor right. PTZ/ • Within system menus, press to confirm a selection. •...
-
Page 20: Rear Panel
Rear Panel 4-Channel 8-Channel HD SDI Video Input: Connect HD-SDI cameras. eSATA: Connect a self-powered eSATA external hard drive (not included) for data backup. IR-EXT: Service only; not supported. Audio Input: RCA inputs for audio-enabled cameras (not included) or self-powered microphones (not included). -
Page 21: Basic Setup
Basic Setup Step 1: Connect the HD-SDI Cameras • Connect the HD-SDI cameras to the HD SDI Video Input ports on the rear panel of the DVR. For details, see “Connecting Cameras” on page 9. 8-channel model shown Push and twist the BNC connector clockwise to secure it to the BNC port. -
Page 22: Step 4: Connect The Monitor
Basic Setup Step 4: Connect the Monitor • Connect the included HDMI cable from the HDMI port to the TV or monitor (recommended) OR; • Connect a VGA cable (not included) from the VGA port to the monitor. 8-channel model shown HDMI Step 5: Connect the Power Adapter and Power on the DVR •... -
Page 23: Step 6: Upgrade Firmware To Latest Version (If Available)
Basic Setup Step 6: Upgrade Firmware to Latest Version (if Available) If a firmware upgrade is available, you will be asked to install it once the DVR starts up. It is required to upgrade your system to the latest firmware version to enable remote connection to the system. -
Page 24: Default System Password & Port Numbers
This system features the exclusive Lorex Stratus connectivity service. This is a cloud connectivity service that allows you to connect to your system over the Internet via a secure handshake with Lorex’s Stratus servers. This means you can easily connect to your system without requiring any network configuration. -
Page 25: Connecting Cameras
Basic Setup Connecting Cameras This DVR is only compatible with 1080P HD-SDI cameras; regular BNC ATTENTION: cameras will not work. Cameras differ in terms of installation or mounting instructions. Please see the documentation that came with your camera(s) for specific installation instructions. About HD-SDI HD-SDI is a standard for transmitting un-compressed, high definition video along high-grade coaxial cables (such as RG59). -
Page 26: Connecting Hd-Sdi Cameras To Your Dvr
Basic Setup Adjust the camera stand to ensure that the camera has a satisfactory view of the area you would like to monitor. Stand configuration depends on the mounting surface you have chosen (see below for suggested stand configurations). Table Mount Wall Mount Ceiling Mount Camera model not be exactly as shown... -
Page 27: Mouse Control
Mouse Control Mouse Control The DVR is designed for mouse navigation. To use a USB mouse (included), connect the mouse to a USB port on the DVR. 8-channel model shown USB port Use the mouse buttons to perform the following: •... -
Page 28: Remote Control
Remote Control Remote Control You can also control the DVR using the included remote control. REC: Press to resume recording after recording has been stopped. • SEARCH: Press to open the Search menu. • Number Keys (1-0): In Live Viewing Mode, press to open the desired channel in Full-screen view. -
Page 29: Using The On-Screen Display
Using the On-Screen Display Using the On-Screen Display Use the system’s graphical on-screen display to navigate menus and configure options and settings. 1. Date & Time 2. Record Status 3. Channel number / Channel Title Date & Time: Displays the date and time on the system Record Status: Displays the current recording status of the system: C=continuous (normal recording);... -
Page 30: Using The Menu Bar
Using the On-Screen Display Using the Menu Bar The Menu Bar allows you to access the Main Menu and control basic functions of the DVR. To access the Menu Bar: Right-click or move the mouse cursor to the bottom of the screen to access the Menu Bar. PIP1X1 PIP1X2 Zoom Split screen... -
Page 31: Using The Virtual Keyboard And Mini-Keyboard
Using the On-Screen Display Using the Virtual Keyboard and Mini-Keyboard You can input numeric or text values using the on-screen virtual keyboard. You will need to use the Virtual Keyboard when entering your User ID and Password. The Virtual Mini-Keyboard is used to input numeric values, such as the time and date. To use the Virtual Keyboard: Using the mouse, click on an option or field, such as the User ID and Password fields (if passwords are enabled). -
Page 32: Using The Zoom Mode
Using the On-Screen Display Using the Zoom Mode Zoom Mode allows you to zoom in on an image while viewing your cameras live. This can be useful if you want to get a closer look at a situation. To use the Zoom Mode: In Live Viewing Mode, select the channel you want to zoom in on in full-screen (double-click the channel if you are in a Split-screen View). -
Page 33: Using Picture In Picture (Pip) Mode
Using the On-Screen Display Using Picture in Picture (PIP) Mode Picture in Picture (PIP) Mode allows you to view one channel in full-screen while viewing up to two other channels. To use Picture in Picture Mode: Right-click to open the Menu Bar and select the PIP1X1 button ( ) or PIP1X2 button ( PIP1X1 shows 1 channel in full screen and 1 other channel;... -
Page 34: Setting The Date And Time
• (Optional) NTP: Click the Setup button next to NTP to synchronize your DVR’s time and date with a Network Time Protocol (NTP) time server. Lorex provides a free NTP service that automatically updates your DVR’s time for Daylight Savings Time. -
Page 35: Configuring Daylight Savings Time (Dst)
Configuring Daylight Savings Time (DST) If your region observes Daylight Savings Time (DST), follow the instructions below to configure your DVR to automatically update the time when the clock updates. To enable automatic DST adjustments: Click the DST Setup button. DST Setup Configure the following: •... -
Page 36: Using A Ntp Server To Set Your System Time
Using a NTP Server to set your System Time A NTP (Network Time Protocol) server syncs your system time with an online time server. Lorex provides a free NTP service that allows your DVR to automatically update the time for Daylight Savings Time. -
Page 37: Recording
Recording Recording By default, the system is set to immediately record video from connected cameras in Continuous Recording Mode. • Recording—Continuous: Normal, continuous recording You can set the system to stop recording once the hard drive is full, or to continually record by overwriting previously recorded data. -
Page 38: Playback And Backup
Playback and Backup Playback and Backup You can view and back up recorded video on the system through the Search Menu. Playing Back Recorded Video To playback a specific date and time: Right-click to open the Menu Bar and click the Record Search button ( Enter the system user name (default: admin) and password (default: 000000) and click Apply. - Page 39 Playback and Backup To search for recorded footage on the DVR: Right-click to open the Menu Bar and click the Record Search button ( ). The Record Search tab opens. Configure the following: • CH: Select the channel you wish to search. Select All to search all channels. •...
-
Page 40: Using Playback Controls
Playback and Backup Using Playback Controls This system features advanced playback controls that allow you to see when you have recorded footage and motion events on your cameras. They also allow you to use digital zoom in playback mode or take backups from short video clips. Different playback controls appear depending on the number of cameras you have selected to playback. -
Page 41: Controlling The Time Range Of The Playback Bar
Playback and Backup Controlling the Time Range of the Playback Bar The time range is the start and end times of the footage displayed in the Playback bar. By default, the Playback bar displays recordings recorded on the day selected for playback (from 00:00~24:00). -
Page 42: Using Video Clip Backup
Playback and Backup Click and drag on the area of the screen you would like to enlarge. The image zooms in on the selected area. Click and drag to zoom in on an area Click and drag inside the box to move the zoom area Zoom icon Right-click to exit and select a different zoom area •... -
Page 43: Backing Up Video
Backup For details on viewing backed up video, see “Lorex Player 11: Playing Backed up Video on PC” on page 97 or see “Lorex Player for Mac: Viewing Backed up Video on Mac” on page 99. Backing Up Video You can back up video to a USB flash drive (not included) connected to the DVR. -
Page 44: Viewing Backed Up Video
For details on viewing backed up video, see “Lorex Player 11: Playing Backed up Video on PC” on page 97 or see “Lorex Player for Mac: Viewing Backed up Video on Mac” on page 99. Converting Backed Up Video to AVI Files The DVR saves its backup files as proprietary video files. - Page 45 Playback and Backup Select the desired file format (.264 , h.264, All File) that you wish to search for. Click Open. Open Click Start to convert and save the file in the default save folder. • Or click Save As to select a desired save folder, then click Start to convert the file. Save As Start Locate the file in the folder you selected in step 4.
-
Page 46: Managing Passwords
Managing Passwords Managing Passwords ATTENTION: By default, the system user name is and the password is . Passwords admin 000000 are enabled by default and are required to access the Main Menu. The password is required to log into the system remotely using a computer or mobile device. You will be prompted to create a custom password after you connect for the first time. -
Page 47: Adding Users
Managing Passwords Configure the following: • User Name: Enter the desired admin user name. • Password: Enter your desired password. • Confirm: Re-enter the password. Click Apply to save your settings. Adding Users You can allow multiple users to log in to the system. When adding different users, you can assign what menus they have access to. - Page 48 Select the menus and channels the user will have access to: Select the menus that the user will have access to. Select which channels will have access to: Backup, Preview, Playback and PTZ Control. Click Apply to save your settings. Configure the following: •...
-
Page 49: Using The Main Menu
Using the Main Menu Using the Main Menu To open the Main Menu: • Right-click to open the Menu Bar and click the Main Menu button ( ). Enter the system user name (default: admin) and password (default: 000000) and click Apply. Display: Configure display options (e.g. -
Page 50: Display
Using the Main Menu Display • U-L: Upper left hand corner. • D-L: Lower left hand corner. The display menu allows you • U-R: Upper right hand corner. to configure camera image • D-R: Lower right hand corner. settings and video output •... -
Page 51: Configuring The Time And Recording Time Display
Using the Main Menu In the Covert drop-down menu, select Click the drop-down menu beside VGA/ Enable. HDMI Resolution and select the output resolution. Click Apply to save your settings. Click Apply to save your settings. Configuring the Time and Right-click repeatedly to exit all menus. -
Page 52: Adjusting Menu Transparency
Using the Main Menu When the DVR restarts, click Yes to • Channel: Select the channel you wish to confirm the default resolution. configure. • Privacy Zone: Select ON to enable privacy NOTE: If your system resolution is already zones or OFF to disable privacy zones. in 1024 x 768, pressing and holding •... - Page 53 Using the Main Menu Under View Setup, select Enable. This lets Click the drop-down menus to select you select and arrange the channels you which channels to show on the screen and want to show on the screen. the arrangement of channels. NOTE: Enabling View Setup disables your ability to change channels the normal way.
-
Page 54: Record
Using the Main Menu Record disabled for the selected hour when the box is gray. The Record menu allows you to configure recording settings, such as the recording resolution, recording schedule, and audio recording. Configuring Pre-recording Settings Select the Rec Para tab. In the Channel drop-down menu, select the desired channel you wish to configure. -
Page 55: Configuring Recording Quality And Video Frame Rate
Using the Main Menu Configuring Recording Quality and Search Video Frame Rate The Search menu allows you You can configure the recording quality to search for saved video on and video frame rate for each channel. your system for playback and backup. -
Page 56: Backing Up Video Files
Click the Backup button to begin copying system. the video files to your flash drive. NOTE: You will need the Lorex Player (included on the CD) to view the saved files. Use the video control buttons to... -
Page 57: Using The Log Search
Using the Main Menu • CH: Select the channels you wish to Using the Log Search search. A log search allows you to search • Search Time: Enter the time range you system event logs. wish to search. To perform a Log search: •... -
Page 58: Network
Configuring Network NOTE: Port forwarding is not required to use Type: DHCP & Static IP the Lorex Stratus Connectivity service. For details on setting up The system has the ability to operate in remote connectivity, see DHCP mode and Static IP mode. -
Page 59: Adjusting Remote Connectivity Streaming Rates
To adjust the SubStream settings: From the Email drop-down menu, select Click the SubStream tab. from: • Default: Uses the Lorex email server to send out alarm notifications. This is the recommended selection. • Enable: Uses custom email server settings. -
Page 60: Configuring Ddns Settings
Right-click until you have exited all menus. You will be prompted to restart. Configuring DDNS settings Lorex DDNS is available as an optional connectivity option. Please see “Appendix E: DDNS Setup (Advanced)” on page 111 for details. -
Page 61: Alarm
Using the Main Menu Alarm • Sensitivity: Select motion sensitivity. The greater the number, the greater the The Alarm tab allows you to sensitivity. configure Motion Detection • Alarm Out: Select the checkbox to enable and Alarm settings. the system to trigger a device connected to the alarm block. -
Page 62: Device
Using the Main Menu Device To configure the Alarm tab: From the Alarm menu, click the Alarm The Device menu allows tab. you to configure hard drive and PTZ settings and format a USB flash drive (not included). • For details on connecting PTZ cameras (not included), see “Appendix B: Connecting a PTZ Camera”... -
Page 63: Formatting Usb Flash Drives
Using the Main Menu In the Overwrite drop-down menu, select To format an eSATA hard drive: Auto (recommended), or select the desired ATTENTION: Formatting an eSATA duration the hard drive should retain its all data hard drive erases on the data. -
Page 64: System
Using the Main Menu System Changing Video Output - NTSC & The System tab allows you to configure the system time To change the video output: and user accounts. In the Video Format drop-down menu, select NTSC or PAL. • For instructions on how to set the system Click Apply to save your settings. -
Page 65: Advanced
Using the Main Menu Advanced connect to the DVR over the Internet. The Advanced menu allows You can enable or disable firmware you to load system defaults, upgrade prompts from appearing. upgrade the system The system must be connected to the firmware, and configure Internet to enable automatic firmware automatic firmware updates. -
Page 66: Restoring To Factory Default Settings
Using the Main Menu To upgrade the system firmware: To load system defaults: In your web browser, visit Right-click to open the Menu Bar and click www.lorextechnology.com and search for the Main Menu button ( the model number of your DVR (check the label underneath your DVR for the model Click Advanced. -
Page 67: Restarting Or Shutting Down The Dvr
Using the Main Menu Restarting or Shutting Down the Configure the following: • Event Type: Select the event that triggers the system to send out a notification or To restart or shut down the DVR: alarm trigger. Choose from Disk No Space Right-click to open the Menu Bar and click (low hard drive space), Disk Error (hard drive error), or Video Loss. -
Page 68: Loading A System Configuration From A Usb Flash Drive
Using the Main Menu Click Save Settings. Wait for the system to save your settings. Click to save all system settings to a USB flash drive Loading a System Configuration from a USB Flash Drive Insert a USB flash drive (not included) that contains a saved configuration to a USB port. -
Page 69: Connecting To Your Dvr Over The Internet On Pc Or Mac
This section refers to Internet setup on PC or Mac, for smartphone/tablet setup, see “Mobile Apps: Accessing your DVR Using a Mobile Device” on page 80. Lorex Stratus Client System Requirements Prior to using Lorex Stratus Client, make sure your system meets or exceeds the following system requirements: Description Requirement ®... -
Page 70: Step 1 Of 3: Connect Your Dvr To Your Router
(Not Included) (Not Included) Step 2 of 3: Obtain the DVR’s Device ID The Device ID is a unique code that allows your system to handshake with the Lorex servers for connection over the Internet. To find the Device ID. -
Page 71: Step 3 Of 3: Connect To The Dvr Over The Internet
Software>Lorex Client Software - PC. Follow the on-screen instructions to install. • OR, download the Client Software for PC from www.lorextechnology.com. Once installation is finished, double-click the Lorex Stratus Client 1 icon ( ) from the desktop. The DVR login screen appears. -
Page 72: Mac
Client Software for Mac. Extract the installer file and double-click it to install. Open Safari, then click Safari>Quit Safari. This resets Safari to complete the installation. Open the Lorex Stratus Client ( ) from the Applications list. Select Device ID... -
Page 73: Using The Pc/Mac Client Software
Using the PC/Mac Client Software Using the PC/Mac Client Software Upon login, the Live tab opens. The Client Software interface is the same on PC or Mac. Navigation Tabs: Allows you to access the following tabs: • Live: Watch live video. •... -
Page 74: Changing Viewing Modes
• P2P (peer-to-peer) indicates that the video is streaming directly from the DVR to the computer running the Client Software. • RELAY indicates that the video is streaming through a Lorex video server. While relay mode is activated, the system will disconnect after 10 minutes of inactivity. Relay mode is only used when a direct connection cannot be made between the DVR and computer. -
Page 75: Taking Screen Shots
Using the PC/Mac Client Software Taking Screen Shots The system can take screen shots of a selected channel during live view. To take a screen shot of a channel: Click beside the desired channel to capture an image. A pop-up window opens on the bottom left corner of the window. Click Preview to view the image or Folder to show the image in the save folder. -
Page 76: Showing / Hiding Channels
Using the PC/Mac Client Software Showing / Hiding Channels The Active Channel List is a convenient way to show / hide the cameras that display in the main viewing window. To show or hide video in the main video window: Click beside the channel number to show a channel. -
Page 77: Changing The Save Directory Of Screenshots Or Recorded Video
Using the PC/Mac Client Software Changing the Save Directory of Screenshots or Recorded Video Click the Local Setting tab. Click beside the desired category to browse for a save directory. Local Setting tab Browse button Select the desired save directory, and then click OK. Click Save to save your changes. -
Page 78: Configuring Ptz Settings
Using the PC/Mac Client Software (Optional) Under Interval, select the maximum length (in minutes) for video saved on the remote computer. Click Save to save your changes. Configuring PTZ Settings The system supports remote PTZ controls for compatible PTZ cameras (not included). •... -
Page 79: Video Playback
Using the PC/Mac Client Software Video Playback Video playback allows you to watch video that has been saved in the DVR’s hard drive. To playback video: Click the Playback tab. Playback tab In the calendar window, click the desired month, year, and date. Select month and year Select date Under the Type drop-down menu, select the desired recording type you wish to search for... -
Page 80: Video Playback Controls
Using the PC/Mac Client Software Video Playback Controls Playback window Video content (green) Drag the line left or right to select the playback time Video slider Download Step Pause content Forward Volume Stop Play Stop all video Screen Capture • Step Forward: Plays video frame by frame. Click the Step Forward button to advance the video by 1 frame. -
Page 81: Configuring Privacy Zone Settings
Using the PC/Mac Client Software Configure the following: • Channel: Select the channel you want to modify. • Name: Enter the channel name if you want to re-name the channel • Position: Select the position of where the title appears in the channel. •... -
Page 82: Configuring Recording Parameters
Using the PC/Mac Client Software Configuring Recording Parameters To configure system recording parameters: Click the Remote Setting tab, and then click Record>Rec Parameters. Configure the following: • Channel: Select the channel you wish to configure. • Record: Select Enable or Disable to start or stop system recording. •... -
Page 83: Configuring System Recording Quality
Using the PC/Mac Client Software (Optional) Use the top Copy and Copy To drop-down to copy the recording schedule to a specific day or all days. Click Copy to copy the schedule. (Optional) Use the bottom Copy and Copy To drop-down to copy the recording schedule to a specific channel or all channels. -
Page 84: Configuring Basic Network Settings
Using the PC/Mac Client Software Configuring Basic Network Settings The basic network menu allows you to configure the network protocol type (DHCP or Static). To configure basic network settings: Click the Remote Setting tab, and click Network. Configure the following under Basic Configuration: •... -
Page 85: Configuring Email Notification Settings
To configure email notification settings: Click the Remote Setting tab, and click Network> Email. In the Email drop-down menu, select Default to use the default Lorex email server (recommended) or select Custom to use your own custom SMTP email server. -
Page 86: Configuring Ddns Settings
Click Save to save your settings. Configuring DDNS Settings Lorex DDNS is available as an optional connectivity option. Please see “Appendix E: DDNS Setup (Advanced)” on page 111 for details. The primary connectivity option uses the Lorex Stratus service to connect to your system over the Internet without requiring port forwarding or DDNS registration For details, See “Connecting to Your DVR Over the Internet on PC or Mac”... -
Page 87: Configuring Motion Detection Settings
Using the PC/Mac Client Software Configuring Motion Detection Settings To configure motion settings: Click the Remote Setting, and click Alarm>Motion. Configure the following motion recording parameters: • Channel: Select the channel you wish to apply the settings to. • Enable: Select this checkbox to enable motion recording. •... -
Page 88: Configuring Alarm Notifications
Using the PC/Mac Client Software Select the Enable checkbox. Beside the Buzzer drop-down menu, select the "beep" duration or select OFF to disable the "beep." In the video window, select the area you wish to monitor for motion. Click Save to apply your settings. Result: The system beeps when it detects motion, and a green "M"... -
Page 89: Configuring Hard Drive Recording Mode
Using the PC/Mac Client Software • Record Channel: Select the channels that the system should record during an alarm trigger. Click Save to apply your settings. Configuring Hard Drive Recording Mode To configure the hard drive recording mode: Click the Remote Setting tab, and click Device>HDD. Overwrite drop-down menu In the Overwrite drop-down menu, select Auto to enable overwrite mode. -
Page 90: Configuring The System Time And Date
Using the PC/Mac Client Software To configure PTZ settings: Click the Remote Setting tab, and click Device>PTZ. Configure the following: • Channel: Select the channel that the PTZ camera connects to. • Protocol: Select the protocol of the PTZ camera*. •... -
Page 91: Changing The System's Menu Time Out
Using the PC/Mac Client Software • Time Format: Select between 12 hour or 24 hour time formats. Select DST to enable daylight savings time, or NTP to sync the time with a NTP time server. NOTE: Using the NTP feature requires that your DVR have a constant Internet connection. Changing the System’s Menu Time Out To change the system’s time out menu: Click the Remote Setting tab, and click System>General. -
Page 92: Viewing System Information
Using the PC/Mac Client Software Select the menus that the user will have access to. Select the menus users will have access to Click Save to apply your settings. Viewing System Information To view system information: Click the Remote Setting tab, and click System>Info. Configuring Firmware Upgrades Firmware upgrades can provide improved functionality to your DVR. -
Page 93: Manually Upgrading System Firmware
Using the PC/Mac Client Software To configure firmware auto upgrades: Click the Remote Setting tab, and click Advanced>Auto Upgrade. Under Auto Upgrade, select Enable to enable automatic firmware updates. Messages for firmware upgrades will appear on the DVR locally and via remote software. Check Check for update to enable local messages on the DVR to notify you for updates. -
Page 94: Restoring Default Settings
Using the PC/Mac Client Software Beside Upgrade File Path, click the browse button ( ). Locate the firmware, and click Open. Click Start to begin the firmware upgrade. Follow the on-screen instructions to complete the firmware upgrade. NOTE: Your system may have to restart after a firmware upgrade. Restoring Default Settings To restore the system’s system defaults: Click the Remote Setting tab, and click Advanced>Load Default. -
Page 95: Configuring Auto-Reboot
Using the PC/Mac Client Software • Buzzer: Select OFF to enable/disable the system buzzer or select the duration of the system buzzer after an event occurs. • Show Message: Select the checkbox to enable the system to display a warning message when an event occurs. -
Page 96: Mobile Apps: Accessing Your Dvr Using A Mobile Device
For the latest device compatibility list, visit www.lorextechnology.com iPhone / iPad Use the Lorex ECO Stratus application to connect to your DVR on the iPhone or iPad. NOTE: Resolution is scaled up for the iPad screen. Prerequisites • iOS version 5.0 and above. - Page 97 Mobile Apps: Accessing your DVR Using a Mobile Device Tap Device Manager. Tap Device Manager Tap +. Tap + Under Name, enter a name for your DVR of your choice. Press the QR code icon ( ) next to Device ID and line up the QR code on the top of the DVR using the ...
- Page 98 Mobile Apps: Accessing your DVR Using a Mobile Device Tap + in one of the display areas and select the channel you would like to view. Select a channel Tap + If this is the first time connecting, you will be prompted to change the DVR password. Tap OK. Tap OK Enter the new password and tap Done.
-
Page 99: Lorex Eco Stratus Interface
Mobile Apps: Accessing your DVR Using a Mobile Device Lorex ECO Stratus Interface You can use Lorex ECO Stratus in both portrait and landscape mode. Tap a channel to select Double tap to view a channel in full screen Disconnect selected... -
Page 100: Using Remote Playback Mode On Iphone/Ipad
Mobile Apps: Accessing your DVR Using a Mobile Device To view manual recordings, see “Viewing Screenshots” on page 85. Using PTZ Controls If you have a PTZ camera (not included) connected, you may control it using the app. NOTE: You must configure the system to communicate with the PTZ camera locally before you can control it using the app. -
Page 101: Viewing Screenshots
You can view screenshots or email them using the app. NOTE: To email screenshots, you must have an email account configured in the Email app. Lorex does not support the Email app. Please refer to your iPhone/iPad user’s guide or www.apple.com if you need support to set up the Email app. -
Page 102: Viewing Manual Recordings
Mobile Apps: Accessing your DVR Using a Mobile Device Tap the screenshot you would like to view. Tap the screenshot you would like to view Swipe left or right to select screenshot Send screenshot as Delete screenshot email attachment Begin slideshow (tap inside the picture to stop the slideshow) Viewing Manual Recordings You can view manual recordings using the app. -
Page 103: Using Device Manager To Manage Dvr's
Mobile Apps: Accessing your DVR Using a Mobile Device Using Device Manager to Manage DVR’s You can use the Device Manager to add, delete, or modify your DVR’s. To delete a DVR: From the Main Menu, tap Device Manager. Swipe to the right on the DVR you would like to delete and tap Delete. Swipe right to delete a DVR Tap Delete to confirm. -
Page 104: Android
Mobile Apps: Accessing your DVR Using a Mobile Device Android Use the Lorex ECO Stratus application to connect to your DVR on an Android smartphone or tablet. NOTE: The instructions below may differ depending on the model of your Android device. - Page 105 Mobile Apps: Accessing your DVR Using a Mobile Device Tap the QR code icon ( ) next to Device ID, and use the camera on your device to line up the QR code on the top of the DVR. Enter Device Name If your device does not have a Tap icon to scan QR code camera, manually enter the...
- Page 106 Mobile Apps: Accessing your DVR Using a Mobile Device You will be prompted to change the DVR password. Tap Confirm. Tap Confirm Enter the new password and tap Save. This password will be used to connect to your system from now on. Enter the new password Tap inside one of the display areas and then tap Select.
-
Page 107: Lorex Eco Stratus Interface
Mobile Apps: Accessing your DVR Using a Mobile Device Lorex ECO Stratus Interface. Tap a channel to select Double tap to view a channel in full screen Disconnect selected Manual PTZ Controls channel Recording Select Screenshot channel Taking Screenshots during live view or playback. - Page 108 Mobile Apps: Accessing your DVR Using a Mobile Device Taking Manual Recordings during live view or playback. • If taking manual recordings from live view: Tap the grid area you would like to start recording on. Tap again when you would like to stop recording. •...
-
Page 109: Using Remote Playback Mode On Android
Mobile Apps: Accessing your DVR Using a Mobile Device Using Remote Playback Mode on Android Remote Playback Mode allows you to view recorded video saved on your DVR’s hard drive. To use remote playback mode: From the Main Menu, tap Remote Playback. Tap Select Channel. -
Page 110: Viewing Screenshots
Manual Record Viewing Screenshots You can view screenshots or share them using the app. NOTE: To share screenshots, you must configure the apps used for sharing. Lorex does not support 3rd party applications. To view screenshots: From the Main Menu, tap Image Manager. -
Page 111: Viewing Manual Recordings
Mobile Apps: Accessing your DVR Using a Mobile Device To share screenshots: to share. Select an app that you would like to share the file with. Follow the app’s instructions to share the file. Select the sharing app Viewing Manual Recordings You can view manual recordings using the app. -
Page 112: Using Device Manager To Manage Dvr's
Mobile Apps: Accessing your DVR Using a Mobile Device Using Device Manager to Manage DVR’s You can use the Device Manager to add, delete, or modify your DVR’s. To delete a DVR: From the Main Menu, tap Device Manager. Press and hold on the DVR you would like to delete and then tap Delete. Press and hold to delete To modify a DVR: From the Main Menu, tap Device Manager. -
Page 113: Lorex Player 11: Playing Backed Up Video On Pc
Lorex Player 11: Playing Backed up Video on PC Lorex Player 11 allows you to view your backed up video files from your DVR on your PC. NOTE: To view backed up video files on Mac, see “Lorex Player for Mac: Viewing Backed up Video on Mac”... -
Page 114: Lorex Player 11 Interface Overview
Lorex Player 11: Playing Backed up Video on PC Lorex Player 11 Interface Overview Click here to open the Advanced Config menu Video Window Add file Remove file Delete file Hide/reveal playlist Rewind Fast Forward Open File Play Stop Previous... -
Page 115: Lorex Player For Mac: Viewing Backed Up Video On Mac
DVR for the model number). Navigate to the product page for your DVR model and download Video Player for MAC. Extract the file and double-click the Lorex Mac Player installer (.pkg) file. Follow the on-screen instructions to install the software. -
Page 116: Loading Individual Video Files
Lorex Player for Mac: Viewing Backed up Video on Mac Loading Individual Video Files To load files saved onto your hard drive: Click the Load new file button ( Browse and select the desired file. Click Open to add the file to the video playlist. -
Page 117: Appendix A: System Specifications
Appendix A: System Specifications Appendix A: System Specifications As our products are subject to continuous improvement, Lorex Technology Inc. and its subsidiaries reserve the right to modify product design, specifications, and prices without E&OE notice and without incurring any obligation. -
Page 118: Appendix B: Connecting A Ptz Camera
Appendix B: Connecting a PTZ Camera Appendix B: Connecting a PTZ Camera You can connect HD-SDI RS-485 PTZ cameras (not included) to the RS485 ports on the rear panel. HD-SDI PTZ cameras are required to use PTZ functions. Regular BNC PTZ cameras are not compatible with the DVR. -
Page 119: Using The Ptz Menu (Local Dvr)
Appendix B: Connecting a PTZ Camera To enter PTZ camera settings in the DVR: Right-click to open the Menu Bar and click the Main Menu button ( ). Enter the system password. Click Device and select the PTZ tab. Configure the following according to your PTZ camera’s specifications: •... -
Page 120: Ptz Presets And Ptz Cruise
Appendix B: Connecting a PTZ Camera Use the on-screen PTZ controls to control the camera. Channel: Speed Slider: Select the channel the PTZ Increase or decrease the pan and tilt camera connects to. speed Direction keys: Camera Pre-set Click the + and - symbols to controls adjust the camera Zoom,... -
Page 121: Selecting Ptz Presets
Appendix B: Connecting a PTZ Camera Selecting PTZ Presets In the No. field, select the number of the preset you would like to select. Click Go to to go to the preset. Deleting PTZ Presets In the No. field, select the number of the preset you would like to delete. Click Clear to delete the preset and click Save to save your changes. -
Page 122: Appendix C: Recording Audio
Appendix C: Recording Audio Appendix C: Recording Audio The system can also record audio for up to 4 channels (4-channel models) or 8 channels (8-channel models). You must have audio-capable cameras (not included) or self-powered microphones (not included) in order to record audio on the system. 8-channel model shown Connect an RCA audio cable from the camera into the corresponding Audio INPUT port... -
Page 123: Appendix D: Replacing The Hard Drive
Appendix D: Replacing the Hard Drive Appendix D: Replacing the Hard Drive The system comes with a pre-installed SATA hard drive. You can expand the system with a maximum of two 4TB 3.5" or 2.5" SATA hard drives (for a maximum storage space of 8TB). NOTE: It is recommended to use surveillance or security-certified hard drives, which are designed to be reliable over long periods of time while recording 24/7. -
Page 124: Installing The Hard Drive
Appendix D: Replacing the Hard Drive and remove the hard drive from the bracket. Replace the hard drive bracket and hard drive bracket screws. Remove hard drive bracket Remove the hard drive screws • If your system has a 2.5" hard drive, turn the DVR over carefully. Hold the hard drive in place and remove the 4 screws securing the hard drive. - Page 125 Appendix D: Replacing the Hard Drive the hard drive to the bracket. Place the hard drive and bracket back in the DVR with the power and data connectors facing the middle and replace the hard drive bracket screws. Insert the hard drive screws Remove hard drive bracket Replace hard drive bracket •...
-
Page 126: Formatting The Hard Drive
Appendix D: Replacing the Hard Drive Connect the power and data cables. Replace the DVR cover. Formatting the Hard Drive must If you replace the pre-installed hard drive, it be formatted in order to function properly with the system. on the hard disk. all data ATTENTION: Formatting the HDD erases This step cannot be undone. -
Page 127: Appendix E: Ddns Setup (Advanced)
Appendix E: DDNS Setup (Advanced) Appendix E: DDNS Setup (Advanced) Free Lorex DDNS service is available as an optional connectivity method to connect to your system over the Internet. DDNS Service is not required to connect to your DVR, since the system supports the new Lorex Stratus cloud connectivity solution. -
Page 128: Step 2 Of 3: Obtain The Dvr's Local Ip Address
To connect using the DVR’s local IP address on a PC: Insert the software CD that comes included with the system. Open the CD and click DVR Software>Lorex Client Software - PC. Follow the on-screen instructions to install. • OR, download the Client Software for PC from www.lorextechnology.com. -
Page 129: To Connect Using The Dvr's Local Ip Address On A Mac
Appendix E: DDNS Setup (Advanced) Once installation is finished, double-click the Lorex Stratus Client 1 icon ( ) from the desktop. The DVR login screen appears. Select IP Login Enter IP address Enter User Name (default: admin) Enter Password (default: 000000) -
Page 130: Ddns Setup-Access Your Dvr Remotely Over The Internet
Appendix E: DDNS Setup (Advanced) Open the Lorex Stratus Client ( ) from the Applications list. Select IP Login Enter IP address Enter User Name (default: admin) Enter Password (default: 000000) Enter Client Port (default: 9000) Click Login Under Login Type, select IP Login. -
Page 131: Step 1 Of 4: Port Forwarding
Step 2 of 4: Create a DDNS Account Lorex offers a free DDNS service for use with your system. A DDNS account allows you to set up a web site address that points back to your local network. This allows you to connect to your system remotely. - Page 132 Appendix E: DDNS Setup (Advanced) The My Lorex account login screen opens (if you are already logged in, skip to step 4). Create a new account or log into an existing account. To create a new account, fill in the required fields on the right and click Create Account.
- Page 133 Appendix E: DDNS Setup (Advanced) Under Your Address, select an address or click Enter a New Address to create a new address. Fill in your address information and click Create Address. Enter your address information Click Create Address Fill in the warranty registration form with your product and purchase details. Check the sticker underneath your DVR for the Product Model Number and Serial Number.
- Page 134 Appendix E: DDNS Setup (Advanced) A page pops up to prompt you to register your product for Lorex DDNS. Click Set Up a New DDNS. Click Set Up a New DDNS Configure the following: Select your product warranty Enter a Device Name of your choice Enter the product’s...
-
Page 135: Step 3 Of 4: Enable Ddns On The Dvr
Appendix E: DDNS Setup (Advanced) • URL Request: Enter the web site address that will be used to connect to your Lorex product. , the address to access your video will be tomsmith For example, if you enter http://tomsmith.lorexddns.net Click Save to register your product for DDNS. -
Page 136: Step 4 Of 4: Connect To The Dvr's Ddns Address
To connect using the DVR’s DDNS address on a PC: Install the Lorex Stratus Client 1 on a remote computer. Once installation is finished, double-click the Lorex Stratus Client 1 icon ( ) from the desktop. The DVR login screen appears. - Page 137 Appendix E: DDNS Setup (Advanced) Open the Lorex Stratus Client ( ) from the Applications list. Select IP Login tomsmith.lorexddns.net Enter DDNS address Enter User Name (default: admin) Enter Password Enter Client Port (default: 9000) Click Login Under Login Type, select IP Login.
-
Page 138: Troubleshooting
Troubleshooting Troubleshooting When a malfunction occurs, it may not be serious and can be corrected easily. The following describes the most common problems and solutions. Please refer to the following before calling Lorex Technical Support: Error Possible Causes Solutions • System is not •... - Page 139 Troubleshooting Troubleshooting (Continued) Error Possible Causes Solutions • There is no picture • Monitor/TV not detected by DVR • Power off the monitor/TV and DVR. Power on the on monitor/TV after monitor/TV, and then power on the DVR connecting it to the •...
Need help?
Do you have a question about the LHD200 and is the answer not in the manual?
Questions and answers