Fujitsu LifeBook T901 Series User Manual
Tablet pc
Hide thumbs
Also See for LifeBook T901 Series:
- User manual (415 pages) ,
- Operating manual (140 pages) ,
- Bios manual (27 pages)
Table of Contents
Advertisement
Quick Links
Copyright
Fujitsu Limited has made every effort to ensure
the accuracy and completeness of this document.
However, as ongoing development efforts are
continually improving the capabilities of our
products, we cannot guarantee the accuracy
of the contents of this document. We disclaim
liability for errors, omissions or future changes.
LifeBook is a trademark of Fujitsu Limited.
Microsoft, Windows, MS, MS-DOS, Windows
NT, Windows XP, Windows Vista and Windows
7 are registered trademarks of the Microsoft
Corporation of the United States in the United
States and other countries.
Phoenix is a registered trademark of Phoenix
Technologies Corporation of the United States.
Copyright© 1981-1999 Microsoft Corporation,
All rights reserved.
Copyright© 1999 Phoenix Technologies, Ltd., All
rights reserved.
This device complies with Part 15 of the FCC rules. Operations are subject to the following two conditions:
(1) This device must not be allowed to cause harmful interference. (2) This device must accept any
interference received, including interference that may cause undesired operation.
Other product names are trademarks or registered
trademarks of their respective companies.
© Copyright 2010 Fujitsu Limited. All rights
reserved. No part of this publication may be
copied, reproduced or translated, without the
prior written consent of Fujitsu Limited. No part
of this publication may be stored or transmitted
in any electronic form without the written consent
of Fujitsu Limited.
Operations are subject to the following two
conditions:
(1) This device may not be allowed to cause
harmful interference.
(2) This device must accept any interference
received, including interference that may cause
undesired operation.
Website: www.hk.fujitsu.com/pc
DECLARATION OF CONFORMITY
according to FCC Part 15
Copyright
i
Advertisement
Table of Contents
Troubleshooting

Subscribe to Our Youtube Channel
Related Manuals for Fujitsu LifeBook T901 Series


Summary of Contents for Fujitsu LifeBook T901 Series
- Page 1 Copyright Copyright Other product names are trademarks or registered Fujitsu Limited has made every effort to ensure trademarks of their respective companies. the accuracy and completeness of this document. However, as ongoing development efforts are © Copyright 2010 Fujitsu Limited. All rights continually improving the capabilities of our reserved.
-
Page 2: Important Safety Instructions
9. If an extension cord is used with this product, IMPORTANT SAFETY make sure that the total ampere rating of the INSTRUCTIONS equipment plugged into the extension cord 1. Read these instructions carefully. Save these does not exceed the extension cord ampere instructions for future reference. - Page 3 Copyright 13. CAUTION: When replacing the battery, Proper Disposal of Battery be sure to install it with the polarities in Under federal, state or local law, it may be illegal the correct position. There is a danger of to dispose of batteries by putting them in the explosion if the battery is replaced with rubbish bin or trash cans.
- Page 4 If you send this product to Fujitsu, or any of its industrial use. affi liates, suppliers, service providers or resellers for repair, Fujitsu does not guarantee the data This product is not designed for or intended for integrity.
- Page 5 Copyright Call Attempts/Retries: AUSTRALIAN WARNINGS WARNING Applications software shall be confi gured so that no more than 3 attempts are made to establish a FOR SAFETY REASONS, ONLY CONNECT connection to a given number (Note: if the modem EQUIPMENT WITH A TELECOMMUNICATIONS can detect service tones, up to 10 attempts can COMPLIANCE LABEL.
- Page 6 Some parameters required for compliance NEW ZEALAND WARNINGS with Telecom’s Telepermit requirements are The grant of a Telepermit for any item of terminal dependent on the equipment (PC) associated equipment indicates only that Telecom has with this device. The associated equipment shall accepted that the item complies with minimum be set to operate within the following limits for conditions for connection to its network.
- Page 7 Copyright B. If you are located in New Zealand NOTE: Modem setting in Windows Vista/Windows 7 1. Click start select Control panel select “Phone and Modem Options”. A. If you are located in Australia 2. Choose “New Zealand in What Country/ region are you in now? pull down menu 1.
-
Page 8: Table Of Contents
® Fujitsu LifeBook T901 Series Tablet PC Table of Contents Pen and Active Digitizer ..... 23 Using the Pen ..........23 Calibrating the Pen ........24 PREFACE Replacing the Pen Tip........24 About This Guide ..........3 Using the Active Digitizer ......25 LifeBook Tablet PC/ Security Buttons ...... - Page 9 Note: Backup and Restore • For more detailed information, you can down- OmniPass User Profi les ......48 load a soft copy from our Fujitsu website: OmniPass Control Center Overview ..... 50 http://www.hk.fujitsu.com • For Wireless LAN information, please refer Version Information ........
- Page 11 Preface...
-
Page 13: Preface
T901 Series Tablet PC is compatible with the ® PC AT, and it comes with Windows XP Tablet Edition pre-installed. Your LifeBook T901 Series Tablet PC is a The warning icon highlights information completely selfcontained unit with an active- that can be hazardous to either you, your matrix (TFT), touchscreen color LCD display. -
Page 15: Getting To Know Your Tablet Pc
Getting to Know Your Tablet PC... -
Page 17: Locating The Controls And Connectors
Locating the Controls and Connectors Connectors and peripheral interfaces on the Figures 2-4 through 2-7. The table below provides LifeBook T901 Series Tablet PC and the optional a short description of each icon on the LifeBook Port Replicator allow you to connect a variety T901 Series Tablet PC. -
Page 18: Top And Front Components
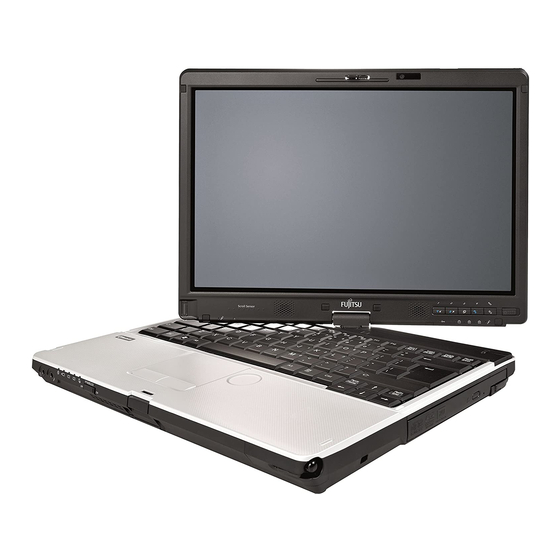
Figure 2-4. LifeBook T901 Series Tablet PC with display open Top and Front Components 4. Speakers The built-in dual speakers provide stereo The following is a brief description of the top and sound. front features of the LifeBook T901 Series Tablet PC. - Page 19 Getting to Know Your Tablet PC 7. Spill Resistant Keyboard 12. Built-in Microphone A full-function keyboard with dedicated The built-in microphones allow for a clearer Windows keys. audio input. 13. Fingerprint Sensor The Fingerprint Sensor provides an alternative Spill resistant keyboard does not imply the way to Windows logon authentication and keyboard is water-proof.
-
Page 20: Left-Side Panel Components
Figure 2-5. LifeBook T901 Series Tablet PC left-side panel Left-Side Panel Components Following is a brief description of your Tablet PC’s left-side components. (Figure 2-5) 1. Pen The pen is used as the interface with the active digitizer display. 2. Modular Bay The Modular Bay can accommodate one of the following devices. -
Page 21: Right-Side Panel Components
Getting to Know Your Tablet PC Figure 2-6. LifeBook T901 Series Tablet PC right-side panel Right-Side Panel Components 5. USB 3.0 Port The USB 3.0 port allow you to connect Following is a brief description of your Tablet PC’s Universal Serial Bus devices. USB 3.0 right-side components. -
Page 22: Rear Panel Components
Figure 2-7. LifeBook T901 Series Tablet PC rear panel Rear Panel Components 4. LAN (RJ-45) Jack The optional internal LAN (RJ-45) port is used for an internal Fast Ethernet (Gigabit 1. Anti-theft Lock Slot Ethernet 1000/100/10Mbps) connection. The anti-theft lock slot allows you to attach an optional physical lock-down device. -
Page 23: Bottom Components
Getting to Know Your Tablet PC Figure 2-8. LifeBook T901 Series Tablet PC bottom panel Bottom Components 4. Port Replicator Connector This connector allows you to connect the Following is a brief description of your Tablet PC’s optional Port Replicator. -
Page 24: Status Indicator Led
The Status Indicator displays symbols that is being charged. correspond with a specifi c component of your LifeBook T901 Series Tablet PC. These symbols 3. Battery Level Indicators ((1, 2, tell you how each of those components are The two Battery Level Indicators state the operating. -
Page 25: Battery Level Indicators
Getting to Know Your Tablet PC 7. Caps Lock Indicator ( 4. Disk/Optical Drive Access Indicator ( The Caps Lock indicator states that your This indicator turns on when an internal keyboard is set to type in all capital letters. hard disk drive or an optical drive device or a removable disk drive is being accessed. -
Page 26: Operating Status Indicator Led
2. Built-in Battery Pack Level OPERATING STATUS Indicator Lamp ( INDICATOR LED This lamp indicates remaining level of the built-in battery pack. • Blue lamp is lit When the power is turned off, the status Remaining battery level: 100% – 50% display LEDs are all OFF except for during •... -
Page 27: Running The Notebook On Its Battery
Getting to Know Your Tablet PC RUNNING THE NOTEBOOK ON ITS BATTERY When the batter y is 90% or more charged, it cannot be recharged even if Recharging the battery the AC adapter is connected. The battery can be recharged when its power level (i.e. -
Page 28: Running The Notebook On Its Battery
Running the notebook on its Checking the power level of battery the battery When the notebook is turned on or when the This section describes the steps to run the notebook on its internal standard battery. battery is being charged, the Battery Level indicators turns on with different color to show the power level of the battery. -
Page 29: Low Battery Condition
Getting to Know Your Tablet PC Low battery condition When the battery is discharged to a very low level, the battery level indicator on the status indicator LED turns red. If it turns red, connect the AC adapter to your notebook immediately to recharge the battery. -
Page 30: Display Panel
Display Panel 1. Lift the display until it is perpendicular to the keyboard. (Figure 2-12) Your LifeBook T901 Series Tablet PC contains a 2. When the display is perpendicular to the display panel that is backlit for easier viewing in keyboard, rotate it 180 degrees in either bright environments. -
Page 31: Adjusting Display Panel Brightness
Getting to Know Your Tablet PC Figure 2-14. Display rotated completely Figure 2-12. Fully open display Figure 2-15. System in tablet confi guration Adjusting Display Panel Brightness Once you have turned on your Tablet PC, you Figure 2-13. Rotating the display may want to adjust the brightness level of the screen to a more comfortable viewing level. - Page 32 The higher the brightness level, the more power the LifeBook T901 Series Tablet PC will consume and the faster your batteries will discharge. For maximum battery life, make sure that the brightness is set as...
-
Page 33: Pen And Active Digitizer
The pen has three switches: a tip switch and a barrel button toggle switch with switches You can use the LifeBook T901 Series pen to at both ends. When activated, the tip switch generate and create electronic “ink”, to select... -
Page 34: Calibrating The Pen
• To move the cursor, hold the pen tip within Replacing the Pen Tip 1/8 inch (3-5mm) from the screen and move With use, the pen tip may become worn or may the pen. pick up foreign particles that can scratch the screen. -
Page 35: Using The Active Digitizer
Getting to Know Your Tablet PC Using the Active Digitizer The integrated Active Digitizer allows you to use the included pen as a pointing device. You can use the pen to click, double-click, drag items and icons, or to draw like a pen or pencil in applications that support this behavior, such as drawing or painting programs. -
Page 36: Lifebook Tablet Pc/Security Buttons
(3) Button 3 (2) Application B Button (4) Button 4 Figure 2-21. LifeBook T901 Series Tablet PC Security/Tablet PC Buttons LifeBook Tablet PC/Security the buttons are used to enter the password, and the fi fth is used as an Enter button. See the right- Buttons hand column of Table 2-2. -
Page 37: Changing Tablet Pc Button Functions
Calculator. Pressing the Fn button twice in succession Page Up/Application B Button causes the Fujitsu Utility Menu to appear on When you press the Page Up button when the your screen, allowing you to modify certain system is running, each press of the button will system settings. -
Page 38: Setting Up Lifebook Security Panel
The user and supervisor password may be set 3. Type in: on this Tablet PC. A supervisor password is C:\Program Files\Fujitsu\Security typically the same for all tablets and notebooks Panel Application\Supervisor\ in a work group, offi ce, or company to allow for FJSECS.EXE, then press [Enter]. -
Page 39: Using Your Lifebook Security Panel
Getting to Know Your Tablet PC Using Your Lifebook Security Panel Precautions Opening and Closing the Cover The security lock feature is in effect both when the system resumes from Off, Standby, or By default, closing the cover automatically places Hibernation state. - Page 40 Removing Security Panel Application with 2. Go to the Utilities\Security Panel Application\ Passwords Still Active User folder on the CD and double-click the setup.exe fi le. The Installing Security Panel Using this feature will not allow any changes to Application window will appear. Follow the the password.
- Page 41 Getting to Know Your Tablet PC...
-
Page 43: Using Your Tablet Pc
Using Your Tablet... -
Page 45: Power Sources
2. Plug the Auto/Airline adapter into the cigarette Power Sources lighter of an automobile with the ignition key in Your LifeBook T901 Series Tablet PC has two the On or Accessories position. possible power sources: a primary Lithium ion battery and an AC adapter. -
Page 46: Starting Your Tablet Pc
The Power/Suspend/Resume button is used to Tablet PC’s BIOS. When your Tablet PC is fi rst turn on your LifeBook T901 Series Tablet PC turned on, the main system memory is empty, and from its off state. Once you have connected your it needs to fi... -
Page 47: Power Management
Using Your Tablet PC Power Management Suspend Mode Suspend or Standby mode in Windows saves Your Fujitsu LifeBook notebook has many the contents of your LifeBook notebook’s options and features for conserving battery system memory during periods of inactivity by power. -
Page 48: Hibernation (Save-To-Disk) Feature
Hibernation (Save-To-Disk) Feature The Hibernation feature saves the contents of If you are running your LifeBook notebook your LifeBook notebook’s system memory to on battery power, be aware that the the hard drive as a part of the Suspend/Resume battery continues to discharge while your mode. -
Page 49: Windows Power Management
Using Your Tablet PC Windows Power Management Power Off Before turning off the power, check that the hard The Power Options icon located in the Windows drive/ optical drive access indicator is off. If you Control Panel allows you to confi gure some of turn off the power while accessing a disk there is the power management settings. -
Page 50: Using Fi Ngerprint Authentication
• Canceling password-protected screen Using fi ngerprint saver authentication* You can lock your computer if the screen saver is password-protected. However, you With fi ngerprint authentication, you can omit have to cancel this lock when canceling the entering a user name and a password by just screen saver. -
Page 51: Omnipass Enrollment Wizard
Using Your Tablet PC OmniPass Enrollment Wizard Figure 2: OmniPass Enrollment Wizard – User Name & Password Figure 1: OmniPass Enrollment Wizard - Welcome The OmniPass Enrollment Wizard guides the user through the process of enrolling an OmniPass user. If you do not see the screen at Startup, you can invoke the wizard by clicking on the Windows taskbar;... - Page 52 As seen in Figure 5, upon successful verifi cation, the window will show a green capture in the window and the text Verifi cation Successful beneath the window. Click Next to proceed. OmniPass recommends that you enroll at least two fi ngers (see Figure 6) and if you choose to enroll the second fi...
- Page 53 Using Your Tablet PC Figure 10: OmniPass Enrollment Wizard – Backup File Password Figure 8: OmniPass Enrollment Wizard – Backup User Profi le To proceed, click Next. In this section of user enrollment, you are required to back up the newly created user profi...
-
Page 54: Omnipass Password Replacement Function
OmniPass Password Replacement function In this section of the OmniPass Password Replacement function, you will learn how you can teach OmniPass of your login credentials. You can authenticate with OmniPass the next time you gain access to the website where you have taught OmniPass with the set of login credentials. - Page 55 Using Your Tablet PC 5. Next, you will be prompted to enter a • Automatically enter this password Friendly Name for the website. protected site when it is activated. Do not prompt for authentication is a less • It is recommended that you input a name secure option.
-
Page 56: Password Management
Password Management You can manage your passwords through an interface in OmniPass. Double-click the OmniPass key in the system tray and click on Manage Your Passwords. Under the Password Protected Dialog, you can choose the website remembered by OmniPass and manage the credentials by clicking Unmask Values. -
Page 57: File And Folder Encryption
Using Your Tablet PC File and Folder Encryption If you choose to encrypt a folder, the folder and all the fi les in this folder will be encrypted. Contents in C:\Windows and C:\Program Besides managing passwords for the Files and the folder where OmniPass is password-protected resources, OmniPass installed cannot be encrypted. -
Page 58: Backup And Restore Omnipass User Profi Les
As mentioned earlier, when encrypting a folder, the folder and all the fi les in this folder will be encrypted. Files that are copied into this encrypted folder will also be encrypted. The fi les in this folder can be read and modifi ed and they will be encrypted automatically once Sample icon for encrypted fi... - Page 59 Using Your Tablet PC Restore OmniPass User Profi le To restore a user profi le, select the Restore a user’s OmniPass profi le and select the profi le to be restored. The user profi le contains all your user specifi c OmniPass data.
-
Page 60: Omnipass Control Center Overview
OmniPass Control Center Manage Your Passwords Overview Please refer to Password Management section for the Manage Your Passwords portion of the Control Center. The OmniPass Control Center can be accessed by the following:- • Clicking on the Windows taskbar; select All Programs; select Softex; click Protect Your Files OmniPass Control Center In this portion of the OmniPass Control Center,... - Page 61 Using Your Tablet PC Change Your System Settings Change Your User Settings With this selection, you can adjust your OmniPass system settings refer to the setting preferences such as: Audio setting, Taskbar of your OmniPass software and the setting tips, Authentication Window setting and File will apply to all the users who logs on to the Encryption setting.
- Page 62 Run Enrollment Wizard Note: The OmniPass guide indicated in this manual serves as a rough guide to the usage In this portion, you can add/remove user to/ of the OmniPass software and the diagram from OmniPass, backup/restore a user’s may differ from the version installed in the OmniPass profi...
-
Page 63: Version Information
Using Your Tablet PC Version Information Scrolling Version information on fi ngerprint The Fingerprint sensor now comes with a authentication utility is displayed in the left- scrolling function. Taking advantage of the hand-side pane of the window. sensor’s technology, users will be able to scroll up and down a document by swiping the fi... -
Page 64: Shock Sensor Utility
Shock Sensor Utility General information The Shock Sensor Utility is designed to decrease the risk of damage to the computer’s hard disk drive (HDD) in the event of excessive impact or vibration. Additionally, the Shock Sensor Utility has the ability to improve the security of the computer by automatically locking the computer with a password when it is carried. - Page 65 Using Your Tablet PC • Ignore keyboard action • The Shock Sensor works only when a user When the keyboard is used, sensitivity is is logged onto the computer. It does not work temporarily lowered. when the computer is shut down, when a user is not logged on, when in sleep mode, •...
-
Page 67: User-Installable Features
User-Installable Features... -
Page 69: Lithium Ion Battery
Recharging the Batteries Lithium ion Battery If you want to know the condition of the primary Your LifeBook T901 Series Tablet PC has a Lithium ion battery, check the Battery Level Lithium ion battery that provides power for indicator located on the Status Indicator panel. The operating your Tablet PC when no external indicator changes as the battery level changes. -
Page 70: Replacing The Battery
Replacing the Battery Your LifeBook T901 Series Tablet PC comes with You may not be able to hear the alarm one battery pack; you might want to consider if the volume control is set too low or is purchasing a spare. By keeping a spare battery turned off by the hardware or software. -
Page 71: Memory Upgrade Module
5. Remove the memory upgrade module from Memory Upgrade Module the static guarded sleeve. Your Fujitsu LifeBook T901 Series Tablet PC 6. Align the memory upgrade module with the comes with a minimum of 256 MB of high speed component side up. Align the connector edge... -
Page 72: Removing A Memory Upgrade Module
2. Pull the clips sideways away from each side of the memory upgrade module at the same Your LifeBook T901 Series Tablet PC is designed time. to share system memory with video memory, 3. While holding the clips out, remove the... -
Page 73: Modular Bay Devices
Modular Bay Figure 4-6. Modular Bay Modular Bay Devices Your Fujitsu Tablet PC contains a Modular Bay. The CD or DVD drive in your Tablet PC is The Modular Bay can house an optical drive, a designed to work optimally when the system Lithium ion battery, and a weight saver. -
Page 74: Removing And Installing Modular Devices
Click [OK] to proceed, or [Cancel] to return to the utility. Confi gure When you click this menu item, the Fujitsu Tablet Show tray icon when CD/DVD drive is Controls window appears. locked: This checkbox should normally be checked. If... - Page 75 User-Installable Features 5. Slide the device you are installing into your 4. Slide your device out until it is clear of the bay. tablet until it clicks into place. This will require light force. 6. It is now safe to turn your tablet back on. 7.
-
Page 76: Port Replicator
You can use this port to connect to a TV with An optional Port Replicator is available from DisplayPort for high quality video output. Fujitsu to support your LifeBook T901 Series The DisplayPort supports both video and Tablet PC. The Port Replicator extends the audio output. -
Page 77: Front Panel Components
User-Installable Features Port Replicator Power On/Off Button Figure 4-9. Port Replicator front panel Front Panel Components Attaching the Port Replicator Following is a brief description of the optional Port To attach the Port Replicator, align the Port Replicator’s front panel components. Replicator connector on the bottom of your Tablet PC with the connector on the Port Replicator and Docking Port... -
Page 79: Troubleshooting
T r o u b l e s h o o t i n g Troubleshooting... -
Page 81: Troubleshooting
Troubleshooting 8. If you have tried the solutions suggested in the Troubleshooting Table without success, Your LifeBook T901 Series Tablet PC is sturdy contact your support representative. and subject to few problems in the fi eld. However, you may encounter simple setup or operating... - Page 82 Problem Possible Cause Possible Solution Audio Problem There is no sound The Software volume Adjust the sound volume control settings in your coming from the control is set too low. software, operating system and applications. built-in speakers Headphones are plugged Plugging in headphones disables the built-in into your Tablet PC.
- Page 83 T r o u b l e s h o o t i n g Problem Possible Cause Possible Solution Keyboard or Mouse Problems The built-in The Tablet PC has gone Push the Suspend/Resume button. keyboard does not into Standby mode. seem to work.
- Page 84 Problem Possible Cause Possible Solution Memory Problems Your memory upgrade Turn off your Tablet PC. Remove and re-install Yo u r Pow e r O n module is not properly your memory upgrade module. screen, or Info menu installed. of the BIOS setup utility information, does not show the You have a memory...
- Page 85 T r o u b l e s h o o t i n g Problem Possible Cause Possible Solution USB Device Problems You have installed The device is not properly Remove and re-install the device. installed. a USB device, but your Tablet PC does not recognize The device may have...
- Page 86 Problem Possible Cause Possible Solution Power Failures You turn on your The installed battery is Check the Status Indicator Panel to determine Tablet PC and completely discharged or the presence and condition of the battery. Install nothing seems to a charged battery or a Power adapter. there is no power adapter happen.
- Page 87 T r o u b l e s h o o t i n g Problem Possible Cause Possible Solution Power Failures Your Tablet PC The battery is dead. Replace the battery with a charged one or install will not work on a Power adapter.
- Page 88 The system The boot sequence settings powers up, and of the setup utility are key while the Fujitsu logo is on screen or use the displays power-on not compatible with your [F2] key and enter the setup utility and adjust the source settings from the Boot menu.
- Page 89 T r o u b l e s h o o t i n g Problem Possible Cause Possible Solution Video Problems Move the display and the brightness control until The built-in display The angle of the display you have adequate visibility. is blank when you and the brightness settings turn on your Tablet...
- Page 90 Problem Possible Cause Possible Solution Video Problems The display does A foreign object, such Remove all foreign objects from the keyboard. not close. as a paper clip, is stuck between the display and the keyboard. The display has If the spots are very tiny This is normal;...
Need help?
Do you have a question about the LifeBook T901 Series and is the answer not in the manual?
Questions and answers