Table of Contents
Advertisement
Advertisement
Table of Contents

Related Manuals for ION iED004


Summary of Contents for ION iED004
- Page 1 Reference Manual iED04 Digital Drum Station...
-
Page 3: Chapter 1: Introduction
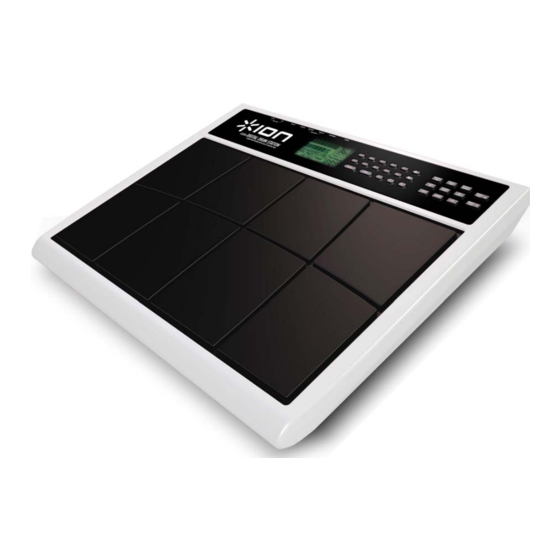
CHAPTER 1: INTRODUCTION 1.1 WELCOME TO THE IED04 DRUM MACHINE! The IED04 includes over 230 high-fidelity drum/percussion sounds, and is easy to operate. As you strike the 8 drum pads (each of which can be assigned to any of the available sounds), the IED04's on-board computer records exactly when you triggered the drum sound and the dynamics of your playing. -
Page 4: C How "Looping" Simplifies Recording
Breaking a song into Patterns saves time since elements of a song often repeat. Example: The second verse might have the same drum pattern as the first verse. Rather than record the same Pattern twice, simply record one Pattern, then list it twice when assembling a Song. This also saves memory (thus leaving room for more Patterns and Songs) since listing a Song step takes up much less memory than recording a Pattern. -
Page 5: D What's A Voice
STOP or switch over to Perform mode. You will hear any previously-played parts as you record new parts. You can also erase drum hits while the pattern is looping to correct for errors. 1.2D What's a Voice? Each of the 8 large pads triggers a voice. A voice is a sound-generating element with several variable parameters: Drum sound, tuning, volume, output assignment (the voice's audio output can go to either one of two sets of stereo outputs, and furthermore, to anywhere within the stereo field of the chosen set of outputs), and MIDI note number. -
Page 6: G Display Layout
entry buttons (0-9) and up arrow (increment, or INC) and down arrow (decrement, or DEC). The latter increase or decrease parameter values on step at a time. • Volume knob (on back of IED04). This knob regulates the volume of the entire unit. 1.2G Display Layout The LCD is divided into several "windows."... -
Page 7: H Text Protocols
• Selected function. This shows which function is currently selected: Drum Set, Record Setup, MIDI Setup, Util, or Step Edit. • Swing. In Compose mode, shows the current swing rhythm, expressed as a percentage (or OFF if swing is off). •... -
Page 8: Steps To Instant Gratification (Setup And Checkout)
1.4 10 STEPS TO INSTANT GRATIFICATION (SETUP AND CHECKOUT) 1. Connect the Main outputs (either left or right for a mono monitoring system, or both for stereo) to a high-quality musical instrument amplifier, PA, or plug the included headphones into the headphone output on the back of the iED04. - Page 9 PATTERN BEAT 001 USER PRESS PLAY PLAYING TEMPO PERFORM 9. Try the following: • Enter a two-digit number between 00-49 using the number keys, then press PLAY. • Press the INC (up arrow) button to select the next higher-numbered Preset Pattern. It will play at the end of the current Pattern.
-
Page 10: Chapter 2: Record Setup
CHAPTER 2: RECORD SETUP Several parameters are often adjusted prior to recording a Pattern, such as metronome, Pattern length, etc. General instructions are: 1. Press the RECORD SETUP button. 2. Use the PAGE (up and down) buttons to select different "pages" of functions; the display's lower right window shows the page number. -
Page 11: Select The Swing Value (Swing Select)
Quantization shifts your playing to the specified beat while you play, so choose the desired value before playing out your rhythms. Remember that you can also change quantization while recording if, for example, you want to record snare with eighth note quantization but high-hats with 16th note quantization. - Page 12 2.3 PAGE 3: ENABLE CLICK (METRONOME) AND SET RHYTHM (CLICK SELECT) The display shows CLICK SELECT; the Click window shows the click's rhythmic value. CLICK SELECT SETUP RECORD PAGE CLICK Enter the click value with the INC/DEC or number buttons (1 = quarter note, 2 = quarter note triplet, 3 = 8th note, 4 = 8th note triplet, 5 = 16th note, 6 = 16th note triplet, 7-0 = Click Off).
-
Page 13: Add/Remove Beats From Pattern Beginning ( Start)
The display says ### BEAT and LENGTH. This indicates a Pattern's length in beats (quarter notes). Enter the desired length with the INC/DEC or number buttons (this must be a three digit number; enter leading zeroes if necessary). To prevent accidental length alteration, you must press PLAY before the IED04 will store the new Pattern length. -
Page 14: Offset A Pattern Or Drum Part
what had been beats 002-008 will now be beats 001-007. Because a beat was removed, the Pattern will be 7 beats long. Changing START to 009 will add a beat to the beginning of the Pattern. What had been beats 001-008 will now be beats 002-009. - Page 15 001/00 DRUM STEP EDIT SWING OFF QUANTIZE If no drum event exists on this beat/sub-beat, the display will show no pad number, and EMPTY in place of volume data. To navigate through the steps at the current quantization rate, use the PAGE UP button to move forward or PAGE DOWN to move backward.
-
Page 16: Name The Pattern (Name)
2.8A Add a New Drum to a Step Use the PAGE buttons to select the step where the drum is to be added. Press the pad that corresponds to the sound you want to add. That drum, along with its volume (how hard the pad was struck), will be recorded into the displayed step. -
Page 17: Chapter 3: Playing Back/Recording Patterns
CHAPTER 3: PLAYING BACK/RECORDING PATTERNS 3.1 PLAYBACK/RECORD BASICS The PATTERN/SONG button chooses between Pattern and Song modes. For all of the following Pattern operations, Pattern mode must be selected, as confirmed by the display. PATTERN ROCK 1 PRESS PLAY TEMPO PERFORM 3.1A The Dual-Purpose Fill Button In addition to calling up Fill Patterns as described in the Introduction, the FILL button can also... -
Page 18: C Set Pattern Tempo
and MIDI parameters. You can therefore keep the groove going at all times, even while you make adjustments prior to recording another part. NOTE: Compose mode cannot be selected when using Preset Patterns, since they cannot be altered. If you wish to alter one of the Preset Patterns, copy it to an empty User Pattern first. -
Page 19: H Select Fill Patterns In Perform (Playback) Mode
003 NEXT PATTERN PATT24 USER PRESS PLAY PLAYING TEMPO PERFORM To select a new Pattern in Perform mode, enter the two-digit Pattern number. If an A Pattern is currently playing, the new Pattern number will play the A variation. If a B Pattern is currently playing, the new Pattern number will play the B variation. -
Page 20: I Record A Pattern
Fills cannot start on the downbeat since a Fill, by definition, starts at some point into the Main Pattern. However, anything you record on the Fill downbeat will play on the first downbeat following the Fill (i.e., the downbeat of the next Pattern). To show why this is a useful feature, consider that when coming out of a fill, you'll often want to hit something like a cymbal crash on the downbeat of the next Pattern yet not have that crash repeat every time the Pattern plays. -
Page 21: Erase Functions
3.1J Select New Patterns and Fills While in Compose (Record) Mode In Compose mode, Main Pattern selection works in the same manner as Perform mode— select a Pattern number (with the desired A or B designator), and the newly-selected Pattern will play back as soon as the current Pattern plays through its entire length. -
Page 22: Copy Functions
3. While holding down ERASE, press the pad corresponding to the sound to be erased just before the first event to be erased, and release just after the last event to be erased. To erase a single event, strike the pad on that single event. 3.2B Erase an Entire Pattern If you erase both Main and Fill Patterns associated with a numbered Pattern, or you erase a Main or Fill Pattern and the other is empty, the Drum Set assignment (but not its Drum Set... - Page 23 • If you copy from Main to Fill (or vice-versa) within a particular numbered Pattern, the destination will be erased and replaced with the source Pattern since Main and Fill Patterns must have the same length. This is useful if you want the Fill to contain variations on the Main Pattern—just copy the Main to Fill and make your additions/changes.
- Page 24 6. Press PLAY. The display says COPY DONE. 7. Release the COPY and PLAY buttons. 3.3C Copy a Single Drum Pad's Part to a Drum Pad in a Different Pattern This copy function merges the source drum pad rhythm with the destination drum pad rhythm in a different Pattern.
-
Page 25: Chapter 4: Creating Drum Sets
CHAPTER 4: CREATING DRUM SETS The IED04's 8 pads can be assigned to various drum sounds, with different levels, tuning, panning, triggering mode, and output jack assignment. Each set of pad parameters is given a number and collectively are called a Drum Set; each A and B user Pattern can have its own Drum Set assignment. -
Page 26: Assign Sounds To Pads
4.2 PAGE 2: ASSIGN SOUNDS TO PADS The display shows the currently selected pad number and the sound assigned to that pad. FATSNARE DRUM DRUM SET PAGE You can assign any of the IED04's sounds to any of the pads, or to more than one pad. Each individual Drum Set can have its own drum sound assignment. -
Page 27: Set Pad Stereo Position (Panning)
1. Press the pad (the display will show the pad number). 2. Enter the desired volume, from 00 (full off) to 99 (maximum volume), with the number or INC/DEC buttons. 3.When the display confirms your choice, either store the edits you've made (see section 4.8) or do more assignments by striking another pad to select it, then assigning the pad volume. -
Page 28: Set Triggering Mode (Asn Mode)
TUNING DRUM DRUM SET PAGE To change the tuning associated with a given pad: 1. Press the pad (the display will show the pad number). 2. Enter the desired tuning with the INC/DEC buttons. The range is from +3 (most sharp) to 0 (normal pitch) to -4 (most flat). -
Page 29: Save Drum Set (Save Set)
Single: When hitting a pad repeatedly, a new hit will automatically terminate any sound that is still decaying. This is useful with many percussion sounds (such as tambourine, agogo, etc.). Group 1 and 2: Pads assigned to a particular group (1 or 2) will cut each other off if a group pad is struck while another pad assigned to the same group continues to sound. -
Page 30: Manual Drum Set Override (Set Mode)
4.8 PAGE 8: MANUAL DRUM SET OVERRIDE (SET MODE) The display says SET MODE. Use the INC/DEC buttons to select PATT (each Pattern uses its assigned Drum Set) or MANUAL (the IED04 will retain the currently selected drum assignments regardless of which Pattern is chosen). Note: If changing Patterns doesn't call up different Drum Sets, this parameter is probably set to MANUAL instead of PATT. -
Page 31: Chapter 5: Song Mode
CHAPTER 5: SONG MODE 5.1 SONG MODE BASICS After creating the Patterns that make up a Song, it's time to string those Patterns together in a musically useful way. You can incorporate Preset Patterns, or a combination of Preset and User Patterns. -
Page 32: C Continue, Re-Start, Or Jump To Next Song Step
5.1C Continue, Re-start, or Jump to Next Song Step • In Compose mode, if you stop a Song and then press PLAY, the Song will continue from the first beat of the Pattern that was playing when STOP was pressed. •... -
Page 33: Real Time Song Creation
5.2 REAL TIME SONG CREATION To create a Song in real time (this assumes an empty song): 1. (Optional) In Pattern mode, select the Pattern you want for the first Song step. 2. Select Song mode and the desired Song number. 3. -
Page 34: B Add A Fill
3. Enter a two-digit Pattern number with the number buttons. If desired, choose between the A/B variations and Preset/User options. 4. If you want to enter another Pattern, press the INC button to move to the next step; or press the DEC button to return to a previous step and change its Pattern. -
Page 35: F Replace A Step
5.3F Replace a Step 1. The IED04 should be in Song and Compose modes. 2. Use the INC/DEC buttons to select the step number to be replaced. 3. Enter the new Pattern number (with appropriate A or B, Fill, or User/Preset options). Since the step is replaced, no renumbering of subsequent steps occurs. -
Page 36: Chapter 6: Midi Setup
CHAPTER 6: MIDI SETUP This menu accesses important MIDI functions. General instructions are: 1. Press the MIDI SETUP button. 2. Use the Page (up and down) buttons to select different "pages" of functions; the display's lower right window shows the page number. These pages are described below. 3. -
Page 37: Send Clock Data To Other Devices (Clockout)
6.2 PAGE 2: SEND CLOCK DATA TO OTHER DEVICES (CLOCKOUT) The display shows CLOCKOUT. To have the IED04 generate timing data at its MIDI out, use the INC/DEC buttons to select ON. Select OFF to inhibit MIDI timing signals from appearing at the MIDI out jack. -
Page 38: Chapter 7: Utility
5. Press the IED04 PLAY button. The IED04 display says SENDING MIDI… and the DD display says RECEIVING ION IED04 to indicate that data has been received. 6. To prevent future confusion, name the DD file using the DD NAME function. -
Page 39: Check Available Memory (Free Mem)
7.3 PAGE 2: CHECK AVAILABLE MEMORY (FREE MEM) When you select Page 2, the display will show the approximate amount of free memory available (expressed as a percentage of the total amount). Background It is important to check memory from time to time because the IED04 always requires some free memory for proper operation. -
Page 40: Chapter 8: Applications
CHAPTER 8: APPLICATIONS 8.1 MIDI SYNC APPLICATIONS 8.1A IED04 As MIDI Timing Master The IED04 can control several other slave MIDI drum machines or sequencers by turning on MIDI Clock Out, which sends IED04 timing information down the MIDI line. 1. -
Page 41: A Create Fills Quickly With The Copy Function
8.2A Create Fills Quickly with the Copy Function Many times a Fill will simply be a variation on another Pattern, but with a few minor differences to add variety or serve different musical purposes. To save time, use the Copy function to copy the main Pattern to the Fill, then add variations to the Fill in real time or with Step Edit mode. - Page 42 There are two eighth notes per quarter note. Thus, there are eight eighth notes per measure of 4/4 music. There are four16th notes per quarter note. Thus, there are sixteen 16th notes per measure of 4/4 music. There are eight 32nd notes per quarter note. Thus, there are thirty-two 32nd notes per measure of 4/4 music.
Need help?
Do you have a question about the iED004 and is the answer not in the manual?
Questions and answers