Table of Contents
Advertisement
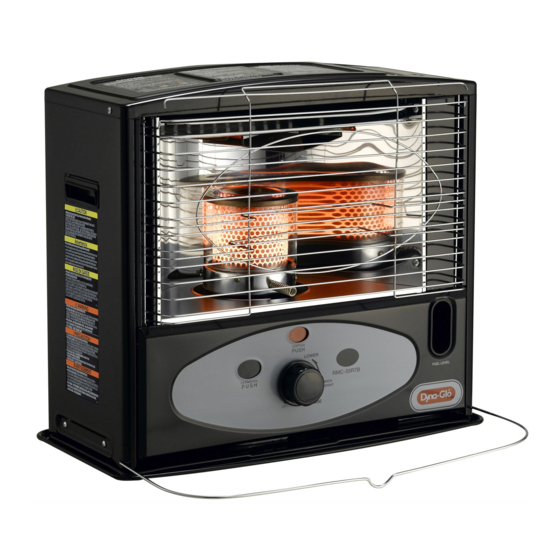
PORTABLE
KEROSENE-HEATER
"OWNER'S MANUAL"
MODEL : RMC- 55R7 / RMC- 55R7B
Before the first use of this heater, please read this OWNER'S MANUAL very
carefully. This OWNER'S MANUAL has been designed to instruct you as to the
proper manner in which to assemble the heater maintain the heater, store the
heater, and most importantly, how to operate the heater in a safe and efficient
manner. Please keep this manual for future reference.
GHP Group, Inc.,
Morton Grove, IL 60053-3207, USA
TELEPHONE : 1-877-447-4768
4221 - 0005 - 11
05/08 Rev. 04
Advertisement
Table of Contents

Related Manuals for Dyna-Glo RMC-55R7


Summary of Contents for Dyna-Glo RMC-55R7
- Page 1 Please keep this manual for future reference. GHP Group, Inc., Morton Grove, IL 60053-3207, USA TELEPHONE : 1-877-447-4768 4221 - 0005 - 11 05/08 Rev.
-
Page 2: Cautions-Safety Guide
CAUTIONS - SAFETY GUIDE - WARNING!! RISK OF EXPLOSION / RISK OF FIRE to fill the fuel reservoir area. This is normal for a cartridge tank kerosene heater. NEVER use any fuel other than water-clear 1-K kerosene or red dyed 1-K kerosene. WARNING!! NEVER use fuel such as gasoline, benzene, paint FAILURE TO INSTALL, MAINTAIN, AND/OR... -
Page 3: Table Of Contents
CONTENTS OF OWNER'S MANUAL PAGE PAGE ITEM ITEM CAUTIONS-SAFETY GUIDE 10~12 WICK REPLACEMENT INTRODUCTION CHECKING THE IGNITION SYSTEM FEATURES WICK ADJUSTER MECHANISM KEROSENE (1-K ONLY) AUTOMATIC SAFETY SHUT-OFF DEVICE UNPACKING AND ASSEMBLING LONG TERM STORAGE OF YOUR THE HEATER HEATER FUELING YOUR HEATER SPECIAL SAFETY PRECAUTIONS AUTOMATIC IGNITION SYSTEM... -
Page 4: Kerosene (1-K Only)
KEROSENE (1- K Only) It is EXTREMELY IMPORTANT to the operation of this heater that you use the proper grade of kerosene. The proper grade of kerosene is identified as 1-K Kerosene. DO NOT OPERATE THIS HEATER WITH ANY FUEL OTHER THAN 1-K KEROSENE! 1-K Kerosene has been refined to virtually eliminate contaminants such as sulphur, which can cause a rotten egg odor during operation of the heater. -
Page 5: Unpacking And Assembling
UNPACKING AND ASSEMBLING THE HEATER 1. REMOVE THE HEATER AND ALL PACKING MATERIALS FROM THE BOX.(Fig. 2) NOTE:Save the shipping carton and packing materials for Owner’s Manual future storage. 2. Open the grille from the right hand side, by pulling up on the lower right hand corner. -
Page 6: The Heater
FUELING YOUR HEATER NOTE : See section 3, page 3 on KEROSENE for instructions on the proper grade of kerosene to use with this heater. CAUTION : NEVER REMOVE THE CARTRIDGE TANK FROM THIS HEATER WHILE THE HEATER IS OPERATING OR WHILE THE HEATER IS STILL HOT. EXTINGUISH THE HEATER AND VERIFY THAT THE HEATER IS COOL TO THE TOUCH BEFORE REFUELING THE HEATER. -
Page 7: Automatic Ignition System
AUTOMATIC IGNITION SYSTEM For safety and convenience, this heater features an automatic ignition system. 2 “D” cell batteries, included with the heater, provide the power for the igniter which lights the wick once it has been raised to its maximum height. When the heater is fueled for the first time, allow a minimum of 60 minutes after filling the heater for the wick to absorb kerosene before you attempt to light the heater. -
Page 8: Adjusting The Wick
ADJUSTING THE WICK After lighting the heater, it is important to check the heater flame within the first 5-7 minutes of operation. After 5-7 minutes of operation, you should use the wick adjuster knob to obtain the proper flame height (see Fig 8). IF THE FLAME IS TOO YELLOW, TURN THE WICK ADJUSTER KNOB DOWN SLIGHTLY UNTIL YOU GET THE BLUE FLAME INDICATED IN FIG.8. - Page 9 NOTE : Carbon build-up on the wick may prevent the wick from completely lowering when the extinguish button is pushed. This can result In the flame not extinguishing. If this happens, continue to push the extinguish button and turn the wick adjuster knob in a counterclockwise direction (towards “OFF”) as far as it will go.
-
Page 10: Wick Maintenance
• • Inspect the batteries If the igniter filament does not get hot enough to ignite the wick and the igniter filament appears to be normal, replace the batteries. For best results use non-alkaline batteries only. • • Inspect the wick Inspect the wick before each use to see if carbon has accumulated on the wick. -
Page 11: Wick Replacement
WICK REPLACEMENT Wick replacement should be performed on a completely cool heater after the cartridge tank has been removed and the remainder of the kerosene in the heater has been burned off. Use only genuine replacement wick. Replacement wick number : Glowick 200-B, Kero-World 20401-U, Dura Heat DH-200, Pick-A-Wick-PW27. Open the tank cover and Unscrew 5 screws, two from the Remove the cabinet. - Page 12 Replacement wick has a The black line on the outside of Replace the wick and holder the wick should match the top in the burner tank. black line. edge of the holder. Rotate 90 degrees left and Fold the new wick and slide it Then press it against the teeth right as well as up and down into the holder.
- Page 13 Reinstall the wind cover. Remove the wick adjusting knob Reinstall the cabinet. once again, if it was reinstalled before. Step 22 Step 23 Step 24 Tighten 5 screws on the Reinstall the chimney and the Reinstall the wick adjusting cabinet cartridge tank.
-
Page 14: Checking The Ignition System
CHECKING THE IGNITION SYSTEM If the automatic ignition system fails to operate properly, perform the following checks: - BATTERIES - 2 “D” cell batteries are located at the rear of the heater. Check for proper installation. And / or Replace with new batteries. - IGNITE R PLUG - If the automatic ignition system still doesn’t work after replacing the batteries, check the igniter plug. -
Page 15: Long Term Storage Of Your Heater
TESTING THE AUTOMATIC SAFETY SHUT-OFF DEVICE: At least once a week during the heating season, it is important to test the safety shut-off device to be sure that it is operating properly. WITH THE HEATER TURNED OFF, raise the wick using the wick adjuster knob to the fully raised position. Grabbing the protective grille, give the heater a firm shake. -
Page 16: Special Safety Precautions
SPECIAL SAFETY PRECAUTIONS Where to use your kerosene heater - Only use a kerosene heater on a level surface. - Do not place a kerosene heater in a traffic areas such as an entrance or exit. Do not use a kerosene heater in a windy area. -
Page 17: Trouble Shooting Guide
TROUBLE SHOOTING GUIDE TROUBLES CORRECTIVE ACTION Heater Will Not Light ; 1. Fuel tank is empty 1. Fill tank with water-clear 1-K kerosene or red dyed 1-K kerosene. 2. Water present in kerosene 2. Drain tank. Remove wick assembly & replace wick. Reinstall wick assembly. -
Page 18: Parts List
BAFFLE ASS'Y VERTICAL REFLECTOR WS-CT06R BOTTOM REFLECTOR WS-CT07R CABINET HANDLE(RMC-55R7) WS-CT08R CABINET HANDLE(RMC-55R7B) WS-CT08RB CABINET(RMC-55R7) WS-CT09R CABINET(RMC-55R7B) WS-CT09RB FUEL INDICATOR WINDOW(RMC-55R7) WS-CT10R 10-1 FUEL INDICATOR WINDOW(RMC-55R7B) WS-CT10RB TOP FRONT PANEL WS-CT37R FRONT PANEL(RMC-55R7) WS-CT12R 12-1 FRONT PANEL(RMC-55R7B) WS-CT12RB WICK HOLDER GASKET...
Need help?
Do you have a question about the RMC-55R7 and is the answer not in the manual?
Questions and answers