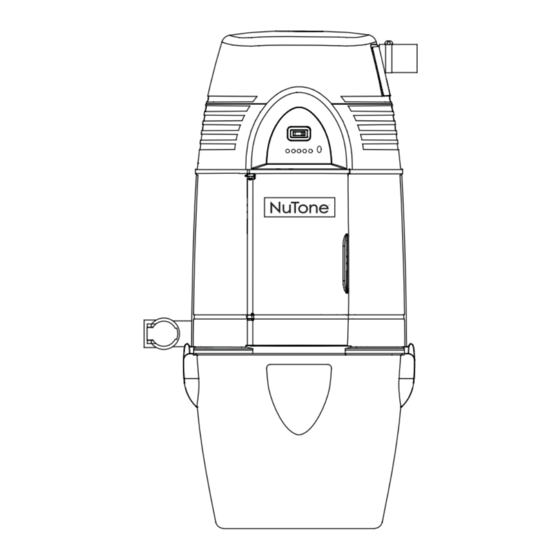
NuTone VX475CC User Manual
Central vacuum power unit
Hide thumbs
Also See for VX475CC:
- Installation tips & user manual (16 pages) ,
- Operating instructions manual (9 pages) ,
- Installation instructions manual (22 pages)
Table of Contents
Advertisement
INSTALLATION TIPS & USER GUIDE
CENTRAL VACUUM POWER UNIT
FOR RESIDENTIAL USE ONLY
!
!
AB0002
M
VX475CC, VX550CC
VX1040CC
ODELS
AND
V
.
.
C
V
S
I
I
ISIT WWW
NUTONE
CA FOR THE
ENTRAL
ACUUM
YSTEM
NSTALLATION
NSTRUCTIONS
B
-N
T
C
I
.; M
, O
.
.
1-888-882-7626
ROAN
U
ONE
ANADA
NC
ISSISSAUGA
NTARIO
WWW
NUTONE
CA
R
:
.
.
EGISTER YOUR PRODUCT ONLINE AT
WWW
NUTONE
CA
Advertisement
Table of Contents

Summary of Contents for NuTone VX475CC
- Page 1 INSTALLATION TIPS & USER GUIDE CENTRAL VACUUM POWER UNIT FOR RESIDENTIAL USE ONLY AB0002 VX475CC, VX550CC VX1040CC ODELS ISIT WWW NUTONE CA FOR THE ENTRAL ACUUM YSTEM NSTALLATION NSTRUCTIONS .; M 1-888-882-7626 ROAN ANADA ISSISSAUGA NTARIO NUTONE EGISTER YOUR PRODUCT ONLINE AT...
-
Page 2: Important Safety Instructions
page 2 IMPORTANT SAFETY INSTRUCTIONS SAVE THESE INSTRUCTIONS READ ALL INSTRUCTIONS BEFORE USING THIS APPLIANCE CAUTION HEN USING AN ELECTRICAL APPLIANCE BASIC PRECAUTIONS DO NOT REMOVE either of the TOP red cap plugs SHOULD ALWAYS BE FOLLOWED INCLUDING THE FOLLOWING that are glued to the unit. -
Page 3: Table Of Contents
WARRANTY ..................16 CENTRAL VACUUM SYSTEM INSTALLATION INSTRUCTIONS Please visit www.nutone.ca for the Central Vacuum System Installation Instructions System Planning and Layout,... -
Page 4: General Information
AR0040 MAKING A JOINT COMPLETING THE INLET ASSEMBLY AO0010 INLET MOUNTING CEMENTING FLEXIBLE TUBING PLATE AE0024A INSTALLING THE INLET SECURE WIRE TO TUBING AO0045 For more details on inlet installation, visit www.nutone.ca for the Central Vacuum System Installation Instructions. AO0011... -
Page 5: Power Unit Installation
WALL MINIMUM CLEARANCE DIMENSIONS 24” 24” TOP VIEW 30⅜” 30⅜” NuTone VX475CC: 11” 3/4” TYP. NuTone VX550CC and VX1040CC: 13¾” MOUNTING HOLES 24” MINIMUM TO CEILING UTILITY VALVE 12⅝” ⁄ ”... -
Page 6: Internal Wiring Diagrams
• VX475CC • VX550CC WHITE BLACK GREEN GREEN 120 VOLTS CAUTION BLUE NuTone VX475CC, VX550CC and VX1040CC power BLUE THERMAL CONTROL PROTECTOR units will attach to the lower intake connections. BLACK BOARD See Fig. 10. Utility valve can be installed on either side. -
Page 7: Grounding Instructions
– if it will not fit the outlet, have a proper outlet installed by a qualified electrician. Fig. 4 Fig. 5 NuTone VX475CC AND VX550CC NOTE: INLET LEADS TO BE CONNECTED TO POWER UNIT TERMINALS USING CRIMP CONNECTORS AND LOW VOLTAGE WIRE HARNESS. -
Page 8: For Models: Dlxkit800, Stdkit400, Stdkit800 And Whkit700
page 8 FOR MODELS: DLXKIT800, STDKIT400, STDKIT800 & WHKIT700 INSTALLING HOSE HANGER CONNECTING HOSE ’ CONT DUAL VOLTAGE HOSE IMPORTANT: Do not return the hose to the store. OPERATING HANDLE SWITCH LOW VOLTAGE HOSE DUAL VOLTAGE HOSE CONNECTING HOSE LOW VOLTAGE HOSE... -
Page 9: For Model: Dlxkit800
page 9 FOR MODEL: DLXKIT800 HOW TO ASSEMBLE POWER BRUSH/WAND/HANDLE CAUTION Always check underside of product for any obstructions prior to use. WARNING Never leave electric power brush unattended while it is plugged in. ANDLE TO ONNECTION AND TO OWER RUSH ONNECTION WAND AND HOSE COMPATIBILITY... - Page 10 page 10 HOW TO USE POWER BRUSH/WAND EDGE CLEANER CAUTION Always pick up hard or sharp objects by hand before using your power brush. Items such as pins, ELECTRONIC CIRCUIT BREAKER hairpins, tacks, crayons, etc., may damage the brush roll or may break the belt. WAND RELEASE AD0030 CAUTION...
-
Page 11: Maintaining The Power Brush
page 11 MAINTAINING THE POWER BRUSH HOW TO CHANGE BRUSH ROLL WARNING Disconnect electrical supply before servicing or cleaning the unit. Failure to do so can result in Fig. 6 electrical shock or personal injury from cleaner suddenly starting. Fig. 7 HOW TO CHANGE BELT WARNING Motor shaft can become hot during normal use. -
Page 12: For All Models
12 FOR ALL MODELS VACUUM POWER CONTROL EMPTYING THE DEBRIS PAIL WHEN TO EMPTY THE DEBRIS PAIL Fig. 10 Fig. 11 Reset . 10 . 11 CONTROL PANEL DIAGRAM A NuTone VX475CC Fig. 11 NuTone VX550CC and VX1040CC AC0001... - Page 13 page 13 EMPTYING THE DEBRIS PAIL CLEANING THE SECONDARY FILTER ’ CONT CLEANING THE INTERNAL FILTER completely Fig. 12 CAUTION Operating the power unit without the secondary filter will void the warranty. . 12 A. F ILTER REMOVAL NOTE: B. F ILTER REINSTALLATION NIT DOOR ECONDARY...
-
Page 14: Troubleshooting Guide
14 TROUBLESHOOTING GUIDE ROBLEMS OSSIBLE CAUSES OSSIBLE EMEDY Reset NOTE This applies only to NuTone VX550CC and VX1040CC. -
Page 15: Service Parts
15 SERVICE PARTS EPLACEMENT ARTS AND EPAIRS In order to ensure your ventilation unit remains in good working condition, you must use Broan-NuTone genuine replacement parts only. Broan-NuTone genuine replacement parts are specially designed for each unit and are manufactured to comply with all the applicable certification standards and maintain a high standard of safety. -
Page 16: Warranty
16 WARRANTY NUTONE MODELS VX475CC, VX550CC AND VX1040CC BROAN-NUTONE CANADA INC. During these time periods, IF YOU NEED ASSISTANCE OR SERVICE 1-888-882-7626...


Need help?
Do you have a question about the VX475CC and is the answer not in the manual?
Questions and answers