Table of Contents
Advertisement
Advertisement
Table of Contents

Related Manuals for AOpen XCmini MP67-D


Summary of Contents for AOpen XCmini MP67-D
- Page 1 XCmini Series Model Name: MP67-D/MP67-DU MP65-D/MP65-DU User Guide...
- Page 2 To minimize pollution and ensure utmost protection of the global environment, please recycle the product. For more information about the collection and recycling of Waste Electrical and Electronic Equipment (WEEE) , you are invited to visit our homepage at www.aopen.com under “Green Products” 廃棄上の指示...
- Page 3 Pour éliminer la pollution et assurer la plus grande protection de l’environnement global, réutilisez s’il vous plaît le produit. Pour plus d’informations sur la gestion des déchets d’Equipements Electriques et Electroniques (DEEE ou WEEE), vous êtes invité à visiter notre site à www.aopen.com sous “ Green Products” .
- Page 4 Schutzes der Umwelt recyceln Sie bitte das Produkt. Für mehr Informationen zum Sammeln und Recyceln von elektrischen und elektronischen Müll (WEEE) besuchen Sie bitte unsere Homepage unter www.aopen.com unter dem Punkt “Green Products”. Istruzioni per lo smaltimento (Italian) Per una migliore salvaguardia del nostro pianeta, si prega di non gettare questo dispositivo elettronico nei normali rifi...
- Page 5 Para más información acerca de dónde depositar y cómo reciclar Equipos Electrónicos y Desperdicios Electrónicos (WEEE), por favor, visite la página web www.aopen.com y entre en la sección Productos Ecológicos (“Green Products”). Kassering (Swedish) För att bättre värna om vår jord bör denna elektroniska utrustning ej kasseras tillsammans med...
- Page 6 Copyright Copyright of this publication belongs to AOpen Inc. AOpen reserves the right to change the content of this publication without obligation to notify any party of such changes or revisions. No part of this publication may be reproduced, transcribed, transmitted, translated into any language, stored in a retrieval system in any form or by any means electronically, mechanically, optically without the prior written permission of this company.
-
Page 7: Safety Instructions
Press the Eject button to retrieve the optical disc only after the in-use indicator goes off. 11. Ambient operation temperature: less than 0~35 ℃ . (Please reference our web site http://www.aopen.com) -
Page 8: Table Of Contents
Table of Contents Chapter 1 Getting Started ........................01 System Overview ......................01 Accessories List ....................... 02 Application Scenarios ..................... 04 The Front View ....................... 05 The Rear View ........................ 06 Rear Side I/O Connector ....................08 Chapter 2 Connecting Your System ....................09 Connecting to Video Display ................... - Page 9 viii...
-
Page 10: Chapter 1 Getting Started
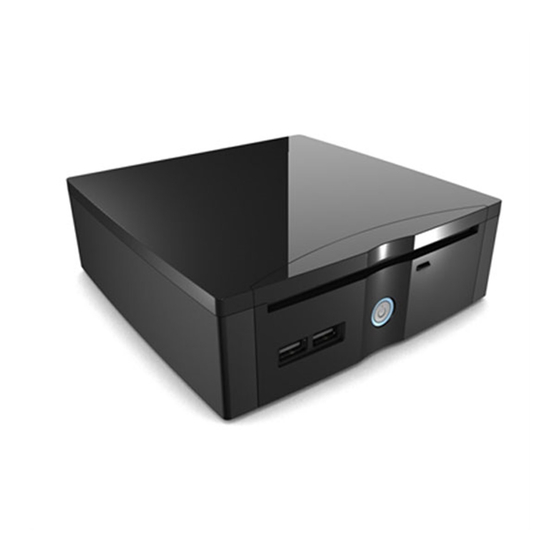
Chapter 1 Getting Started System Overview The system unit, measuring 167.5 by 167.5 by 54 mm, is one of the smallest Intel personal computers in the world. The system could be built with an Intel Arrandale processor and runs Microsoft Windows 7 system. The system could be equipped with optional slide-in DVD-RW and 2.5-inch high capacity hard disk drive. -
Page 11: Accessories List
Accessories List Driver CD Bundled Software (by Model) Riser Card 90W DC 20V PowerAdapter Power Cord S/PDIF Converter Screw of HDD (4pcs) Screw of SATA Card (2 pcs) - Page 12 Wireless Antenna DVI to VGA Converter (by Model) (by Model)
-
Page 13: Application Scenarios
Application Scenarios Study Scenario You can place your system together with an LCD video display, speakers, printer/scanner/fax, DSL (cable) modem, or other peripheral devices in your study. Living Room Scenario You can connect the system in your living room to an HDTV, speakers, DVD/VCD players, DSL (cable) modem, or other peripheral devices to build a digital home center. - Page 14 Offi ce Scenario You can connect the system in a business conference room to a projector in order to make presentations. Mobility Scenario Because the system comes in very compact size, you can carry it from your home to the offi ce, or to a business meeting conveniently in a hand bag.
-
Page 15: The Front View
The Front View The power button is located in the center of the front panel. An optional optical disc drive is also located near the top of the front panel. You can place an optical disc into the opening near the top of the front cover. -
Page 16: The Rear View
The Rear View You can fi nd the connectors for the power source, DVI, Displayport, network, USB 2.0, Line in (S/PDIF out), Line out, and MIC as illustrated below. S/PDIF cable connector There is one S/PDIF cable connector in your package box. To connect to the back panel of your machine correctly, please refer to the diagram as shown below:... -
Page 17: Rear Side I/O Connector
Rear side I/O Connector HDMI TV Projector CRT Monitor LCD Monitor Displayport TV DVI to VGA & DVI Adapter Internet ADSL(Cable) Modem Line in (S/PDIF out) Speaker out Microphone in Kensington Lock USB 2.0 Port Expender (USB HUB) Power Cord Fax/Scanner/Printer Bluetooth Dongle Card Reader/Flash Memory... -
Page 18: Chapter 2 Connecting Your System
Chapter 2 Connecting Your System Connecting to Video Display You can connect the system to many types of video display devices, including projector, LCD or traditional cathode ray tube (CRT) monitor, or TV unit. Connecting the LCD or CRT Monitor You can connect the system to an LCD monitor. - Page 19 Monitor VGA Cable DVI Cable...
-
Page 20: Connecting To Hdtv Set
Connecting to HDTV Set You can connect the system to a Displayport TV unit. The video signal and audio signal connector from the Displayport TV unit, connects to the Displayport connector through a Displayport cable. HDTV Displayport cable... -
Page 21: Connecting To Projector
Connecting to Projector More and more people have the need to connect a PC or a notebook PC to a projector in order to make presentations. The system is designed with the connector for outputting to a projector. In case you want to connect to a projector, you can use a DVI to VGA converter as illustrated in System Installation Diagram in chapter 1. -
Page 22: Connecting To Keyboard And Mouse
Connecting to Keyboard and Mouse You can connect the keyboard and mouse to the USB connectors. -
Page 23: Connecting To Usb Hub
Connecting to USB Hub The system is designed to allow users to connect an USB hub which allows a user to install many USB devices to the system. Simply connect the USB connector of an USB hub to the system. -
Page 24: Connecting To Fax/Printer/Scanner
Connecting to Fax/Printer/Scanner Currently many manufacturers build the functions of printer, scanner, and fax into one unit. You can connect the system to a fax/printer/scanner unit in case the machine is built with USB connector. Connecting to Speaker The system comes with built-in mono speaker. You can install active speaker set which comes with its own power plug in order to enjoy stereo sound effect. -
Page 25: Connecting To The Internet And Network
Connecting to the Internet and Network Your system is built with a network connector on the back panel as illustrated in Chapter 1. The connector allows you to connect your system to the Internet through a DSL (or ADSL) or cable modem, or to an Ethernet network. -
Page 26: Connecting To Web Camera
Connecting to Web Camera More and more people are using instant messaging software or free international Internet phone calls to communicate over the Internet with friends. The effects can be enriched by installing a web camera to the system. You can shop around for a USB web camera from a local retail outlet or purchase one through a web-enabled retailer. -
Page 27: Connecting To Memory Sticks, Card Readers, Memory Cards
Connecting to Memory Sticks, Card Readers, Memory Cards You can copy fi les from another PC to the system. There are a wide variety of memory devices which can be used for copying fi les from another PC. These memory devices include memory sticks (fl... - Page 28 Once you insert a memory device to your system, a balloon will appear at the lower right corner of your screen, telling you that the system has detected that a new hardware was installed to the system. The balloon will also show the icon which is associated with the hardware device (memory).
-
Page 29: Connecting The Power Source
Connecting Power Source The system comes with a power cable and adapter. Plug the output of the power adapter to the power connector on the back panel of the system unit. Then, connect the power plug to the wall outlet. Once the system is connected to the power source, the power indicator in the middle of the front panel will light up. -
Page 30: Chapter 3 Installing Driver
Chapter 3 Installing Driver You can use the autorun menu of Bonus CD disc. Choose the utility and driver from the icons at left side, and then click on the “GO” button to complete installation automatically. Install Driver Install Utility Browse CD Contents Readme Exit CD... -
Page 31: Troubleshooting
Troubleshooting Q: After connecting the peripherals to the system unit, the keyboard, mouse, and speakers does not work. The display monitor shows nothing. What should I do? A: You can check if you follow the correct installation procedure to make the connection. Check if the peripherals are connected to their respective connectors correctly. - Page 32 these keys for more than fi ve seconds to make sure the system performs a “warm reset”.The other alternative is to follow system prompt message to turn the system to normal operation. The worst case scenario is to uninstall the application software and install that application again by making use Windows Install/Remove functions from the Control Panel.
-
Page 33: Technical Support
Thanks for choosing AOpen products. We invite you to register at http://www.aopen.com to become a Gold Member of Club AOpen so as to ensure quality service in the future. In order to maintain the best service to every customer of us, we recommend you to follow the procedures below and seek help from our branches according to the region you buy the product. - Page 34 Online Manual: To download manual, please log on and then select your preferred language. Under “Type” directory, choose “Manuals” to go to our manual database. You can also fi nd the manual and EIG in AOpen Bonus Pack. http://global.aopen.com/download.aspx Test Report: We recommend you to choose board/card/device from the compatibility test reports for assembling your PC.
-
Page 35: Appendix
Appendix Setting BIOS BIOS Setup when 1st Power On After fi nishing the setting of connect correct cable, power on and enter the BIOS Setup screen, then press <DEL> key during POST (Power On Self Test). Choose “Load Optimized Defaults” for recommended optimal performance. - Page 36 Select ODD name if installing the Windows OS via ODD installed Before the Windows 7/Vista/XP are installed, please select your ODD name : Advanced BIOS Features > First Boot Device to ODD name.
- Page 37 Comparison Table: Model MP67-D MP65-D MP67-DU MP65-DU Chipset Intel QM67 Chipset Intel QM65 Chipset Intel QM67 Chipset Intel QM65 Chipset LAN Chip Intel WG82579LM Intel WG82579V Intel WG82579LM Intel WG82579V IC TPM IC TPM SLB9635TT1.2V SLB9635TT1.2V Supermulti ODD Supermulti ODD USB3.0...
- Page 38 Note: Please keep the JP2, Intel Management Engine Enable/Disable, setting as picture shows. If change the setting, the system will not function properly.
Need help?
Do you have a question about the XCmini MP67-D and is the answer not in the manual?
Questions and answers