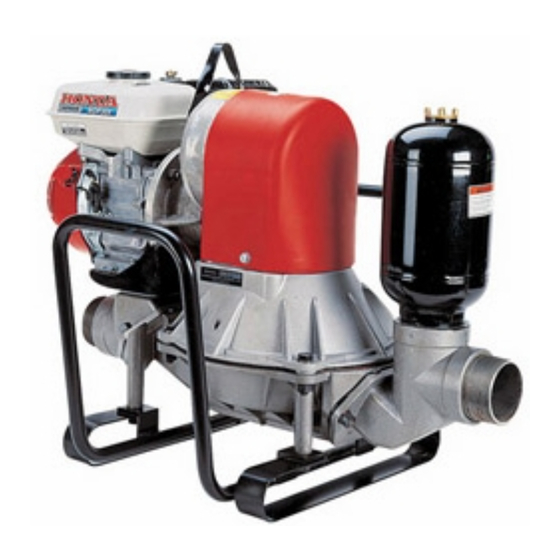
Honda WDP30X Owner's Manual
Honda owner's manual diaphragm pump wdp20x, wdp30x
Hide thumbs
Also See for WDP30X:
- Instructions manual (75 pages) ,
- Owner's manual (24 pages) ,
- Owner's manual (24 pages)
Table of Contents
Advertisement
Quick Links
Advertisement
Chapters
Table of Contents
Troubleshooting

Related Manuals for Honda WDP30X


Summary of Contents for Honda WDP30X
- Page 2 The engine exhaust from this product contains chemicals known to the State of California to cause cancer, birth defects or other reproductive This owner’s manual is considered diaphragm pump. It must be available to all operators of the pump and should remain with the pump if resold. The information and specifications the time of approval for printing.
- Page 3 Congratulations on your selection of a Honda diaphragm are certain you will be pleased with your purchase of one of the finest pumps on the market. We want to help you get the best results from your new pump and to operate it safely.
-
Page 4: A Few Words About Safety
INTRODUCTION A FEW WORDS ABOUT SAFETY Your safety, and the safety of others, are very important. And using this pump safely is an important responsibility. To help you make informed decisions about safety, we have provided operating procedures manual. This information hurt you or others. -
Page 5: Table Of Contents
Turn to the beginning PUMP SAFETY. Important information and what you can do to prevent injury. CONTROLS Identification the controls work. BEFORE OPERATION How to prepare your pump and yourself before you begin pumping. OPERATION. Starting and stopping the engine, safe pumping practices, and pumping tips. -
Page 7: Pump Safety
This chapter explains what you need to know to operate your diaphragm pump safely. IMPORTANT SAFETY INFORMATION Operator Responsibility Pump Operation. Refuel With Care ... Hot Exhaust ... Carbon Monoxide SAFETY LABEL LOCATION PUMP SAFETY Hazards ... -
Page 8: Operator Responsibility
PUMP SAFETY IMPORTANT SAFETY INFORMATION Honda WDP20X and WDP30X pumps are not designed to pump drinking water. Pump only non-potable water, muddy water, and water containing solids. Other uses can result in injury to the operator or damage to the pump and other property. -
Page 9: Hot Exhaust
Hot Exhaust The muffler becomes very hot during operation and remains ,hot for a while after stopping the engine. Be careful not to touch the muffler while it is hot. Let the engine cool before transporting the pump or storing it indoors. To prevent fire hazards, keep the pump at least 3 feet (1 meter) away from building walls and other equipment during operation. -
Page 10: Safety Label Location
PUMP SAFETY SAFETY LABEL LOCATION The label shown here contains important safety information. read it carefully. This label is considered pump. So if the label comes off or becomes hard to read, contact your authorized Honda pump dealer for a replacement. DO NOT PUMP FLAMMABLE Pump can explode and you can be seriously hurt or killed. -
Page 11: The Controls Work
This chapter shows you the locations of controls and other important parts of your pump, and tells you how the controls work. COMPONENT DESCRIPTION Throttle Lever..ChokeLever FuelValveLever Ignition Switch ... Oil Alert” System ... Recoil Starter. IDENTIFICATION OF CONTROLS. CONTROLS... -
Page 12: Identification
(priming yp) STkAlNER 2 inch - WDPSOX 3 inch - WDP30X Record the frame and engine serial numbers in the space below. You will need these serial numbers when ordering parts and when making technical or warranty inquiries (see page 66). -
Page 13: Throttle Lever
DESCRIPTION OF CONTROLS You will use these controls every time you operate your diaphragm pump. Throttle Lever The throttle lever controls the engine speed. Moving the throttle lever fully to the left gives maximum engine speed. Moving the throttle lever fully to the right returns the engine to idle speed. -
Page 14: Ignition Switch
CONTROLS Ignition Switch The ignition switch allows the operator to start and stop the engine. Switch positions: OFF: To stop the engine. To start and run the engine. Oil AlertTM System The Oil Alert system is designed to prevent engine damage caused by an insufficient amount of oil in the crankcase. -
Page 15: How To Prepare Your Pump And Yourself Before You
This chapter tells you how to prepare your pump and yourself before you begin pumping. ARE YOU READY TO GET STARTED? Knowledge ... IS YOUR PUMP READY TO GO? ... Check the General Condition of the Pump ... Check the Suction and Discharge Hoses ... Check the Engine m ... -
Page 16: Before Operation
BEFORE OPERATION ARE YOU READY TO GET STARTED? Your safety is your responsibility. significantly reduce your risk of injury. Knowledge Read and understand how to operate them. Familiarize yourself with the pump and its operation before you begin pumping. Know what to do in case of emergencies. Be sure of what you are pumping. -
Page 17: Before Operation
IS YOUR PUMP READY TO GO? For your safety, and to maximize the service life of your equipment, is very important to take a few moments before you operate the pump to check its condition. or have your servicing dealer correct it, before you operate the pump. Improperly maintaining to correct a problem before operation, could cause a malfunction... -
Page 18: Before Operation
BEFORE OPERATION Check the Suction and Discharge Hoses . Check the general condition of the hoses. Be sure the hoses are in serviceable condition before connecting Remember that the suction hose must be of reinforced construction to prevent hose collapse. Check that the sealing washer in the suction hose connector good condition (see page 21). -
Page 19: Operation
This chapter tells how to operate your pump safely and effectively. To safely realize the full potential of this pump, you need a complete understanding of its operation and a certain amount of practice with its controls. Read this chapter completely before operating the pump. Take time to familiarize yourself with the controls and how they operate. -
Page 20: Safe Operating Precautions
OPERATION SAFE OPERATING To safely realize the full potential of this pump, you need a complete understanding of its operation and a certain amount of practice with its controls. Before operating the pump for the first time, please review the IMPORTANT SAFETY /NFORMA.T/ON on page 6 and the chapter tilted BEFORE OPERATION. -
Page 21: Condition
Due to the pump diaphragm and hoses will move up and down and side-to-side This may cause the pump to walk or move around while pumping. Depending on the surface conditions, factors it may be necessary to anchor the pump to limit pump movement. - Page 22 OPERATION When water being pumped contains solids, the solids may get lodged under the clappet valves which will prevent the clappet valves from closing completely. discharge hose should angle upward as it exits the pump. DISCHARGE HOSE If the discharge hose must run across a roadway, the hose should cross the roadway...
-
Page 23: Condition
PUMP PREPARATION Suction Hose Connection Use a commercially clamps. Hose must be the same size or larger than the suction port. To prevent hose from collapsing, noncollapsible wall or braided wire construction. as possible to the pumping liquid. Avoid hose bends and sharp turns. Pump performance level and the hose is kept straight. -
Page 24: Discharge Hose Connection
Pump priming is not required if the vertical distance from water to the pump (suction head) is less than 14 feet on WDP20X or 16 feet for a WDP30X. The suction head can be increased to 21 feet for the WDP20X or 24 feet for the WDP30X by priming the pump. -
Page 25: Starting The Engine
STARTING THE ENGINE 1. Turn the fuel valve to the ON position. 2. Move the choke lever to the CLOSED position. Do not use the choke if the engine is warm or the ambient temperature is high. 3. Turn the ignition switch to the ON position. -
Page 26: Condition
OPERATION 5. Pull the starter grip lightly until resistance is felt, then pull it briskly. 1 NOTICE Return the starter grip slowly back to the engine to prevent damage to the starter. 6. As the engine warms up, gradually move the choke lever to the OPEN position. -
Page 27: Stopping The Engine
STOPPING THE ENGINE Emergency To stop the engine in an emergency, turn the ignition switch to the OFF position. Normal Move the throttle lever fully to the right to the IDLE position. Turn the ignition switch to the OFF position. Turn the fuel valve to the OFF position. -
Page 29: How To Load And Carry Your Pump Safely
TRANSPORTING This chapter explains how to load and carry your pump safely. BEFORE LOADING LOADING AND UNLOADING. -
Page 30: Transporting
TRANSPORTING BEFORE LOADING When transporting the pump, be sure to keep it upright. If the pump is tilted or overturned, fire hazard. Allow the engine to cool before transporting 1. Turn the ignition switch to the OFF position. 2. Turn the fuel valve to the OFF position. -
Page 31: Maintenance
This chapter explains when and how to perform routine inspection, service, and adjustments maintenance tasks should be done by your dealer. Your dealer is best equipped and staffed to provide the level of service and safety you and your pump deserve. THE IMPORTANCE MAINTENANCE Safety Precautions. -
Page 32: Maintenance
MAINTENANCE THE IMPORTANCE Good maintenance is essential for safe, economical operation. It will also help reduce pollution. Improper maintenance, problem before operation, can cause a malfunction hurt or killed. Always follow the inspection and maintenance recommendations owner’s manual. To help you properly care for your pump, the following pages include a maintenance schedule, maintenance... -
Page 33: Maintenance Safety
MAINTENANCE SAFETY Some of the most important safety precautions cannot warn you of every conceivable performing maintenance. should perform a given task. Failure to properly follow maintenance instructions to be seriously hurt or killed. Always follow the procedures and precautions Safety Precautions Make sure the engine is off before you begin any maintenance repairs. -
Page 34: Maintenance
Replace Clean r.lnan~Adi~ 1st Clean Check-Adjust Check-Adjust Inspect Inspect Check torque Check WDP30X pump shop manual. commercial use, log hours of operation to determine intervals. a1 1 o*(l) I O(3) I O(2) O(2) Every 2 years (2) (Replace if necessary) -
Page 35: Maintenance
FUEL Fuel tank capacity: 0.66 US gal (2.5 f) Refuel in a well-ventilated has been running, allow it to cool. Refer to page 41 for fuel recommendations and page 67 for information about oxygenated Never refuel the pump inside a building where gasoline fumes may reach flames or sparks. -
Page 36: Engine Maintenance
MAINTENANCE ENGINE MAINTENANCE Engine Oil Change Drain the oil while the engine is warm. Warm oil drains quickly and completely. 1. Remove the oil filler cap, drain bolt and sealing washer. Drain the oil into a suitable container. 2. Reinstall the drain bolt and sealing washer. Tighten the plug securely. - Page 37 4. Screw in the oil filler cap/dipstick FILLER/DIPSTICK CAP TOPOFOIL FILLER NECK Engine Oil Recommendations Oil is a major factor affecting performance 4-stroke automotive SAE 1 OW-30 is recommended shown in the chart may be used when the average temperature your area is within the recommended The SAE oil viscosity and service classification the oil container.
-
Page 38: Maintenance
MAINTENANCE Air Cleaner Service A dirty air filter will restrict air flow to the carburetor, performance. If you operate the pump in very dusty areas, clean the air filter more often than specified in the MAINTENANCE 1 NOTICE Operating the engine without an air filter, or with a damaged air filter, will allow dirt to enter the engine, causing rapid engine wear. -
Page 39: Maintenance
4. Clean the filters. Paper element: Tap the element lightly several times on a hard surface to remove excess dirt, or blow compressed exceeding 30 psi (207 kPa)] through the filter element from the inside out. Never try to brush the dirt off; brushing will force dirt into the paper fibers. -
Page 40: Maintenance
MAINTENANCE Service Spark Plug Recommended spark plugs: 1 NOTICE Spark plugs of the wrong size or incorrect heat range can cause engine damage. For good performance, free of deposits. Allow the engine to cool before servicing the spark plug. 1. Disconnect the spark plug cap and remove any dirt from around the spark plug area. -
Page 41: Maintenance
5. Check that the spark plug washer is in good condition, and thread the spark plug in by hand to prevent cross-threading. 6. After the spark plug is seated, tighten with a spark plug wrench to compress the washer. If installing a new spark plug, tighten l/2 turn after the spark plug seats to compress the washer. -
Page 42: Specifications
MAINTENANCE Carburetor Adjustment 1. Start the engine outdoors, and let it warm up to normal operating temperature. 2. Move the throttle lever to the slowest position. 3. Using a screwdriver, throttle stop screw to obtain the standard idle speed. Stand:;: Idle Speed: 1,400 -150... -
Page 43: Maintenance
Fuel Recommendations Use unleaded gasoline This engine is certified to operate on unleaded gasoline. Unleaded gasoline produces fewer engine and spark plug deposits and extends exhaust system life. Never use stale or contaminated Avoid getting dirt or water in the fuel tank. Occasionally you may hear light “spark knock”... -
Page 44: Maintenance
MAINTENANCE Fuel Filter/Fuel Line Turn the fuel valve to the OFF position. Remove the carburetor drain screw and gasket. Turn the fuel valve to the ON position and drain the fuel into a suitable container. Disconnect the fuel line at the carburetor. Remove the two 6 mm nuts and one 6 x 25 mm bolt securing the fuel tank. -
Page 45: Maintenance
PUMP SERVICE Pump Chamber Flushing With the engine stopped, the pump case should be flushed after each use to prevent sediment from building up in the case. 1. Disconnect the suction and discharge hoses. 2. Insert a garden hose into the suction side of the pump. Turn on the water and thoroughly flush sediment out the discharge side. -
Page 46: Maintenance
MAINTENANCE Grease Pump Connecting 1. Remove plastic access plug. 2. Disconnect spark plug cap and pull recoil starter until grease fitting is below access opening. 3. Wipe grease fitting clean to prevent dirt from getting into bearing. Using a manual grease gun, pump one or two strokes of NLGI #2 general purpose grease into bearing. -
Page 47: Maintenance
Pump Clappet Valves 1. Disconnect spark plug cap from the spark plug, refer to page 38. 2. Turn the fuel valve lever to the off positon, refer to page 11. 3. Flush pump chamber, refer to page 43. 4. Lift suction side of pump and allow all water to drain out the discharge fitting. -
Page 48: Maintenance
MAINTENANCE 9. Install the clappet valves over the studs. On the discharge side, the flat side of the valve should face the housing. On the suction side, the flat side of the valve should face the port. 10. Install both ports making sure all clappet valve tabs are positioned correctly. -
Page 49: Maintenance
Pump Diaphragm Disassembly Disconnect spark plug cap from the spark plug, refer to page 38. Drain the fuel tank, refer to page 42 for fuel tank draining. Flush pump chamber, refer to page 43. Lift suction side of pump and allow all water to drain out discharge fitting. -
Page 50: Maintenance
MAINTENANCE 7. Remove connecting rod plastic cover. 8. Use a 17 mm wrench and remove the bolt securing the connecting rod to the crank arm. Wipe the rod surface clean and use a felt tip marker to mark the outside of the connecting rod for reassembly. -
Page 51: Maintenance
10. If the diaphragm is to be reused, mark diaphragm and diaphragm locking flanges. With a 19 mm wrench, remove the four nuts securing the connecting rod to the lower flange. Remove the diaphragm. For reassembly, note shoulder on top of diaphragm. -
Page 52: Maintenance
MAINTENANCE 1. Position diaphragm between connecting rod flange and lower flange then install nuts and washers. Note diaphragm shoulder on top. See page 49 for tightening torque. DIAPI iRAGM 2. Apply NLGI #2 general purpose grease to connecting rod bearing. 3. -
Page 53: Maintenance
5. Pull recoil starter slowly until diaphragm pulls up against upper case stops. DIAPHRAGM Crank arm should be approximately 6. Install lower case making sure the diaphragm is centered and not pinched between the case stops. Tighten hardware following torque procedure on page 49. 7. -
Page 55: Troubleshooting
This chapter tells you what to check for if you encounter problems with your pump. ENGINE WILL NOT START. Fuel... Sparkplug... PUMP WILL NOT PUMP......54 TROUBLESHOOTING . -
Page 56: Troubleshooting
TROUBLESHOOTING ENGINE WILL NOT START Fuel 1. Is there enough fuel in the fuel tank? (page 33). 2. Is the fuel valve ON? 3. Is the choke lever in the closed position for cold engine or open position for a warm engine? 4. -
Page 57: Ensure That It Will Start Easily When You Want To Use It Again
This chapter tells you how to protect your pump, and ensure that it will start easily when you want to use it again. STORAGE PREPARATION Cleaning ... Engine ... Pump ... Fuel ... Adding fuel stabilizer to extend fuel storage life..Draining the Fuel Tank and Carburetor. -
Page 58: Storage Preparation
STORAGE STORAGE PREPARATION The following steps will help to keep rust and corrosion from impairing your pump’s function and appearance, and will make the engine easier to start when you use the pump again. Cleaning Engine Wash the engine by hand, and be careful to prevent water from entering the air cleaner or muffler. -
Page 59: Fuel
Fuel Gasoline will oxidize and deteriorate in storage. Old gasoline will cause hard starting, and it leaves gum deposits that clog the fuel system. If the gasoline in your pump’s engine deteriorates during storage, you may need to have the carburetor and other fuel system components serviced or replaced. -
Page 60: Storage
STORAGE Draining the Fuel Tank and Carburetor 1. Remove the carburetor drain screw with a 10 mm wrench or screwdriver, and drain the fuel system into an approved gasoline container. Gasoline is highly flammable and explosive. You can be burned or seriously injured when handling fuel. -
Page 61: Storage
Air Cleaner Check the air filter and clean as necessary (see page 36). Engine Cylinder Remove the spark plug (see page 38). Pour a tablespoon (5 - 10 cc) of clean engine oil into the cylinder. Slowly pull the recoil starter rope a few times to distribute the oil in the cylinder. -
Page 62: Placing In Storage
STORAGE PLACING IN STORAGE If your pump will be stored with gasoline in the fuel tank and carburetor, it is important to reduce the hazard of gasoline vapor ignition. Select a well ventilated storage area away from any appliance that operates with a flame, such as a furnace, water heater, or clothes dryer. -
Page 63: Technical Information
This chapter gives you dimensions, capacities, and other technical information. DIMENSIONS AND WEIGHT ... ENGINE DESIGN AND PERFORMANCE PUMP ... GEAR BOX ... MAINTENANCE TUNEUP ... PUMP PERFORMANCE WIRING DIAGRAM. SPECIFICATIONS CURVE .. -
Page 64: Specifications
1.8 in (46 mm) Neoprene with nylon cloth Neoprene with cast iron inserts 73 strokes/min. 2.56 in (65.0 mm) 0.8 qt (0.8 f) 8OW/90 GL5 gear oil WDP30X WZCA single cylinder connecting rod 3 in (76.2 mm) NPT 16ft(4.9m) 24 ft (7.3 m) 80 gpm (303 Urnin) ) 2.4 in (60 mm) -
Page 65: Specifications
MAINTENANCE Fuel Engine oil Gear box oil Spark plug type Maximum governed speed TUNEUP Spark Plug Gap Carburetor Idle Speed Valve Clearance (cold) Other Specifications Unleaded gasoline with a pump octane rating of 86 or higher SAE IOW-30, API SH or SJ SAE 8OW/90 GL5 gear oil NGK - BPRGES DENS0 - W20EPR-U... -
Page 66: Specifications
SPECIFICATIONS PUMP PERFORMANCE This graph shows the relationship between the pump discharge capacity and the total dynamic head. As you increase the total head, the discharge capacity will decrease. * Based on clear water at sea level. WIRING. DIAGRAM .CURVE * Discharge Capacity (gpm) IGNITION SWITCH... -
Page 67: Warranty Repair Problem
ADDITIONAL This chapter contains additional information, Honda publications available to you, and tells you how to contact us if you have a question or a warranty repair problem. HONDA PUBLICATIONS ShopManual Par&Catalog WARRANTY SERVICE INFORMATION. OXYGENATED EMISSION CONTROL SYSTEM INFORMATION Source of Emissions ... -
Page 68: Additional Information
ADDITIONAL INFORMATION HONDA PUBLICATIONS These publications will give you additional information about maintaining your pump. You may order them from your Honda water pump dealer. Shop Manual This manual covers complete maintenance and overhaul procedures. It is intended to be used by a skilled technician. Parts Catalog This provides a complete pictorial parts listing. -
Page 69: Oxygenated Fuels
OXYGENATED FUELS Some conventional ether compound. These gasolines are collectively referred to as oxygenated fuels. To meet clean air standards, some areas of the United States and Canada use oxygenated fuels to help reduce emissions. If you use an oxygenated fuel, be sure it is unleaded and meets the minimum octane rating requirements. -
Page 70: Maintenance
ADDITIONAL INFORMATION EMISSION CONTROL Source of Emissions The combustion process produces carbon monoxide, oxides of nitrogen, and hydrocarbons. nitrogen is very important because, under certain conditions, they react to form photochemical Carbon monoxide does not react in the same way, but it is toxic. Honda utilizes lean carburetor settings and other systems to reduce the emissions of carbon monoxide, oxides of nitrogen, and hydrocarbons. -
Page 71: Additional Information
Replacement Parts The emission control systems on your new Honda engine were designed, built, and certified to conform with EPA and California emission regulations. We recommend the use of genuine Honda parts whenever you have maintenance done. These original-design replacement parts are manufactured to the same standards as the original parts, so you can be confident of their performance. -
Page 72: Spark Arrester Service (Optional Equipment)
ADDITIONAL INFORMATION SPARK ARRESTER SERVICE (optional equipment) The spark arrester must be serviced every 100 hours to keep it functioning as designed. 1. Allow the engine to cool, the remove the two 8 mm nuts and remove the muffler from the cylinder head. 2. -
Page 73: Index
Air Cleaner: Clean ... Inspect..36 Carburetor: Idle Speed Adjustment..40 High Altitude Operation...4 0 Choke Lever..Component Identification.. Description of Controls ... 11 Discharge Hose Connection.. 22 Emission Control System Information..68 Engine: Oil Change..34 Oil Level Check.. -
Page 74: Important Safety Information
INDEX Safety: Important Safety Information..Maintenance ..31 Safety Label Locations..8 Safety Message Definitions Serial Numbers ..10 Spark Arrester Service..70 Spark Plug Service ..38 ..61 Specifications.. Starting the Engine ..23 Stopping the Engine ..25 Emergency ... -
Page 75: Information
QUICK REFERENCE INFORMATION Type Fuel Capacity Type Engine Oil Capacity Type Spark Plug Carburetor Idle speed Before each Maintenance rG:f Subsequent After each Unleaded gasoline with pump octane rating of 86 or higher (page 41). 0.66 US gallons (2.5 !) SAE 1 OW-30, API SH or SJ (page 35) 0.6 US quarts (0.6 !) Resistor:...
Need help?
Do you have a question about the WDP30X and is the answer not in the manual?
Questions and answers