Advertisement
Table of Contents
- 1 Table of Contents
- 2 Warning Decal Placement
- 3 Important Precautions
- 4 Before You Begin
- 5 Assembly
- 6 Grease to the Ramp Axle (74
- 7 How to Use the Elliptical Exerciser
- 8 Maintenance and Troubleshooting
- 9 Exercise Guidelines
- 10 Part List
- 11 Exploded Drawing
- 12 Ordering Replacement Parts
- 13 Limited Warranty
- Download this manual
Model No. PFEL03807.0
Serial No.
Write the serial number in the
space above for reference.
Serial
Number
Decal
QUESTIONS?
As a manufacturer, we are commit-
ted to providing complete customer
satisfaction. If you have questions,
or if parts are damaged or missing,
PLEASE DO NOT CONTACT THE
STORE; please contact Customer
Care.
IMPORTANT: You must note the
product model number and serial
number (see the drawing above)
before contacting us:
CALL TOLL-FREE:
1-888-533-1333
Mon.–Fri. 6 a.m.–6 p.m. MST
Sat. 8 a.m.–4 p.m. MST
ON THE WEB:
www.proformservice.com
CAUTION
Read all precautions and instruc-
tions in this manual before using
this equipment. Keep this manual
for future reference.
USER'S MANUAL
Visit our website at
www.proform.com
new products, prizes,
fitness tips, and much more!
Advertisement
Table of Contents

Subscribe to Our Youtube Channel
Related Manuals for Pro-Form PFEL03807.0


Summary of Contents for Pro-Form PFEL03807.0
- Page 1 Model No. PFEL03807.0 USER'S MANUAL Serial No. Write the serial number in the space above for reference. Serial Number Decal QUESTIONS? As a manufacturer, we are commit- ted to providing complete customer satisfaction. If you have questions, or if parts are damaged or missing, PLEASE DO NOT CONTACT THE STORE;...
-
Page 2: Table Of Contents
TABLE OF CONTENTS WARNING DECAL PLACEMENT ............. .2 IMPORTANT PRECAUTIONS . -
Page 3: Important Precautions
IMPORTANT PRECAUTIONS WARNING: To reduce the risk of serious injury, read all important precautions and instructions in this manual and all warnings on your elliptical exerciser before using your elliptical exerciser. ICON assumes no responsibility for personal injury or property damage sustained by or through the use of this product. -
Page 4: Before You Begin
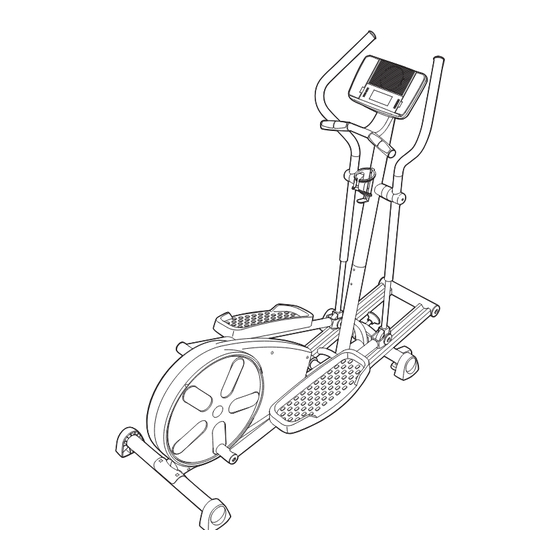
BEFORE YOU BEGIN Thank you for selecting the new PROFORM ® Ramp product model number and serial number before con- Trainer 420 elliptical exerciser. The Ramp Trainer 420 tacting us. The model number and the location of the is an incredibly smooth exerciser that moves your feet serial number decal are shown on the front cover of in a natural elliptical path, minimizing the impact on this manual. -
Page 5: Assembly
ASSEMBLY To hire an authorized service technician to assemble the elliptical exerciser, call 1-800-445-2480. Assembly requires two persons. Place all parts of the elliptical exerciser in a cleared area and remove the packing materials. Do not dispose of the packing materials until assembly is completed. Assembly requires the included hex keys and your own Phillips screwdriver , adjustable wrench... - Page 6 To make assembly easier, read the infor- mation on page 5 before you begin assembling the elliptical exerciser. Attach the Rear Stabilizer (35) to the Frame (1) with two M10 x 77mm Carriage Bolts (58) and two M10 Nylon Locknuts (84). 2.
-
Page 7: Grease To The Ramp Axle (74
3. Apply a generous amount of the included grease to the Ramp Axle (74). Have a second person hold the Ramp (78) near the Frame (1) in the position shown. Insert the Ramp Axle (74) through the Ramp and the Frame. Tighten an M8 x 25mm Patch Screw (70), with an M8 Washer (64) and a Ramp Cover (59), into each end of the Ramp Axle. - Page 8 5. Orient an Upper Body Leg (6) and a Ramp Wheel (24) as shown. Attach the Upper Body Leg and the Ramp Wheel to the Left Pedal Arm (21) with an M8 x 63mm Bolt Set (67) and two Wheel Covers (97). Repeat this step for the Right Pedal Arm (not shown).
- Page 9 7. Have a second person hold the Upright (2) near the Frame (1) as shown. Next, connect the Upper Wire Harness (18) to the Lower Wire Harness (38). Attach the Upright (2) to the Frame (1) with two M8 x 69mm Button Bolts (91), two M8 Split Washers (95), and two M8 Nylon Locknuts (87).
- Page 10 9. The Console (10) can be operated with four “D” batteries (not included); alkaline batteries are recommended. IMPORTANT: If the ellip- tical exerciser has been exposed to cold temperatures, allow it to warm to room temperature before inserting batteries into the Console.
- Page 11 11. Orient the Right Upper Body Arm (5) so that the indicated tube is facing inward. Lubricate the upper end of the right Upper Body Leg (6) with high-temperature lubricant. Then, slide the Right Upper Body Arm onto the Upper Body Leg.
-
Page 12: How To Use The Elliptical Exerciser
HOW TO USE THE ELLIPTICAL EXERCISER HOW TO MOVE AND LEVEL THE ELLIPTICAL HOW TO EXERCISE ON THE ELLIPTICAL EXERCISER EXERCISER To move the elliptical exerciser, stand in front of it, To mount the elliptical exerciser, firmly hold the upper place one foot against one of the wheels, and firmly body arms and carefully step onto the pedal that is in hold the upper end of the upright. - Page 13 Note: If there is a sheet of clear plastic on the face of the console, remove it before using the console. FEATURES OF THE CONSOLE cable (available at electronics stores), you can con- nect the elliptical exerciser to your portable stereo, The advanced console offers a selection of features home stereo, computer, or VCR and play special designed to make your workouts more enjoyable and...
- Page 14 HOW TO USE THE MANUAL MODE The Training Zones bar—The Training 1. Press any button on the console or begin Zones bar will show pedaling to turn on the console. the approximate inten- sity level of your A few seconds after the console is turned on, the exercise.
- Page 15 Note: The console handgrip pulse sensor, the lower display will show can show speed and your heart rate for up to 30 seconds. The display distance in either will then show your heart rate along with the other miles or kilometers. modes.
- Page 16 HOW TO USE A PRESET PROGRAM one of the “Too Fast” indicators lights, decrease your pace; when the “On Pace” indicator lights, 1. Press any button on the console or begin maintain your current pace. pedaling to turn on the console. See step 1 on page 14.
- Page 17 4. Follow your progress with the matrix, the HOW TO USE A HEART RATE PROGRAM Training Zones bar, and the displays. 1. Press any button on the console or begin See step 4 on page 14. pedaling to turn on the console. 5.
- Page 18 4. Hold the handgrip pulse sensor. ment. If your heart rate is too far below or above the target heart rate setting, the resistance of the It is not necessary to hold the handgrips continu- pedals will automatically increase or decrease to ously during the program.
- Page 19 HOW TO CONNECT YOUR CD PLAYER, VCR, HOW TO CONNECT YOUR PORTABLE STEREO OR COMPUTER Note: If your stereo has an RCA-type AUDIO OUT To use iFIT.com CDs, the elliptical exerciser must be jack, see instruction A below. If your stereo has a connected to your portable CD player, portable stereo, 1/8"...
- Page 20 HOW TO CONNECT YOUR HOME STEREO HOW TO CONNECT YOUR COMPUTER Note: If your stereo has an unused LINE OUT jack, Note: If your computer has a 1/8" LINE OUT jack, see instruction A below. If the LINE OUT jack is see instruction A.
- Page 21 HOW TO CONNECT YOUR VCR B. Plug one end of a 1/8" to RCA stereo audio cable (available at electronics stores) into the jack Note: If your VCR has an unused AUDIO OUT jack, beneath the console. Plug the other end of the see instruction A below.
- Page 22 HOW TO USE AN IFIT.COM CD OR VIDEO The program will function in almost the same way PROGRAM as a preset program (see step 3 on page 16). However, an electronic “chirping” sound will alert To use an iFIT.com CD or video program, the you when the resistance setting and/or pace set- elliptical exerciser must be connected to your CD play- ting is about to change.
- Page 23 HOW TO USE IFIT.COM PROGRAMS DIRECTLY 6. Follow the online instructions to start the FROM OUR WEBSITE program. Our website at www.iFIT.com allows you to play When you start the program, an on-screen count- iFIT.com programs directly from the Internet. To use down will begin.
-
Page 24: Maintenance And Troubleshooting
MAINTENANCE AND TROUBLESHOOTING Inspect and properly tighten all parts of the elliptical HANDGRIP PULSE SENSOR TROUBLESHOOTING exerciser regularly. Replace any worn parts immedi- ately. The elliptical exerciser can be cleaned with a If the handgrip pulse sensor does not function proper- soft cloth and mild detergent. -
Page 25: Exercise Guidelines
EXERCISE GUIDELINES Burning Fat—To burn fat effectively, you must exer- WARNING: cise at a low intensity level for a sustained period of Before beginning time. During the first few minutes of exercise, your this or any exercise program, consult your body uses carbohydrate calories for energy. - Page 26 SUGGESTED STRETCHES The correct form for several basic stretches is shown at the right. Move slowly as you stretch—never bounce. 1. Toe Touch Stretch Stand with your knees bent slightly and slowly bend forward from your hips. Allow your back and shoulders to relax as you reach down toward your toes as far as possible.
- Page 27 NOTES...
-
Page 28: Part List
PART LIST—Model No. PFEL03807.0 R0108A Key No. Qty. Description Key No. Qty. Description Frame Clamp Upright Reed Switch/Wire Front Stabilizer Flywheel Left Upper Body Arm Flywheel Axle Right Upper Body Arm Flywheel Bearing Upper Body Leg “C” Magnet Sleeve “C” Magnet Bracket... - Page 29 Key No. Qty. Description Key No. Qty. Description M8 x 69mm Button Bolt M4 Washer M5 x 6mm Screw Wheel Cover – Hex Key M3 x 16mm Screw – Grease Packet M8 Split Washer – User’s Manual Note: Specifications are subject to change without notice. See the back cover of this manual for information about ordering replacement parts.
-
Page 30: Exploded Drawing
EXPLODED DRAWING A—Model No. PFEL03807.0 R0108A... - Page 31 EXPLODED DRAWING B—Model No. PFEL03807.0 R0108A 63 76...
-
Page 32: Ordering Replacement Parts
ORDERING REPLACEMENT PARTS To order replacement parts, please see the front cover of this manual. To help us assist you, be prepared to provide the following information when contacting us: • the model number and serial number of the product (see the front cover of this manual) •...
Need help?
Do you have a question about the PFEL03807.0 and is the answer not in the manual?
Questions and answers