
Subscribe to Our Youtube Channel
Related Manuals for Marantz M-CR503


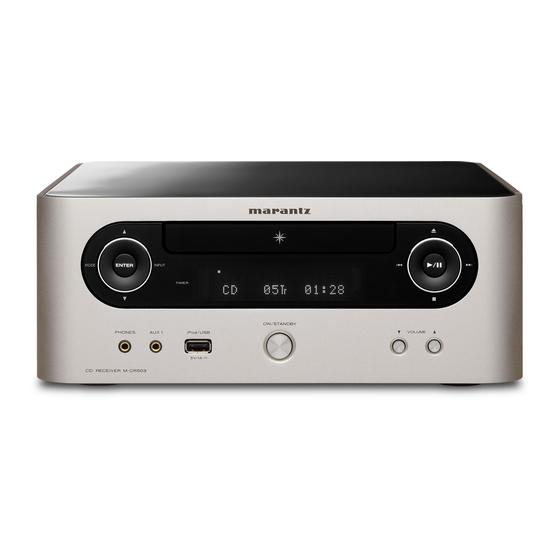
Summary of Contents for Marantz M-CR503
- Page 1 SVENSKA NEDERLANDS ESPAÑOL ITALIANO FRANÇAIS DEUTSCH ENGLISH CD Receiver M-CR503...
-
Page 2: Important Safety Instructions
SVENSKA NEDERLANDS ESPAÑOL ITALIANO FRANÇAIS DEUTSCH ENGLISH IMPORTANT SAFETY SAFETY PRECAUTIONS CAUTION: INSTRUCTIONS To completely disconnect this product from the mains, disconnect the plug from the wall socket outlet. CAUTION Read these instructions. The mains plug is used to completely interrupt the power supply to RISK OF ELECTRIC SHOCK Keep these instructions. - Page 3 ENGLISH DEUTSCH FRANÇAIS ITALIANO ESPAÑOL NEDERLANDS SVENSKA NOTE ON USE / HINWEISE ZUM GEBRAUCH / OBSERVATIONS RELATIVES A L’UTILISATION / NOTE SULL’USO / NOTAS SOBRE EL USO / ALVORENS TE GEBRUIKEN / OBSERVERA ANGÅENDE ANVÄNDNINGEN WARNINGS WARNHINWEISE AVERTISSEMENTS AVVERTENZE ADVERTENCIAS WAARSCHUWINGEN VARNINGAR •...
- Page 4 Batterier får absolut inte kastas i soporna eller brännas. Kassera dem enligt lokala bestämmelser som t.ex. en bokhylla eller liknande. Marantz Europe för kemiskt avfall. • Mer än 0,3 m rekommenderas. A division of D&M Europe B.V.
- Page 5 Вы приобрели устройство радиоприемное/проигрываюшее диски производства компании “D&M Холдингс Инк”, Япония (“D & M Holdings Inc.”, Japan). Модель M-CR503 является CD-ресивером и предназначена для приема радиовещания и проигрывания CD в домашних аудиосистемах. Это изделие широко известно в кругах истинных ценителей высококлассного звука. Качество и безопасность подтверждены множеством тестов, проведенных как зарубежными, так и российскими...
-
Page 6: Table Of Contents
ENGLISH Contents Getting started Basic operations Advanced Operations ·······································································2 ···································································12 ························································21 Accessories ····················································································2 Preparations ················································································12 Preparations ················································································21 Main features ·················································································2 Turning the power on ·································································12 Before playing a USB or an iPod ·················································21 Cautions on handling ····································································2 Before playing a disc···································································12 MP3 or WMA playback order of MP3 or WMA fi... -
Page 7: Getting Started
ENGLISH Getting started Thank you for purchasing this Marantz product. To ensure proper Main features Cautions on handling operation, please read this user guide carefully before using the product. After reading the guide, be sure to keep it for future reference. -
Page 8: Discs
ENGLISH Discs Loading discs Cautions on handling Discs playable on this unit • Place the disc in the tray, label side up. • Do not get fi ngerprints, oil or dirt on discs. Music CDs • Make sure the disc tray is fully open when inserting the disc. •... -
Page 9: About The Remote Control
ENGLISH About the remote control Inserting the batteries Operating range of the remote control Operate the remote control while pointing it at the remote sensor. q Remove the rear cover of the w Set two R03/AAA batteries in remote control. the battery compartment in the indicated direction. -
Page 10: Part Names And Functions
ENGLISH Part names and functions For buttons not explained here, see the page indicated in parentheses ( ). Front panel Headphones jack (PHONES) ··················································· (14) Disc tray ····················································································· (3) Used to connect headphones. Tray used to insert a compact disc. AUX1 input jack ·······································································... -
Page 11: Display
AUX OUT terminals ··································· (10) AC inlet (AC IN) ··········································· (11) Connect to an external pre-main amplifi er. Connect the supplied AC power cord. AUX2 IN terminals ····································· (10) Connect to an IS301 wireless dock for iPod from Marantz or CD player. -
Page 12: Remote Control
ENGLISH Part names and functions Remote control This section explains the buttons used to playback each input source. n Buttons that work with all input sources (CD, TUNER, iPod and USB) n Buttons that work with CDs The buttons listed at “Buttons that work with all input sources” can also be used. CLOCK button ·············································... - Page 13 ENGLISH Part names and functions n Buttons that work with the tuner n Buttons that work with iPods or USBs The buttons listed at “Buttons that work with all input sources” can also be used. The buttons listed at “Buttons that work with all input sources” can also be used. Number buttons ·········································...
-
Page 14: Basic Connections
ENGLISH Basic connections This section explains how to connect speakers, recording Connecting the speaker cables Speaker connections equipment, and antennas. Carefully check the left (L) and right (R) channels and + (red) and – For other connections, see the sections below. Audio cable (sold separately) (black) polarities on the speakers being connected to the unit, and be n The wireless receiver connection (vpage 19) -
Page 15: Connecting Components
MD recorder / with the ventilation around the unit or in connections, the unit may Black White Tape deck be damaged. Turn off the power and then contact a Marantz service center. AUDIO AUDIO NOTE • Do not connect two FM antennas simultaneously. -
Page 16: Connecting The Power Cord
ENGLISH Connecting an antenna Connecting the power cord n AM loop antenna assembly Put the stand section Stand through the bottom of Square the loop antenna from hole the rear and bend it Loop Projecting forward. antenna part Insert the projecting part into the square hole in the stand. -
Page 17: Basic Operations
ENGLISH Basic operations Before playing a disc This section explains how to set the current time, and how to Symbols used to indicate buttons in this guide playback a CD or tuner. Press ON/STANDBY For other operations, see the sections below. Button located on both the main unit and the remote control BUTTON n MP3 and WMA fi... -
Page 18: Setting The Current Time (24-Hour Display)
ENGLISH Setting the current time Operations possible during playback (24-Hour Display) Adjusting the tone Adjusting the master volume GExampleH Setting the current time to 10:15 am to select the tone parameter to be adjusted. [TONE] Press VOLUME Press to turn the power on. The volume level is displayed. -
Page 19: Muting The Sound
ENGLISH Operations possible during playback CD playback Symbols used to indicate buttons in this guide Muting the sound This section explains how to playback CDs. For details on how to Button located on both the main unit and the remote control playback other media, see the sections below. -
Page 20: Playing Repeatedly (Repeat Playback)
ENGLISH CD playback Playing repeatedly (Repeat playback) Playing tracks in the desired order Switching the display (Program playback) Press Press [TIME/DISPLAY] [REPEAT] Elapsed time of Remaining time Playback in the respective repeat mode starts. Up to 25 tracks can be programmed. current track of current track In the stop mode, press... -
Page 21: Tuner Playback
ENGLISH Tuner playback Symbols used to indicate buttons in this guide Button located on both the main unit and the remote control Tuning in Broadcast Stations Automatically presetting FM stations BUTTON (Auto preset) <BUTTON> Button only on the main unit Connect the antenna beforehand (vpage 10). -
Page 22: Presetting Fm/Am Stations Manually
ENGLISH Tuner playback n Giving station names to preset channels Presetting FM/AM stations manually Listening to preset stations Names of up to 8 characters can be input. 9> [NUMBER] 0 – 9 [CH –, CH +] <8 This unit can be preset with a total of 99, FM and AM broadcast Tune in the preset channel you want to name. -
Page 23: Pty (Program Type)
ENGLISH Tuner playback Symbols used to indicate buttons in this guide PTY (Program Type) TP (Traffi c Program) Button located on both the main unit and the remote control BUTTON TP identifi es programs that carry traffi c announcements. PTY identifi es the type of RDS program. <BUTTON>... -
Page 24: Ct (Clock Time)
<ui> connected. press <ENTER> Connect the RX101 to the M-XPort (Marantz-eXtension Port) of the unit. • For the installation and operating procedures, read the operating instructions that come with the RX101. To restore original settings, repeat steps 1 – 3, select “IR=ENABLE”... -
Page 25: Usb Memory Device Connection
ENGLISH USB memory device connection iPod connection Symbols used to indicate buttons in this guide Button located on both the main unit and the remote control BUTTON memory <BUTTON> Button only on the main unit device iPod [BUTTON] Button only on the remote control NOTE •... -
Page 26: Advanced Operations
• Be sure to stop playback before turning the power off. • Marantz will accept no responsibility whatsoever for any loss of iPod For playback of fi les recorded on USB, fi les in the fi rst folder on the data. -
Page 27: Mp3 And Wma Fi Les Playback
ENGLISH MP3 and WMA fi les playback Symbols used to indicate buttons in this guide n Tag data n To switch the folder or fi le during playback Button located on both the main unit and the remote control ID3-Tag (Ver. 1.x and 2.x ) BUTTON Folder META-Tag... -
Page 28: Ipod ® Playback
Press NOTE Playback starts. All the fi les in the selected folder are played repeatedly. • Marantz will accept no responsibility whatsoever for any loss of iPod data. Folder mode playback resumes. NOTE • Depending on the type of iPod and the software version, some iPod nano 1G and iPod video do not have Direct mode support. -
Page 29: Disconnecting The Ipod
ENGLISH iPod ® fi les playback Portable audio player playback Symbols used to indicate buttons in this guide n To switch the display Button located on both the main unit and the remote control Your portable audio player can be connected to this unit’s portable jack [TIME/DISPLAY] During playback, press BUTTON... -
Page 30: Usb Memory Device Playback
• For details on the order of playback for fi les stored on a USB memory Only music fi les that are not copyright-protected can be played on • Marantz will take no responsibility whatsoever for any loss or device, see “MP3 or WMA playback order of MP3 or WMA fi les”... -
Page 31: Setting The Timer
ENGLISH Setting the timer Symbols used to indicate buttons in this guide Button located on both the main unit and the remote control This device can playback using the timer playback (everyday timer, BUTTON to select the input source, then press once timer) and sleep timer. -
Page 32: Setting The Sleep Timer
ENGLISH Setting the timer Setting the sleep timer [o p] to select “ON” or <MODE> <INPUT> Use this function to automatically switch the power to the standby “OFF” for the timer, then press [ENTER/MEMO] mode after a specifi c amount of time (minutes). <ENTER>... -
Page 33: Setting The Speakers
ENGLISH Setting the speakers Symbols used to indicate buttons in this guide Button located on both the main unit and the remote control Setting speaker output n Listening to music using BI-AMP BUTTON Bi-amp can be used to connect speakers using two pairs of speaker <BUTTON>... -
Page 34: Setting Amp Characteristics
Properties are fl at. (Default) FLAT This enhances bass frequencies when speakers are placed directly on furniture or on a rack. M-CR503 If you feel that there is too much bass, select your favorite properties from among RESPONSE1 to RESPONSE4. -
Page 35: Other Functions
ENGLISH Other functions Symbols used to indicate buttons in this guide Button located on both the main unit and the remote control Auto power on NOTE BUTTON When the power is in standby, the power turns on when any of <BUTTON>... -
Page 36: Ipod Stand
• Do not use the iPod stand for purposes other than the one it is intended to perform. • Marantz will accept no responsibility whatsoever for any damage of equipment connected to this unit while it is used. -
Page 37: Explanation Terms
• Turn off the power and contact Power turns off such as an overload, excess voltage occurs or suddenly and a Marantz service center. temperature for any reason. TIMER indicator In this unit, the power turns off suddenly. fl ashes red. - Page 38 • This is not a malfunction. – in the proper direction, as proper direction, following the the set cannot recognize is Marantz does not guarantee that indicated by the polarity marks polarity marks in the battery connected. all USB memory devices will in the battery compartment.
-
Page 39: Specifi Cations
ENGLISH Specifi cations Index n CD player • Audio performance Accessories ·························································· 2 MP3 ························································ 21, 22, 32 S/N ratio (1 kHz) 100 dB AM loop antenna ················································ 11 Mute ··································································· 14 Dynamic range (1 kHz) 100 dB AMP characteristics ··········································· 29 Total harmonic distortion (1 kHz) 0.01 % Audio cable ···············································... - Page 43 Printed in China 06/2010 541110493031M...
Need help?
Do you have a question about the M-CR503 and is the answer not in the manual?
Questions and answers