Table of Contents
Advertisement
Advertisement
Table of Contents

Related Manuals for Marantz M-CR502


Summary of Contents for Marantz M-CR502
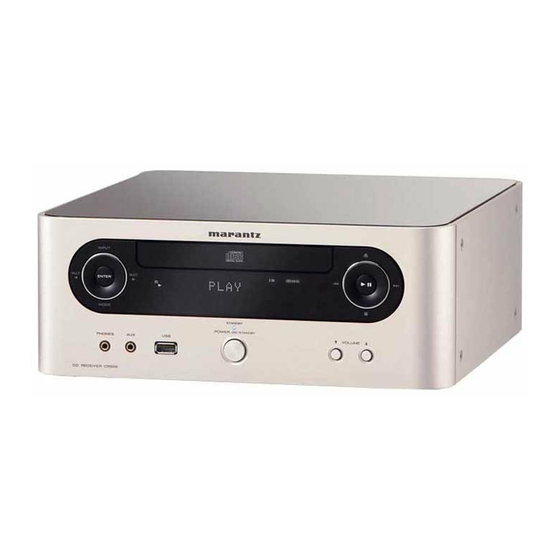
- Page 1 SVENSKA ITALIANO ESPAÑOL NEDERLANDS DEUTSCH FRANÇAIS ENGLISH CD Receiver M-CR502...
- Page 2 VIKTIGT Marantz angeführt werden müssen. seguro o se ponga en contacto con Marantz. IMPORTANT Fö att garantin skall gälla är det kundens sak att When seeking warranty service, it is the responsibility of...
- Page 3 éclaboussures. Spritzwasser aussetzen. The M-CR502 is in conformity with the - Do not remove the cover from the equipment. - Ne pas essayer de retirer le boîtier de l’appareil. - Die Abdeckung nicht vom Gerät abnehmen.
- Page 4 Nederlands Español Italiano Svenska WAARSCHUWINGEN ADVERTENCIAS AVVERTENZE VARNINGAR - Stel het apparaat niet bloot aan regen, vocht, - No exponga el equipo a la lluvia, la humedad, goteos - Non esporre l’apparecchio alla pioggia, all’umidità, al - Utsätt inte utrustningen för regn, fukt, droppande druppels of spetters.
-
Page 5: Table Of Contents
ENGLISH INTRODUCTION CONTENTS Thank you for selecting the Marantz M-CR502 CD Receiver for your A/V system. FEATURES ..................................2 Please read these operating instructions carefully. We recommend that you read the entire user guide before you attempt to connect or operate the player. -
Page 6: Features
INCORPORATES A BI-AMP SYSTEM TO EQUIPMENT MAINS WORKING SETTING condensation. This CD player uses an optical REALIZE FULL PERFORMANCE OF THE BI- lens, so the condensation may form in the Your Marantz product complies with the household Left Right Above following cases. -
Page 7: Usage Of Remote Controller
ENGLISH BEFORE USING OPERATIONAL RANGE USAGE OF REMOTE CONTROLLER CAUTIONS ON HANDLING BATTERIES Misuse of the batteries can result in electrolyte Operate the unit with the remote controller within LOADING BATTERIES leakage, rupturing, corrosion, etc. the range of the illustration below. Bear in mind the following points when using Before using the remote controller for the first time, batteries. -
Page 8: Names And Functions
ENGLISH NAMES AND FUNCTIONS !3 0 (OPEN/CLOSE) button !6 VOLUME 3 up button FRONT PANEL VOLUME 4 down button Used to open/close the disc tray. !3 !4 Adjusts the audio volume. !4 6 (PLAY/PAUSE) button See page 11. !5 ∞ § buttons •... -
Page 9: Remote Controller
ENGLISH NAMES AND FUNCTIONS COMMON OPERATIONS ⁄8 MENU button CD/USB OPERATIONS (CD/USB MODE) REMOTE CONTROLLER Performs the same operations as the click wheel z POWER button MENU button on an iPod. v PROGRAM button Used to turn on the unit’s power or put the unit in Initiates program play. -
Page 10: Rear Panel
AUX IN terminal i Speaker B output terminals Connect to an IS201 Music Junction for the iPod Connect to the speakers. from Marantz or CD player. o REMOTE IN terminal Connect to the REMOTE CONTROL output terminal of Marantz products. -
Page 11: Basic Connections
ENGLISH BASIC CONNECTIONS CONNECTING SPEAKER CABLES SETTING SPEAKER OUTPUTS CONNECTING SPEAKERS After turning on the unit’s power (See page 11), set the speaker output for the unit to match the speaker connections made to terminals A and B. The default setting is SPKR A. Note: Be sure to lower the audio volume before making speaker settings. -
Page 12: Connecting The Am/Fm Antennas
ENGLISH BASIC CONNECTIONS CONNECTING THE SUPPLIED ANTENNAS CONNECTING THE OUTDOOR AM CONNECTING THE AM/FM ANTENNAS ANTENNA CONNECTING THE SUPPLIED FM ANTENNA Be sure to use the supplied FM antenna indoors. Notes: Outdoor To use, extend and adjust the antenna’s positioning AM loop antenna •... -
Page 13: Connecting Usb Devices
A USB device storing compressed MP3 or WMA music data files may be connected. The audio output jack of a portable music player may be connected to the AUX IN (external input) terminal of the unit using a commercially available audio cable with 3.5-mm diameter stereo mini-plugs. Marantz CD Recorder AUX2 AUX1... -
Page 14: Connecting Headphones
ENGLISH BASIC CONNECTIONS CONNECTING HEADPHONES CONNECTING THE POWER CABLE Connect the 3.5-mm diameter headphone plug into the PHONES jack on the unit. • Plug the supplied power cable into AC power cord connector socket on the unit. • When headphones are connected, audio ceases to be output from the speakers of this unit. •... -
Page 15: Basic Operations
ENGLISH BASIC OPERATIONS PLAYING A CD SETTING POWER TO ON/STANDBY LISTENING TO A CD Select CD as the input source by pressing the INPUT button on the unit or the CD Before turning on the power, check again that all The unit can also play MP3 and WMA music data Start playing the CD by pressing the 6 button on the remote controller. -
Page 16: Listening To A Radio Broadcast
ENGLISH BASIC OPERATIONS PLAYING THE NEXT TRACK LISTENING TO A RADIO BROADCAST Select FM or AM as the input source using 1. 2. the INPUT button on the unit or the TUNER Play the next track by pressing the § Before listening to a radio broadcast, be sure to button on the remote controller. -
Page 17: Listening To Music Stored On A Usb Device
• A scrolling display of “Track Name,” “Artist Name,” and “Album Name” Notes: appears when playing an MP3/WMA disc • Marantz does not guarantee the operation of, or or USB device. 3. 4. supply of power to, any USB devices. -
Page 18: Listening To An External Device
ENGLISH BASIC OPERATIONS REMOTE CONTROL OPERATION OF THE IS201 MUSIC JUNCTION FOR THE iPOD FROM MARANTZ LISTENING TO AN EXTERNAL DEVICE Connect external devices (mobile audio devices) to AUX1 located on the front Perform the following operations using the supplied remote controller. -
Page 19: Basic Settings
ENGLISH BASIC SETTINGS SETTING THE TIME USING THE TIMER Confirm the time setting and exit time Set the minute setting using the VOLUME setup by pressing the ENTER button while +/– buttons while the minute indicator is Operations are performed using the remote the hour and minute indicators are flashing. -
Page 20: Adjusting The Tone
ENGLISH BASIC SETTINGS SETTING THE SLEEP TIMER ADJUSTING THE TONE CHANGING THE BRIGHTNESS OF SETTING ECO MODE THE DISPLAY PANEL This function automatically places this unit in When ECO mode is selected, the unit enters a standby mode when the specified time arrives. low-power consumption mode in which nothing is displayed on the display panel during standby Note:... -
Page 21: Practical Connections
Marantz DVD player. 7 button. • The unit can be controlled using the remote sensor of a Marantz DVD player connected to the unit. Be sure to set “IR=DISABLE” when controlling in this way. Select “IR=DISABLE” using the 1/2 buttons and then press the ENTER button. -
Page 22: Advanced Operations
ENGLISH ADVANCED OPERATIONS REPEAT PLAY A-B REPEAT PLAY USING CD AND USB DEVICES CD ALL TRACK REPEAT EASILY All track repeat play results when the REPEAT Repeat play settings can be made during playback • Repeatedly play your favorite section of a CD. button on the remote controller is pressed twice. - Page 23 ENGLISH ADVANCED OPERATIONS LISTENING TO TRACKS IN A SPECIFIED CHANGING THE TRACKS REGISTERED Press the ENTER button on the remote Press the 2 button on the remote controller ORDER FOR PROGRAM PLAY controller. or the 6 button on the unit to play your favorite specified track.
- Page 24 ENGLISH ADVANCED OPERATIONS SWITCHING THE DISPLAY ON THE MP3/WMA MUSIC FILES i Year of creation Press the ENTER button on the remote DISPLAY PANEL controller. • Information displayed on the display panel changes as given below each time the TIME/ The display on the display panel can be switched INFO button is pressed.
-
Page 25: Convenient Functions For Listening To Radio Broadcasts
ENGLISH ADVANCED OPERATIONS CONVENIENT FUNCTIONS FOR Select TUNER AM or TUNER FM by pressing ABOUT MP3/WMA FILES the INPUT button on the unit or the TUNER LISTENING TO RADIO BROADCASTS button on the remote controller. • The standard specification supported by this CD receiver is “MPEG-1 Audio Layer-3” (with a The unit can store up to 30 FM and 20 AM stations, sampling frequency of 32, 44.1 or 48 kHz.) This CD receiver does not support other standards such Hold down the ENTER button for 3 or more... - Page 26 ENGLISH ADVANCED OPERATIONS DELETING REGISTERED PRESET NUMBERS Select a frequency that can be received using Repeat Steps through about until Press the MODE button on the unit for 3 or the 1/2 buttons on the unit or the TUNING you have entered all characters. more seconds or the SET UP button on the Preset numbers can be erased by calling 3/4 buttons on the remote controller and...
- Page 27 ENGLISH ADVANCED OPERATIONS RDS (RADIO DATA SYSTEM) RDS SEARCH TRAFFIC PROGRAM (TP) Press the ENTER button to set select RDS search selection mode. Use this function to automatically tune to FM • TP identifies programs that carry traffic • RDS (works only on the FM band) is a broadcasting stations that provide RDS service.
- Page 28 ENGLISH ADVANCED OPERATIONS PTY SEARCH TRAFFIC PROGRAM SEARCH (TP SEARCH) Press the 1/2 buttons on the front panel Press the 1/2 buttons on the front panel or the VOLUME button on the remote or the VOLUME button on the remote Use this function to find RDS stations broadcasting •...
- Page 29 ENGLISH ADVANCED OPERATIONS RT (RADIO TEXT) CT (CLOCK TIME) Press the 1/2 button on the front panel Press the 1/2 buttons on the front panel or the VOLUME button on the remote or the VOLUME button on the remote • You can set the clock time automatically from controller to display “RT ON/OFF.”...
-
Page 30: Setting Amp Characteristics (Speaker A, B)
ENGLISH ADVANCED OPERATIONS SWITCHING RDS INFORMATION DISPLAY PTY: SETTING AMP Select the desired characteristics from the Displays the program type of broadcast list below using the 1/2 buttons on the unit CHARACTERISTICS (SPEAKER A, B) being received. or the VOLUME buttons on the remote controller and then press the ENTER •... -
Page 31: Listening To Music Using Bi-Wiring
ENGLISH ADVANCED OPERATIONS SETTING SPEAKER OUTPUT LISTENING TO MUSIC USING BI-WIRING • Set the speaker output of the unit to BI-AMP. Bi-wiring can be used to connect speakers using two pairs of speaker cables to connect the unit and speaker system. -
Page 32: Listening To Music In Two Locations Using A Multi-Drive Connection
ENGLISH ADVANCED OPERATIONS SETTING SPEAKER OUTPUT LISTENING TO MUSIC IN TWO LOCATIONS USING A MULTI-DRIVE CONNECTION • Set the speaker output of the unit to BI-AMP. You can listen to music in different rooms using this unit with two pairs of speaker systems. •... -
Page 33: Performing Reset
ENGLISH ADVANCED OPERATIONS ADJUSTING THE AUDIO LEVEL BALANCE PERFORMING RESET DEFAULT STATUS BETWEEN SPEAKERS A AND B • All settings can be returned to default status. INPUT With the output of Speaker A fixed, the audio level • Reset is selected on the unit. Volume of Speaker B can be adjusted within the range –6 dB to +6 dB. -
Page 34: If You Experience Problems
Be sure to check the items in the following list if you experience problems. If checking the following items CD AND USB OPERATIONS does not resolve your problem, please contact the retail store where you purchased your product or your nearest Marantz Consumer Marketing or Service Center. Symptom Possible Cause... -
Page 35: Radio Operations
ENGLISH IF YOU EXPERIENCE PROBLEMS RADIO OPERATIONS OPERATING EXTERNAL EQUIPMENT Symptom Possible Cause Resolution Symptom Possible Cause Resolution Cannot select a broadcast station The unit has lost all preset Register the broadcast station The connections to external devices Refer to connecting external by preset number. -
Page 36: Miscellaneous
ENGLISH MISCELLANEOUS EXTERNAL DIMENSIONS (Units: mm) SPECIFICATIONS AND EXTERNAL DIMENSIONS CD PLAYER Audio performance S/N ratio (1kHz) .......................100dB or more Dynamic range (1kHz) .....................100dB or more Total harmonic distortion ....................0.01% or less AUDIO AMP Rated output (1kHz, total harmonic distortion 0.1%, 8 ) ..........40W + 40W Effective maximum output (1kHz, total harmonic distortion 10%, 8 ) ...... -
Page 37: Discs That Can Be Played Back
ENGLISH MISCELLANEOUS DO NOT USE DISCS WHICH COME IN NOTES ABOUT THE DISCS DISCS THAT CAN BE PLAYED BACK ABOUT PLAYING COPY- SPECIAL SHAPES. CONTROLLED CDS The following discs can be played using this CD HANDLE THE DISCS CAREFULLY SO AS receiver. - Page 38 Marantz Authorized Service Station list. If these wil mar the finish of the equipment. Likewise, writing, please include the model and serial number never use cloths containing chemical substances.
- Page 39 You can find your nearest authorized distributor or dealer on our website. is a registered trademark. Printed in China 08/2008 541110098139M mzh-d...
Need help?
Do you have a question about the M-CR502 and is the answer not in the manual?
Questions and answers