Table of Contents
Advertisement
Quick Links
Advertisement
Table of Contents

Related Manuals for Tektronix TSG 601


Summary of Contents for Tektronix TSG 601
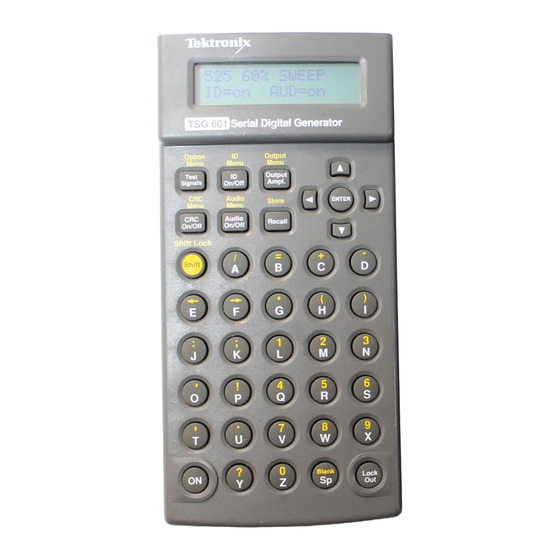
- Page 1 Service Manual TSG 601 Serial Digital Generator 070-8911-02 Warning The servicing instructions are for use by qualified personnel only. To avoid personal injury, do not perform any servicing unless you are qualified to do so. Refer to the Safety Summary prior to...
- Page 2 Copyright Tektronix, Inc., 1994. All rights reserved. Printed in U.S.A. Tektronix products are covered by U.S. and foreign patents, issued and pending. Information in this publication supersedes that in all previously published material. Specifications and price change privileges reserved. The fol- lowing are registered trademarks: TEKTRONIX and TEK.
-
Page 3: Warranty
product. - Page 4 TSG 601 Service Manual...
- Page 5 Television Products Division P.O. Box 500 Beaverton, Oregon U.S.A. declare under our sole responsibility that the TSG 601 Serial Digital Generator to which this declaration relates is in conformity with the following standards: EN50081-1, Generic Emission Standard EN50082-1, Generic Immunity Standard...
- Page 6 TSG 601 Service Manual...
-
Page 7: Table Of Contents
2–2 Using your TSG 601 ........ -
Page 8: List Of Figures
......1–12 Figure 1–6: 75% Color Bars, B–Y ......1–13 viii TSG 601 Service Manual... -
Page 9: List Of Tables
Figure 1–37: The Significance of the Active Picture Markers ..1–27 Figure 3–1: Block Diagram of the TSG 601 ....3–3 List of Tables Table 1–1: Encoding Parameters... - Page 10 ....3–4 Table 4–1: Required Equipment ......4–1 TSG 601 Service Manual...
-
Page 11: General Safety Summary
These terms may appear on the product: Danger indicates an injury hazard immediately accessible as you read the marking. Warning indicates an injury hazard not immediately accessible as you read the marking. Caution indicates a hazard to property including the product. TSG 601 Service Manual... - Page 12 Replace the NiCad battery pack if the batteries do not recharge within the recom- mended time, or if the operating time from a full charge seems significantly shortened. NOTE. Always discard batteries in accordance with all local regulations. TSG 601 Service Manual...
-
Page 13: Service Safety Summary
Only qualified personnel should perform service procedures. Read this Service Safety Summary and the General Safety Summary before performing any service procedures. Use the Proper Fuse Use only the type and rating fuse specified for this product. xiii TSG 601 Service Manual... - Page 14 TSG 601 Service Manual...
-
Page 15: Specifications
Specifications... -
Page 17: Introduction
Electronic Measuring Apparatus”; IEC 348 Canadian Standards Association Electrical Standard for Electrical and Elec- tronic Measuring and Testing Equipment; CAN/CSA C22.2 No. 231 Standard for Electrical and Electronic Measuring and Testing Equipment, Second Edition, July 21, 1980 1–1 TSG 601 Service Manual... -
Page 18: Performance Conditions
25 C, is being operated within environmental limits (see Table 1–9), and has had a minimum warm-up of 20 minutes. Safety Standard Compliance The following safety standards apply to the TSG 601: ANSI S82 — Safety Standard for Electrical and Electronic Test, Measuring, Controlling, and Related Equipment, 1988. -
Page 19: Specification Tables
(700 mV) corresponding to level 940. B–Y and R–Y 897 quantization levels in the center of the quan- tization scale (corresponding to 350 mV) with zero signal (0 mV) corresponding to level 512. 1–3 TSG 601 Service Manual... -
Page 20: Table 1–2: Timing Relationships
1 0 0 P3 1 0 0 P2 Hamming Code 6:3 1 0 0 P1 Even parity bits 1 – 6 1 0 0 P0 0 0 0 0 0 0 0 0 Protection Bit States 1–4 TSG 601 Service Manual... -
Page 21: Figure 1-1: Analog/Digital Line Timing, 625/50 Systems
Specifications Figure 1–1: Analog/Digital Line Timing, 625/50 Systems Figure 1–2: Analog/Digital Line Timing, 525/60 Systems 1–5 TSG 601 Service Manual... -
Page 22: Figure 1-3: Analog/Digital Field Timing, 625-Line Systems
Specifications Figure 1–3: Analog/Digital Field Timing, 625-line Systems 1–6 TSG 601 Service Manual... -
Page 23: Figure 1-4: Analog/Digital Field Timing, 525-Line Systems
See Figures 1–8, 1–9, and 1–10, and Table 1–10 Pluge (BBC 1) See Figure 1–11 and Table 1–11 Field Timing, 625/50 700 mV Lines 83–166 105 mV Lines 167–250 Field Timing, 525/60 700 mV Lines 72–142 105 mV Lines 143–212 1–7 TSG 601 Service Manual... - Page 24 See Figures 1–22, 1–23, and 1–24 4T Pulse HAD 400 ns 10T Pulse HAD 1000 ns (1.0 s) Pulse Amplitude 350.0 mV B–Y 196.3 mV R–Y 248.1 mV 2T Pulse HAD 200 ns (Y channel only) 1–8 TSG 601 Service Manual...
- Page 25 See Figures 1–35, 1–36, and 1–37, and Table 1–13 Field Timing, 625/50 Vertical Limits Lines 24 and 310 Horizontal Limits Lines 25 through 309 Field Timing, 525/60 Vertical Limits Lines 21 and 262 Horizontal Limits Lines 22 through 261 1–9 TSG 601 Service Manual...
-
Page 26: Table 1–4: Serial Digital Video Output
Jitter less than 360 ps Over a period of one line. Error Detection Ancillary Data Active picture CRC (0-AP-CRC, Tektronix propri- etary) on lines 9 & 272 (525) or 5 & 318 (625). EDH (SMPTE RP-165) Table 1–5: Cable Simulator... -
Page 27: Table 1–6: Character Identification
9.1 cm (3.6 in) Depth 19.1 cm (7.5 in) Net Weight TSG 601 0.48 kg (1.06 lb) TSG 601 with battery pack 0.68 kg (1.5 lb) Shipping Weight (with AC adapter) 1.50 kg (3.31 lb) 1–11 TSG 601 Service Manual... -
Page 28: Waveform Diagrams
Meets the requirements of NTSB Test Procedure 1A, category II (24 inch drop) Waveform Diagrams NOTE. The following diagrams represent the analog equivalents of the TSG 601 digital test signals. Horizontal axis units are microseconds after the start of Dig- ital Active Video. -
Page 29: Figure 1-6: 75% Color Bars, B-Y
Figure 1–6: 75% Color Bars, B–Y Figure 1–7: 75% Color Bars, R–Y Table 1–10: 75% and 100% Color Bars Timing 625/50 0.74 s 7.26 13.70 20.22 26.74 33.18 39.70 46.15 525/60 0.37 6.96 13.56 20.07 26.67 33.26 39.85 46.37 1–13 TSG 601 Service Manual... - Page 30 Specifications Figure 1–8: 100% Color Bars, Y Figure 1–9: 100% Color Bars, B–Y 1–14 TSG 601 Service Manual...
- Page 31 Specifications Figure 1–10: 100% Color Bars, R–Y Figure 1–11: Pluge 1, Y only 1–15 TSG 601 Service Manual...
-
Page 32: Table 1–11: Pluge Timing
Specifications Figure 1–12: 625 Line Pluge 2, Y Channel Only Table 1–11: Pluge Timing 625 & 525 21.57 s 23.87 26.17 28.47 40.07 52.07 Figure 1–13: 525 Line Pluge 2, Y Only 1–16 TSG 601 Service Manual... -
Page 33: Table 1–12: 5-Step Staircase And Modulated 5-Step Timing
Specifications Figure 1–14: 5-Step Staircase and Modulated 5-Step, Y Figure 1–15: 5-Step Staircase, B–Y and R–Y Table 1–12: 5-Step Staircase and Modulated 5-Step Timing 625 & 525 6.96 s 13.48 20.07 26.59 33.18 39.70 46.30 1–17 TSG 601 Service Manual... - Page 34 Specifications Figure 1–16: 625 Line Modulated 5-Step, B–Y and R–Y Figure 1–17: 525 Line Modulated 5-Step, B–Y and R–Y 1–18 TSG 601 Service Manual...
- Page 35 Specifications Figure 1–18: Limit Ramp, Y Figure 1–19: Limit Ramp, B–Y and R–Y 1–19 TSG 601 Service Manual...
- Page 36 NOTE. You may set the shallow ramp pedestal to one of the ten levels shown. To do so, use the keys to select from levels 0 through 9 when the TSG 601 is in normal operation and the Shallow ramp is “active.” Figure 1–21: Shallow Ramp, B–Y and R–Y 1–20...
- Page 37 Specifications Figure 1–22: 625 Line Mod Pulse and Bar, Y Figure 1–23: 625 Line Mod Pulse and Bar, B–Y Figure 1–24: 625 Line Mod Pulse and Bar, R–Y 1–21 TSG 601 Service Manual...
- Page 38 Specifications Figure 1–25: 525 Line Mod Pulse and Bar, Y Figure 1–26: 525 Line Mod Pulse and Bar, B–Y Figure 1–27: 525 Line Mod Pulse and Bar, R–Y 1–22 TSG 601 Service Manual...
- Page 39 Specifications Figure 1–28: 60% Line Sweep with Markers, Y Figure 1–29: 60% Line Sweep with Markers, B–Y and R–Y 1–23 TSG 601 Service Manual...
- Page 40 Specifications Figure 1–30: 500 kHz Bowtie (reduced amplitude), Y Figure 1–31: 500 kHz Bowtie (reduced amplitude), B–Y and R–Y 1–24 TSG 601 Service Manual...
- Page 41 Specifications Figure 1–32: Bowtie Markers, Y Channel Only Figure 1–33: Convergence, Vertical Lines; Y Channel Only 1–25 TSG 601 Service Manual...
- Page 42 Specifications Figure 1–34: Convergence, Horizontal Lines; Y Only Figure 1–35: Active Picture Markers, Vertical Limits, Y Channel Only 1–26 TSG 601 Service Manual...
-
Page 43: Table 1–13: Active Picture Markers Timing
53.26 625/50: B–Y and R–Y — — 1.04 52.44 53.18 525/60: Y 0.16 53.02 0.29 52.89 53.26 525/60: B–Y and R–Y — — 0.29 52.89 53.18 Figure 1–37: The Significance of the Active Picture Markers 1–27 TSG 601 Service Manual... - Page 44 Specifications 1–28 TSG 601 Service Manual...
-
Page 45: Operating Information
Operating Information... -
Page 47: Powering The Instrument
User manual whenever you need more information on any topic. Powering the Instrument The TSG 601 is DC powered. You may power it with the standard AC adapter, the optional 9.6 V NiCad battery pack, eight standard AA batteries, or a “BP”... -
Page 48: Keypad And Display Conventions
After a minute with no key press, the display back light will be dimmed to conserve battery charge. To guard against battery discharge if you forget to turn the TSG 601 off, enable Auto Power Down through the Diagnostic menu (see page 5–4). -
Page 49: Using Your Tsg 601
Operating Information Using your TSG 601 Here’s a list of what you can do with your TSG 601. Simple instructions for each operation begin on the indicated page. For more information on any subject, see the User manual. Output serial video test signals (page 2–4). -
Page 50: Outputting Serial Video Test Signals
2. Power the TSG 601 (page 2–1) and switch it on. By default, the instrument will begin with most settings that were in effect when it was switched off. -
Page 51: Adjusting The Output Amplitude
3. Press any rectangular key to exit the Output Amplitude Adjust function. Controlling the Video Component (Y, C Channels 1. Enter the Output menu (press , then ) and press Shift Output Ampl. ENTER reach “Channel Output Selection.” The display will look something like this: 2–5 TSG 601 Service Manual... -
Page 52: Specifying 8- Or 10-Bit Data Words
The channel status will change instantly—you don’t have to press ENTER NOTE. All three component channels default to ON whenever the TSG 601 is switched off and back on, regardless of prior “Channel Output” settings. Specifying 8- or 10-bit Data Words 1. -
Page 53: Inserting Id Messages
NOTE. Only the position of the currently displayed ID may be changed. If you wish to change the picture location of a message that is not displayed, you must first recall it through the ID menu or the Recall menu. 2–7 TSG 601 Service Manual... -
Page 54: Setting Up An Id Cycle
Press to confirm. ENTER 7. To replace the current ID with the ID cycle, scroll through the ID menu to the “ID Cycle OFF” selection. Press a horizontal arrow key to change the 2–8 TSG 601 Service Manual... -
Page 55: Cable Simulation
To simulate the addition of 50 meters of 75 coaxial cable anywhere in your system, connect the TSG 601 into the signal path with the two BNCs marked “APPROX 50M CABLE.” The connectors are interchangeable, and the circuit will simulate 50 m of Belden 8281 cable—which attenuates the signal by approximately 5.4 dB at 135 MHz—whether the TSG 601 is... -
Page 56: Recalling Presets And Ids
The first line of an ID message will occupy the bottom line of the display; use the key to see the second line. For example, the “factory” ID#1 is “Tektronix TSG601 Serial Digital.” The display will first look like this: Pressing the... -
Page 57: Theory Of Operation
Theory of Operation... -
Page 59: Block Diagram Description
(keyboard or RS-232 port, battery low condition, and improper termina- tion) and then responding accordingly. Logic. The logic of the TSG 601 is contained in a FPGA (A1U2). The logic in the FPGA can be blocked into three major groups:... -
Page 60: Table 3–1: Circuit Addresses
IC to determine if the output is properly terminated. Power Supply. The TSG 601 uses a switching power supply to generate the +5 V supply. Input power can be supplied either through the DC input jack or by batteries mounted in the instrument’s integral battery compartment. -
Page 61: Figure 3–1: Block Diagram Of The Tsg 601
Serial Amplitude Adjust Video Driver Cable Open/ Termination Short Indicator Detector Power Supply Interchangeable TCXO 50 m Input/Output 27 MHz Cable DC Input Board Clock Battery Input Figure 3–1: Block Diagram of the TSG 601 3–3 TSG 601 Service Manual... -
Page 62: Keypad
These voltage thresholds are dependent on the battery type and are listed in Table 3–2. Table 3–2: Low Battery Voltage Thresholds Battery Type Alkaline 7.5 V 6.5 V NiCad 9.3 V 8.6 V 3–4 TSG 601 Service Manual... -
Page 63: Startup Sequence
EAV and SAV data. After the SRAMs are loaded, the microprocessor sets a flag in the FPGA that causes the instrument to enter into the operating sequence mode of operation, which is discussed below. 3–5 TSG 601 Service Manual... -
Page 64: Operating Sequence
If the output is not properly terminated in 75 , the summing point will activate the tank circuit made up of A1L3, A1C30, and circuit board capacitance. The tank circuit drives 3–6 TSG 601 Service Manual... -
Page 65: Lcd Display
A1Q2. Power Supply The TSG 601 is DC powered either by batteries or by an AC adapter with a nega- tive center lead orientation. When the adapter DC output is connected to A1J5, power is not drawn from the batteries. A1L7 and A1C7 act as an EMI regulator, and A1Q9 and A1VR1 protect the circuitry from a DC power adapter with a pos- itive center lead. - Page 66 Theory of Operation 3–8 TSG 601 Service Manual...
-
Page 67: Performance Verification And Adjustment Procedures
Performance Verification and Adjustment Procedures... -
Page 69: Required Test Equipment
Performance Verification and Adjustment Procedures This section consists of a detailed performance verification procedure to verify the operation of the TSG 601, and an adjustment procedure to return the instru- ment to in-spec operation. A performance verification “Checklist” appears on page 4–2. -
Page 70: Performance Verification Checklist
Performance Verification and Adjustment Procedures Performance Verification Checklist Use the following checklist if you are familiar with the operation of the TSG 601 and video performance verification techniques. NOTE. Allow a 20-minute warm-up for the TSG 601 and the instruments used for performance verification. -
Page 71: Procedures
On the 11403A, verify that the signal amplitude is 700 8 mV. c. Press once so that 720 mV is displayed on the TSG 601 LCD. d. On the 11403A, verify that the signal amplitude is 720 8 mV. - Page 72 On the 11403A, verify that the signal amplitude is 900 8 mV. g. Press so that 880 mV is displayed on the TSG 601 LCD. h. On the 11403A, verify that the signal amplitude is 880 8 mV. 3. Serial Digital Output Rise and Fall Times Specification: 400–1000 ps @ 20% to 80% amplitude points...
- Page 73 ........498.4 ps (cursors set so eye crossing is in the center) b. Set the TSG 601 output amplitude to 800 mV. c. Verify that the eye crossing stays within the cursors. 5. Cable Simulator Return Loss...
-
Page 74: Adjustment Procedures
BNC terminators together. Place the terminators on the TSG 601 Serial Video Output. d. Connect the AC adapter and switch the TSG 601 on. e. Place the instrument on its right-hand side (AC adapter plug pointing up), with the display end of the instrument farthest away from you; you will be making an adjustment on the main board while looking at the instrument’s display. - Page 75 To reassemble the instrument, reverse steps b and a. In step b, be sure to install the ribbon cable with the brown wire leading to pin 1 of J10. Output Amplitude Allow a minimum 20 minute warm-up for the TSG 601 and the oscilloscope. a. Configure the 11403A as follows: WAVEFORM MENU Vertical Desc.
- Page 76 Press the up arrow. The display should now read “ADJ Signal Ampl. 1000 mV.” Use the left and right arrows to adjust the amplitude on the 11403A to 5 mV. Press to store the new values in NVRAM. ENTER 4–8 TSG 601 Service Manual...
-
Page 77: Maintenance
Maintenance... -
Page 79: Battery Hints
For best results, replace or recharge the batteries when you first see this warning. Low Battery Shut Down To prevent erratic operation at very low power levels, the TSG 601 will shut it- self down if the battery voltage drops below a second, lower threshold that also depends on the Battery Type setting. -
Page 80: Preventive Maintenance
Dirt can provide high-resistance electrical leakage paths between con- ductors or components in a humid environment. CAUTION. The TSG 601 case is made of molded plastic. Do not allow water to get inside of any enclosed assembly or component. Do not clean any plastic materials with organic cleaning solvents, such as benzene, toluene, xylene, acetone, or similar compounds, because they may damage the plastic. -
Page 81: Troubleshooting Aids
(if applicable). NOTE. Check for Change Information at the rear of the manual for inserts describing corrections and modifications to the instrument and manual. 5–3 TSG 601 Service Manual... -
Page 82: Circuit Board Illustrations
The circuit board assemblies are assigned assembly numbers starting with A1. Circuit boards have been assigned an assembly number so that they may be or- dered from Tektronix, Inc. They are as follows: A1 Main Board Assembly A2 Keypad Board Assembly... - Page 83 1. Auto power down; use the left ( ) or right ( ) arrow key to toggle between enabled and disabled. The Auto Power Down function shuts the TSG 601 off when there has been no key press for approximately 10 minutes, to conserve battery charge. The Auto Power Down symbol (a rotating line) appears in the upper-right corner of the display when the function is enabled.
-
Page 84: Corrective Maintenance
Corrective maintenance deals with obtaining replacement parts, torque specifica- tions, and component replacement. Obtaining Replacement parts are available from or through the local Tektronix, Inc., field office or representative. Replacement Parts When ordering parts be sure to include the following information in your order: 1. -
Page 85: Torque Specifications
Maintenance Torque Specifications Only #4 screws are used in the TSG 601 to secure the case halves together. DO NOT USE MORE THAN 3 INCH POUNDS OF TORQUE ON THESE SCREWS. Replacing Assemblies WARNING. Disconnect the AC adapter and batteries before replacing any components. -
Page 86: Main Board And Lcd Removal/Replacement
1. Once the Main board is out of the way, lift the plastic spacer board out of the instrument. This is held in place only by a friction fit. 2. Lift the Keypad board out of the TSG 601. This too is held in place by a friction fit. -
Page 87: Replaceable Electrical Parts
Replaceable Electrical Parts... -
Page 89: Parts Ordering Information
Replaceable Electrical Parts This section contains a list of the components that are replaceable for the TSG 601. Use this list to identify and order replacement parts. There is a separate Replaceable Electrical Parts list for each instrument. Parts Ordering Information Replacement parts are available from or through your local Tektronix, Inc., Field... - Page 90 Indicates the code number of the actual manufacturer of the part. (Code to name (Column 6) and address cross reference can be found immediately after this page.) Mfr. Part No. (Column 7) Indicates actual manufacturer’s part number. 6–2 TSG 601 Service Manual...
- Page 91 2100 LOGIC DRIVE SAN JOSE CA 95124 75915 LITTELFUSE TRACOR INC 800 E NORTHWEST HWY DES PLAINES IL 60016–3049 SUB OF TRACOR INC 80009 TEKTRONIX INC 14150 SW KARL BRAUN DR BEAVERTON OR 97077–0001 PO BOX 500 6–3 TSG 601 Service Manual...
- Page 92 Mfr. Code. Manufacturer Address City, State, Zip Code 82567 DYNAMICS CORP OF AMERICA 400 W NORTH ST CARLISLE PA 17013–2248 REEVES–HOFFMAN DIV 91637 DALE ELECTRONICS INC 2064 12TH AVE COLUMBUS NE 68601–3632 PO BOX 609 6–4 TSG 601 Service Manual...
- Page 93 A1C58 283–5114–00 CAP,FXD,CER:MLC;0.1UF,10%,50V,X7R,1206 04222 12065C104KAT(1A A1C59 283–5203–00 CAP,FXD,CER:MLC;1000PF,10%,100V,X7R,1206 04222 12061C102KAT1A A1C60 283–5203–00 CAP,FXD,CER:MLC;1000PF,10%,100V,X7R,1206 04222 12061C102KAT1A A1C61 283–5114–00 CAP,FXD,CER:MLC;0.1UF,10%,50V,X7R,1206 04222 12065C104KAT(1A A1C62 283–5114–00 CAP,FXD,CER:MLC;0.1UF,10%,50V,X7R,1206 04222 12065C104KAT(1A A1C63 283–5114–00 CAP,FXD,CER:MLC;0.1UF,10%,50V,X7R,1206 04222 12065C104KAT(1A A1C64 283–5114–00 CAP,FXD,CER:MLC;0.1UF,10%,50V,X7R,1206 04222 12065C104KAT(1A 6–5 TSG 601 Service Manual...
- Page 94 H X 0.125 TAIL,30 GOLD,SLDR MASKPOSTS,DUAL ENTRY A1J2 131–5543–01 CONN,BOX:PCB,BTM ENTRY;FEM,STR,2 X 10,0.1 CTR,0.23 53387 929842–01–10–30 H X 0.125 TAIL,30 GLD,SLDRMASK POST,DUAL ENTRY A1J5 131–5527–00 JACK,PWR DC:PCB;MALE,RTANG,2MM PIN,11MMH(0.433) X 0LXM2 DJ005A 3.5MM(0.137) TAIL,9MM(0.354) W,TIN,W/SW,DC PWR JACK 6–6 TSG 601 Service Manual...
- Page 95 RES,FXD:THICK FILM;10.0K OHM,1%,0.125W,TC=100 PPM 50139 BCK1002FT A1R38 321–5209–00 RES,FXD,FILM:243 OHM,1%,0.125WTAPE & REEL,SMD 91637 CRCW–1206–2430F A1R39 321–5049–00 RES,FXD:THICK FILM;1M OHM,1%,0.125W,TC=100PPM 57668 MCR18FXEA1M A1R40 311–5040–00 RES,VAR,TRMR:CERMET;10K OHM,25%,0.25W,4MM TK2073 G4DT103M SQ,TOP ADJ A1R42 321–5038–00 RES,FXD:THICK FILM;47.5K OHM,1%,0.125W,TC=100 PPM 50139 BCK4752FT 6–7 TSG 601 Service Manual...
- Page 96 IC,MISC:CMOS,PWR SUPPLY SUPERVISOR;MPU RESET 1ES66 MAX1232CSA (C74 GEN,5V SUPPLY SENSING,MPU WATCHDOGTIMER A1U9 156–6491–00 IC,MEMORY:CMOS,ROM ;12 LINES X 24 COLUMN TV 80009 156649100 A1U10 156–5588–01 IC,LINEAR:BIPOLAR,V REF;POS,2.5V,1.0%,40PPM,SERIES 04713 MC1403DR2 A1U11 155–0416–00 IC,ASIC:BIPOLAR,VIDEO SERIALZER;FULL CUSTOM,M763 TK2598 155041600 6–8 TSG 601 Service Manual...
- Page 97 CONN,RF JACK:BNC;50 OHM,FEMALE,STR,PCB,0.450 H X 24931 28JR299–3 (4)0.040 SQ,0.189 TAIL,ON 0.250 CTRPCB A4J4 131–5436–00 CONN,RF JACK:BNC;50 OHM,FEMALE,STR,PCB,0.450 H X 24931 28JR299–3 (4)0.040 SQ,0.189 TAIL,ON 0.250 CTRPCB 174–3183–00 CABLE ASSEMBLY: 80009 174318300 (CONNECTED @ A1J8 & A4J1) 6–9 TSG 601 Service Manual...
- Page 98 Replaceable Electrical Parts 6–10 TSG 601 Service Manual...
-
Page 99: Diagrams
Diagrams and Circuit Board Illustrations... - Page 101 Example: ID CONTROL, (ID CONTROL), or /ID CONTROL. Abbreviations are based on ANSI Y1.1–1972. Other ANSI standards that are used in the preparation of diagrams by Tektronix, Inc. are: Y14.15, 1966 — Drafting Practices. Y14.2, 1973 — Line Conventions and Lettering.
- Page 102 When more than one schematic diagram is used to illustrate the circuitry on a circuit board, the circuit board illustration will only appear opposite the first dia- gram; the lookup table will list the diagram number of other diagrams that the other circuitry appears on. 7–2 TSG 601 Service Manual...
- Page 104 A2 Key Board Static Sensitive Devices See Maintenance Section Schematic Diagram <1> Component Locator Chart Assembly A2. TSG 601...
- Page 105 TSG 601 KEYPAD...
- Page 106 C58 † C59 † VR1 † C60 † VR2 † C61 † R52 † C62 † R53 † R54 † † = on back of board. A3 LCD Board (front) A3 LCD Board (back) A1 Main Board (back) TSG 601...
- Page 107 FLASH PROM TEST SIGNAL FLASH PROM WATCHDOG TCXO MICROPROCESSOR VIDEO SRAMs CHARACTER ID DISPLAY GENERATOR FPGA RS–232 DRIVER TSG 601 CPU AND SERIAL DIGITAL GENERATION A1 & A3...
- Page 108 Schematic Diagram <2> Component Locator Chart A1 Main Board. Partial assembly A1 also shown on schematic diagrams 1 and 3. C107 C108 C109 C110...
- Page 109 SERIALIZER SERIAL DRIVER TERMINATION DETECTOR TSG 601 SERIAL OUTPUT...
- Page 110 Schematic Diagram <3> Component Locator Chart A1 Main Board. Partial assembly A1 also shown on schematic diagrams 1 and 2. C100 C101 C105 C111 TSG 601...
- Page 111 POLARITY PROTECTION DC IN 9–15V BATTERY SUPPLY CONTROL COMPARTMENT BATTERY CHARGER SWITCHING SUPPLY SERIAL VIDEO OUTPUT APPROX 50 M CABLE 50 M CABLE SIMULATOR APPROX 50 M CABLE TSG 601 POWER SUPPLY AND I/O PANEL A1 & A4...
-
Page 113: Replaceable Mechanical Parts
Replaceable Mechanical Parts... - Page 115 Replaceable Mechanical Parts This section contains a list of the components that are replaceable for the TSG 601. Use this list to identify and order replacement parts. There is a separate Replaceable Mechanical Parts list for each instrument. Parts Ordering Information Replacement parts are available from or through your local Tektronix, Inc., Field...
- Page 116 Indicates the code number of the actual manufacturer of the part. (Code to name (Column 7) and address cross reference can be found immediately after this page.) Mfr. Part Number Indicates actual manufacturer’s part number. (Column 8) 8–2 TSG 601 Service Manual...
- Page 117 BLDG. #22 0VG90 GLOBTEK INC 186 VETERANS DRIVE NORTHVALE, NJ 07647 62712 SEIKO INSTRUMENTS USA 2990 W LOMITA BLVD TORRANCE CA 90505–5102 80009 TEKTRONIX INC 14150 SW KARL BRAUN DR BEAVERTON OR 97077–0001 PO BOX 500 8–3 TSG 601 Service Manual...
- Page 118 0VG90 WD49E1000CRA12C OPTIONAL ACCESSORIES 119–4539–00 POWER SUPPLY:12W; 12V 1A, 180CM CORD WITH 2.1MM FEMALE RIGHT ANGLECONN, CN (OPTION 1J ONLY) –17 119–4488–00 BAT PACK ASSY: 0DWW6 101–147–1 070–8910–00 MANUAL,TECH:USER,TSG601 TK2548 070891000 070–8911–00 MANUAL,TECH:SERVICE,TSG601,DP TK2548 070891100 8–4 TSG 601 Service Manual...
- Page 119 8–5 TSG 601 Service Manual...
- Page 120 8–6 TSG 601 Service Manual...
Need help?
Do you have a question about the TSG 601 and is the answer not in the manual?
Questions and answers