
Related Manuals for PEERLESS GM


Summary of Contents for PEERLESS GM
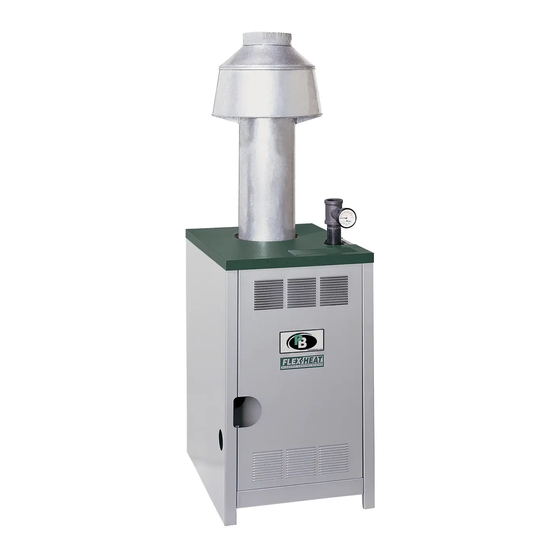
- Page 1 Series Boilers I n s t a l l a t i o n , O p e r a t i o n & M a i n t e n a n c e M a n u a l...
-
Page 2: Table Of Contents
TABLE OF CONTENTS TABLE OF CONTENTS USING THIS MANUAL 7. CSD CODE REQUIREMENTS A. GENERAL ......23 A. -
Page 3: Using This Manual
USING THIS MANUAL USING THIS MANUAL A. INSTALLATION SEQUENCE DANGER Follow the installation instructions provided in this Indicates a condition or hazard which will cause manual in the order shown. The order of these severe personal injury, death or major property instructions have been set in order to provide the damage. -
Page 4: Preinstallation
Do not install boiler on carpeting. Boiler installation Series GM Boiler shall be determined as follows: on carpeting is a fire hazard. ⎛ ⎝... - Page 5 PREINSTALLATION where: I other = Input of appliances other than fan assisted in Btu/hr ACH = air change per hour (percent of the volume of the space exchanged per hour, expressed as a decimal) For fan assisted appliances, calculate the required volume of air using the following equation: ⎛...
- Page 6 PREINSTALLATION Figure 1.4: Air Openings – All Air from Outdoors through Vertical Ducts Figure 1.6: Air Openings – All Air from Outdoors through One Opening ii. Where communicating with the outdoors through horizontal ducts, each opening shall 5. Combination Indoor and Outdoor Combustion Air: If have a minimum free area of 1 in²...
-
Page 7: Installation Survey
E. CIRCULATORS iii. Nonmotorized dampers shall be fixed in the open position. The Series GM boiler is not equipped with a circulator or a means to control circulator operation. Provide b. Motorized dampers shall be interlocked with the circulator and zone controls, such as Taco zoning equipment so that they are proven in the full circulator or Honeywell R845. -
Page 8: Boiler Set-Up
BOILER SET-UP 2. BOILER SET-UP 1. Provide a sound, level foundation. Locate boiler as 3. Separate the wood shipping pallet from the boiler near to the chimney or outside wall as possible and base by removing two (2) hold-down bolts at each centralized with respect to the heating system. -
Page 9: Water Piping And Controls
WATER PIPING AND CONTROLS 3. WATER PIPING AND CONTROLS Design piping and size circulator(s) to suit the system. Refer to the I=B=R - Residential Hydronic Heating Installation/Design Guide and the PB Heat Water Survey for guidance. A. BOILER SUPPLY AND RETURN Install boiler to protect the gas ignition system components from water (dripping, spraying, etc.) during appliance operation and service (circulator replacement,... -
Page 10: Safety Relief Valve
WATER PIPING AND CONTROLS b. When system return water temperature will be below 130°F (54°C), pipe the boiler with a bypass arrangement to blend the system return and hot supply to obtain at least 130°F (54°C) entering the boiler. For more information on bypass piping, consult the PB Heat Water Installation Survey. -
Page 11: Piping For Zoned Systems
WATER PIPING AND CONTROLS C. PIPING FOR ZONED SYSTEMS 1. See Figures 3.6 and 3.7 for basic zoned system layouts. Circulators may be installed in either supply or return piping. Refer to PB Heat Water Installation Survey for additional information. 2. -
Page 12: Expansion Tank
WATER PIPING AND CONTROLS D. EXPANSION TANK FREEZE PROTECTION For new or existing systems that must be freeze- 1. Consult the tank manufacturer’s instructions for protected: specific information relating to tank installation. Size the expansion tank for the required system volume WARNING and capacity. -
Page 13: Venting
VENTING 4. VENTING A. DRAFT HOOD 1. The boiler is equipped with a draft hood designed to: a. provide for the ready escape of flue gases from the boiler in the event of no draft. b. prevent a backdraft from entering the boiler. c. -
Page 14: Automatic Vent Damper Installation - General
VENTING B. AUTOMATIC VENT DAMPER C. VENT PIPING AND CHIMNEY INSTALLATION – GENERAL 1. Install vent piping in accordance with current edition of National Fuel Gas Code, ANSI Z223.1/NFPA 54 1. Do not use one vent damper to control two or more under “Venting of Equipment”, or applicable heating appliances. -
Page 15: Boiler Removal From Common Venting System
VENTING Figure 4.4: Venting with Vent Damper in Horizontal Position d. Place in operation the appliance being inspected. D. BOILER REMOVAL FROM COMMON Follow the lighting instructions. Adjust thermostat so VENTING SYSTEM appliance will operate continuously. At the time of removal of an existing boiler, follow these e. -
Page 16: Gas Piping
Per Hour) Per Hour) Per Hour) 6. Install a ground joint union ahead of the gas control GM-05 assembly to permit servicing of the control. Some GM-06 local codes require an additional equipment shutoff valve when using the combination gas controls. If... - Page 17 1/2 psig (3.5 kPa). 9. Minimum permissible natural gas supply pressure Inches Water Column (kPa)]: GM-05 GM-06 GM-07 GM-08 Figure 5.2: Gas Connection to Boiler - Internal...
-
Page 18: Electrical
ELECTRICAL 6. ELECTRICAL NOTICE This unit when installed must be electrically grounded in accordance with the requirements of the authority having jurisdiction or, in the absence of such requirements, with the current edition of the National Electrical Code , ANSI/NFPA 70 or the Canadian Electrical Code Part I, CSA C22.1, Electrical Code. 3. - Page 19 ELECTRICAL Figure 6.2: Taco Zoning Circulator Wiring Figure 6.3: Hydrolevel 550 Low Water Cutoff Wiring...
- Page 20 ELECTRICAL Figure 6.4: Connection and Schematic Diagram, Intermittent Ignition, Natural Gas 5. Pilot flame detected. SEQUENCE OF OPERATION, INTERMITTENT a. Igniter off. IGNITION: b. Main gas on, igniting main burners. 1. Thermostat calls for heat. Note: If pilot flame is not detected within 30 seconds, 2.
- Page 21 ELECTRICAL Figure 6.5: Connection and Schematic Diagram, Intermittent Ignition, LP Gas 5. Pilot flame detected. SEQUENCE OF OPERATION, INTERMITTENT a. Igniter off. IGNITION: b. Main gas on, igniting main burners. 1. Thermostat calls for heat. Note: If pilot flame is not detected within 30 seconds, 2.
- Page 22 ELECTRICAL Figure 6.6: Connection and Schematic Diagram, Standing Pilot 5. Pilot flame detected by thermocouple. Main gas on, SEQUENCE OF OPERATION, STANDING igniting main burners. PILOT: Note: If pilot flame is not detected, main and pilot 1. Thermostat calls for heat. gas are automatically turned off.
- Page 23 ELECTRICAL Figure 6.7: Intermittent Ignition System Operating Sequence...
- Page 24 ELECTRICAL Figure 6.8: Circulator Wiring Figure 6.9: Zone Valve Wiring...
-
Page 25: Csd Code Requirements
The CSD-1 Code may be ordered by calling 1-800-THE-ASME. B. CSD PART CF REQUIREMENTS The Series GM is CSA certified to ANSI Z21.13 (CSA 4.9) and as such meets all CSD-1 Part CF requirements for combustion side controls for units under 400,000 btuh (117 kW) input. -
Page 26: Csd Part Ce Electrical
CSD CODE REQUIREMENTS E. CSD PART CE ELECTRICAL REQUIRMENTS Note the following electrical requirements per CSD-1 Section CE-110(a): “A disconnecting means capable of being locked in the open position shall be installed at an accessible location at the boiler so that the boiler can be disconnected from all sources of potential. -
Page 27: Start-Up Procedures
START-UP PROCEDURES 8. START-UP PROCEDURES 8. Connect a manometer to 1/8 NPT tapping provided A. COMPLETING THE INSTALLATION on the manifold. See Figures 8.1 and 8.2. 1. Confirm that all water, gas and electricity are 9. Confirm that the gas supply pressure to the boiler is turned off. - Page 28 START-UP PROCEDURES Figure 8.1: Gas, Valve, Manifold and Burner Assembly, GM-05/06 (Standing Pilot shown, Intermittent Ignition similar) Figure 8.2: Gas, Valve, Manifold and Burner Assembly, GM-07/08 (Intermittent Ignition) Figure 8.3: Valve Tapping and Adjustment Screw Figure 8.4: Valve Tapping and Adjustment Screw...
- Page 29 START-UP PROCEDURES Figure 8.5: Operating Instructions, SmartValve Intermittent Ignition (boiler model suffix “SV”)
-
Page 30: Operating Instructions
START-UP PROCEDURES FOR YOUR SAFETY READ BEFORE LIGHTING WARNING: If you do not follow these instructions exactly, a fire or explosion may result causing property damage, personal injury, or loss of life. A. This appliance is equipped with an ignition device Immediately call your gas supplier from a which automatically lights the pilot. -
Page 31: Lighting Instructions
START-UP PROCEDURES FOR YOUR SAFETY READ BEFORE LIGHTING WARNING: If you do not follow these instructions exactly, a fire or explosion may result causing property damage, personal injury, or loss of life. A. This appliance has a pilot which must be lighted by If you cannot reach your gas supplier, call the fire hand. -
Page 32: Control Descriptions
START-UP PROCEDURES 3. In no case should the final manifold pressure vary B. CONTROL DESCRIPTIONS more than ±0.3 inches (±75 Pa) water column from See Figure 8.8 for locations of these devices. the above specified pressures. Any necessary major changes in the flow should be made by changing the 1. -
Page 33: Check-Out Procedure
START-UP PROCEDURES Table 8.1a: Meter Conversion – Natural Gas b. Spark Intermittent Ignition System: Burner inputs in Btu/hr for various meter timings and Turn gas supply off. heat values. (Table based on 2 cubic feet of gas through meter). Set thermostat or controller above room temperature to call for heat. -
Page 34: Troubleshooting
TROUBLESHOOTING 9. TROUBLESHOOTING DANGER A. SHUT-DOWN CAUSED BY PILOT OUTAGE, VENT SAFETY SHUTOFF When servicing or replacing items that communicate SWITCH OR FLAME ROLLOUT SAFETY with the boiler water, be certain that: SHUTOFF SWITCH ● ● There is no pressure on the boiler. In the event of a shut-down caused by a pilot outage, ●... - Page 35 TROUBLESHOOTING Table 9.1: Boiler Troubleshooting Guide PROBLEM POSSIBLE CAUSES CORRECTIVE ACTIONS Burners not functioning. 1. No power. 1. Check line voltage wiring and fuses. 2. Limit (Aquastat) not working. 2. Check wiring and contacts, relay, temperature setting. Clean and adjust as necessary. 3.
- Page 36 TROUBLESHOOTING Figure 9.1: SmartValve™ Intermittent Ignition System Troubleshooting Sequence...
-
Page 37: Maintenance
MAINTENANCE 10. MAINTENANCE WARNING Product Safety Information Refractory Ceramic Fiber Product This appliance contains materials made from refractory ceramic fibers (RCF). Airborne RCF, when inhaled, have been classified by the International Agency for Research on Cancer (IARC), as a possible carcinogen to humans. After the RCF materials have been exposed to temperatures above 1800°F (982°C), they can change into crystalline silica, which has been classified by the IARC as carcinogenic to humans. -
Page 38: General
MAINTENANCE 4. Check for water leaks in boiler and system piping. A. GENERAL 5. Smell around the appliance area for gas. If you smell 1. Disconnect this boiler from the gas supply piping gas, follow the procedure listed in the during any pressure testing of the gas system. -
Page 39: Annually (Before Start Of Heating Season)
MAINTENANCE E. ANNUALLY (BEFORE START OF HEATING SEASON) DANGER When servicing or replacing components, be absolutely certain that the following conditions are met: ● ● Water, gas and electricity are off. ● ● The boiler is at room temperature. ● ● There is no pressure in the boiler. -
Page 40: Boiler Dimensions & Ratings
BOILER DIMENSIONS & RATINGS 11. BOILER DIMENSIONS & RATINGS Figure 11.1: Boiler Views Table 11.1: Series GM Boiler Dimensions SERIES GM BOILER DIMENSIONS Jacket Left of Jacket to the Top of Jacket to Vent Connector Size “D” Width Centerline of Vent... -
Page 41: Repair Parts
P .O. Box 447, New Berlinville, PA 19545-0447. Use the figures and tables on pages 39-43 to assist in ordering parts. Note: Remember to include boiler model number and serial number when ordering parts. Item Part Selection GM-05/ GM-06/ GM-07/ GM-08/ Description... -
Page 42: Main Burners
REPAIR PARTS Item Part Selection Description GM-05 GM-06 GM-07 GM-08 Information Gas Manifold 50712 50713 50714 50715 Main Burner Specify quantity 50192 50192 50192 50192 Main Burner w/ Pilot Clip 1 per boiler See Table below Orifice Spud, #40 Natural Gas, 0-2000 ft. (0-610 m) -
Page 43: Block And Flue Collector
Igniter/Sensor Cable with Ceramic Boot 50627 Figure 12.4: Gas Valve and Pilot, Intermittent Ignition, Natural Gas Figure 12.5: Gas Valve and Pilot, Intermittent Ignition, LP Gas Item Part Selection Description GM-05 GM-06 GM-07 GM-08 Information Block 91041 91042 91043 91044... -
Page 44: Jacket
REPAIR PARTS Item Part Selection Description GM-05 GM-06 GM-07 GM-08 Information Jacket Assembly Complete jacket* with 90465 90466 90467 90468 insulation and screws *Complete Jacket Consists of: Left Side Panel Right Side Panel Rear Panel Inner Front Panel Removable Front Panel... -
Page 45: Automatic Vent Damper
REPAIR PARTS Item Description GM-05 GM-06 GM-07 GM-08 " 50756 50756 50756 50756 Drain Valve*, Conbraco 31-602-04 51587 51587 51587 51587 Flame Rollout Safety Shutoff Switch 50788 50788 50788 50788 Transformer, 40VA, Johnson Y65T42-0 50539 50539 50539 50539 Honeywell L4080B1261 Limit... - Page 46 NOTES...
- Page 47 Series Boilers I n s t a l l a t i o n , O p e r a t i o n & M a i n t e n a n c e M a n u a l TO T H E I N S TA L L E R : This manual is the property of the owner and must be affixed near the boiler for future reference.
Need help?
Do you have a question about the GM and is the answer not in the manual?
Questions and answers