Table of Contents
Advertisement
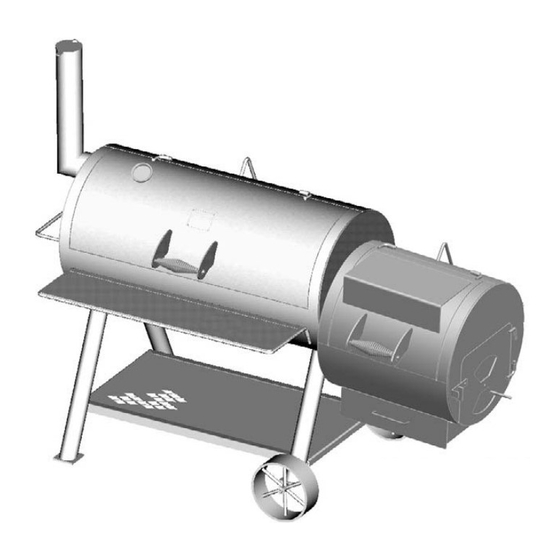
Longhorn
MODEL 06201348 • ASSEMBLY INSTRUCTIONS
For Outdoor
Use Only
CAUTION
THIS UNIT IS HEA VY!
DO NOT assemble without a helper .
CAUTION
Some parts may contain sharp edges – especially as
noted in manual. Wear protective gloves if necessary.
CAUTION
Read and follow all safety statements, warnings,
assembly instructions and use & care directions before
attempting to assemble.
WARNING
All surfaces can be hot during use. Use protection as
required to prevent burning.
Smoker
Tools needed for assembly:
Two adjustable wrenches • Hammer
WARNING
Do not use this unit on or near combustible surfaces or
structures such as wood decks, dry leaves or grass, vinyl
or wood siding, etc. SEE OWNER'S MANUAL FOR
IMPORTANT SAFETY INFORMATION.
WARNING
NEVER LEA VE FIRE UNA TTENDED!
Do not allow small children near flame. Hot embers can
fly out in breezy conditions. Adequate fire extinguishing
material should be readily available.
WARNING
CARBON MONOXIDE HAZARD
Burning charcoal inside can kill you. It gives off carbon
monoxide, which has no odor. NEVER burn charcoal
inside homes, vehicles or tents.
Longhorn Smoker 06201348-42804230(05-13-08)
TM
Advertisement
Table of Contents

Related Manuals for oklahoma joes Longhorn Smoker 06201348


Summary of Contents for oklahoma joes Longhorn Smoker 06201348
- Page 1 Longhorn Smoker MODEL 06201348 • ASSEMBLY INSTRUCTIONS For Outdoor Tools needed for assembly: Use Only Two adjustable wrenches • Hammer CAUTION WARNING Do not use this unit on or near combustible surfaces or THIS UNIT IS HEA VY! structures such as wood decks, dry leaves or grass, vinyl DO NOT assemble without a helper .
-
Page 2: Parts List
STOP! Call Our Help Line Missing a part? No need to go back to the store! The store where you made your purchase does not stock parts for this item. If you need parts, whether they are missing or damaged, call the Customer Service toll free Help Line. - Page 3 box strapping and remove top of box. Lay sides of carton on ground next to carton bottom. Remove parts from inside of unit. One person should hold the unit steady at the firebox end while another removes the support pieces from the carton. Smoke chamber Firebox With...
- Page 4 each short leg, slide one 1/2” flat washer onto axle, followed by a wheel, then another 1/2” flat washer . Slide a hitch pin into the hole at the end of the axle. Hitch pin Wheel 1/2” Flat washer 1/2” Flat washer Axle Short leg Hitch pin...
- Page 5 Have one person hold wood rack in position shown while another attaches rack to legs using four 3/8-16x1” hex-head bolts Fully tighten these four bolts. Wood rack MAKE SURE THAT LEG BOLTS ARE TIGHT ENOUGH SO THAT LEGS WON’T SLIP OFF OFU Ps O in S gTt S h. r ee people, roll the unit over the handle brackets and stand it up onto its legs.
- Page 6 Smokestack Attach smokestack to end of smoke chamber by sliding stack into smokestack receiver. While holding the smokestack in a Smokestack receiver vertical position, tighten th 3 e /8-16x3/4” hex-head bolt i n the nut that is welded to the smokestack receiver. Smoke chamber To attach damper to firebox side door, place one...
- Page 7 Handle Assembly . . . While holding handle in position between handle brackets, slide rod into one bracket, through handle, and out through other bracket. Secure at each end of rod with hitch pins . Repeat process to assemble firebox handle. Handle bracket Hitch pin Handle...
- Page 8 Temperature gauge...
- Page 9 Slide ash collector into ash collector guide. Ash collector...
- Page 10 HARDWARE LIST Hardware is shown actual size. You may have spare hardware after assembly is complete. 3/8-16x1” 3/8-16x3/4” 1/4-20x3/4” Hex-Head Bolt Hex-Head Bolt Hex-Head Bolt 3/8-16 Hex Nut 1/4-20 Lock Nut Qty. 8 Qty. 9 Qty. 2 Qty. 8 Qty. 2 (4 already installed) (8 already installed) (1 already installed)
- Page 11 Preparing and Using Your Longhorn Smoker Before cooking with your Longhorn Smoker, the following steps should be closely followed to both cure the finish and season the interior steel. Failure to properly follow these steps may damage the finish and/or impart metallic flavors to your first foods.
- Page 12 RECIPES Beef Brisket Pork Shoulder Bone out a whole pork shoulder. Rub down with OKLAHOMA JOE’S Using an OKLAHOMA JOE’S seasoning, shake the mix over all surfaces of the brisket and pat into the meat. Place in the refrigerator Original Barbecue Seasoning on the inside and outside. Tie shoulder overnight.
-
Page 13: Limited Warranty
Defective or missing parts subject to this limited warranty will not be replaced without registration or proof of purchase. Register online at www.charbroil.com complete and return via mail the Product Registration Card located on t e last page of the Use & Care manual included with this product and retain your sales receipt for proof of purchase. - Page 14 Please register your product online at: www.grillregistration.com (If you register online, you do not need to send in this registration card.) PLEASE FILL OUT THIS CARD AND RETURN IT WITHIN 10 DAYS OF PURCHASE. FAILURE TO RETURN MAY AFFECT YOUR WARRANTY COVERAGE . FOR WARRANTY SERVICE PROOF OF PURCHASE WILL BE REQUIRED.
- Page 15 TOLL FREE 1-800-232-3398...
Need help?
Do you have a question about the Longhorn Smoker 06201348 and is the answer not in the manual?
Questions and answers