Table of Contents
Advertisement
SERIAL NUMBER:
NÚMERO DE SERIE:
NUMÉRO DE SÉRIE:
______________________________________
See rating label on grill for serial number.
El número de serie se encuentra en la etiqueta
deespecificaciones de la parrilla.
Voir l'étiquette d'évaluation sur le gril pour le numéro
de série.
DATE PURCHASED:
FECHA DE COMPRA:
DATE D'ACHAT:
______________________________________
Need Help? Visit Oklahomajoes.com for video assembly tips. If you'd rather - you can call us at 1-800-318-7744
Necesita ayuda? Visite Oklahomajoes.com para obtener consejos sobre el montaje de videos. Si prefiere, puede llamarnos al 1-800-318-7744
Besoin d'aide? Visitez Oklahomajoes.com pour des astuces d'assemblage vidéo. Si vous préférez, vous pouvez nous appeler au 1-800-318-7744
A MAJOR CAUSE OF FIRES IS FAILURE TO MAINTAIN REQUIRED
CLEARANCES (AIR SPACES) TO COMBUSTIBLE MATERIALS. IT IS OF
UTMOST IMPORTANCE THAT THIS PRODUCT BE INSTALLED ONLY IN
ACCORDANCE WITH THESE INSTRUCTIONS.
IMPORTANT: RETAIN FOR FUTURE REFERENCE. READ CAREFULLY.
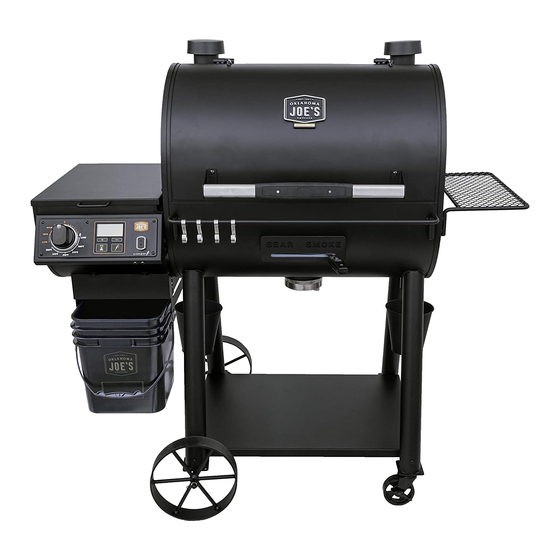
DLX PELLET GRILL
MODEL NUMBER 20202106
ASSEMBLY GUIDE
PN: 42805468 • 08/14/2019
Advertisement
Table of Contents

Related Manuals for oklahoma joes Rider 20202106


Summary of Contents for oklahoma joes Rider 20202106
- Page 1 DLX PELLET GRILL MODEL NUMBER 20202106 ASSEMBLY GUIDE SERIAL NUMBER: NÚMERO DE SERIE: NUMÉRO DE SÉRIE: ______________________________________ See rating label on grill for serial number. El número de serie se encuentra en la etiqueta deespecificaciones de la parrilla. Voir l’étiquette d’évaluation sur le gril pour le numéro de série.
-
Page 2: Important Safeguards
READ ALL INSTRUCTIONS BEFORE INSTALLING IMPORTANT SAFEGUARDS When using electrical appliances, basic safety precautions AND USING THE APPLIANCE. should always be followed including the following: • Do not touch hot surfaces. IMPORTANT SAFETY INFORMATION • To protect against electrical shock, do not immerse cord, plugs, con- troller or heating element in water or any other liquid. -
Page 3: Disposal Of Ashes
on the unit. Do not try to smother the fire. We recommend that you D A N G E R keep a class ABC approved fire extinguisher on site. If an uncon- trolled fire does occur, call your Fire Department. For North American Consumers: 3. - Page 4 CREOSOTE - Formation and need for removal When wood pellets are burned slowly, they produce tar and other organic vapors that combine with expelled moisture to form creo- sote. The creosote vapors condense in a relatively cool oven flue and exhaust hood of a slow burning fire. As a result, creosote residue accumulates on the flue lining and exhaust hood.
-
Page 5: Símbolos De Seguridad
LEA TODAS LAS INSTRUCCIONES ANTES DE INSTRUCCIONES DE SEGURIDAD IMPORTANTES INSTALAR Y USAR EL APARATO. Cuando utilice aparatos eléctricos, siga siempre las medidas básicas de seguridad, incluidas las siguientes: INFORMACION DE SEGURIDAD IMPORTANTE • No toque las superficies calientes. • Para protegerse contra descargas eléctricas, no sumerja el cable, los enchufes, el controlador o el elemento calefactor en agua o SÍMBOLOS DE SEGURIDAD cualquier otro líquido. - Page 6 2. En caso de producirse un fuego de grasa descontrolado, apague el P E L I G R O aparato y deje la tapa cerrada hasta que el fuego se apague. No des- enchufe el cable de alimentación. No arroje agua sobre la unidad. No Para consumidores norteamericanos: intente sofocar el fuego.
- Page 7 CREOSOTA: formación y necesidad de remoción Cuando los pellets de madera se queman lentamente, producen alquitrán y otros vapores orgánicos que se combinan con la humedad expulsada para formar creosota. Los vapores de creosota se condensan en una chimenea de horno relativamente fría y una campana extractora de fuego lento. Como resultado, los residuos de creosota se acumulan en el revestimiento de la chimenea y la campana extractora.
-
Page 8: Information De Sécurité Importante
IMPORTANTES MESURES DE PROTECTION LISEZ TOUTES LES INSTRUCTIONS AVANT Il convient de prendre des mesures de sécurité de base lors de D’INSTALLER ET D’UTILISER L’APPAREIL l’utilisation d’appareils électriques, y compris les suivantes : INFORMATION DE SÉCURITÉ IMPORTANTE • Ne touchez pas les surfaces chaudes. •... - Page 9 sayez pas d’étouffer les flammes. Nous vous recommandons d’avoir D A N G E R un extincteur de classe ABC approuvé sur place. En cas d’incendie non contrôlé, appelez votre service d’incendie. Pour les consommateurs nord-américains : 3. Ne transportez pas et ne déplacez pas votre appareil pendant qu’il Branchez cet appareil dans une prise de courant à...
- Page 10 CRÉOSOTE - Formation et enlèvement Lorsque des granules de bois brûlent lentement, elles produisent du goudron et d’autres vapeurs organiques qui se combinent à l’humidité évacuée pour former du créosote. Ces vapeurs de créosote se condensent dans l’air rel- ativement frais qui s’échappe d’une combustion lente. En conséquence, les résidus de créosote s’accumulent sur la paroi du conduit de fumée et dans la hotte d’aspiration.
-
Page 11: De Pi Èces De Rechang E
RE PLACE M E NT PARTS DIAG RAM • DIAG RAMA DE PI EZAS DE RE PU ESTO • SCH É MA DE PI ÈCES DE RECHANG E OK LAHO M AJ O ES. CO M... -
Page 12: Replacement Parts List
RE PLACE M E NT PARTS LIST Description Description FIREBOX SMOKE STACK CAP TOP LID KIT, GREASE BLOCK, F/ SEAR ZONE CHAMBER LOGO PLATE SEAR ZONE, HEAT BAFFLE CHAMBER AIR CHANNEL SUPPORT SEAR ZONE, STATIONARY CHAMBER AUGER HOUSING SEAR ZONE, ROTATING CHAMBER GASKET F/ HOPPER HANDLE LEVER BRACKET, F/ SEAR ZONE FIRE POT... -
Page 13: Lista De Piezas De Repuesto
LISTA DE PI EZAS DE RE PU ESTO Clave Cantidad Descripción Clave Cantidad Descripción CÁMARA DE COMBUSTIÓN BASE DE LA PILA DE AHUMADO TAPA SUPERIOR TAPA DE LA PILA DE AHUMADO PLACA DEL LOGOTIPO KIT, BLOQUE DE GRASA PARA LA CÁMARA DE LA ZONA DE DORADO SOPORTE DEL CANAL DE AIRE ZONA DE DORADO, CÁMARA DE... -
Page 14: Liste Des Pièces De Rechange
LISTE DES PI ÈCES DE RECHANG E Qté Description Qté Description CHAMBRE DE COMBUSTION BASE DE LA CHEMINÉE COUVERCLE COUVERCLE DE LA CHEMINÉE PLAQUE DE LOGO BLOC DE GRAISSAGE POUR LA ZONE DE GRILLAGE SUPPORT DE LA CONDUITE D’AIR DÉFLECTEUR DE CHALEUR, CHAMBRE DE BOÎTIER DE LA TARIÈRE GRILLAGE JOINT POUR TRÉMIE... - Page 15 HARDWARE LIST • LISTA DE HARDWARE • LISTE DU MATÉ RI E L Key • Clv Description • Descripción Picture • Imagen • Image Qty. • Cant. • Qté • Clé 1-4-20 x 3” HEX SCREW TORNILLO HEXAGONAL HEX VIS 5/16-18 x 3/4”...
- Page 16 ASSE M BLY / ASSE M BLAG E / ASAM BLEA C A U T I O N THIS UNIT IS HEAVY! DO NOT attempt to assemble without a helper. ¡ESTA UNIDAD ES PESADA! NO intente ensamblar sin un ayudante. CET APPAREIL EST LOURD! NE PAS essayer de se réunir sans aide.
- Page 17 ASSE M BLY / ASSE M BLAG E / ASAM BLEA OK LAHO M AJ O ES. CO M...
- Page 18 ASSE M BLY / ASSE M BLAG E / ASAM BLEA OK LAHO M AJ O ES. CO M...
- Page 19 ASSE M BLY / ASSE M BLAG E / ASAM BLEA OK LAHO M AJ O ES. CO M...
- Page 20 ASSE M BLY / ASSE M BLAG E / ASAM BLEA C A U T I O N • DO NOT use the Side Hopper Release Handle to move your grill. It is not de- signed to support the weight of the grill. •...
- Page 21 ASSE M BLY / ASSE M BLAG E / ASAM BLEA C A U T I O N • The Ash Cup (#47) must be installed and se- curely tightened during operation. • La Ash Cup (# 47) debe instalarse y apretarse de manera segura durante la operación.
- Page 22 ASSE M BLY / ASSE M BLAG E / ASAM BLEA OK LAHO M AJ O ES. CO M...
- Page 23 ASSE M BLY / ASSE M BLAG E / ASAM BLEA OK LAHO M AJ O ES. CO M...
- Page 24 ASSE M BLY / ASSE M BLAG E / ASAM BLEA ✓ OK LAHO M AJ O ES. CO M...
- Page 25 ASSE M BLY / ASSE M BLAG E / ASAM BLEA OK LAHO M AJ O ES. CO M...
- Page 26 ASSE M BLY / ASSE M BLAG E / ASAM BLEA OK LAHO M AJ O ES. CO M...
- Page 27 ASSE M BLY / ASSE M BLAG E / ASAM BLEA OK LAHO M AJ O ES. CO M...
-
Page 28: First-Time Startup
FOR YOU R SAFETY - STARTI NG U P YOU R PE LLET G RI LL a. Turn the control knob to the LOW grilling setting. FIRST TIME START UP b. Make sure your pellets are igniting: Follow these instructions to make sure your Pellet Grill is run- •... - Page 29 FOR YOU R SAFETY - STARTI NG U P YOU R PE LLET G RI LL C A U T I O N The main power switch will shut the power off to the control panel and to the grill components only. When servicing the control panel or any parts ensure that the power supply cord is disconnected to avoid a shock hazard.
-
Page 30: Primera Puesta En Marcha
PARA SU SEGURIDAD: PUESTA EN MARCHA DE SU PARRILLA DE PELLETS PRIMERA PUESTA EN MARCHA c. Observe y escuche los pellets que caen del tubo del sinfín hacia el brasero. Cuando eso suceda, sabrá que Siga estas instrucciones para asegurarse de que su parrilla el tubo del sinfín está... - Page 31 PARA SU SEGURIDAD: PUESTA EN MARCHA DE SU PARRILLA DE PELLETS PUESTAS EN MARCHA POSTERIORES: las puestas en ciclo de apagado apagará todos los componentes eléctricos y marcha posteriores son sencillas. apagará la unidad de manera ordenada y controlada. 1. Encienda la parrilla utilizando el interruptor de encen- dido en el panel de control.
-
Page 32: Premier Démarrage
POUR VOTRE SÉCURITÉ – DÉMARRAGE DE VOTRE BARBECUE À GRANULES PREMIER DÉMARRAGE barbecue est prêt à fonctionner. d. Tournez le bouton en position ARRÊT. Suivez ces instructions afin de vous assurer que votre e. Remettez le déflecteur, les grilles et les étagères de barbecue à... - Page 33 POUR VOTRE SÉCURITÉ – DÉMARRAGE DE VOTRE BARBECUE À GRANULES DÉMARRAGES SUBSÉQUENTS – démarrages après 20 minutes, la température reste en dessous de 100 °F subséquents sont simples. (38 °C), le système affichera le code d’erreur ER5. Le système 1. Allumez le barbecue avec l’interrupteur situé...
- Page 34 COM MON TROU BLESHOOTI NG • SOLUCIÓN DE PROBLE MAS COM U N ES DÉ PAN NAG E COM M U N What if I didn’t run the Shutdown Burn? creando una posible situación de sobrecalentamiento cuando está Before you run your grill the next time follow these steps: encendido.
- Page 35 E LECTRICAL CI RCU IT DIAG RAM • DIAG RAMA DE CI RCU ITO E LECTRICO • SCH É MA DE CI RCU IT É LECTRIQU E NOTE: CI RCU IT DIAG RAM PROVI DE D FOR RE FE RE NCE ON LY. DO NOT MODI FY ANY CI RCU ITS PROVI DE D WITH YOU R G RI LL.
-
Page 36: Limited Warranty
LI M ITE D WARRANTY This warranty only applies to units purchased from an authorized retailer. Manufacturer warrants to the original consumer-purchaser only that this product shall be free from defects in workmanship and materials after correct assembly and under normal and reasonable home use for the periods indicated below beginning on the date of purchase*. The manufacturer reserves the right to require that defective parts be returned, postage and or freight pre-paid by the consumer for review and examination. -
Page 37: Garantía Limitada
GARANTÍA LI M ITADA Esta garantía solo se aplica a las unidades compradas en un minorista autorizado. El fabricante únicamente garantiza al comprador-consumidor original que este producto estará libre de defectos materiales y de materiales después de corregir el montaje y bajo uso doméstico normal y razonable durante los periodos indicados a continuación a partir de la fecha de la compra*. -
Page 38: Garantie Limitée
GARANTIE LIMITÉE Cette garantie ne s’applique qu’aux appareils achetés auprès d’un détaillant autorisé. Le fabricant garantit au premier consommateur acheteur que ce produit sera exempt de défauts de fabrication et de matériel après un bon assemblage et avec une utilisation résidentielle normale et raisonnable pendant les périodes indiquées ci-dessous, à compter de la date de l’achat*. - Page 39 PRODUCT REG ISTRATION / REG ISTRACIÓN DE L PRODUCTO / PRODUCT REG ISTRATION / REG ISTRACIÓN DE L PRODUCTO / E N REG ISTRE M E NT DU PRODU IT E N REG ISTRE M E NT DU PRODU IT Two convenient ways to register your product: Deux manières pratiques d’enregistrer votre produit: Dos maneras convenientes de registrar su producto:...
- Page 40 So, how did it go? Share your awesome cooking experience with everyone! We are live on all the social media sites! Join the community! Entonces, ¿cómo te fue? ¡Comparte tu increíble experiencia culinaria con todos! ¡Estamos en vivo en las redes sociales! ¡Únete a la comunidad! Alors, comment ça s’est passé? Partagez votre expérience culinaire avec tout le monde! Nous sommes en direct sur tous les sites de médias sociaux! Rejoignez la communauté!
Need help?
Do you have a question about the Rider 20202106 and is the answer not in the manual?
Questions and answers