Table of Contents
Advertisement
Welcome .................................................................
1
Safety Instructions ...............................................
1-3
Range at a Glance ...................................................
4
Controlsat a Glance .............................................. 5-7
,
:
....
*,
| O•
Surfac_ Co0king ............. .......... ...:i....21.i.......
8_10
•
8
•
Coil Element Surface ....................................... 9
•
Glass-Ceramic Surface ................................... 10
•
Oven Operation ................................................
1t-14
Baking and Roasting ...................................... 11
•
12
•
..................................................
12
•
Broiling ..........................................................
13
•
•
Oven Cooking ..........................................
14
•
Care and Cleaning ...........................................
15-18
•
Self-Clean Oven .......................................
15-16
•
Cleaning Chart .......................................... 17-18
•
Maintenance ....................................................
19-20
•
Before You Call for Service ............................ 21-22
•
Warranty ..............................................................
23
•
®
Advertisement
Table of Contents

Subscribe to Our Youtube Channel
Related Manuals for Maytag MER5710


Summary of Contents for Maytag MER5710
-
Page 1: Table Of Contents
Welcome ..............Safety Instructions ..........Range at a Glance ........... Controlsat a Glance ..........5-7 Surfac_ Co0king ......:i..21.i..8_10 • ..| O• Surface Controls • Coil Element Surface ........9 • Glass-Ceramic Surface ........10 • Oven Operation ..........1t-14 Baking and Roasting ........ -
Page 2: Welcome
Models: U.S. • MER5710 • MER5530 • MER5550 • MER5730 • MER5755 Welcome..,.,..,. Important Safety Congratulations your choice of Maytag electric range.Instructions,,,,.,.,.,.,.,,., Your complete satisfaction is very important to us. Read and follow all instructions before using this ap- Read this user's guide carefully. - Page 3 General Instructions Cooktop WARNING: NEVER use appliance door, NEVER leave surface units unattended or drawer, if equipped, as a step stool or seat especially when using high heat settings. as this may result in possible tipping of the An unattended boilover could cause appliance, damage to the appliance, and se- smoking and a greasy spillover can cause...
-
Page 4: Safety Instructions
Safety Instructions (continued)........ Oven Child Safety Use care when opening door. Let hot air NEVER leave children alone or unsu- or steam escape before removing or replac- pervised in area where appliance is in ing food. use or is still hot. For proper oven operation and perfor- NEVER allow children to sit or stand :_.. -
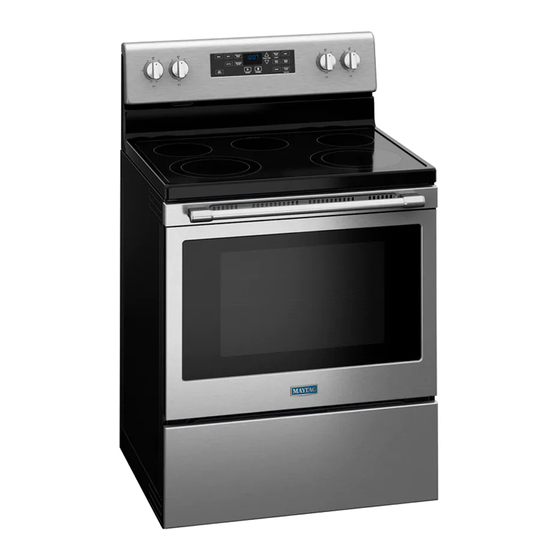
Page 5: Range At A Glance
Range at a Glance eooooooooooeooooeooeooeoooooeeooeoeoee :!i) 21) ELECTRONIC CONTROL (pages 5-7) OVEN LIGHT SWITCH (page 12) BACKGUARD • . SURFACE CONTROLS ." AND INDICATOR LIGHT (pages 8 & 9) I• SURFACE CONTROLS OVEN VENT (page 12) AND INDICATOR LIGHT • ° on glass-ceramic range •... - Page 6 Controls at a Glance......The control panel is designed for ease in programming. The display window on the electronic control shows time of day, timer and oven temperatures. BAKE TIMER CLOCK " CLEAN COOK STOP TIME TIME NOTE: Styling and features may differ slightly depending on the model. Function Pads For example: If you set the oven to bake at 350°F and then set a timing operation,...
- Page 7 CLEAN Pad Setting the Timer Use to set self-clean cycle. The timer can be set from one minute (0:01 ) up to 9 hours and 50 minutes (9:50). For models with a manual door lock: The timer can be used independently of any other oven 1.
-
Page 8: Controlsat A Glance
Controls at a Glance (continued)....... Cancel Clock Display Option Oven Temperature Adjustment Option If you prefer that the time of day not be displayed: You may adjust the oven temperature if you think the oven is not baking correctly. To decide how much to change the To set: Press CLOCK and CANCEL pads at the same time temperature, set the temperature 25 degrees higher or lower and hold for three seconds,... -
Page 9: Surfac_ Co0King
Surface ........Cooking Surface Controls Suace Cooking CAUTIONS: Use to turn on the surface elements. An infinite choice of Before Cooking heat settings is available from LOW to HIGH. The knobs • Always place a pan on the surface unit before you turn can be set on or between any of the numbered settings. -
Page 10: Coil Element Surface
1-2 inches beyond the element. To lower cooktop: Hold the front edge of the cooktop and eEl). Contact your Maytag dealer for details. carefully push back on each support rod to release. Then • Clean frequently. (See cleaning section, page 17.) gently lower the top into place. -
Page 11: Glass-Ceramic Surface
Glass-Ceramic Surface Tips to Protect the Surface (select models) • Before first use, clean the cooktop as directed in the cleaning chart on page 18. CAUTION: Do not use the cooktop if the glass is • Do not use glass pans. They may scratch the surface. cracked or broken, or if metal melts on to it. -
Page 12: Oven Operation
Oven Operation ........Food food Oven Operation CAUTIONS: Follow manufacturer's Prepared Warning: instructions. If a plastic frozen food container and/or its • Be sure all packing material is removed from oven before cover distorts, warps, or is otherwise damaged during cooking, immediately discard the food and its container. -
Page 13: Oven Vent And Light
Oven Vent RACK 2: When the oven is in use, the area near the vent may feel warm Used for roasting small cuts of meat. casseroles. or hot to the touch. Never block the vent opening, baking loaves of bread, bundt cakes or custard pies. onglass-ceramic r ange Used for roasting large cuts of meat and poultry, Two rack: Use rack positions 2 and 4, or 1 and 4. -
Page 14: Broiling
Oven Operation (continued)......Broiling • For best results, use a pan designed for broiling. • For additional broiling tips, refer to the "Cooking Made Simple" booklet. Setting the Controls for Broiling Broil 1. Press the BROIL pad. • BROIL indicator on the BROIL pad will light. Indicator •... -
Page 15: Clock Controlled Oven Cooking
Clock Controlled Oven Cooking The clock must be functioning and set at the correct time of CAUTION day for this feature to operate correctly. • Highly perishable foods such as dairy products, pork, Clock Controlled Oven Cooking is used to turn the oven on poultry or seafood arenot recommended for delayed cook and off at a preset time of day. -
Page 16: Care And Cleaning
Care and Cleaning ........Self-Clean Oven Toprevent damage, do not clean or rub the gasket around oven designed gasket Self-Clean CAUTIONS: door. The to seal in heat during the clean cycle. • It is normalfor parts of the range to become hot during a clean cycle. - Page 17 Setting the Controls for Self Clean NOTE: These instructions cover automatic lock and manual lock models. 1. Close oven door. 2. Move door lock lever right to the locked position _bh._ _.,_ (select models). 3. Press CLEAN pad. • CLEAN indicator on the CLEAN pad will flash. •...
-
Page 18: Cleaning Chart
Care & Cleaning (continued)......Cleaning CAUTIONS: • Be sure appliance is off and all parts are cool before • To prevent staining or discoloration, clean appliai handling or cleaning. This is to avoid damage and after each use. possible burns. •... - Page 19 Cleaning Chart -- continued Parts Cleaning Procedure Glass • Avoid using excessive amounts of water which may seep under or behind glass. Oven window • Wash with soap and water or g]ass cleaner. Rinse with clear water and dry. Oven door •...
-
Page 20: Maintenance
Maintenance......... Cleaning Products Oven Door ACAUTION Because of the many new cleaning products introduced in the marketplace each year, it is not possible to list all products that can be safely used to clean this appliance. Listed below arejust • Do not place excessive weight on or stand on an open oven door. - Page 21 Oven Light Storage Drawer [ACAUTIONS: ACAUTION: • Disconnect power to range before replacing light bulb. • Do not store plastic, paper products, food or flammable materials in this drawer. The drawer . Use a dry potholder to prevent possible harm to hands may become too warm for these items when the when replacing bulb.
-
Page 22: Before You Call For Service
Before You Call for Service...... Check these )oints if... • Check to be sure plug is securely inserted into receptacle. • Check or re-set circuit breaker. Check or replace fuse. Part or all of the appliance does • Check power supply. not work. - Page 23 • Be sure to retain proof of purchase to verify warranty status. Refer to WARRANTY (next page) for further information of owner's responsibilities for warranty service. • If the dealer or service company cannot resolve the problem, write to Maytag Appliances Sales Company, Attn: CAIR Center, RO.
-
Page 24: Warranty
MAYTAG • 403 West Fourth Street North • EO. Box 39 • Newton, Iowa 50208 Form No. A/12/99 Part No. 8113P261-60 _,R_,_ h t t p : / [ w w w.
Need help?
Do you have a question about the MER5710 and is the answer not in the manual?
Questions and answers