Table of Contents
Advertisement
Quick Links
Color Plasma Display
Model Name
42PD8800TA
55PD8800TA
READ THE INSTRUCTIONS INSIDE CAREFULLY.
KEEP THIS USER MANUAL FOR FUTURE REFERENCE
For future reference, record the serial number of your monitor.
SERIAL NO.
This serial number is located on the rear of the monitor.
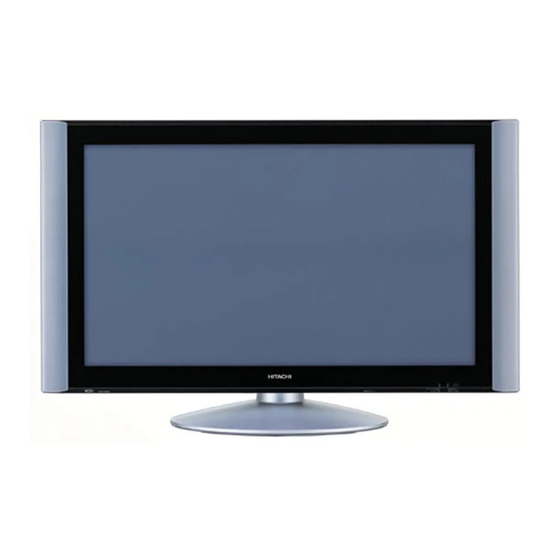
This is the image of the model 42PD8800TA.
Desktop stand shown above is optional.
USER MANUAL
Advertisement
Table of Contents

Related Manuals for Hitachi 42PD8800TA


Summary of Contents for Hitachi 42PD8800TA
- Page 1 KEEP THIS USER MANUAL FOR FUTURE REFERENCE For future reference, record the serial number of your monitor. SERIAL NO. This serial number is located on the rear of the monitor. This is the image of the model 42PD8800TA. Desktop stand shown above is optional. USER MANUAL...
-
Page 2: Table Of Contents
CONTENTS IMPORTANT SAFETY INSTRUCTIONS ... 1 INTRODUCTION ... 2 About This Manual ... 2 Trademark Credits ... 2 About Software ... 2 SAFETY PRECAUTIONS ... 3 About the Symbols ... 3 Cleaning and Maintenance ... 6 ABOUT PLASMA DISPLAY ... 7 Image Retention of Plasma Display ... -
Page 3: Introduction
INTRODUCTION Thank you for purchasing the HITACHI Plasma Display. We hope that you will enjoy the great performance with this product. This Plasma monitor has been designed to meet the International standards. However, it could cause personal injuries and property damage if improperly handled. In order to prevent potential danger and obtain maximum benefi t from your set, please observe the following instructions when installing, operating, and cleaning the product. -
Page 4: Safety Precautions
SAFETY PRECAUTIONS For your safety, please read the following precautions carefully before using this product. Improper use would cause serious personal injuries and/or damage to your property or this product. About the Symbols The following are the symbols used in this manual and affi xed on the unit itself. Please fully understand the meanings of the symbols before reading the instructions in this section. - Page 5 SAFETY PRECAUTIONS (continued) There is a risk of fi re, electric shock, or serious injury. ■ Do not place any objects on top of the unit. Objects such as Liquid containers (vase, fi sh tank, fl owerpot, cosmetics or liquid medicine). If water or any liquid spill onto the unit, it may cause short-circuit and result in fi...
- Page 6 SAFETY PRECAUTIONS (continued) ■ Do not place the unit at the dusty place. It could cause malfunction. ■ Do not cover or block any ventilation holes on the product. The monitor would overheat, and it could cause fi re or damage the product which may shorten its service life. Install the product in accordance with the instructions in this manual.
-
Page 7: Cleaning And Maintenance
SAFETY PRECAUTIONS (continued) ■ Do not install the unit in high temperature. It could damage the cabinet or parts of the product. Do not install near any heat sources such as radiator, heat registers, stoves, or other apparatus that produce heat. Keep the unit out of direct sunlight. -
Page 8: About Plasma Display
ABOUT PLASMA DISPLAY Image Retention of Plasma Display The plasma display has one of characteristics that results in panel image retention depending on how the plasma display is used. The following are the common cases and effective usages regarding the image retention. Characteristics of Image Retention The phenomenon of image retention is caused by partially degrading the phosphor due to the partial display of character and fi... -
Page 9: Option
User Manual *The type of power plug provided may be different from this drawing for some countries. OPTION Ask your local dealer for further details. Desktop Stand : SD8G4237 (for 42PD8800TA) SD8G5500 (for 55PD8800TA) Remote Control AA size batteries Power Cord... -
Page 10: Component Names
Main Power Switch (on the bottom surface) t Remote Control Receiver y Indicating Lamp u Desktop Stand (option) q Handgrips (only for 42PD8800TA) w Side Input e Terminal Board (External Device Connection) r Power Cord Socket t Control Panel (see below for details) Please refer to for the connections. -
Page 11: Remote Control
COMPONENT NAMES (Continued) Remote Control NOTE Some buttons are only for Teletext mode, and other buttons have different functions in Teletext mode from the use of TV mode. Those buttons are indicated by [ ]. Refer to "About Teletext" on q Sub Power w Function Select (TV/DVD/SAT) Press this button to select function mode... -
Page 12: Preparation
Do not place the remote control under the direct sunlight or near sources of excessive heat. Caution When Moving the Main Unit As this product is heavy, whenever it is moved, two people are required to transport it safely. 42PD8800TA Whenever the unit is moved, it should be lifted forwards... -
Page 13: Safety Precaution On Main Unit Installation
Read SAFETY PRECAUTIONS ( *When installing the unit, use the optional Desktop Stand (SD8G4237 for 42PD8800TA, SD8G5500 for 55PD8800TA). Please refer to the user manual of the stand. The Desktop Stand (Option) has been used for the illustration in this manual. -
Page 14: Connection
CONNECTION Terminal Positions SD MEMORY CARD PUSH-EJECT ertyu INPUT INPUT INPUT INPUT OUTPUT (AV1) (AV2) (AV3) (AV4) Y/VIDEO Y/VIDEO S-VIDEO WOOFER VIDEO VIDEO VIDEO PH35814 AUDIO AUDIO AUDIO AUDIO AUDIO MONO MONO MONO MONO Connecting Procedure This unit is ready for various kinds of connections. Make a connection in the following steps. Be sure to turn off the Main Power fi... - Page 15 CONNECTION (continued) Connecting Procedure (continued) 3. Connecting to External Equipment Terminals on Rear AV1 and AV2 can be connected to the equipment with either Component or Composite output. Depending on whether the Y/VIDEO input of your selected equipment is Y signal or Video signal, it automatically regards as Component or Composite. When using as Composite, do not insert the jacks into P Y/VIDEO AUDIO...
- Page 16 CONNECTION (continued) Connecting Procedure (continued) Monitor Out can be used to display same image as main unit on another monitor. When this output terminal is connected to an external monitor with a 75 Ohm terminal, the same image from composite(AV1~5), or S-Video(AV3,5), or RF signal can be displayed to the external monitor. VIDEO AUDIO Sub Woofer terminal can bring the deep bass sound from the external speaker.
- Page 17 CONNECTION (continued) Connecting Procedure (continued) Terminals on Side Since the following terminals are located on the side, it is very convenient to use the extra device on a temporary basis after done the connections on the rear panel. AV5 can be connected to the equipment with an S-Video output and composite output. If your external device has a S-video terminal, S-VIDEO connection is recommended for higher quality picture.
- Page 18 CONNECTION (continued) Connecting Procedure (continued) 4. Connecting the plug into the wall socket Connect the Power Cord after completing all other connections. (The type of plug is different from this drawing for some countries.) CAUTION Use only the Power Cord provided. Do not use a power supply voltage other than that indicated(AC100-240V, 50/60Hz).
-
Page 19: Basic Operation
BASIC OPERATION Power On/Off Now, turn On the main power of the unit. Make sure that the Power Cord has plugged into the wall socket. To turn On the power of the unit: 1. Press the Main Power switch on the unit. The Indicating Lamp will illuminates in Red (Standby mode). -
Page 20: First Time Setup
BASIC OPERATION (continued) First Time Setup When you turn ON the TV for the fi rst time, your TV automatically leads to the settings of “Language” and “Auto Tuning.” 1. The fi rst screen appeared will ask you to choose the language of your TV’s display. 2. -
Page 21: Input Switching To Tv/Av1~5, Hdmi, And Rgb
BASIC OPERATION (continued) Input Switching to TV/AV1~5, HDMI, and RGB By pressing Input Select button, you can switch the input. To watch actual broadcast, press Input Select button on the control panel, the numeric buttons or Channel Up/Down button on the remote control. To display the image outputting from the external equipments connected to each terminal (AV1~5, HDMI 1, 2, and RGB), select corresponding mode. -
Page 22: Menu Operation
MENU OPERATION How to use the On-Screen Display (OSD) system With the On-Screen Display system, you can access the various kinds of the features and functions in this product. Basic Operation MENU 1. Press button on the remote control or Menu button on the control panel of the unit. -
Page 23: Setup Menu (Tv Mode)
MENU OPERATION (continued) Setup Menu (TV mode) With this menu, you can access various kinds of features relating to TV channel settings. Selected Items Mode Auto Tuning Search Position Frequency Manual Tuning Name Sound System Information AV00 is useful when connecting to equipments such as VCR which its antenna terminal can output the specifi ed channel frequency. - Page 24 MENU OPERATION (continued) Setup Menu (TV mode) (continued) Selected Items Color System Manual Tuning Skip Antenna Att. Fine Tuning Sort Teletext Language Auto Off Auto SECAM Select color system from 5 different modes. NTSC4.43 NTSC3.58 It allows you to skip unregistered channels automatically when you use channel up (+) down (-) buttons to select channels.
-
Page 25: Setup Menu (Av Mode)
MENU OPERATION (continued) Setup Menu (AV mode) With this menu, you can select or adjust the condition of the input signals from each terminal. Selected Items System 1 System System 2 System 1 Color AV1~AV5 system System 2 Video AV1, AV2 Input Do not change the original setting. -
Page 26: Setup Menu (Rgb Mode)
MENU OPERATION (continued) Setup Menu (RGB mode) With this menu, you can adjust the display condition of the image which is inputting from the RGB terminals. By pressing ▼button at the bottom of the 1st Setup menu page, the 2nd Setup menu page will appear on the screen. Selected Items Auto Adjust Horizontal Position*... - Page 27 MENU OPERATION (continued) Setup Menu (RGB mode) (continued) Selected Items Input Level Frequency Display WVGA Type WXGA Mode Vertical Filter Frequency Mode Information The items indicated by “ ” can be automatically stored the setting depending on the signal mode. The signal mode is identifi...
-
Page 28: Function Menu
MENU OPERATION (continued) Function Menu This menu provides various ways to protect your panel, reduce power consumption, and set up utilizing the useful functions, such as Freeze Mode and Photo Input. Selected Items Screen Saver Screen Wipe Black Side Panel Video Power Save Freeze Mode Default Zoom... - Page 29 MENU OPERATION (continued) Function Menu (continued) Selected Items Luminance Manager Picture Size Reset Background Slide Effect Slide Interval Slide Music Slide Mode Reset Information The item “Screen Wipe” cannot be stored. Select “On” or “60 Min.” to conduct this function as needed. Setup hint This helps to avoid the image retention such as station logo by lowering the brightness of 4 corners.
-
Page 30: Picture Menu (Tv/Av Mode)
MENU OPERATION (continued) Picture Menu (TV/AV mode) In this menu, you can make specifi c adjustments for the picture based on your preference. By pressing ▼button at the bottom of each menu page, the next Picture menu page will appear on the screen. Picture Picture Mode Dynamic... - Page 31 MENU OPERATION (continued) Picture Menu (TV/AV mode) (continued) Selected Items Contrast Mode* Reset YNR* CNR* Film Mode* 3D Comb Filter* LTI* CTI* Black Enhancement* Auto Color* Reset Setup hint It allows you to choose from 3 modes. Dynamic Dynamic: Sharpen the gradation to improve the contrast feeling.
- Page 32 MENU OPERATION (continued) Picture Menu (TV/AV mode) (continued) Selected Items Color Temp. Adjust** Color Management** Color Decoding Information The items indicated by “ ” can be stored the setting for each of inputs and picture modes (Dynamic/Natural/Cinema). You can enjoy different setting depending on the selected input such as VCR in AV1. In addition, the items indicated by “...
-
Page 33: Picture Menu (Rgb Mode)
MENU OPERATION (continued) Picture Menu (RGB mode) In this menu, you can make specifi c adjustments for the RGB picture based on your preference. Selected Items Contrast Brightness Color Tint Picture Enhancement Color Temperature This adjusts the contrast to meet the lighting environment by using ◄►. - Page 34 MENU OPERATION (continued) Picture menu (RGB mode) (continued) Selected Items Color Temp. Adjust.** Reset Information There is a useful function to automatically store the setting on menu in almost every item so that you do not have to reset every time. Furthermore, the following items can be stored more specifi cally. In addition, the items indicated by “...
-
Page 35: Audio Menu
MENU OPERATION (continued) Audio Menu With this menu, you can adjust and customize the audio condition as you like. You can move on to the next menu screen by pressing ▼button at the bottom. Selected Items Audio Mode Treble** Bass** Balance TruBass Perfect Volume**... -
Page 36: Timer Menu
MENU OPERATION (continued) Audio Menu (continued) Selected Items Headphone Volume Headphone Select NOTE The headphone is NOT available when the image from the RGB or Photo Input is on the screen. Information There is a useful function to automatically store the setting on menu in almost every item so that you do not have to reset every time. -
Page 37: Function
FUNCTION Power Swivel With the optional Desktop stand, you can adjust the angle of the panel side to side by pressing remote control. SWIVEL 1. Press button on the remote control. The Swivel Display (as shown in the fi gure on the right) will appear on the screen. -
Page 38: About Teletext
FUNCTION (continued) About Teletext What is “Teletext” Teletext is the written information services provided by each TV channel. Most TV channels provide information via Teletext such as: TV program schedule Weather forecasts Sports results Newsfl ash How to operate the Teletext You can display the Teletext simply by pressing the remote control buttons. -
Page 39: Size Switching
FUNCTION (continued) Size Switching Each time button of the remote control is pressed, the screen display size is switched in sequence, and the status will be displayed at the bottom of the screen. TV/AV signal input TV/AV1/AV2/AV3/AV4/AV5/HDMI1/HDMI2 Panoramic Full Cinema You can display the image at optimum condition by selecting display size depending on the current output image as shown below. - Page 40 “Vertical Filter” On from “Setup Menu” ( Zoom1 * Real mode gives the image with same shapes as that of computer monitor. Zoom2 This mode is only available for VGA(640x480) and WVGA(864x480) in 42PD8800TA, and from VGA(640x480) to WXGA(1280x768) in 55PD8800TA. Normal Real* Circular display Zoom1...
-
Page 41: Multi Picture Mode
FUNCTION (continued) Multi Picture Mode With this feature, you can watch different channels simultaneously on one screen in several ways. As for the available signals, please refer to "Recommended Signal List" on This function is NOT available in HDMI input. To activate Multi Picture mode in either TV, AV, and RGB mode, press on the remote control. - Page 42 FUNCTION (continued) Multi Picture Mode (continued) 2-picture mode (continued) 4. To switch to 4-picture mode, press The 4-picture mode is displayed on the screen. NOTE Each time is pressed, the picture mode will be switched by following order. 2-4-12 2-Picture 2-Picture (1080i)* * When receiving 1080i format of component signal, there is a mode (2-Picture(1080i)) which sub-screen is displayed inside of the large screen (Main-screen).
- Page 43 FUNCTION (continued) Multi Picture Mode (continued) 4-picture mode (continued) NOTE You cannot display the picture with Component signal on Side B screens. 4. To EXIT from Multi Picture mode, press Next time you press to activate the Multi Picture mode, it will start from 4-picture mode. 5.
- Page 44 FUNCTION (continued) Multi Picture Mode (continued) Activate the Multi Picture Mode in RGB Mode When you activate the Multi Picture mode in RGB Input, the picture will be displayed at the mode which the Sub- screen is displayed inside of the large screen (Main-screen). To activate Multi Picture mode, press The speaker icon indicates the following.
-
Page 45: Picture Freezing
FUNCTION (continued) Picture Freezing This is the useful function utilizing the characteristics of freezing picture effectively. By pressing button, you can change to freeze mode easily 2-4-12 anytime you like. Press it again to return to normal picture. There are two types of freeze mode as usage. These are possible to select at the “Freeze Mode”... -
Page 46: Photo Input Function
FUNCTION (continued) Photo Input Function With this Photo Input function, you can enjoy watching Photos from such devices as Digital Still Camera and SD card on monitor along with useful features such as Slide Show with Background Music and Movie picture. Operating the Photo Input 1. - Page 47 FUNCTION (continued) Photo Input Function (continued) Displaying Still Picture in Photo Mode Thumbnail-Size Image (Index) to Full-Size Image Photo Index (1 Page). No. 23 28/05/03 1600x1200 Full size File#23 is displayed. When you enter the Photo Index mode, the You can also select the preferred fi le in both Thumbnail-size and Full-size image by inputting the fi le directly with numeric buttons of remote control.
- Page 48 FUNCTION (continued) Photo Input Function (continued) Displaying Still Picture in Photo Mode (continued) Slide Show Function Photo Index (2 Page) Select the file. If the pause is left for more than a minute, the slide show restarts automatically. If you stop the slide show halfway, the photo index page selects the fi le in which you stopped. You can make specifi...
- Page 49 FUNCTION (continued) Photo Input Function (continued) Displaying Movie Picture in Movie Mode Thumbnail-Size Image (Index) to Full-Size Image: Photo Index (1 Page). Movie Index (1 or*1 or *2 Movie starts. *1: Press ▲▼ or *2: Press button in remote control or *3: For the Previous button on remote control or OSD, pressing it once starts over the current movie.
- Page 50 FUNCTION (continued) Photo Input Function (continued) Other You can select the background pattern on “Background” from “Function Menu.” Function Menu Background Press button whenever you want to return from full size image to index. The fi le information is displayed by pressing Thumbnail-Size Image To exit from Photo Input…...
- Page 51 FUNCTION (continued) Photo Input Function (continued) CAUTION The picture may not be displayed on this monitor in case of copying, viewing or editing by computers, etc. Do not connect any apparatus other than DSC, USB card reader, and SD card/MMC to the Photo Input connector.
-
Page 52: Audio Switching
FUNCTION (continued) Audio Switching NICAM / Sound Multiplex(including A2) (TV mode) You can make optimum use of available audio by pressing if receiving NICAM and sound multiplex signals; otherwise, pressing this button will have no effect, such as when only mono sound is received. These can be divided into two main categories: Bilingual/Dual Sound broadcast and Stereo broadcast. -
Page 53: Power Save Mode
FUNCTION (continued) Power Save Mode When AV input is selected You are provided the function to save power consumption when no signal is detected in AV input. Set to On in “Video Power Save” from Function Menu, which leads to the power save mode in AV1 /AV2 /HDMI1 /HDMI2 and the Standby mode in other AV input. -
Page 54: Dvd Player / Stb Selection
After pressing buttons to select the maker and type as shown below. Set up hint Example: HITACHI DVDw 1. Set up the maker. Press button to indicate the DVD LED on the remote control. While the DVD LED is blinking (Approx. -
Page 55: Troubleshooting
TROUBLESHOOTING Before calling service technician, check the following tables fi rst. If the problem is not be solved with the suggested procedures, contact your local dealer. For your safety, NEVER try to repair the product by yourself. When Following Messages Appear on the Screen Message Power Save No Sync. - Page 56 TROUBLESHOOTING (continued) Symptom and Check List (continued) Symptoms No picture The Indicating lamp → Off No picture The Indicating lamp → Orange It means that the unit is in “Power Save mode”. No picture The indicating lamp → Green The top of the monitor and surface of the panel heat up.
- Page 57 If the condition is not improved with Auto Adjust, adjust “Clock Phase” till you get fl icker-free display. It could happen when the image with more than 512 lines (42PD8800TA) / 768 lines (55PD8800TA) of vertical resolution is displayed. Please note this is not malfunction.
-
Page 58: Product Specifications
PRODUCT SPECIFICATIONS SPECIFICATION Display dimensions Panel Resolution Net dimensions Net weight Temperature Ambient conditions Relative humidity Power supply Power consumption/ at standby Audio output (VIDEO input) Input terminals Input signals Output Signal (RF input) Input terminal / Receiving range RF Video System (RGB input) Input terminals Input signals... -
Page 59: Signal Input
PRODUCT SPECIFICATIONS (continued) Signal Input RGB terminal (D-sub 15-pin connector) Input signal G or sync on green No connection No connection R.GND G.GND B.GND No connection No connection [SDA] H. sync or H/V composite sync V.sync. [V.CLK] [SCL] S-input connector pin specifi cations Input signal Y-GND C-GND... -
Page 60: Recommended Signal List
Note that different signals having all these elements alike may be handled as the same signal. Displaying images with more than 512 lines (42PD8800TA) / 768 lines (55PD8800TA) of vertical resolution at Full diplay (compressed display) can result in the interpolation of stripes. - Page 61 PRODUCT SPECIFICATION (continued) Recommended Signal List (continued) With Multi Picture Function 2-Picture Input terminal Main SECAM ○ ○ ○ ○ PAL, SECAM ~AV5 ○ ○ NTSC3.58/4.43 ○ ○ 576i, 576p ○ ○ 480i, 480p ○ ○ 720p/50, 60 ○ ○ 1080i/50, 60 4-Picture / 2-Picture(1080i)* Input terminal...
- Page 62 QR65402 Printed in Japan...
Need help?
Do you have a question about the 42PD8800TA and is the answer not in the manual?
Questions and answers