Grindmaster Grind’n Brew-10 Operation And Instruction Manual
Grind’n brew coffee systems models: -11, -21, -10, -20 including h, hq versions
Hide thumbs
Also See for Grind’n Brew-10:
- Operation and instruction manual (24 pages) ,
- Operation and instruction manual (24 pages)
Table of Contents
Advertisement
Quick Links
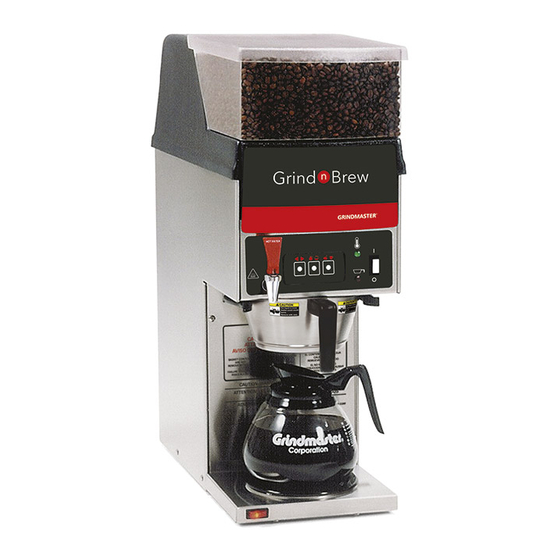
Grind'n Brew Coffee Systems™
11, -21, -10, -20 including H, HQ versions
Models:
-
Table of Contents
TABLE OF CONTENTS
Warning Labels . . . . . . . . . . . . . . . . . . . . . . . . . . . .2
Warning Labels . . . . . . . . . . . . . . . . . . . . . . . . . . . .2
Technical Data . . . . . . . . . . . . . . . . . . . . . . . . . . . . .3
Unit Installation . . . . . . . . . . . . . . . . . . . . . . . . . . . .4
Water Hook-up . . . . . . . . . . . . . . . . . . . . . . . . . . . .4
Electrical Hook-up & Start-up Procedure . . . . . . . .5
Operating the Touchpad . . . . . . . . . . . . . . . . . . . . .5
Brewing . . . . . . . . . . . . . . . . . . . . . . . . . . . . . . . . . .6
Setting Throw Weights and Water Portion . . . . . . .6
Timer Settings . . . . . . . . . . . . . . . . . . . . . . . . . . . . .6
Setting the Grind . . . . . . . . . . . . . . . . . . . . . . . . . . .7
Maintenance . . . . . . . . . . . . . . . . . . . . . . . . . . . . . .7
Shear Plate Replacement . . . . . . . . . . . . . . . . . . . .8
Water Solenoid Valve Replacement . . . . . . . . . . . .8
Control Board Settings . . . . . . . . . . . . . . . . . . . . . .9
Troubleshooting Guide . . . . . . . . . . . . . . . . . . .10-11
Exploded Views . . . . . . . . . . . . . . . . . . . . . . . .12-16
Wiring Diagrams . . . . . . . . . . . . . . . . . . . . . . . . . .17
Prior authorization must be obtained from
Grindmaster Corporation for all
warranty claims.
© Grindmaster Corporation, 1997
PRINTED IN USA
Operation and Instruction Manual
for
Model Grind'n Brew-10
Model Grind'n Brew-20H
Grindmaster Corporation
4003 Collins Lane
Louisville, KY 40245 USA
(502) 425-4776
(800) 568-5715 (Technical Service Only)
FAX (502) 425-4664
www.grindmaster.com
Model Grind'n Brew-11H
Model Grind'n Brew-21
(800) 695-4500
Patents Pending
0505 Form # BW-350-11
Part #70661
Advertisement
Table of Contents

Related Manuals for Grindmaster Grind’n Brew-10


Summary of Contents for Grindmaster Grind’n Brew-10
-
Page 1: Table Of Contents
Wiring Diagrams ......17 Model Grind’n Brew-20H Model Grind’n Brew-21 Prior authorization must be obtained from Grindmaster Corporation for all warranty claims. Grindmaster Corporation 4003 Collins Lane... -
Page 2: Warning Labels
Warning Labels ! WARNING: USE ONLY ON A CIRCUIT THAT IS PROPERLY PROTECTED AND CAPABLE OF THE RATED LOAD. ! WARNING: ELECTRONICALLY GROUND THE CHASSIS. ! WARNING: DO NOT DEFORM PLUG OR CORD. ! WARNING: FOLLOW NATIONAL AND LOCAL ELECTRICAL CODES. ! WARNING: WATER CONNECTIONS SHALL COMPLY WITH THE PLUMBING CODE OF BOCA &... -
Page 3: Technical Data
Technical Data - Single Bean Domestic Models 208/240 208/240 208/240 208/240 1710 1710 2674 3560 1810 1810 2749 3660 Technical Data - Dual Bean Domestic Models 208/240 208/240 208/240 208/240 1710 1710 2674 3560 1810 1810 2749 3660 1810 1810 3660 Page 3 Grind’n Brew Coffee Systems™... -
Page 4: Unit Installation
Unit Installation IMPORTANT: This brewer should be installed by a knowledgeable and experienced commercial equipment installer. Brewer Contents Your brewer package should include the following: 1 Grinderbrewer (either single or dual bean) 1 Operation and Instruction Manual (this manual) 1 Hose to 1/4" flare fitting (part # 61237) Tools Required for Installation #2 Phillips screwdriver 9/16"... -
Page 5: Electrical Hook-Up & Start-Up Procedure
Electrical Hook-up and Start-up Procedure (All Models) IMPORTANT: Do not plug the unit in yet. IMPORTANT: This equipment must be installed in compliance with applicable Federal, State and/or Local electrical codes having jurisdiction. Do not use extension cords. Make sure that the outlet the brewer plugs into is grounded. -
Page 6: Brewing
Brewing IMPORTANT: Brewers are factory set for the correct grind and brew times for average situations. You should not need to make adjustments in the field. 1. Make sure that a new paper filter is in the brew basket and the brew basket is in place in the brewer. 2. -
Page 7: Setting The Grind
Setting the Grind (Refer to Figure D) Tools Required: #2 Phillips screwdriver, 7/8" box wrench, large flat blade screwdriver 1. Remove front decal panel by removing screw on underside of panel and 2 screws on both sides of panel. 2. Loosen adjusting screw lock nut by turning counter clockwise. 3. -
Page 8: Shear Plate Replacement
Shear Plate Replacement (Refer to Figure F) Tools Required: #2 Phillips screwdriver, large flat blade screwdriver 1. Unplug the machine. 2. Remove the front panel. Shut off the bean flow to the grinder. Single bean units require you to pull the bean shut-off valve forward. -
Page 9: Control Board Settings
Control Board Settings (Refer to Figure H) Jumper should remain on pin 1 & 2 Jumper Controls - No pin connected with jumper - No minimum brewing temperature. - Jumper connecting 2 & 3 - Low temperature no brew. The brewing cycle will wait until temperature of water (factory setting) is ready before continuing. -
Page 10: Troubleshooting Guide
Troubleshooting Guide The following procedures must be performed by a qualified service technician. CAUTION: Unplug power cord from outlet before cleaning or servicing the unit. Problem Possible Cause Remedy • Set to portion more coffee. • Not enough coffee used Weak coffee •... - Page 11 8:00 AM - 6:00 PM Eastern Standard Time or an authorized service center in your area. Please have the model and serial num- ber ready so that accurate information can be given. Prior authorization must be obtained from Grindmaster Corporation’s Technical Services Department for all warranty claims. Page 11...
-
Page 12: Exploded Views
Exploded View Grind’n Brew Assembly Grind’n Brew Coffee Systems™ Page 12... -
Page 13: Warmer Assembly
Mounting Sheet Assembly Warmer Assembly Basket Arm Assembly Page 13 Grind’n Brew Coffee Systems™... - Page 14 Exploded View Hot Water Tank Assembly 61762 PLUG, 5/8" HOLE 61128 PROBE, THERMISTOR 12" LG. 71147 GROMMET, PROBE 61773 COVER, TANK PIC 1 70635 FASTON TAB, 1/4" X 0.032" 71129 NUT, 8-32 KEPS S/S 82116 BRACKET, TANK 71084 SCREW, 8-32 X 1/2" S/S 71166 NUT, TINNERMAN 8-32 S/S 61626...
- Page 15 Exploded View Hot Water Tank Assembly (Export Units) Page 15 Grind’n Brew Coffee Systems™...
- Page 16 Single Bean Upper Assembly Dual Bean Upper Assembly Grind’n Brew Coffee Systems™ Page 16...
-
Page 17: Wiring Diagrams
Wiring Diagram 115/230V, 60Hz Page 17 Grind’n Brew Coffee Systems™...
Need help?
Do you have a question about the Grind’n Brew-10 and is the answer not in the manual?
Questions and answers